
Summary of Contents for WINIA DTE74 Series
- Page 1 USER MANUAL Dryer DTE74***, DTG74*** DTE74@@@ DTG74@@@_WINIA폼(가스+전기건조기).indd 1 2022-02-22 오후 3:38:42...
-
Page 2: Table Of Contents
TABLE OF CONTENTS IMPORTANT SAFETY INSTRUCTIONS ............................3-6 Grounding requirements ..................................4 FEATURES AND BENEFITS Key Parts and Components ................................7 INSTALLATION INSTRUCTIONS Key Dimensions and Specifications ..............................8 Location Requirements ..................................8 Choose the Proper Location ................................ 8 Clearances ......................................8 Electric Dryers ....................................10 Electrical Requirements ................................ -
Page 3: Important Safety Instructions
IMPORTANT SAFETY INSTRUCTIONS READ ALL INSTRUCTIONS BEFORE USE Your safety and the safety of others is very important. We have provided many important safety messages in this manual and on your appliance. Always read and obey all safety messages. This is the safety alert symbol. This symbol alerts you to potential hazards that can kill or hurt you and others. -
Page 4: Grounding Requirements
IMPORTANT SAFETY INSTRUCTIONS BASIC SAFETY PRECAUTIONS WARNING: To reduce the risk of fire, electric shock, or injury to persons when using this appliance, follow basic precautions, including the following: • Read all instructions before using the dryer. • Before the dryer is removed from service or discarded, remove •... - Page 5 IMPORTANT SAFETY INSTRUCTIONS SAFETY INSTRUCTIONS FOR INSTALLATION WARNING: To reduce the risk of fire, electric shock, or injury to persons when using this appliance, follow basic precautions, including the following: • Properly ground dryer to conform with all governing codes •...
- Page 6 IMPORTANT SAFETY INSTRUCTIONS SAFETY INSTRUCTIONS FOR CONNECTING ELECTRICITY WARNING: To reduce the risk of fire, electric shock, or injury to persons when using this appliance, follow basic precautions, including the following: • Do not, under any circumstances, cut or remove the •...
-
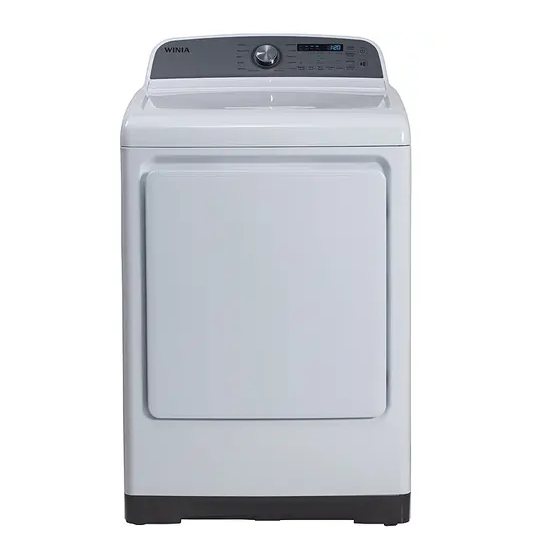
Page 7: Features And Benefits
FEATURES AND BENEFITS KEY PARTS AND COMPONENTS There are several important components that are referenced in this manual. EASY-TO-USE CONTROL PANEL Select the desired dry cycle, add cycle options or adjust settings with the touch of a button. TIME AND STATUS DISPLAY The easy-to-read LED display shows cycle status and estimated time remaining. -
Page 8: Installation Instructions
INSTALLATION INSTRUCTIONS KEY DIMENSIONS AND SPECIFICATIONS Description Dryer (Electric DTE74*** and Gas DTG74***) Electrical Requirements Refer to the rating label Dimensions 27 in. W x 30 in. D x 45.6 in. H (50.5 in. D with door open) 68.6 cm W x 76.3 cm D x 115.8 cm H (128.3 cm D with door open) Net Weight Electric : 119 Ib(54kg) Gas : 121lb(56kg) Drying Capacity (IEC rating) - Page 9 INSTALLATION INSTRUCTIONS CLEARANCES (continued) 3" 14" max * (7.6 cm) (35.6 cm) 21.7" (55.1cm) 21" 48 in.² (53.3cm) (310 cm²) 45.6" (115.8cm) 24 in.² (155 cm²) 30" 5" ** (76.3cm) (12.7 cm) 1" 27" 1" 3" 50.5" (7.6 cm) (2.54 cm) (68.6 cm) (2.54 cm) (128.3cm)
-
Page 10: Electric Dryers
INSTALLATION INSTRUCTIONS ELECTRIC DRYERS ELECTRICAL REQUIREMENTS WARNING: To help prevent fire, electrical shock, serious injury, or death, the wiring and grounding must conform to the latest edition of the National Electrical Code, ANSI/NFPA 70 and all applicable local regulations. Please contact a qualified electrician to check your home’s wiring and fuses to ensure that your home has adequate electrical power to operate the dryer. Special Electrical Requirements for Mobile or Electrical Requirements for Electric Models Only Manufactured Homes WARNING: WARNING: To reduce the risk of fire, electric shock, or injury... -
Page 11: Connecting Electric Dryers
INSTALLATION INSTRUCTIONS ELECTRIC DRYERS (continued) CONNECTING ELECTRIC DRYERS WARNING: Connect the power cord to the terminal block. Each colored wire should be connected to the terminal block screw with the same color wire around it. For example, connect the black power cord wire to the terminal block screw with the black wire around it. -
Page 12: Gas Dryers
INSTALLATION INSTRUCTIONS GAS DRYERS GAS REQUIREMENTS (GAS MODELS ONLY) WARNING: To reduce the risk of fire, electric shock, or injury to persons when using this appliance, follow basic precautions, including the following: • Gas supply requirements: As shipped from the factory, •... -
Page 13: Connecting The Gas Supply
INSTALLATION INSTRUCTIONS GAS DRYERS (continued) WARNING: To reduce the risk of fire, electric shock, or injury to persons when using this appliance, follow basic precautions, including the following: • Installation and service must be performed by a qualified • If necessary, the correct nozzle (for the LP nozzle kit, installer, service agency, or the gas supplier. -
Page 14: Venting The Dryer
INSTALLATION INSTRUCTIONS VENTING THE DRYER IMPORTANT! CHECK YOUR EXHAUST SYSTEM FOR PROBLEMS The most common cause of dryer problems is poor exhaust venting. Before installing your new dryer, check the items listed below to make sure you get the best possible performance. This can save you time and money by reducing cycle times and increasing energy efficiency. - Page 15 INSTALLATION INSTRUCTIONS VENTING THE DRYER (continued) Routing and Connecting Ductwork Follow the guidelines below to maximize dryer Correct Venting performance and reduce lint buildup and condensation in the ductwork. NOTE: Transition duct and fittings are NOT included and must be purchased separately. • Use 4 inch (102 cm) diameter rigid or semi-rigid metal duct. •...
-
Page 16: Leveling The Dryer
INSTALLATION INSTRUCTIONS LEVELING THE DRYER REVERSING THE DOOR SWING WARNING: Tools Required • Phillips or large flat-blade screwdriver (for hinge screws) • To reduce the risk of injury to persons, adhere to all • Small flat blade screwdriver (for lifting out parts) industry recommended safety procedures including the use of long sleeved gloves and safety glasses. - Page 17 INSTALLATION INSTRUCTIONS REVERSING THE DOOR SWING (continued) Remove the two hinge covers Remount the inner door frame. Use a flat-head screwdriver to remove the two hinge hole With the door hinges and hinge covers in the new locations, covers from the cabinet side. Reattach the covers over the remount the inner door onto the outer door with the screws exposed hinge holes on the opposite side of cabinet.
-
Page 18: Final Installation Check
INSTALLATION INSTRUCTIONS FINAL INSTALLATION CHECK Testing Dryer Heating Once you have completed the installation of the dryer and it is in its fi nal location, confi rm proper operation with the following GAS MODELS steps and tests. Close the dryer door, press the POWER button to turn the dryer Is gas turned on? (Gas models only) on, and start the dryer on a heat setting. -
Page 19: Restricted Or Blocked Airflow
INSTALLATION INSTRUCTIONS AIRFLOW RESTRICTED OR BLOCKED Check the duct condition. Avoid long runs or runs with multiple elbows or bends. If the Check Vent( ) Led is blinking, check the exhaust system for restrictions and damage. Repair or replace the exhaust system as needed. -
Page 20: How To Use
HOW TO USE WARNING: To reduce the risk of fire, electric shock, or injury to persons, read this entire manual, including the Important Safety Instructions, before operating this dryer. CONTROL PANEL FEATURES Dial Signal Turn the Dial to select a cycle for your laundry load. See the P ress to turn Signal on or off. When turned on, a Signal Cycle Guide for detailed descriptions of cycles. -
Page 21: Simple Steps To Start
HOW TO USE Simple steps to start To change the cycle during operation 1. Press Power to turn the dryer on. 1. Press Start/Pause to stop operation. 2. Turn the Cycle Selector to select a cycle, or select the Time 2. -
Page 22: Special Features
HOW TO USE SPECIAL FEATURES Control Lock Use this option to disable the controls. All controls will be disabled except for the Power button. Once set, the Control Lock must be turned off before the controls can be used. After the dryer has shut off, the Power button will allow the dryer to be turned on, but the controls will remain ocked. When the option is set, CL appears in the display. ress and hold the Less Time button for three seconds to activate or deactivate the Control Lock. -
Page 23: Cycle Guide
HOW TO USE CYCLE GUIDE The best way to dry items is to follow the instructions on the care label. If no drying instructions are provided, see the following table for reference. Items Cycle Follow the care label instructions or dry using Bedding. Bedspreads &... -
Page 24: Cycle Chart
HOW TO USE CYCLE CHART NOTE: For best results, follow the load size recommendations for each dry cycle. Large load : Fill the drum to about 3/4 full. Do not add items over this level as they need to tumble freely. Medium load : Fill the drum to about 1/2 full. - Page 25 HOW TO USE CYCLE CHART ● ○ NOTE: : factory setting, : can be selected Functions (Temp. Control) Cycle High ● Normal ● Heavy Duty ● Bedding ● Towels ● Sanitize ● Delicates ● Perm.Press ● Refresh ● Express Air Dry ●...
-
Page 26: Sorting Loads
HOW TO USE WARNING: To reduce the risk of fire, electric shock, or injury to persons, read this entire manual, including the Important Safety Instructions, before operating this dryer. SORTING LOADS LOADING THE DRYER WARNING: Fabric Care Labels Most articles of clothing feature fabric care labels that To reduce the risk of fire, electric shock, or injury to persons include instructions for proper care. -
Page 27: User Maintenance Instructions
USER MAINTENANCE INSTRUCTIONS WARNING: To reduce the risk of fire, electric shock, or injury to persons, read this entire manual, including the Important Safety Instructions, before operating this dryer. • Unplug the dryer or turn the power off before cleaning to avoid the risk of electric shock. Failure to follow this warning can cause serious injury, fire, electrical shock, or death. • Never use harsh chemicals, abrasive cleaners, or solvents to clean the dryer. They will damage the finish. REGULAR CLEANING Cleaning the Exterior Proper care of your dryer can extend its life. -
Page 28: Maintaining The Exhaust System
USER MAINTENANCE INSTRUCTIONS MAINTAINING THE EXHAUST SYSTEM The most common cause of dryer problems is poor exhaust venting. Poor exhaust venting may result from the following conditions: • DIRTY OR DAMAGED EXHAUST DUCTS • WRONG VENT MATERIAL • RESTRICTED OR DAMAGED VENT HOOD •... -
Page 29: Troubleshooting Guide
TROUBLESHOOTING GUIDE BEFORE CALLING FOR SERVICE Checkpoints If the dryer operates abnormally, first check the list of problems in the table below and try the suggested actions. Problem Action Does not run. • Make sure the door is latched shut. • Make sure the power cord is plugged into a live electrical outlet. • Check your home’s circuit breakers or fuses. •... - Page 30 TROUBLESHOOTING GUIDE BEFORE CALLING FOR SERVICE (continued) Checkpoints If the dryer operates abnormally, first check the list of problems in the table below and try the suggested actions. Problem Action Lint on clothes. • M ake sure the lint filter is cleaned before every load. For clothes that naturally build up lint, clean the filter during the cycle. • Some fabrics are lint producers (for example, a fuzzy white cotton towel) and they must be dried separately from clothes that are lint trappers (for example, a pair of black linen pants). •...
-
Page 31: Information Codes
TROUBLESHOOTING GUIDE INFORMATION CODES If the dryer fails to operate, you may see an information code on the display panel. To determine what you should do, check the list of codes in the table below, and then try the suggested actions. Code Action Start button is pressed with dryer door open. -
Page 32: Warranty
If during in-home service repair cannot be completed, it may be necessary to remove, repair and/ or return the product. If in-home service is unavailable, WINIA may elect, at our option, to provide for transportation of our choice to and from a WINIA authorized service center. -
Page 33: Service
Customer Service Center To speak to a representative for more information about the product: 1-877-393-7823 (Toll-Free) DTE74@@@ DTG74@@@_WINIA폼(가스+전기건조기).indd 33 2022-02-22 오후 3:38:49... - Page 34 ABOUT THIS MANUAL ABOUT THIS MANUAL (주)신광씨링 광주광역시 서구 하남대로 502번길 14 담 당 김보연 님 브 랜 드 WINIA 언 어 영어 F.MODEL B.MODEL DTE74@@@ DTG74@@@_WINIA폼(가스+전기건조기) B U Y E R 인 쇄 애드컴 MEMO 접수 : 216x280mm (총 33p) 220215 - 총...
Need help?
Do you have a question about the DTE74 Series and is the answer not in the manual?
Questions and answers