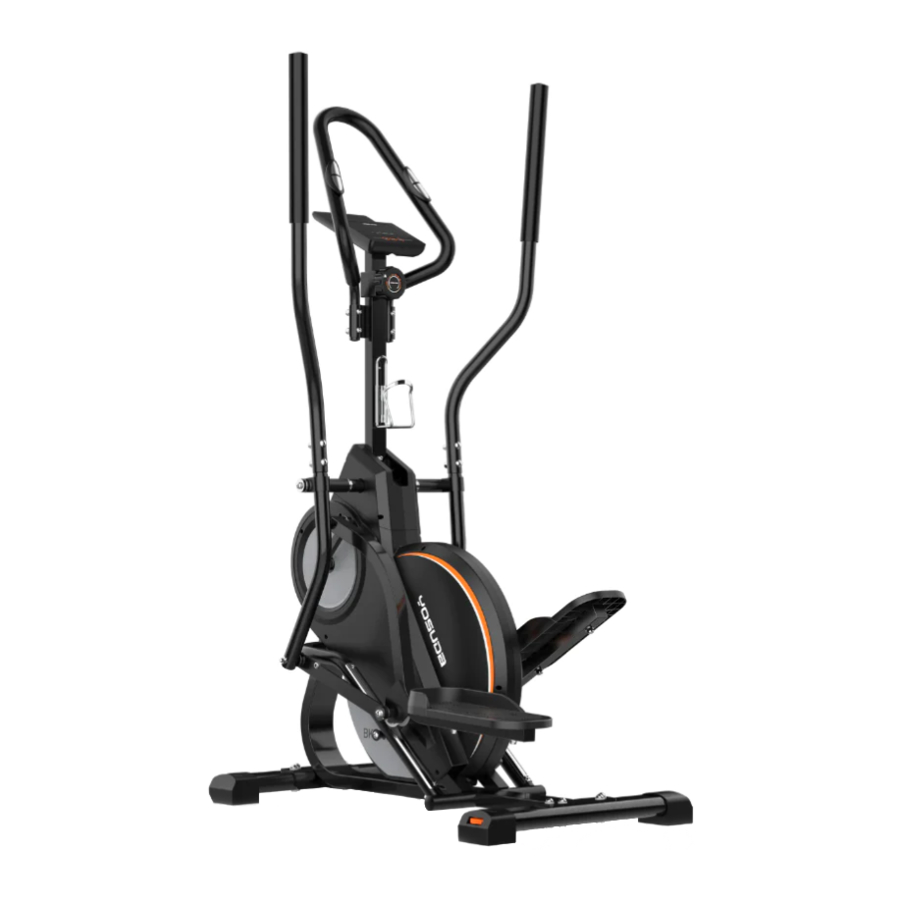
Advertisement
IMPORTANT SAFETY INFORMATION
Please note the following safety warnings and precautions before assembling and using the equipment. It is your responsibility to ensure that all users of the equipment are informed of all warnings and precautions.
- Before starting any exercise program, you should consult your physician to determine if you have any medical or physical conditions that could put your health and safety at risk or prevent you from using the equipment properly. Your physician's advice is essential if you are taking any medication that affects your heart rate, blood pressure, or cholesterol level.
![warning]() Note: This equipment is not suitable for therapeutic use.
Note: This equipment is not suitable for therapeutic use. - Be aware of your body's signals. Incorrect or excessive exercise can damage your health. Stop exercising if you experience any of the following symptoms: pain, tightness in your chest, irregular heartbeat, shortness of breath, lightheadedness, dizziness, or feelings of nausea. If you do experience any of these conditions, you should consult your physician before continuing with your exercise program.
- Keep children and pets away from the equipment. The equipment is designed for adult use only.
- This machine can only be used by one person at a time.
- Use the equipment on a solid, flat level surface with a protective cover for your floor or carpet. To ensure safety, the equipment should have at least 6.5 feet (2m) of free space all around it.
- Ensure that all nuts and bolts are securely tightened before using the equipment. The safety of the equipment can only be maintained if it is regularly examined for damage and/or wear and tear.
- Wear suitable sport clothes and sports shoes while using the equipment, especially the sports shoes must fit. Avoid wearing loose clothing that may become entangled in the equipment.
- Always use the equipment as indicated. If you find any defective components while assembling or checking the equipment, or if you hear any unusual noises coming from the equipment during exercise, discontinue use of the equipment immediately and do not use until the problem has been rectified. Note: only the original accessories provided by the factory are used on maintenance.
- The equipment can adjust the resistance to adjust the motion intensity, you can rotate the tension control knob clockwise or counter-clockwise select your suitable level of resistance.
- Do not place fingers or objects into the moving parts of the equipment.
- Your product is intended for use in cool and dry conditions. You should avoid storage in extreme cold, hot or damp areas as this may lead to corrosion and other related problems.
- Clean only with a damp cloth, do not use solvent cleaners and also note to wipe off the sweat on the equipment after exercise.
- When assembling, it's advised to place parts on a mat (rubber or wood) to avoid soiling.
- To avoid bodily injury and/or damage to the product or property, proper lifting and moving are required.
- The maximum weight capacity of this unit is 300lbs (136kg).
- This equipment is designed for indoor and home use only; it is not intended for commercial use.
 ATTENTION: MAKE SURE ALL SCREWS AND NUTS ARE TIGHTENED BEFORE EXERCISE.
EXPLODED DRAWING

Part List
| No. | Sepc. | Qty. | No. | Sepc. | Qty. |
| 1 | Middle Handlebar | 1 | 29 | Spring Washer D8 | 11 |
| 2 | Foam Grip | 1 | 30 | Flat Washer D8 | 4 |
| 3 | Handle Pulse Sensor | 2 | 31 | D Shaped Washer φ16xφ28x5t | 2 |
| 4 | Cross Recessed Pan Head Tapping Screw ST4.2*20 | 17 | 32 | Nylon Bush | 10 |
| 5 | Round Head Inner Hexagon Head Bolt M8*35 | 4 | 33L/R | L/R Swing Rod | 2 |
| 6 | Wave Washer D8*Φ16*1.5*R20 | 8 | 34 | Wave Washer φ26*φ16*0.3 | 2 |
| 7 | Acorn Cap Nut M8 | 8 | 35L | Upper Left Cover | 1 |
| 8 | Monitor | 1 | 35R | Upper Right Cover | 1 |
| 9 | Cross Head Screw M5*10 | 2 | 36 | Inner Hexagon Nut M10*1 | 4 |
| 10 | Upright Post | 1 | 37 | Flywheel Axis | 1 |
| 11 | Tension Control Knob | 1 | 38 | Cross Recessed Pan Head Tapping Screw M5*10 | 2 |
| 12 | Tension Control Knob Back Cover | 1 | 39 | Flat Washer D8*Φ16*1.5 | 13 |
| 13 | Cross Head Screw M5*20 | 1 | 40 | Axis 6000RS | 2 |
| 14 | End Cap | 1 | 41 | Round Head Inner Hexagon Head Bolt M8*55 | 8 |
| 15 | Handle Pulse Wire | 2 | 42L/R | L/R Adjustable End Cap | 2 |
| 16 | Water Bottle Holder | 1 | 43 | Flywheel | 1 |
| 17 | Round Head Inner Hexagon Head Bolt M8*55 | 1 | 44 | Front Stabilizer | 1 |
| 18 | Nylon Nut M8 | 7 | 45 | Rear Stabilizer | 1 |
| 19 | Round Head Inner Hexagon Head Bolt M8*40 | 1 | 46 | Flat Washer Φ10.1*Φ30*2 | 8 |
| 20 | Main Frame | 1 | 47 | Bushing Φ30*Φ10*5.4 | 8 |
| 21 | Sensor Support | 1 | 48 | Connection Strap | 2 |
| 22 | Cross Recessed Pan Head Tapping Screw ST4.2*20 | 17 | 49 | Half Round Head Inner Hexagon Head Bolt M8*22*Φ10*15.2*Φ8*31 | 2 |
| 23 | Sensor Wire | 1 | 50 | Half Round Head Inner Hexagon Head Bolt M8*9*Φ10*16 | 2 |
| 24L/R | L/R Handlebar | 2 | 51 | Slide Bolt | 2 |
| 25 | Foam Grip | 2 | 52 | Bearing 6200Z | 4 |
| 26 | Adjustable Bolt | 2 | 53 | Inner Sleeve φ10.5*φ16*9 | 2 |
| 27 | Half Round Head Square Neck Bolt M8*42 | 4 | 54 | Slide Wheel | 2 |
| 28 | Round Head Inner Hexagon Head Bolt M8*16 | 2 | 55 | Nylon Nut M10 | 2 |
| 56 | Half Round Head Inner Hexagon Head Bolt M8*12*Φ10*32 | 2 | 80 | Circular Tube Cap | 2 |
| 57 | Sub Wheel | 2 | 81 | Pressure Spring | 1 |
| 58L/R | L/R Pedal Tube | 2 | 82 | Flat Washer D16*Φ28*2 | 2 |
| 59 | Hexagon Head Bolt M8*50 | 4 | 83L/R | L/R Crank + Axsi | 2 |
| 60L/R | L/R Pedal | 2 | 84 | Crank End Cap | 2 |
| 61 | Pedal Plate | 2 | 85 | Flange Nut M10*1.25 | 2 |
| 62 | Square Tube Cap | 2 | 86 | Wave Washer Φ21*Φ17.5*0.3 | 1 |
| 63 | Slider Cladding Plate | 2 | 87 | Axsi Blocked D17 | 2 |
| 64 | Nylon Nut M6 | 9 | 88 | Bearing 6203ZZ | 2 |
| 65 | Round Head Inner Hexagon Head Bolt M6x40 | 4 | 89 | Outer Hexagon Screw M6x15 | 4 |
| 66 | Circular Tube Cap | 6 | 90 | Belt Wheel | 1 |
| 67 | Adjustable End Cap | 2 | 91 | Mid Axsi + Pulley | 1 |
| 68 | Axis Blocked D12 | 2 | 92 | Spring Washer D6 | 4 |
| 69 | Wave Washer φ12.5*φ15.5*0.3 | 1 | 93 | Belt | 1 |
| 70 | Magentic Board Axis | 1 | 94 | Long Axsi | 1 |
| 71 | Magentic Board | 1 | 95 | Hexagon Flange Nut M10*1 | 2 |
| 72 | Hexagon Bolt M5*47 | 1 | 96 | Hexagon Nut M6 | 4 |
| 73 | Hexagon Nut M5 | 1 | A | Socket Head Screw Wrench S6 | 2 |
| 74 | Hexagon Bolt M6*45 | 1 | B | Cross Wrench S13,14,15 | 1 |
| 75 | Magentic Metal Board | 1 | |||
| 76 | Magnet | 4 | |||
| 77 | Plug | 1 | |||
| 78L | Lower Left Cover | 1 | |||
| 78R | Lower Right Cover | 1 | |||
| 79L | L Cover | 1 | |||
| 79R | R Cover | 1 |
Hardware and Tool List

ASSEMBLY INSTRUCTIONS
Preparatory Work
- Before assembling, make sure there is enough space.
- Use tools provided or your owner built-for-purpose tools when assembling.
- Before assembling, make sure all of the components are all-ready (please refer to the product exploded view).
- To avoid misalignment due to over-tightening, please do not use a wrench and use only hand-tightening for now to ensure easy assembly. Wrench-tightening should be performed after all parts are assembled to ensure all nuts, bolts, and parts are tightly secured before use.
Assembly Instructions
Step 1:

Remove the Front and Rear Protective Tube (a&b), by removing the Screws (c) and Washers (d) with the Socket Head Screw Wrench S6 (A).
NOTE: The Front and Rear Protective Tube (a&b), Screws (c) and Washers (d) are only used for protection during shipment, they are not the parts of this machine, and can be discarded.
Step 2:

- Attach the Front and Rear Stabilizer (44&45) to the Main Frame (20), by using 8pcs Round Head Inner Hexagon Head Bolts M8*55 (41), 8pcs Spring Washers (29) and 8pcs Flat Washers (39). Tighten and secure with Socket Head Screw Wrench S6 (A).
- Then put the Upright Post (10) up (as the arrow in below diagram), and lock it with 1pc Flat Washer D8*Φ16*1.5 (39), 1pc Spring Washer D8 (29), and 1pc Round Head Inner Hexagon Head Bolt M8*40 (19).
- Finally, attach the Upper Left/Right Cover (35L/R) to the Main Frame (20), tighten and secure with Cross Wrench S13, 14, 15 (B).
Step 3:

Attach the L/R Pedal (60L/R) and Pedal Plate (61) to the L/R Pedal Tube (58L/R), by using 4pcs Hexagon Head Bolts M8*50 (59), 4pcs Flat Washers D8*Φ16*1.5 (39) and 4pcs Nylon Nuts (18).
Step 4:
- In sequence remove the preinstalled Bolt M8*16 (28), Spring Washer D8 (29), Flat Washer D8 (30), D Shaped Washer (31) and 2pcs Wave Washers(34) from one end of the Long Axsi (94).

- Put the Long Axsi (94) (the end with the parts removed) through the L Swing Rod (33L), then put on 1pc Wave Washer (34), and then put it through the Main Frame (20).

- After the Long Axsi (94) is put through the Main Frame (20), put on another 1pc Wave Washer (34), and then put it through the R Swing Rod (33R).
![]()
- In sequence put on D Shaped Washer (31), Flat Washer D8 (30), Spring Washer D8 (29), Bolt M8*16 (28) to Long Axsi (94).
![]()
- Simultaneously tighten and secure the Bolts M8*16 (28) of the both ends of the Long Axsi (94) with 2pcs Socket Head Screw Wrench S6 (A). As the below diagram shows, left side anticlockwise, right side clockwise.
![]()
- Remove the preinstalled 2pcs Bushings (47) from the L/R Swing Rod (33L/R), then attach the L/R Swing Rod (33L/R) to the L/R Pedal Tube (58L/R) by in sequence installing Connection Strap (48), Bushing (47), Flat Washer (46), Bolt (50).


Step 5:

Attach the L/R Handlebar (24/R) to the L/R Swing Rod (33L/R), by using 4pcs
Half Round Head Square Neck Bolts M8*42 (27), 4pcs Wave Washers D8*Φ16*1.5*R20 (6) and 4pcs Acorn Cap Nuts M8 (7). Tighten and secure with Cross Wrench S13, 14, 15 (B).
Step 6:

- Attach the Middle Handlebar (1) to the Upright Post (10), by using 4pcs Round Head Inner Hexagon Head Bolts M8*35 (5), 4pcs Wave Washers D8*Φ16*1.5*R20 (6) and 4pcs Acorn Cap Nuts M8 (7).
- Connect the wire of Handle Pulse Sensor (3) with Handle Pulse Wire (15).
Step 7:

- Firstly contact the Monitor (8) with Handle Pulse Wire (15) and Sensor Wire (23).
- Remove the preinstalled 2pcs Cross Head Screws M5*10 (9) from the back of the Monitor (8) by using Cross Wrench S13,14,15 (B), then using these 2pcs Cross Head Screws M5*10 (9) to attach the Monitor (8) to the monitor supporting plate of the Upright Post (10). (There are 4 holes on the back of the Monitor, you can choose different 2 holes to install to adjust the height of the monitor.)
- Remove the preinstalled 2pcs Cross Recessed Pan Head Tapping Screws M5*10 (38) from the Upright Post (10) by using Cross Wrench S13,14,15 (B), then using these 2pcs Cross Recessed Pan Head Tapping Screws M5*10 (38) to attach the Water Bottle Holder (8) to the Upright Post (10).
COMPUTER WITH PULSE INSTRUCTIONS
Functional Button
MODE
- Press it to select functions.
- Hold it for 5 seconds to convert KM/H or Mile/H
SET
- To set value of time, distance and calories, pulse when not in scan mode.
RESET
- Press to reset time, distance and calories.
- Hold it for 3 seconds to reset time, distance and calories, pulse.
Functional and Operations
- SCAN: Press MODE button until "SCAN" appears, monitor will rotate through the following functions: time, calories, speed, distance and total distance. Each display will be hold 4 seconds.
- TIME(TMR): Count the total time from exercise start to end.
- SPEED(SPD): Display current steed.
- DISTANCE(DST): Count the distance from exercise start to end.
- CALORIES(CAL): Count the total calories from exercise start to end.
- TOTAL DISTANCE(ODO): Count the total distance after installing the batteries.
- PULSE RATE:
Press MODE button until〝![]() 〞appears. Before measuring your pulse rate, please place both your palms on the contact pads and the monitor will show your current heart beat rate in beats per minute(BPM) on the LCD after 3~4 seconds.
〞appears. Before measuring your pulse rate, please place both your palms on the contact pads and the monitor will show your current heart beat rate in beats per minute(BPM) on the LCD after 3~4 seconds.
Remark: During the process of pulse measurement, because of the contact jamming, the measurement value may be higher than the virtual pulse rate during the first 2~3 seconds, then it will return to normal level. The measurement value can not be regarded as the basis of medical treatment. - AUTO ON/OFF & AUTO START/STOP
Without any signal for 4 minutes, the power will turn off automatically.
When the wheel is in motion or pressing the button, the monitor is in action. 9. ALARM
The functions of time, distance and calorie can be set countdown, any of above value goes to zero, the computer will alarm for 5 seconds. After establishing a good target pulse, if the user's actual pulse exceed the target pulse, the electronic watch will have been reporting to the police a hint.
Press MODE to select the function, then press SET to adjust the value.
Specifications
| FUNCTION | AUTO SCAN | Every 4 seconds |
| TIME(TMR) | 0:00~99:59 (minutes: seconds) | |
| CURRENT SPEED(SPD) | The maximum pick-up signal is 999.9KM/H or Mile/H | |
| TRIP DISTANCE(DST) | 0~999.9KM or Miles | |
| CALORIES(CAL) | 0~9999cal | |
| TOTAL DISTANCE(ODO) | 0~999.9KM or Miles | |
PULSE RATE(  ) ) | 40~240BPM (beat per minute) | |
| BATTERY TYPE | 2PCS of SIZE-AAA or UM-4 | |
| OPERATING TEMPERATURE | 0℃~+40℃ (32℉~104℉) | |
| STORAGE TEMPERATURE | -10℃~+60℃(14℉~168℉) | |
EXERCISE INSTRUCTIONS
Warm-Up
A successful exercise program consists of three parts: warm-up, aerobic exercise, and cool-down. Warm-up is a very important part of your exercise routine and should be done before each exercise session. Warm-up exercises relax your body and stretch muscles so your body is ready for more strenuous work. Cool-down exercises after a workout can help relax your muscles and reduce soreness.
We recommend the following warm-up/cool-down exercises before and after every session. Follow the illustrations below.
- Down Stretch
![]()
Bend your knees slightly and bend body slowly, let your back and shoulders relax, and try to touch your toes. Keep it for 10 ~15 seconds, repeat 3 times. - Hamstring Stretch
![]()
Sit with your left leg extended and bend your right leg at the knee as you place the sole of your right foot against the inner thigh of your extended leg. Try to touch your toes. Keep it for 10 ~15 seconds, and then switch leg, repeat 3 times.
- Calf and Foot Stretch
![]()
Place both hands against a wall to aid your balance. Press the ball of your left foot against the wall and keep the heel of the same foot rested on the floor (make sure your left knee is bent). Slowly start to straighten your left knee and you will feel the muscles in your left calf stretch. Switch leg and repeat 3 times. - Quadriceps Stretch
![]()
Stand on your left leg and hold onto a support with your left hand. Flex your right leg behind you, grasp your ankle or foot with your right hand and pull your foot toward your buttocks. Keep your back straight and right knee pointed down. Switch leg and repeat 3 times. - Groin Stretch
![]()
Sit with your knees flexed and soles of feet together. Hold your ankles and bend at your hips (keep your back straight) as you press your knees toward the floor with your elbows, repeat 3 times.


Exercise Stage
You are advised to exercise in the a same training strength last for a minimum of 12 minutes (most of peoples last for 15~20 minutes). After repeat it for several times, you can increase training strength gradually. After exercising for a period of time, your heart beat will be close to the shaded part in the graph as below. Note: This exercising is a step-by-step process while not a one-step process. It needs to adhere to.

Recovery Phase
This stage is to let your Cardio-vascular System and muscles wind down. This is a repeat of the warm up exercise, e.g. reduce your tempo, continue for approximately 5 minutes. Then repeat the exercise phase, please be careful not to force or jerk your muscles.
When using elliptical fitness exercises, please don't increase training intensity arbitrarily. It may make your leg muscles sprain, which means you can't continue exercising for a long time.
Equipment Tip
Adjusting the Tension Control Knob can change the resistance of the equipment, the higher resistance the harder to step. Users can find a suitable speed for yourself.
CUSTOMER SERVICE
Your satisfaction is very important to us, PLEASE CONTACT US.
Feel free to contact our customer service if any needs:
- yosudasports@gmail.com
- www.yosudabikes.com
- Contact us via Amazon: Login your Amazon account > choose "Your orders" > find the order ID > click "Contact seller"
ASSEMBLING VIDEO
- Download the Amazon Shopping APP
- Scan the transparency barcode on the product's packaging
![]()
- View the assembling video


VideosYOSUDA Cardio Climber Assembly Video
Documents / Resources
References

Download manual
Here you can download full pdf version of manual, it may contain additional safety instructions, warranty information, FCC rules, etc.
Download YOSUDA CARDIO CLIMBER E9 - Elliptical Manual and Assembly Video
Advertisement

Need help?
Do you have a question about the CARDIO CLIMBER and is the answer not in the manual?
Questions and answers