Advertisement
Overview

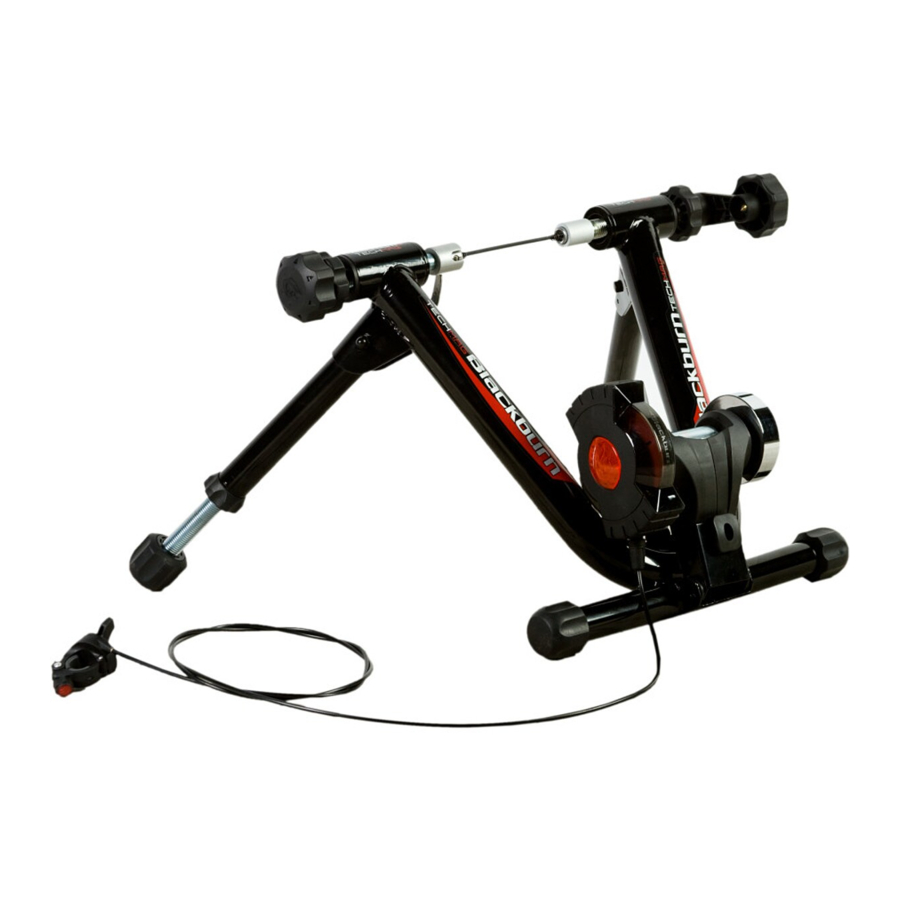
TECHMAG 6™ DIRECTIONS
- Attach the resistance unit (RU) to the trainer frame (see diagram steps 1-3). Tighten the RU pivot bolt to 25 in-lbs (3NM) – DO NOT OVER-TIGHTEN!

- Fold out both front legs to their fully extended positions
- Unthread the RU Adjustment Knob until the Resistance Unit will not interfere with the bicycle wheel during installation.
- Install supplied quick release skewer (QR) into rear wheel. Follow your bicycle/wheel manufacturer recommendations for removing and installing quick releases or have a qualified bicycle shop replace it for you.
![]()
The mounting cones of your Blackburn trainer have been designed specifically to work with the supplied quick release skewer (QR). Mounting a bicycle to the trainer with any other fastening device can make it unstable or result in serious injury. - Check the pressure in the tires and make sure they are at or near the maximum rating indicated on the side of the tire.
NOTE: Low tire pressure can increase tire wear and potentially cause slippage on the RU roller. - During shipping, the wheel adjustment knobs are fully tightened. Standing behind the trainer, first unthread the left hand adjustment knob to retract the skewer cone followed by unthreading the right hand adjustment knob to fully retract the right skewer cone.
- Place rear wheel of bicycle into trainer with left side of QR against left cone. Rotate the cone until there is no interference with the QR lever. Turn left side adjustment knob until tire is centered over the roller of the RU. Thread inner lock nut against the trainer frame.
NOTE: Once the left cone has been positioned and locked it does not need to be adjusted again until a different bicycle is used. - Slowly thread the FastCrank™ adjuster to extend the right side cone and lock right side of QR into the trainer frame. Once QR is locked in place between the cones thread inner lock nut against trainer frame.
- Uncoil the remote resistance adjuster and mount it on your handlebar. If installing the remote on a 26.0mm or smaller diameter handlebar use the included rubber inserts in the bar mount. If installing on a 31.8 (OS) diameter bar remove the included rubber inserts.
![]()
Do not over-tighten the remote adjuster clamp as this may damage the clamp and / or your handle bar.
![]()
Be sure to check that the remote adjuster cable is clear from all moving parts on the bicycle and trainer. Interference between bicycle, rider, or trainer and the adjuster cable can cause serious physical injury to the rider or damage to the bicycle and trainer. - Before getting on the bicycle carefully check that it is securely fasted to the trainer by pushing side to side on the saddle to see if you can twist it out of the trainer frame.
- Screw in the adjuster knob on the RU until the tire is slightly deformed by the RU roller and then thread locking nut into place against RU bracket.
NOTE: Putting too much tension on the RU against the tire can cause premature wear of the tire and stress on the RU unit. - Adjust the height of the trainer by screwing the front feet of the trainer in or out until the frame is stable and the rear wheel of the bicycle is at least 1cm off of the ground.
NOTE: The trainer frame may depress slightly under the weight of a rider so double check that there is enough clearance under the tire. The clearance height may need to be higher if using the trainer on carpet, etc. - Carefully get on the bicycle and start pedaling slowly. Do not make any sudden moves until you are sure the bicycle is securely mounted in the frame, if loose repeat steps 6-12.
- The Tech Mag 6 RU provides six linear resistance settings. Turn the remote resistance adjuster to "1" for the lowest resistance and progress to setting "6" for the highest resistance level. Resistance will also increase with speed as indicated in the chart below.


The RU will get hot to the touch during use. Keep children or pets away from the trainer when in use and sometime afterward until it cools down.
The use of any indoor trainer creates a hazard to others due to the number of rotating parts, etc. Be sure to always use your trainer in an open space to eliminate the possibly of contact with people or things that could be injured or damaged. Keep people or animals away from the trainer when in use.
NOTE: You are more likely to drip sweat onto your bicycle frame, components and floor while riding a trainer vs. normal riding. The use of the Blackburn Sweat Net (sold separately) can reduce the likelihood of corrosion of your bicycle and damage to your floor due to sweat build up.
© 2011 Bell Sports, Inc.
Customer Service: 1-800-456-2355
www.blackburndesign.com

Documents / Resources
References
Download manual
Here you can download full pdf version of manual, it may contain additional safety instructions, warranty information, FCC rules, etc.
Advertisement

Need help?
Do you have a question about the TECHMAG 6 and is the answer not in the manual?
Questions and answers