Danby Designer DDMW1060BSS-6, DDMW1061BSS-6 - 5 in 1 Microwave Manual
- Owner's manual (45 pages)
Advertisement
- 1 IMPORTANT SAFETY INSTRUCTIONS
- 2 INSTALLATION INSTRUCTIONS
-
3
OPERATING INSTRUCTIONS
- 3.1 COOKING TECHNIQUES
- 3.2 COOKING UTENSILS GUIDE
- 3.3 FEATURES
- 3.4 CONTROL PANEL
- 3.5 CLOCK
- 3.6 TIMER
- 3.7 BASIC FUNCTIONS
- 3.8 MICROWAVE COOKING
- 3.9 FAST MICROWAVE COOKING
- 3.10 BROIL / GRILL COOKING
- 3.11 COMBINATION
- 3.12 POPCORN
- 3.13 CONVECTION COOKING
- 3.14 DEFROST BY WEIGHT
- 3.15 DEFROST BY TIME
- 3.16 KEEP WARM
- 3.17 AIR FRY
- 3.18 AUTOMENU
- 3.19 DEODORIZATION
- 3.20 ECO
- 3.21 CHILD LOCK / MUTE
- 4 TROUBLESHOOTING
- 5 Documents / Resources
IMPORTANT SAFETY INSTRUCTIONS

READ AND FOLLOW ALL SAFETY INSTRUCTIONS
When using electrical appliances basic safety precautions should be followed, including the following:

To reduce the risk of burns, electric shock, fi re, injury to persons or exposure to excessive microwave energy:
- Read all instructions before using the appliance.
- Read and follow the specific "PRECAUTIONS TO AVOID POSSIBLE EXPOSURE TO EXCESSIVE MICROWAVE ENERGY".
- This appliance must be grounded. Connect only to properly grounded outlet. See "GROUNDING INSTRUCTIONS".
- Install or locate this appliance only in accordance with the provided installation instructions.
- Some products such as whole eggs and sealed containers - for example, closed glass jars - are able to explode and should not be heated in this oven.
- Use this appliance only for its intended use as described in this manual. Do not use corrosive chemicals of vapors in this appliance. This type of oven is specifically designed to heat, cook or dry food. It is not designed for industrial or laboratory use.
- As with any appliance, close supervision is necessary when used by children.
- Do not operate this appliance if it has a damaged cord or plug, it if is not working properly or if it has been damaged or dropped.
- This appliance should be serviced only by qualified service personnel. Contact nearest authorized service facility for examination, repair, or adjustment.
- Do not cover or block any openings on the appliance.
- Do not store this appliance outdoors. Do not use this product near water - for example, near a kitchen sink, in a wet basement, near a swimming pool or similar location.
- Do not immerse cord or plug in water.
- Keep cord away from heated surface.
- Do not let cord hang over edge of table or counter.
- When cleaning surfaces of door and oven that comes together on closing the door, use only mild, nonabrasive soaps, or detergent applied with a sponge or soft cloth.
- To reduce the risk of fi re in the oven cavity:
- Do not overcook food. Carefully attend appliance when paper, plastic, or other combustible materials are placed inside the oven to facilitate cooking.
- Remove wire twist -ties from paper or plastic bag before placing bag in oven.
- If material inside of the oven ignite, keep oven door closed, turn oven off, and disconnect the power cord, or shut off power at the fuse or circuit breaker panel.
- Do not use the cavity for storage purposes. Do not leave paper products, cooking utensils, or food in the cavity when not in use.
Liquids, such as water, coffee, or tea are able to be overheated beyond the boiling point without appearing to be boiling. Visible bubbling or boiling when the container is removed from the microwave is not always present. THIS COULD RESULT IN VERY HOT LIQUIDS SUDDENLY BOILING OVER WHEN THE CONTAINER IS DISTURBED OR A UTENSIL IS INSERTED INTO THE LIQUID.
PRECAUTIONS TO AVOID POSSIBLE EXPOSURE TO EXCESSIVE MICROWAVE ENERGY
- Do not attempt to operate this oven with the door open since open door operation can result in harmful exposure to microwave energy. It is important not to defeat or tamper with the safety interlocks.
- Do not place any object between the oven front face and the door or allow soil or cleaner residue to accumulate on sealing surfaces.
- Do not operate the oven if it is damaged. It is particularly important that the oven door close properly and that there is no damage to the:
- door (bent),
- hinges and latches (broken or loosened),
- door seals and sealing surfaces.
- The oven should not be adjusted or repaired by anyone except properly qualified service personnel.
GROUNDING INSTRUCTIONS
This appliance must be grounded. In the event of an electrical short circuit, grounding reduces the risk of electrical shock by providing an escape wire for the electrical current.
This appliance is equipped with a cord that has a grounding wire with a grounding plug. The power cord must be plugged into an outlet that is properly grounded. If the outlet is a standard 2-prong wall outlet, it is your responsibility to have it replaced with a properly grounded 3-prong wall outlet. The serial rating plate indicates the voltage and frequency the appliance is designed for.
Improper use of the grounding plug can result in a risk of electric shock. Consult a qualified electrician or service agent if the grounding instructions are not completely understood, or if doubt exists as to whether the appliance is properly grounded.
Do not connect your appliance to extension cords or together with another appliance in the same wall outlet. Do not splice the power cord. Do not under any circumstances cut or remove the third ground prong from the power cord.
If the power supply cord is damaged, it must be replaced by the manufacturer, its service agent or similar qualified person in order to avoid hazard.
Have a qualified electrician install a grounded outlet near the appliance if the power cord is too short.
A short power supply cord is provided to reduce the risks resulting from becoming entangled in or tripping over a longer cord.
RADIO FREQUENCY INTERFERENCE
This equipment generates and uses ISM frequencies and if not installed and used properly in strict accordance with the manufacturer's instructions, it may cause interference to radio and television reception. It has been type-tested and found to comply with limits for ISM Equipment pursuant to Part 18 of FCC Rules, which are designed to provide reasonable protection against such interference in a residential installation.
However, there is no guarantee that interference will not occur in particular installations. If this equipment does cause interference to radio or television reception, which can be determined by turning the equipment off and on, the interference can be corrected by one or more of the following methods:
- Reorient the receiving antenna of radio or television.
- Move the microwave oven away from the receiver.
- Plug the microwave into a different outlet so that microwave and receiver are on different branch circuits.
The manufacturer is not responsible for any radio or TV interference caused by unauthorized modification of this appliance. It is the responsibility of the user to correct such interference.
| Oven capacity: | 28 L 1 cu. ft. |
| Turntable diameter: | ø31.5 cm ø12.4 in |
| External dimensions: | 52 x 50.8 x 32.6 cm 20.5 x 20 x 12.8 in |
| Net weight: | 18.5 kg 40.8 lbs |
| Rated voltage: | 120 V ~ 60 Hz |
SAFETY - SUPERHEATED LIQUID
Liquids are able to be overheated beyond the boiling point without appearing to be boiling due to the surface tension of the liquid. Visible bubbling will not always be present when the liquid is removed from the appliance. This could result in very hot liquids suddenly boiling over when a utensil or other item such as a tea bag is inserted into the liquid.
To reduce the risk of injury:
- Do not overheat liquids. Do not heat any liquid for more than 2 minutes per cup.
- Stir liquids before and halfway through heating.
- Do not use straight-sided containers with narrow necks as this can cause a build up of steam.
- Superheated liquid can begin to spontaneously boil when removed from the microwave. After heating, allow the liquid to stand in the microwave for 30 seconds before removing.
- Use extreme care when inserting a utensil or other item into hot liquids.
The contents of milk bottles and baby food jars should be stirred or shaken and the temperature checked before serving in order to avoid burns.
Do not defrost frozen beverages, especially carbonated beverages, in this appliance as they could explode.
Hot foods and steam can cause burns. Be careful when opening any container that has been heated in the appliance. Direct the opening away from hands and face to avoid burns.
SAFETY - ARCING
Arcing refers to sparks inside the microwave while it is in operation. Arcing is caused by:
- Metal or foil inside the appliance.
- Recycled paper towels being used inside the appliance, as these can contain small pieces of metal.
If arcing is present, stop operation and remove any metal or paper towels from the appliance.
INSTALLATION INSTRUCTIONS
- Remove all packing materials from the inside and outside of the appliance. Do not remove the cardboard mica sheet covering the magnetron.
- Check the appliance for damage before using, such as a misaligned or bent door, damaged door seals, broken or loose door hinges or latches, or dents inside the cavity or on the door. If there is any damage to the appliance, do not use it, return it to its point of purchase or contact consumer care.
- The appliance must be placed on a fl at, stable surface that is able to hold its weight and the heaviest food likely to be placed in the appliance.
- Do not use this appliance where heat, moisture or high humidity are generated.
- Do not clean this appliance with or use near combustible materials.
- Allow 30 cm (12 inches) of space above the appliance, 7.5 cm (3 inches) at the back of the appliance and 7.5 cm (3 inches) on both sides for proper air fl ow around the appliance. Do not block any ventilation openings on the appliance.
- Do not operate the appliance without the glass tray, roller support and shaft in their correct positions.
- Do not remove the legs.
![]()
Do not install the microwave over a range cooktop or other heat producing appliance. If installed near or above a heat source the microwave could be damaged and the warranty would be void.

OPERATING INSTRUCTIONS
COOKING TECHNIQUES
To achieve the best results when cooking in this appliance, follow the suggestions below.
STIRRING
Stir foods while cooking to distribute heat evenly. Food at the outside of the dish absorbs more energy and will heat more quickly so stir from the outside of the dish toward the center.
ARRANGEMENT
Arrange unevenly shaped foods thicker, meatier parts toward the outside of the turntable so they receive more heat. To prevent overcooking, place delicate items toward the center of the turntable.
SHIELDING
Delicate foods can be shielded with narrow strips of aluminum foil to prevent overcooking. Use only small amounts of foil as this can cause arcing and damage to the appliance.
TURNING
Turn food over midway through cooking to expose all parts to the microwave energy. This is important with large items and meat.
STANDING
Foods cooked in a microwave build up internal heat and continue to cook for a few minutes after heating stops. Let foods stand to complete cooking, especially meats and liquids. All liquids should be allowed to stand for a few minutes after cooking and should be shaken or stirred before consuming.
ADDING MOISTURE
Microwave energy is attracted to water molecules. Food that is uneven in moisture content should be covered and allowed to stand after cooking to allow the heat to disperse evenly. Add a small amount of water to dry food to help it cook.
COOKING UTENSILS GUIDE
Certain utensils are inappropriate for use in a microwave. See below for more information on which utensils are recommended, which should only have limited use and which are not recommended.
RECOMMENDED
Microwave Browning Dish: Used to brown the exterior of small food items. Follow the directions provided with the browning dish.
Microwavable Plastic Wrap: Used to retain steam. Leave a small opening to avoid a build up of steam. Do not place directly on food.
Glass and Ceramic Bowls and Dishes: Use for heating or cooking.
Paper Plates and Cups: Use for short term heating at low temperatures. Do not use recycled paper as they can contain metal and could ignite.
Paper Towels and Napkins: Use for short term heating and covering. They can absorb excess moisture and prevent splattering. Do not use recycled paper towels as they can contain metal and could ignite.
Wax Paper: Use as a cover to prevent splattering.
Thermometers: Only use those that are labeled "microwave safe" and follow all directions. Check the food in several places. Conventional thermometers can be used once the food has been removed from the microwave.
LIMITED USE
Ceramic, Porcelain and Stoneware: Only use if they are labeled "microwave safe".
Plastic: Only use if labeled "microwave safe".
NOT RECOMMENDED
Glass Jars and Bottles: Regular glass is too thin to be used in a microwave. It can shatter and cause damage or injury.
Paper Bags: These are a fi re hazard and could ignite. The only exception is popcorn bags, which are designed for microwave use.
Styrofoam Plates and Cups: These can melt and leave an unhealthy residue on food.
Plastic Storage and Food Containers: These can melt and ignite.
Metal Utensils: These can cause arcing and damage to the appliance. Remove all metal before operation.
Note: To check if a dish is safe for use in the microwave, place the empty dish in the appliance and microwave on high for 30 seconds. If the dish becomes very hot, it should not be used.
FEATURES

- Control panel
- Turntable shaft
- Turntable ring assembly
- Glass tray
- Observation window
- Door assembly
- Safety interlock system
- Grill rack
- Baking tray
Note: The grill rack is made of metal and should not be used when running the microwave.
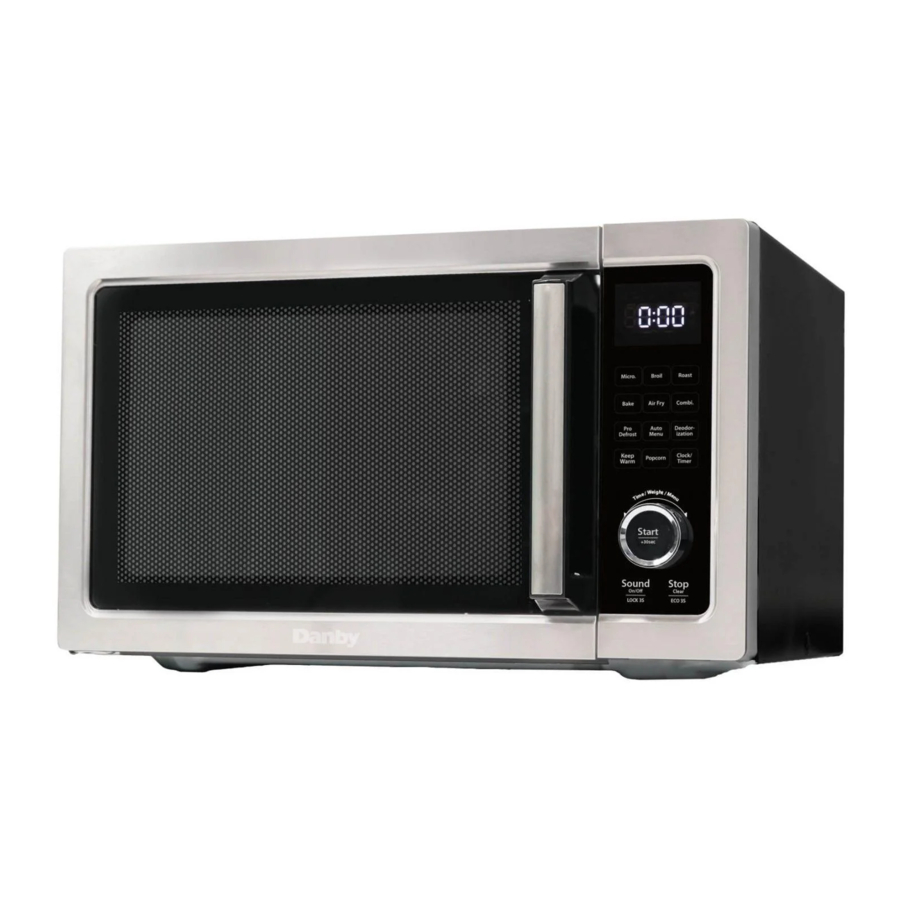
CONTROL PANEL

- Microwave
- Broil
- Roast
- Bake
- Air fry
- Combi
- Pro defrost
- Auto menu
- Deodorization
- Keep warm
- Popcorn
- Clock/Timer
- Start/+30sec
- Sound on/off
- Stop/clear
CLOCK
The clock can be only be set as a 12 hour clock.
To set the current time:
- Press the clock/timer button once. The display will show "00:00".
- Turn the control knob to set the current hour.
Press the clock/timer button to confirm selection. - Turn the control knob to set the current minute.
Press the clock/timer button to confirm selection.
During operation, press the clock/timer button to see the current time.
TIMER
The time can be set to a maximum of 95 minutes.
To set the timer:
- Press the clock/timer button twice. The display will show "00:00"
- Turn the control knob to set the desired time.
- Press the start/+30sec button to confirm selection.
Note: Programs cannot be set while the timer is running.
BASIC FUNCTIONS
- The oven will beep 5 times when a program is complete.
- Press the stop/clear button to pause a program.
- Press the start/+30sec button to start or continue a program.
MICROWAVE COOKING
- Press the microwave button repeatedly to choose the desired power level as per the below chart.
- Press the start/+30sec button to confirm.
- Turn the control knob to set the desired cook time.
- Press the start/+30sec button to begin the chosen program.
- When the program is complete the microwave will beep 5 times.
Level Power Display 10 100% P100 9 90% P90 8 80% P80 7 70% P70 6 60% P60 5 50% P50 4 40% P40 3 30% P30 2 20% P20 1 10% P10
FAST MICROWAVE COOKING
Turning the control knob can add or subtract cook time. The setting time of the rotary knob has stages as follows:
- 0 ~ 1min, step 5 seconds
- 1 ~ 5min, step 10 seconds
- 5 ~ 10min, step 30 seconds
- 10 ~ 30min, step 1 minute
- 30 ~ 95 min, step 5 minutes
During a normal microwave program, press the start/+30sec button to add 30 seconds to the cook time.
BROIL / GRILL COOKING
- Press the broil button once. The display will show "G-1".
- Press the start/+30sec button to confirm and then set the desired time by turning the knob.
- Press the start/+30Sec button to begin the program.
- The display will show the time remaining. The unit will beep halfway through the program to indicate the food should be turned over or stirred.
- The unit will beep fi ve times when the program is complete.
COMBINATION
- Press the combi button once to choose the microwave and convection function. Press the combi button twice to choose the microwave and grill function. Press the start/+30sec button to confirm.
- Turn the control knob to set the desired time.
- Press the start/+30sec button to begin the program.
- The display will show the time remaining.
- The unit will beep fi ve times when the program is complete.
Press Display Microwave Grill Convection Once C-1 • • Twice C-2 • •
POPCORN
- Press the popcorn button. The default weight is 2.75 oz. Press twice for 3.2 oz and three times for 3.5 oz.
- Press the start/+30sec button to begin the program.
- The unit will beep fi ve times when the program is complete.
CONVECTION COOKING
Convection cooking allows the microwave to function as a regular oven. It is recommended to preheat the oven before using.
There are ten convection temperatures available: 100F, 150F, 250F, 275F, 300F, 325F, 350F, 375F, 400F, 425F.
With preheating
- Press the roast or bake button once. The display will show "100F" and the convection icon will illuminate. Press the roast or bake button repeatedly to choose the desired temperature.
- Press the start/+30sec button to confirm the selection.
- Press the start/+30sec button again to begin preheating.
- When preheating is complete the temperature scale icon will fl ash. The food can be placed in the oven.
- Turn the control knob to set the desired cook time.
- Press the start/+30sec button to begin the program.
- The unit will beep fi ve times when the program is complete.
Without preheating
- Press the roast or bake button once. The display will show "100F" and the convection icon will illuminate. Press the roast or bake button repeatedly to choose the desired temperature.
- Press the start/+30sec button to confirm the selection.
- Turn the control knob to set the desired cook time.
- Press the start/+30sec button to begin the program.
- The unit will beep fi ve times when the program is complete.
DEFROST BY WEIGHT
The weight range for defrosting items is between 4 ~ 100 oz.
- Press the pro defrost button to choose the desired program DEF1 - DEF6, as per the chart below.
- Press the start/+30sec button to confirm the selection.
- Turn the control knob to set the weight of the food being defrosted.
- Press the start/+30sec button to begin the program.
- The unit will beep fi ve times when the program is complete.
Program Display Vegetables DEF1 Fruit DEF2 Chicken DEF3 Fish DEF4 Meat DEF5 Broth DEF6
DEFROST BY TIME
- Press the pro defrost button repeatedly to choose "DEF7".
- Press the start/+30sec button to confirm the selection.
- Turn the control knob to set the desired defrost time.
- Press the start/+30sec button to begin the program.
- The unit will beep fi ve times when the program is complete.
KEEP WARM
- Press the keep warm button to keep food in the oven warm. The display will show "L1" and the grill icon. Press repeatedly for other programs as per the below chart. Press the start/+30sec button to confirm.
- Set the desired temperature by turning the knob, then press the start/+30sec button to confirm.
- Set the desired time by turning the knob, then press the start/+30sec button to begin the program.
- The unit will beep fi ve times when the program is complete.
Program Display Temperature (F) Max Time Yogurt L1 105 12 hours Proofing L2 105 12 hours Keep warm L3 140/160/175 95 mins Slow cook L4 195 / 230 12 hours
AIR FRY
- Press the air fry button. The display will show "H01". Press the air fry button repeatedly to choose the desired program based on the chart below.
- Press the start/+30sec button to confirm the selection.
- The unit will beep fi ve times when the program is complete.
Program Display Weight Frozen French fries H01 ~ 11oz Frozen onion rings H02 ~ 9oz Frozen chicken nuggets H03 ~ 13oz Frozen chicken wings H04 ~ 18 oz Frozen chicken legs H05 ~ 24 oz Chicken tenders H06 ~ 11 oz Frozen shrimp H07 ~ 9 oz Fish sticks H08 ~ 11 oz Spring rolls H09 ~ 11 oz Mozzarella sticks H10 ~ 11 oz
AUTOMENU
- Press the automenu button. The display will show "A01" and the microwave icon. Press the automenu repeatedly to choose the desired program based on the below chart.
- Press the start/+30sec button to confirm.
- Turn the control knob to set the desired weight.
- Press the start/+30sec button to begin the program.
- The unit will beep fi ve times when the program is complete.
Note: Preheating is recommended when using the cake and cookie programs.
| Program | Display | Weight (oz) |
| Beverage | A01 | 4 |
| 8 | ||
| 12 | ||
| Dinner plate | A02 | 5 |
| 8 | ||
| 12 | ||
| 15 | ||
| 21 | ||
| Soup | A03 | 8 |
| 16 | ||
| 24 | ||
| Potato | A04 | 8 |
| 16 | ||
| 24 | ||
| Vegetables | A05 | 4 |
| 8 | ||
| 16 | ||
| Oatmeal | A06 | 28 |
| Pizza | A07 | 10 |
| 14 | ||
| Cake | A08 | 16 |
| Cookie | A09 | 6 |
DEODORIZATION
Press the deodorization button to begin the program. The fan will run for 5 minutes without engaging the heating function to remove odors from the oven. The oven will beep fi ve times when the program is complete.
ECO
Press the eco button to turn off the display. Press any button to turn the display back on.
CHILD LOCK / MUTE
Press the sound on/off button to mute the oven. The buttons will not make sounds when the oven is muted. Press the sound on/off button again to restore sound.
Press and hold the sound on/off button for 3 seconds to engage the child lock. The buttons cannot be pressed when the child lock is engaged. Press and hold the sound on/off button for 3 seconds to remove the child lock.
TROUBLESHOOTING
| PROBLEM | POSSIBLE CAUSE |
| No power |
|
| Arcing or sparking during operation |
|
| Unevenly cooked food |
|
| Overcooked food |
|
| Undercooked food |
|
| Poor Defrosting |
|

DANBY PRODUCTS LIMITED, ONTARIO, CANADA N1H 6Z9
DANBY PRODUCTS INC., FINDLAY, OHIO, USA 45840
Documents / Resources
References
Download manual
Here you can download full pdf version of manual, it may contain additional safety instructions, warranty information, FCC rules, etc.
Download Danby Designer DDMW1060BSS-6, DDMW1061BSS-6 - 5 in 1 Microwave Manual
Advertisement


Need help?
Do you have a question about the Designer DDMW1060BSS-6 and is the answer not in the manual?
Questions and answers