Advertisement
IMPORTANT SAFETY INSTRUCTIONS
For your own safety, always follow these basic precautions when using a FoodSaver appliance:
- Read the Owner's Manual carefully for operating instructions. Read all instructions in this manual before use.
- When using an electrical appliance, basic precautions are required to always be followed, including the following:
Read all instructions before using this appliance.

To reduce the risk of electric shock:
- Do not reach for an appliance that has fallen into water. Unplug immediately from receptacle.
- Do not use while bathing or in a shower.
- Do not place or store appliance where it is able to fall or be pulled into a tub or sink. Do not place in or drop into water or other liquid.
- Always unplug this appliance from the electrical outlet immediately after using.
- Unplug this appliance before cleaning.


To reduce the risk of burns, fire, electric shock:
- Do not use appliance on wet surfaces or outdoors.
- To protect against electric shock, do not immerse any part of appliance, power cord or plug in water or other liquid. Unplug from outlet when not in use and before cleaning.
- To disconnect, unplug power cord from electrical outlet. Do not disconnect by pulling on cord.
- Do not operate appliance with a damaged power cord or plug. Do not operate appliance if it malfunctions or is in any way, damaged.
For details, contact Consumer Services at number listed below.
- Use appliance only for its intended use.
- Closely supervise children when using any electrical appliance. Do not allow appliance to be used as a toy.
- Caution: A short power cord is provided to reduce risks from entanglement or tripping over a longer cord. An extension cord may be used when marked electrical rating is no less than electrical rating of this appliance.
- No cords should drape over counter or tabletop, where cords can be tripped over or pulled on unintentionally, especially by children.
- Do not place on or near a hot gas or electric burner, or heated oven. Extreme caution must be used when moving products containing hot liquids.

- Vacuum packaging is NOT a substitute for the heat process of canning.
- For best results, use only with FoodSaver Zipper Bags, Containers and Accessories.
- When vacuum sealing zipper bags, small amounts of liquids, crumbs, or food particles can be inadvertently pulled into the Valve, creating a possible air leak. To prevent this, follow these tips:
- For soups, sauces and liquids: Use a container. Sealing liquid in Zipper Bags is NOT recommended.
- For powdery or fine-grained food: Avoid overfilling bags or use a container. You can also place a coffee filter or paper towel on top of the food beneath valuve before vacuuming.
- Ensure the zipper is closed securely and no food debris is trapped in the zipper. Food trapped in the zipper can create a leak which may cause the bag to lose its vacuum seal over time.
- Reservoir must be in place during operation of FoodSaver Zipper Bags and Preserve & Marinate Containers. For use with FoodSaver Jar Sealers and Bottle Stoppers, remove Reservoir and seal using the Accessory Port.
SAVE THESE INSTRUCTIONS HOUSEHOLD USE ONLY
 This appliance has a polarized plug (one blade is wider than the other). As a safety feature to reduce the risk of electrical shock, this plug is intended to fit in a polarized outlet only one way. If the plug does not fit fully into the outlet, reverse the plug. If it still does not fit, contact a qualified electrician. Do not attempt to modify the plug in any way. If the plug fits loosely into the AC outlet or if the AC outlet feels warm do not use that outlet.

POWER CORD INSTRUCTIONS
A short power-supply cord (or detachable power-supply cord) is provided to reduce risks resulting from becoming entangled in or tripping over a longer cord. Longer detachable power-supply cords or extension cords are available and may be used if care is exercised in their use. If a long detachable power-supply cord or extension cord is used:
- The marked electrical rating of the detachable power-supply cord or extension cord should be at least as great as the electrical rating of the appliance;
- If the appliance is of the grounded type, the extension cord should be a grounding type 3-wire cord; and
- The longer cord should be arranged so that it will not drape over the counter top or table top where it can be pulled on by children or tripped over unintentionally.
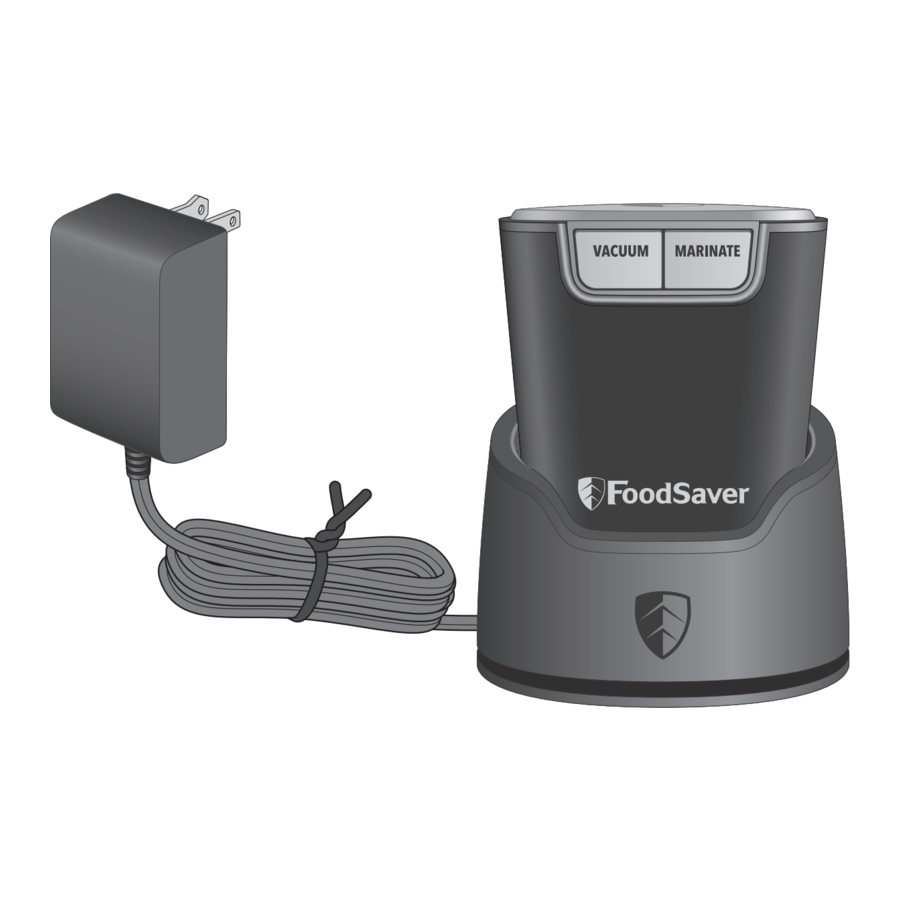
Product Features


- Vacuum Button
- Marinate Button
- Accessory Port
- Reservoir
- Vacuum Indicator Light
- Marinate Indicator Light
- Charging Dock
- Charging Contacts

The user-friendly, intuitive control panel makes it easy for you to get the most out of your FoodSaver System:
- Vacuum Button
Press to remove air from FoodSaver Zipper Bags, Containers, or Accessories. - Vacuum Indicator Light
Flashes when air is being removed and will turn off once vacuum process is complete. - Marinate Button
Press to run marinate cycle that marinates food in minutes instead of hours. - Marinate Indicator Light
Flashes during the 12 minute marinate cycle and will turn off once marinate cycle is complete. - Charging Dock
Plug Charging Dock into wall and put Handheld into Dock with buttons facing forward. Lights will flash while charging and then will stop and illuminate once fully charged.
How to
Zipper Bags
- Place food into FoodSaver Zipper Bag. Lay zipper bag flat with gray circle facing upwards and slide fingers across zipper to close the bag. For Zipper Bags, make sure not to put any food under the valve.
- Place the Handheld firmly over the gray circle on the zipper bag.
- Press and release the Vacuum Button to start the vacuum process.


Once the air is removed, the Handheld Vacuum Sealer will turn off automatically. Place handheld back into Charging Dock.
Zipper Bags are safe for pantry and fridge use only.
Use the Preserve & Marinate Containers
To Vacuum Seal:
- Put food into FoodSaver Container and place lid securely on top making sure the green valve is turned to the Vacuum position.
![]()
- Place the Handheld firmly on the green valve.
- Press and release the Vacuum Button to start the vacuum process. Indicator dimple on the container will depress showing air is being removed.
![]()


Once the air is removed, the Handheld Vacuum Sealer will turn off automatically. Place Handheld back into Charging Dock.
To release vacuum and open, turn knob on lid to Open.
To Marinate:
- Put food and marinade into FoodSaver Container and place lid securely on top making sure the green valve is turned to the Marinate position.
![]()
- Remove the Reservoir from the Handheld and insert Accessory Port firmly into the center of the green valve on container.
![]()
- Press and release the Marinate Button to start the Marinate cycle.
![]()


Marinate cycle will run for about 12 minutes and will pull a vacuum and release 3 times before shutting off once complete.
Replace Reservoir on the Handheld and place Handheld back into Charging Dock.
Device Accessories
For Jar Sealers & Bottle Stoppers:
- Prepare accessory according to FoodSaver Accessory Guidelines, which are included with accessory purchases.
- Remove the Reservoir from the Handheld and insert Accessory Port firmly into the hole on the accessory.
![]()
- Press and release the Vacuum Button to start the vacuum process.
![]()
- Once the air is removed, the Handheld Vacuum Sealer will turn off automatically. Replace Reservoir on the Handheld & place Handheld back into Charging Dock.


NOTE: FoodSaver Jar Sealers are for use with Ball and Kerr brand Mason jars only.
Do NOT use screw bands when vacuum sealing jars. To open, wedge spoon between Mason jar lid and highest part of threaded rim. Twist spoon gently to release vacuum. FoodSaver Bottle Stoppers: To release vacuum and open, twist and pull up on Bottle Stopper.
Care & Cleaning of your Device
To Clean Appliance
- Always unplug appliance before cleaning.
- Do not immerse appliance in water.
- Avoid using abrasive products or materials to clean any appliance components. These cleaners can scratch the surface and damage the black foam rubber pads.
- Use a mild dish washing soap and a warm, damp cloth to wipe away food residue inside or around components.
- Empty Reservoir after each use. Wash in warm soapy water. Air dry before replacing.
To remove Reservoir from FoodSaver: while holding Handheld Vacuum Sealer with one hand, pull clear Reservoir away from main housing of unit.
Preserve & Marinate Containers
- The Container Base and Lid can be safely washed in the top rack of the dishwasher. You can also wash both pieces in warm, soapy water; rinse well and dry thoroughly. The green gasket can be washed in warm, soapy water; rinse well and dry thoroughly.
- FoodSaver Containers are microwave safe for reheating only, not for cooking. Always thaw foods in either the refrigerator or microwave - do not thaw perishable foods at room temperature.
Vacuum Sealing and Food Safety
The vacuum sealing process extends the life of foods by removing most of the air from the sealed container, thereby reducing oxidation, which affects nutritional value, flavor and overall quality. Removing air can also inhibit growth of microorganisms, which can cause problems under certain conditions:
Mold– Easily identified by its fuzzy characteristic. Mold cannot grow in a low oxygen environment; therefore vacuum sealing can slow the growth of mold.
Yeast – Results in fermentation, which can be identified by smell and taste. Yeast needs water, sugar and a moderate temperature to grow. It can also survive with or without air. Slowing the growth of yeast requires refrigeration, while freezing stops it completely.
Bacteria – Results in an unpleasant odor, discoloration and/or soft or slimy texture. Under the right conditions, anaerobic bacteria such as Clostridium Botulinum (the organism that causes Botulism) can grow without air and sometimes cannot be detected by smell or taste. Although it is extremely rare, it can be very dangerous.
To preserve foods safely, it is critical that you maintain low temperatures. You can significantly reduce the growth of microorganisms at temperatures of 40°F (4°C) or below. Freezing at 0°F (-17°C) does not kill microorganisms, but stops them from growing. For long-term storage, always freeze perishable foods that have been vacuum sealed, and keep refrigerated after thawing.
It is important to note that vacuum sealing is NOT a substitute for canning and it cannot reverse the deterioration of foods. It can only slow down the changes in quality. It is difficult to predict how long foods will retain their top-quality flavor, appearance or texture because it depends on age and condition of the food on the day it was vacuum sealed.
Vacuum sealing is NOT a substitute for refrigeration or freezing.
Any perishable foods that require refrigeration must still be refrigerated or frozen after vacuum sealing.
Due to the risk of anaerobic bacteria, fresh mushrooms, onions, garlic, and soft cheeses should never be vacuum sealed.
When vacuum sealing apples, they must be sliced, and put a small bit of lemon juice on the slices to prevent them from browning.
Because of their natural ripening, bananas may actually decay faster under a vacuum seal.
Troubleshooting
| Problem | Solution |
| Vacuum sealer does not start when Vacuum or Marinate Button is pressed |
|
Device starts but bag is not evacuating air |
|
Device starts but air is not removed from Container |
|
| Vacuum Nozzle and Air Valve are not making secure contact |
|
| Air was removed from the bag, but now air has re-entered |
|
| If you need further assistance |
|
Replacement Parts

For replacement parts, please visit the website or call consumer services.
US: www.FoodSaver.com | CA: www.FoodSaver.ca | MX: www.oster.com.mx/foodsaver

Documents / Resources
References
Download manual
Here you can download full pdf version of manual, it may contain additional safety instructions, warranty information, FCC rules, etc.
Advertisement


Need help?
Do you have a question about the FS210 and is the answer not in the manual?
Questions and answers