Table of Contents
Advertisement
Available languages
Available languages
Quick Links
L O I Ç A I N D U S T R I A L A V ASTOV I G L I E I N D U S T R I A LI
ITALIANO
FRANÇAIS
ENGLISH
DEUTSCH
ESPAÑOL
PORTUGUÉS
L A V ASTOV I G L I E I N D U S T R I A LI
LAVE-VA I S E L L E I N D U S T R I E L ES
IND U S T R I A L D I S H W A S H ER
I N D U S T R I E G E S C H I R R S P Ü L ER
L AV A VA J I L L AS I N D U S T R I A L ES
LAVE-VA I S E L LE I N D U S T R I E L ES
IND U S T R I A L D I S H W A S H ER
I N D U S T R I E G E S C H I R R S P Ü L ER
L AV A VA J I L L AS I N D U S T R I A L ES L
O I Ç A I N D U S T R I A IS
GEBRAUCHSANWEISUNG UND INSTALLATION
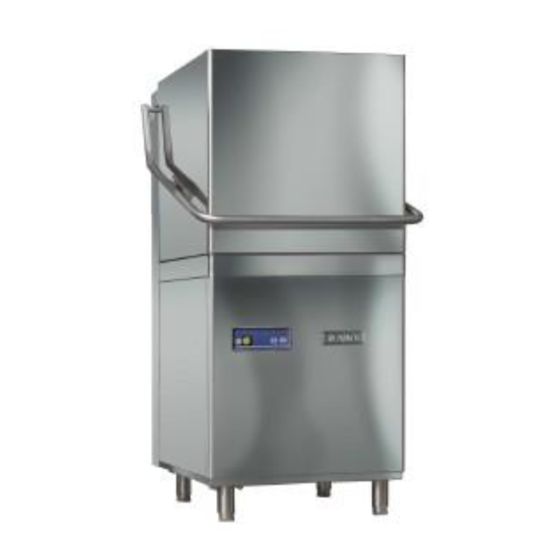
TAM 1000 TOP
TAM EU
TEL: 07 1 43 81 44 77
FAX: 07 1 43 81 44 99
tam-eu.com
74354 Besigheim
Mundelsheimer Weg 12
MANUALE D'USO E INSTALLAZION
MANUEL D'EMPLOI ET MISE EN PLACE
MANUAL FOR USE AND INSTALLATION
MANUAL DE INSTALACIÓN DE USO
MANUAL DE INSTALAÇO USO
Advertisement
Table of Contents

Summary of Contents for TAM 1000 TOP
- Page 1 L AV A VA J I L L AS I N D U S T R I A L ES L O I Ç A I N D U S T R I A IS TAM 1000 TOP TAM EU...
- Page 2 Mod. E1000 Mod. N1000 Mod. 1300 - 1300S ITALIANO FRANÇAIS ENGLISH 1 – Lampada spia linea 1 – Lampe-témoin ligne 1 – Line pilot light 2 – Interruttore generale 2 – Interrupteur général 2 – Main switch 3 – Lampada spia ciclo 3 –...
- Page 3 Mod. 1000T - 1000BT 130T - 100STMod. 1000E ITALIANO FRANÇAIS ENGLISH 1 - Display temp. tank/boiler’s water 1 - Display temp.e acqua vasca/boiler 1 - Display temp. eau cuve/ surchauffeur 2 - Lampada spia macchina pronta 2 - spy Lamp ready machine 2 - Lampe-témoin machine prête 3 - Selettore tempo lavaggio breve 3 - Selector short time washing...
- Page 4 CONSTRUCTION DE L'APPAREIL BAU DES GERÄTS COMPOSIÇÃO DO APARELHO COSTRUZIONE DELL'APPARECCHIO CONSTRUCTION DETAILS CONSTRUCCIÕN DEL APARATO COMPONENTI MACCHINA COMPOSANTS MACHINES COMPONENTS OF THE MACHINE MASCHINENKOMPONENTEN COMPONENTES DE LA MÁQUINA COMPONENTES DA MÁQUINA FRANÇAIS ENGLISH ITALIANO 1 – Girante lavaggio 1 – Bras de lavage 1 –...
-
Page 5: Norme Di Installazione
NORME DI INSTALLAZIONE Portare la lavastoviglie sul luogo d'installazione, rimuovere l'imballo, verificare l'integrità della macchina, dei componenti e che la merce corrisponda alle specifiche dell'ordine. In caso di dubbio, non utilizzare l'apparecchiatura fino a quando non sarà controllata da personale qualificato. Rimuovere i cartoni, il pallet di legno, le reggette ed il polistirolo dividendoli in base alla tipologia e procedere allo smaltimento presso discariche. -
Page 6: Allacciamento Elettrico
ALLACCIAMENTO ELETTRICO L’apparecchio è da collegare ad un interruttore generale a muro di adeguata potenza del tipo con sganciatore termico e relativo blocco differenziale. Per i modelli trifase utilizzare un cavo elettrico tipo H07RN-F di adeguata sezione nominale. Attenzione: è obbligatorio realizzare un buon collegamento di terra secondo le norme vigenti,e inserire l’apparecchiatura stessa in un sistema equipotenziale collegando la vite posta sul basamento contrassegnata con il relativo simbolo. - Page 7 DISPOSITIVI DI SICUREZZA 1) Microinterruttore sulla capot che interrompe il ciclo all’apertura della stessa; il ciclo riparte alla chiusura. 2) Protettore termoamperometrico sulla pompa di lavaggio. 3) Controllo del livello acqua sia nel boiler che nella vasca. 4) Dispositivo che impedisce il ritorno dell’acqua del boiler in rete. 5) Troppopieno, collegato allo scarico, per mantenere il livello dell’acqua in vasca costante (solo nei mod.
-
Page 8: Modelli Con Pompa Di Scarico
Mod.E 1000 · Posizionare l’interruttore generale 2 nella posizione “on” · Attendere lo spegnimento della lampada spia boiler Pos.4 · Chiudere la cappotta per iniziare il ciclo di lavaggio · La spia Pos.3 rimarrà accesa per tutta la durata del ciclo. Mod.N 1000 –... -
Page 9: Messa In Funzione
MODELLI ELETTRONICI Dopo aver verificato che tutti i "CONTROLLI PRELIMINARI" citati nel paragrafo 9 siano stati rispettati,procedere come segue: ACCENSIONE E RIEMPIMENTO VASCA Inserire l’interruttore a muro, il 6/a si illuminerà di colore rosso per segnalare macchina in tensione. Chiudere la capot, premere il pulsante generale 6, il led 6/b diventa di colore verde e contemporaneamente il led 2 inizierà... - Page 10 SCARICO VASCA Al termine delle operazioni di lavaggio comportarsi come segue: - portare l’interruttore generale sulla posizione "OFF"; - disinserire l’interruttore generale a muro; - chiudere il rubinetto d'alimentazione acqua; - togliere troppopieno H (la macchina inizia a scarcare) (Fig. 10) - lavare l’interno della vasca e i filtri con prodotti idonei;- ricollocare filtro e troppopieno nelle rispettive sedi.
- Page 11 PROBLEMA CAUSA RIMEDIO NON SI ACCENDE LA Lampada bruciata. LAMPADA INDICANTE LA Manca tensione rete. TENSIONE ELETTRICA Sostituire. Aprire rubinetto. Rubinetto acqua chiuso. Trappola aria sporca. Pulire. ALL'AVVIAMENTO NON Pressostato difettoso. Sostituire. CARICA ACQUA Bobina elettrovalvola bruciata. Sostituire. Membrana rotta o difettosa. Sostituire.
-
Page 12: Manutenzione E Pulizia
MANUTENZIONE E PULIZIA L’apparecchio è costruito in maniera tale da richiedere ben poche manutenzioni; ciò nono-stan- te consigliamo di far controllare lo stesso due volte l’anno da un tecnico specializzato. N.B.: danneggiamenti intenzionali, danni dovuti ad incuria o negligenza oppure derivantidal non rispetto delle prescrizioni, istruzioni e norme, o da collegamenti errati, non sonodi responsabilità... -
Page 13: Norme D'installation
NORME D'INSTALLATION Aménager le lave-vaisselle sur le lieu de son installation, enlever l’emballage, vérifier l’intégrité de la machine, des composants et que la marchandise corresponde bien au nombre de pièces commandées. En cas de doutes, ne pas utiliser l’appareil jusqu’à ce qu’elle n’ait été contrôlée par du personnel qualifié. -
Page 14: Branchement Electrique
BRANCHEMENT ELECTRIQUE L’appareil doit être relié à un interrupteur général au mur de même puissance de modèle avec un dégraphage thermique et un relatif bloc différentiel. Pour les modèles triphasés utiliser un câble èlectrique de type H07RN-F de même longueur. Attention: il est obligé... - Page 15 DISPOSITIF DE SECURITE 1) Microintérrupteur de capot pour arrêter le cycle si la porte est ouverte. Fermer la porte pour recommencer le cycle interrompu. 2) Protecteur thermo-ampérometrique sur le pompe de lavage. 3) Protection de niveu soit sur le chauffe-eau que sur le bac. 4) Dispositif qui empêche le retour de l’eau du chauffe-eau dans le réseau.
-
Page 16: Modeles Munis De Pompe D 'Evacuation
Mod.E 1000 · Positionner l'interrupteur général 1 sur "on" · Attendre l'extinction de la lampe-témoin du surchauffeur pos.4 · Fermer la capote pour commencer un cycle de lavage · La lampe-témoin pos.3 restera allumée pour toute la durée du cycle. Mod.N 1000 - N 1000 B ·... -
Page 17: Mise En Route
MODELES ELECTRONIQUES Apres avoir vérifie que tous les CONTROLES PRELIMINAIRES notés dans le paragraphe 9 sont bien respectes, procéder comme suivre: ALLUMER ET REMPLISSAGE DE LA CUVE Lorsque la capot est fermée appuyer sur le bouton 2, la lampe commencera a clignoter de couleur rouge, le rem- plissage du surchauffeur et de la cuve commenceront au même temps. - Page 18 PERIODIQUEMENT Contrôler que l’eau n’ait pas une dureté supérieure à 15° Fr. Vérifier que la température et la pression soient correctes, la pression ne devra pas dépasser les 400 Kpa pour ne pas dommager l’intérieur de la machine. Nettoyer les moulinets et les gicleurs des incrustations. Démonter les bras de lavage 1 et de rinçage 2 en dévissant la bague filetée 3 (Fig.
- Page 19 ANOMALIE CAUSE REMEDE LE VOYANT LUMINEUX Ampoule brûlée. INDIQUANT QUE LA Substituer.Contrôler l'interrupteur Il n'y a pas de courant. MACHINE EST SOUSTEN- d'alimentation ou la prise de courant. Substituer. SIONS NE S'ALLUME PAS Robinet de l'eau fermé. Ouvrir le robinet. LA MACHINE NE SE Entrée d'air obstruée.
-
Page 20: Entretien Et Nettoyage
ENTRETIEN ET NETTOYAGE L’appareil est conçu de telle sorte qu’il ne requiert que très peu d’entretien; nous préconisons malgré tout de le faire contrôler quand même deux fois par an par un technicien qualifié. N.B.: le constructeur décline toute responsabilité venant de dommages volontaires, dommages issus d’un manque de soin ou négligence ou dérivant du non-respect des indications, instructions et normes, ou de branchements erronés. -
Page 21: Installation Regulations
INSTALLATION REGULATIONS Set the dishwasher where it is to be installed, remove the packaging, check that the machine and components are complete and that the goods correspond to order specifications. If in doubt, do not use the appliance until it has been checked by qualified staff. Remove the cardboard box, the wooden pallet, the bands and the polystyrene and sort the materials into different types and then dispose of them at waste disposal centres. -
Page 22: Electrical Connection
ELECTRICAL CONNECTION The appliance is to be connected to a wall master switch of suitable power, provided with a thermal release and the relevant switch unit. Three-phase models must be provided with a power cable of suitable ength, H07RN-F type. Attention: the grounding system is to be connected in full compliance with the current regulations. -
Page 23: Safety Device
SAFETY DEVICE 1) Door microswitch to stop the cycle when the hood is opened; close the door to restart. 2) Thermoamperometric protection on washing pump. 3) Level control on both boiler and tank. 4) Device preventing boiler water from flowing back into the mains. 5) Overflow device connected to the drain to keep tank water level constant (only in the models without discharge pump). - Page 24 STARTING Wait until the machine has reached the right temperature (light 4 off), carry out one empty cycle then place the basket in the dishwasher having removed leftovers and scraps from the dishes. Mod.E 1000 - Set the main switch 1 to “on” ·...
-
Page 25: Electronic Models
ELECTRONIC MODELS Before powering the machine make sure that all points indicate in the paragraph 9 have been checked. START UP AND FILLING THE TANK. When the hood is closed press the push button 2, lamp will start flashing red and tank and boiler will start to fill. Lamp will become green when filling of tank and boiler will be ready. - Page 26 PERIODICALLY Make sure water hardness is not over 15° Fr (150 ppm). Make sure water temperature and pressure ratesare correct; a pressure rate of over 400 Kpa might damage appliance components. Remove any deposits from nozzles and blades. Remove the 1 washing and rins 7 arms by undoing the lock nut 3 (Fig.7 ). Clean the wash rotors and rinse under a jet of clean water.
- Page 27 PROBLEM CAUSE SOLUTION LINE INDICATOR LAMP Bulb burnt. Replace. DOES NOT LIGHT Line voltage lacking. Check supply switch or wall socket. Water tap closed. Open tap. Water trap dirty. Clean. ON STARTING NO Replace. Pressure switch defective. WATER SUPPLY Solenoid coil burnt. Replace.
-
Page 28: Maintenance And Cleaning
MAINTENANCE AND CLEANING The appliance has been built in such a way that it requires little maintenance. Nonetheless, it is advisable to have it checked twice a year by a qualified technician. N.B. : the manufacturer declines all responsibility for damage caused deliberately or due to carelessness or negligence or as a result of failure to comply with the regulations, instructions or standards or due to incorrect connections. -
Page 29: Installation Des Geräts
INSTALLIERUNGSNORMEN Die Spülmaschine an den Aufstellungsort bringen, die Verpackung entfernen, die Vollständigkeit der Maschine und der Komponenten überprüfen und sicherstellen, daß die Ware den spezifischen Angaben des Auftrages entspricht. Im Zweifelsfall die Vorrichtung bis zur Kontrolle durch qualifiziertes Personal nicht verwenden. Die Kartonagen, die Palette aus Holz, das Umreifungsband und das Polystyrol entfernen, sie voneinander trennen und die Müllverwertung, je nach ihrer Art, bei Mülldeponien durchführen. -
Page 30: Elektrischen Anschlüsse
ELEKTRISCHEN ANSCHLÜSSE Das Gerät wird angeschlossen an einem allgemeinen Schalter von angemessener Stärke des Typs mit termischem Auslöser und entsprechende, Differentialblock. Bei den dreiphasigen Modellen verwenden Sie einen elektrischen Kabel vom Typ H07RN-F von angemessener Länge. Vorsicht: die Realisierung einer guten Erdung gemäß der geltenden Normen ist notwen- dig.Verbinden Sie das Gerät in einem äquipotenzialen System, indem Sie es an den auf derGrundlage durch das relative Symbol gekennzeichneten Schrauben anschließen. -
Page 31: Auffüllen Der Wanne Und Start
SICHERHEITSVORRICHTUNGEN 1) Mikroschalter auf der Tür zur Unterbrechung des Wasch- oder Spülvorgangs im Fall von Türoffnung. Die Tür schließen um der Vorgang fortlaufen zu lassen. 2) Heißstromschutz auf Waschpumpe. 3) Schutz auf Niveau von Boiler und Wanne. 4) Die Maschine ist ausgestattet mit einer Einrichtung die dazu dient, die Rückkehr des Wassers von dem Boiler zurück ins Wassernetz zu ermöglichen. -
Page 32: Modelle Mit Auslasspumpe
Mod. E 1000 - Den Hauptschalter 1 auf Position „ON“ stellen - Abwarten, bis die Kontrolllampe des Boilers Pos. 4 erlischt - Die Haube schließen und den Spülgang starten - Die Kontrolllampe Pos. 3 leuchtet während des gesamten Spülgangs auf Mod. - Page 34 WANNENABFLUß 12 Am Ende der Spüloperationen verhalten Sie sich wie folgt: -bringen Sie den allgemeinen Schalter auf der Stellung "OFF"; -schalten Sie den allgemeinen Schalter an der Wand aus; -drehen Sie den Wasserzuspeisunghahn zu; -entfernen Sie das Allzuvoll H (die Maschine beginnt auszuladen)(Abb.10)(nur bei den Modellen ohne Auslasspumpe);...
- Page 35 STÖRUNG URSACHE ABHILFE SPANNUNGSANZEIGE- Ersetzen. Lampe durchgebrannt. LAMPE EUCHTET NICHT Speiseschalter bzw. Spannungsausfall. Wandsteckdose prüfen. Wasserhahn zu. Wasserhahn aufmachen. Luftfilter verschmutz. Reinigen. KEIN WASSEREINFÜLLEN Druckwächter defekt. Ersetzen. BEIM ANLAUF Spule des Magnetventils Ersetzen. durchgebrannt. Defekte bzw. Ersetzen. bescä digte Membrane. Klappen-Mikro unterbrochen.
- Page 36 DEUTSCH DEUTSCH...
-
Page 37: Instandhaltung Und Reinigung
INSTANDHALTUNG UND REINIGUNG Die Vorrichtung ist auf eine Art gebaut worden, die sehr wenige Wartungsschritte erfordert; nichtsdestotrotz empfehlen wir die Vorrichtung zweimal jährlich von einem spezialisierten Techniker kontrollieren zu lassen. Wichtig: absichtliche Beschädigungen, Schäden, die auf Achtlosigkeit oder Nachlässigkeit zurückzuführen sind, oder Schäden, die von der Nichtberücksichtigung der Vorschriften, Hinweise und Normen oder von fehlerhaften Anschlüssen herrühren, fallen nicht unter den Verantwortungsbereich des Herstellers. -
Page 38: Normas De Instalacion
NORMAS DE INSTALACION Llevar el lavaplatos al lugar de su instalación, quitar el embalaje, verificar la integridad de la máquina, de los componentes y que la mercadería corresponda a las especificaciones de la orden de compra. En caso de dudas, no utilizar el aparato hasta que no haya sido controlado por personal calificado. -
Page 39: Conexion Electrica
CONEXION ELECTRICA El aparato hay que conectarlo a un interruptor general de pared de adecuada potencia del tipo con desenganche térmico y relativo bloqueo diferencial. Para los modelos trifasicos utilice un cable electrico tipo H07RN-F de adecuada longitud. Atención: es obligatorio realizar una buena conexión a tierra según las normas vigen- tes, y introducir el aparato mismo en un sistema equipotencial: utilice para esto el tor- nillo puesto en la base;... - Page 40 DISPOSITIVOS DE SEGURIDAD 1) Microinterruptor de la puerta que interrumpe el ciclo en caso de abertura de la misma. Cierre la puerta para volver a tomar el ciclo interrumpido. 2) Protector termoamperométrico de la bomba de lavado. 3) Protección del nivel sea en el boiler que en la tina. 4) La maquina posee un dispositivo que impide el regreso del agua del calentador en red.
- Page 41 Mod.E 1000 Pongan el interruptor general 1 en la posición “on” · · Esperen que el testigo del calderín Pos.4 se vuelva apagado · Cierren la capota para empezar el ciclo de lavado · El testigo Pos.3 se queda encendido por toda la duración del ciclo. Mod.N 1000 - N 1000 B Pongan el interruptor general 1 en la posición “on”...
- Page 42 PERIODICAMENTE Controle que el agua no tenga una dureza superior a 15° Fr. Controle que la temperatura y la presión del agua sean aquellas justas; la presión no tendra que superar los 400 Kpa para no dañar los organos internos. Limpiar los mulinillos y los rociadores de las incrustaciónes y suciedad de fondo.
- Page 43 PROBLEMA CAUSA SOLUCIÓN NO SE ENCIENDE EL Substituir. Piloto quemado. PILOTO QUE INDICA Controle i nterruptor ali mentaci ón Falta tensión en la red eléctrica. TENSIÓN ELÉCTRICA o toma alimentación pared. Grifo cerrado. CUANDO SE PONE EN Respiradero sucio. Substituir. MARCHA NO CARGA Manóstato averiado.
-
Page 44: Limpieza Ordinaria Diaria
MANUTENZIONE E PULIZIA El aparato esta construido en modo tal que necesita bien pocas manutenciones; mas no obstante esto le aconsejamos de hacer controlar el mismo dos veces cada año por un tec-nico especializado. N.B.: avarias intencionales, daños debidos al descuido o derivados por el no respeto de las prescripciones, instrucciones y normas, o por conexiones equivocadas, no son de responsabilidad del constructor. -
Page 45: Normas Para A Instalação
NORMAS PARA A INSTALAÇÃO Posicionar a máquina da loiça no local onde será instalada, retirar a embalagem, verificar a integridade da máquina, dos seus componentes e verificar que a mercadoria corresponda à encomenda feita. Em caso de dúvida, não utilizar a máquina até quando não será controlada pelo pessoal especializado. -
Page 46: Ligação Eléctrica
LIGAÇÃO ELÉCTRICA O aparelho deve ser ligado a um interruptor geral de parede que disponha de uma potência adequada, do tipo com disjuntor térmico e relativo bloqueio diferencial. Para os modelos trifásicos, utilizar um cabo eléctrico tipo H07RN-F com um comprimento adequado. Atenção: é... - Page 47 DISPOSITIVOS DE SEGURANÇA 1) Microinterruptor na porta que interrumpe o ciclo no caso em que a mesma se abra. Fechar para voltar ao ciclo interrompido. 2) Protector termoaperométrico na bomba de lavagem. 3) Proteção de nivel seja no aquecedor que no tanque. 4) A máquina está...
-
Page 48: Modelos Com Bomba De Descarga
Mod.E 1000 - Posicionar o interruptor geral 1 em posição “on” - Aguardar o apagamento da luz indicadora do boiler Pos. 4 - Fechar a capota para iniciar o ciclo de lavagem - A indicadora Pos.3 permanecerá acesa por toda a duração do ciclo. Mod.N 1000 - N 1000 B - Posicionar o interruptor geral 1 em posição “on”... - Page 50 PERIODICAMENTE Controlar que a água não tenha uma dureza superior a 15° Fr. Verificar que a temperatura e a pressão da água sejam aquelas correctas; a pressão não deverá superar os 400 Kpa para não causar danos aos órgãos da máquina. Limpar os remoinhos e os injectores de eventuais incrustações.
- Page 51 PROBLEMA CAUSA SOLUÇÃO Substitui r. NÃO SE ACENDE A Lâmpada fundida. Controlar o interruptor de LÂMPADA QUE INDICA Falta tensão de rede. alimentação ou a tomada de alimen- TENSÃO ELÉCTRICA tação na parede. Torneira de água fechada. Abri r a tornei ra. Tubo da água obstruído.
-
Page 52: Manutenção E Limpeza
MANUTENÇÃO E LIMPEZA O aparelho foi fabricado de modo que precise de bem poucas manutenções, apesar disto, sugerimos fazer controlá-lo duas vezes por ano por um técnico especializado. N.B.: danos intencionais, danos devidos à incúria ou neglicência ou consequentes à falta de cumprimento das prescrições, instruções ou ligações erradas, não podem ser atribuídas à... - Page 53 N1000 MODELLO MODEL MEDELE MODELL DATI TECHNICAL DONNEES TECHNISCHE NON IN DOTAZIONE NOT ON ISSUE TECNICI DATA TECHNIQUES DATEN PAS FOURNI EN DOTATION NICHT DABEI Allacciamento Elettrico Electric Connection Rubinetto di Intercettazione Branchement electrique Intercepting Cock Elektroanschluss Roubinet d'Interception Abfangerhanh Morsetto Equipotenziale Borne E'quipotentiel Grigliato Sifonato...
- Page 54 E1000 MODELLO MODEL MEDELE MODELL DATI TECHNICAL DONNEES TECHNISCHE NON IN DOTAZIONE NOT ON ISSUE TECNICI DATA TECHNIQUES DATEN PAS FOURNI EN DOTATION NICHT DABEI Allacciamento Elettrico Electric Connection Rubinetto di Intercettazione Branchement electrique Intercepting Cock Elektroanschluss Roubinet d'Interception Abfangerhanh Morsetto Equipotenziale Borne E'quipotentiel Grigliato Sifonato...
- Page 55 N1300 MODELLO MODEL MEDELE MODELL DATI TECHNICAL DONNEES TECHNISCHE NON IN DOTAZIONE NOT ON ISSUE TECNICI DATA TECHNIQUES DATEN PAS FOURNI EN DOTATION NICHT DABEI Allacciamento Elettrico Electric Connection Rubinetto di Intercettazione Branchement electrique Intercepting Cock Elektroanschluss Roubinet d'Interception Morsetto Equipotenziale Borne Abfangerhanh E'quipotentiel Equipotential Grigliato Sifonato...
- Page 56 1000 E BOBINA TELERUTTORE CONTROL SWITCH CON- BOBINE TELERUPTEUR SPULE FERNSCHALTER CONT. TELERRUPTOR BOBINA DO INTER. BOILER TACT CHAUFFE-EAU BOILER BOILER ELECTR. DA CALDEIRA CONTATTI AUSILIARI RELAY AUXILIARYS CONTACTO AUXILIAR CONTATOS DOS KONTAKT HILFSRELAIS RELE' CONTACT RELEVADOR AUXILIARYS DO RELE' BOBINA TELERUTTORE BOBINE TELERUPTEUR KONTAKT PERNSCHAL...
- Page 57 1000 2 TEMPI 400V/3 +N BOBINA TELERUTTORE CONTROL SWITCH BOBINE TELERUPTEUR SPULE FERNSCHALTER CONT. TELERRUPTOR BOBINA DO INTER. BOILER CONTACT CHAUFFE-EAU BOILER BOILER ELECTR. DA CALDEIRA CONTATTI AUSILIARI RELAY AUXILIARYS CONTACTS AUXILIAIRES CONTACTO AUXILIAR CONATOS DOS AUXI- KONTAKT HILFSRELAIS RELE' CONTACT RELAIS RELEVADOR...
- Page 58 1300 3 TEMPI 400V/3 +N BOBINA TELERUTTORE CONTROL SWITCH BOBINE TELERUPTEUR SPULE FERNSCHALTER CONT. TELERRUPTOR BOBINA DO INTER. BOILER CONTACT CHAUFFE-EAU BOILER BOILER ELECTR. DA CALDEIRA CONTATTI AUSILIARI RELAY AUXILIARYS CONTACTO AUXILIAR CONTATOS DOS KONTAKT HILFSRELAIS RELE' CONTACT RELEVADOR AUXILIARYS DO RELE' BOBINA TELERUTTORE BOBINE TELERUPTEUR KONTAKT PERNSCHAL...
- Page 59 Pannello comandi PS P12 10 11 12 13 14 15 P PR BOBINA TELERUTTORE CONTROL SWITCH BOBINE TELERUPTEUR SPULE FERNSCHALTER CONT. TELERRUPTOR BOBINA DO INTER. BOILER CONTACT CHAUFFE-EAU BOILER BOILER ELECTR. DA CALDEIRA CONTATTI AUSILIARI RELAY AUXILIARYS CONTACTS AUXILIAIRES CONTACTO AUXILIAR CONATOS DOS AUXI- KONTAKT HILFSRELAIS RELE'...
- Page 60 POMPA LAVAGGIO WASH PUMP POMPE LAVAGE PUMPE WASCHUNG BOMBA DE LAVADO BOMBA DE LAVAGEM DOOR MICROSWITCH RELAIS RELE' MICRO PORTA RELAIS MICRO PORTE RELE MICRO PUERTA RELE' MICRO PORTA RELAY MIKROSCHALTER TUR RELAY AUXILIARYS R1-R2 RELE' AUSILIARIO RELAIS AUXILIARIS HILFSRELAIS AUXILIAR RELEVADOR AUXILIARYS DO RELE' CONTACT...
- Page 61 Pannello comandi PS P12 10 11 12 13 14 15 1300 ELECTRONIC BOBINA TELERUTTORE CONTROL SWITCH BOBINE TELERUPTEUR SPULE FERNSCHALTER CONT. TELERRUPTOR BOBINA DO INTER. BOILER CONTACT CHAUFFE-EAU BOILER BOILER ELECTR. DA CALDEIRA CONTATTI AUSILIARI RELAY AUXILIARYS CONTACTS AUXILIAIRES CONTACTO AUXILIAR CONATOS DOS AUXI- KONTAKT HILFSRELAIS RELE'...
- Page 62 KONTROLLEUCHTE SPIA LINEA POWER PILOT LIGHT LAMPE-TEMOIN LIGNE TESTIGO LINEA LUZ DA LINHA LINIE SHORT CYCLE PILOT LAMPS TEMOIN CYCLE KONTROLLEUCHTE LUZ DE ASSINALACAO SPIA CICLO CORTO TESTIGO CICLO CORTO LIGHT COURT KURZERZYK CICLO CURTO LONG CYCLE PILOT LAMPS TEMOIN CYCLE KONTROLLEUCHTE LUZ DE ASSINALACAO SPIA CICLO LUNGO...
- Page 63 In Übereinstimmung mit den Anforderungen der Europäischen Este aparato lleva el marcado CE en conformidad con la Directiva Richtlinie 2002/96/EG über Elektro- und Elektronik-Altgeräte 2002/96/EC del Parlamento Europeo y del Consejo sobre residuos de aparatos eléctricos y electrónicos (RAEE). (WEEE) ist vorliegendes Gerät mit einer Markierung versehen. La correcta eliminación de este producto evita consecuencias Sie leisten einen positiven Beitrag für den Schutz der Umwelt und die negativas para el medioambiente y la salud.
- Page 64 För mer information om hantering, återvinning och återanvändning av sophanteringstjänst eller butiken där produkten inhandlades. denna produkt, var god kontakta de lokala myndigheterna, ortens 5019 106 00637...
- Page 65 elektr opisywanego urządzenia można uzyskać w lokalnym urzędzie miasta, w Dette apparatet er merket i samsvar med EU-direktiv 2002/96/EC yczn miejskim przedsiębiorstwie utylizacji odpadów lub w sklepie, w którym om avhending av elektrisk og elektronisk utstyr (Waste Electrical and ych i produkt został...
- Page 66 отпа тяване на Tento spotrebič je označený v súlade s Európskou smernicou дъци възможните негативни последствия за околната среда и 2002/96/ES o likvidácii elektrických a elektronických zariadení (WEEE). здравето на хората, което в противен случай може да бъде " Zabezpečením, že tento výrobok bude zlikvidovaný správnym предизвикано...
- Page 67 5019 106 00637...
Need help?
Do you have a question about the 1000 TOP and is the answer not in the manual?
Questions and answers