Samsung WB150 User Manual
Hide thumbs
Also See for WB150:
- User manual (160 pages) ,
- Quick start quide (16 pages) ,
- Quick start manual (16 pages)
Table of Contents
Advertisement
Quick Links
User Manual
WB150/WB150F
WB152/WB152F
This user manual includes detailed usage
instructions for your camera. Please read
this manual thoroughly.
Click a topic
Basic troubleshooting
Quick reference
Contents
Basic functions
Extended functions
Shooting options
Playback/Editing
Wireless network
Settings
Appendixes
Index
Advertisement
Table of Contents

Related Manuals for Samsung WB150


Summary of Contents for Samsung WB150
- Page 1 This user manual includes detailed usage instructions for your camera. Please read this manual thoroughly. Click a topic Basic troubleshooting Quick reference User Manual Contents WB150/WB150F Basic functions WB152/WB152F Extended functions Shooting options Playback/Editing Wireless network Settings Appendixes Index...
- Page 2 This may result in electric shock. disconnect all power sources, such as the battery or charger, and then contact a Samsung service center. Prevent damage to subjects’ eyesight. Do not use the flash in close proximity (closer than 1 m/3 ft) to people or animals.
- Page 3 • Samsung is not responsible for damage or injuries caused by Do not force the camera’s parts or apply pressure to the unapproved batteries, chargers, cables or accessories. camera.
- Page 4 Health and safety information Exercise caution when you connect cables or adapters and Check that the camera is operating properly before use. install batteries and memory cards. The manufacturer takes no responsibility for any loss of files or damage that may result from camera malfunction or improper If you force the connectors, improperly connect cables, or use.
- Page 5 Outline of the User Manual Basic functions Copyright information Learn about your camera’s layout, icons, and basic • Microsoft Windows and the Windows logo are functions for shooting. registered trademarks of the Microsoft Corporation. • Mac is a registered trademark of the Apple Corporation. Extended functions •...
- Page 6 Indicators used in this manual Icons used in this manual Shooting mode Indicator Icon Function Smart Auto Additional information Program Safety warnings and precautions Aperture Priority, Camera buttons. For example, [Shutter] represents the Shutter Priority, Manual shutter button. DUAL IS Page number of related information Scene The order of options or menus you must select to...
- Page 7 Expressions used in this manual Pressing the shutter Exposure (Brightness) • Half-press [Shutter]: press the shutter halfway down The amount of light that enters your camera determines the exposure. You can alter the exposure with shutter speed, • Press [Shutter]: press the shutter all the way down aperture value, and ISO sensitivity.
- Page 8 Basic troubleshooting Learn to solve common problems by setting shooting options. The subject’s eyes Red eye occurs when the subject's eyes reflect light from the camera flash. • appear red. Set the flash option to Red-eye or Red-eye Fix. (p. 61) •...
- Page 9 Quick reference Capturing photos of people Capturing panoramic action Reducing camera shake photos • s mode > Beauty Shot • R mode > Action Panorama • Optical Image Stabilization (OIS) • Red-eye/Red-eye Fix (to prevent or correct •...
-
Page 10: Table Of Contents
Contents Extended functions Basic functions ............34 ..............13 Using the Smart Auto mode ........35 Unpacking ..............14 Using the Scene mode ..........37 Camera layout ............. 15 Using the 3D Photo mode ........... 38 Inserting the battery and memory card ....... 18 Using the HDR mode .......... - Page 11 Contents Shooting options Using Face Detection ..........68 .............. 57 Detecting faces ............68 Selecting a resolution and quality ....... 58 Capturing a self portrait shot ........69 Selecting a resolution ..........58 Capturing a smile shot ..........69 Setting the photo quality ..........59 Detecting eye blinking ..........
- Page 12 Contents Playback/Editing Wireless network ............... 84 ............111 Viewing photos or videos in Playback mode ....85 Connecting to a WLAN and configuring network settings ............112 Starting Playback mode ..........85 Connecting to a WLAN ..........112 Viewing photos ............91 Setting network options ..........
- Page 13 Contents Settings ................131 Settings menu ............132 Accessing the settings menu ........132 Sound ..............133 Display ..............133 Settings ..............134 Appendixes ..............137 Error messages ............138 Camera maintenance ..........139 Cleaning your camera ..........139 Using or storing the camera ........140 About memory cards ..........
-
Page 14: Basic Functions
Basic functions Learn about your camera’s layout, icons, and basic functions for shooting. Unpacking Selecting options or menus ………………………………… 14 ……………… 23 Using [MENU] …………………………… 23 Camera layout ……………………………… 15 Using [Fn] ………………………………… 25 Inserting the battery and memory card …... -
Page 15: Unpacking
• The items included in the box may differ depending on the model. • You can purchase optional accessories at a retailer or a Samsung service center. Samsung is not responsible for any problems caused by using unauthorized accessories. Basic functions... -
Page 16: Camera Layout
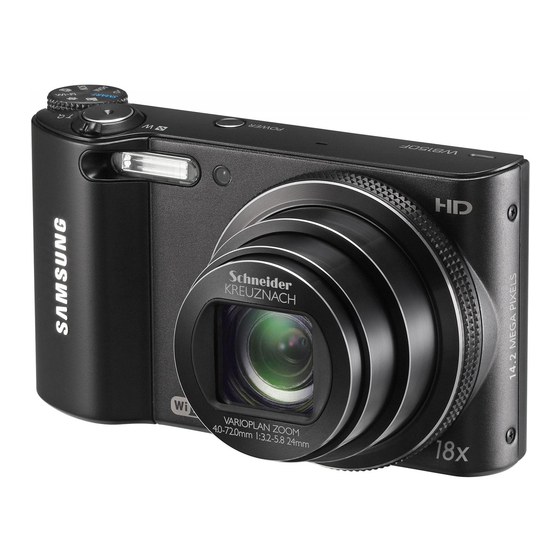
Camera layout Before you start, familiarize yourself with your camera’s parts and their functions. POWER button Microphone Shutter button Speaker Flash AF-assist light/Timer lamp Lens USB and A/V port Accepts USB cable and A/V cable Tripod mount Battery chamber cover Insert a memory card and battery Basic functions... - Page 17 Camera layout Zoom button • In Shooting mode: Zoom in or out • In Playback mode: Zoom in on part of a photo or view files as thumbnails, or adjust the volume Mode dial (p. 17) Status lamp • Blinking: When the camera is saving a photo or video, being read by a computer or printer, or when Attaching the strap...
- Page 18 Camera layout Mode dial Buttons Icon Description Button Description Smart Auto: Capture a photo with a scene mode selected Start recording a video. automatically by the camera. Access options or menus. Program: Capture a photo by setting options except the shutter speed and aperture value which the camera sets Go back.
-
Page 19: Inserting The Battery And Memory Card
Memory card Rechargeable battery Slide the lock down to release Insert the battery with the the battery. Samsung logo facing up. You can use the internal memory for temporary storage if a memory card is not inserted. Rechargeable battery Basic functions... -
Page 20: Charging The Battery And Turning On Your Camera
Charging the battery and turning on your camera Charging the battery Turning on your camera Before you use the camera for the first time, you must charge the Press [POWER] to turn your camera on or off. • battery. Plug the small end of the USB cable into your camera, The initial setup screen appears when you turn on the camera and then plug the other end of the USB cable into the AC for the first time. -
Page 21: Performing The Initial Setup
Performing the initial setup When you turn on your camera for the first time, the initial setup screen appears. Follow the steps below to configure the camera’s basic settings. Verify that Language is highlighted, and then press Press [D/c] to select Home, and then press [o]. •... - Page 22 Performing the initial setup Press [c] to select Date/Time Set, and then press Press [c] to select Date Type, and then press [t] or [t] or [o]. [o]. Press [D/c] to select a date type, and then press Date/Time Set [o].
-
Page 23: Learning Icons
Learning icons The icons the camera displays on the screen change according to the mode you select or the options you set. Shooting options (right) Shooting information Icon Description Icon Description Smart zoom on Shooting mode Aperture value Photo resolution Shutter speed Video resolution Single shot mode... -
Page 24: Selecting Options Or Menus
Selecting options or menus To select an option or a menu, press [m] or [f]. Using [MENU] Going back to the previous menu To select options, press [m], and then rotate the navigation Press [m] again to go back to the previous menu. button or press [D/c/F/t] or [o]. - Page 25 Selecting options or menus For example, to select a White Balance option Rotate the navigation button or press [D/c] to select in Program mode: White Balance, and then press [t] or [o]. Rotate the mode dial to p. Photo Size Quality White Balance Smart Filter...
-
Page 26: Using [Fn]
Selecting options or menus Using [Fn] Press [D/c] to scroll to You can access shooting options by pressing [f], but some White Balance : Auto WB options are not available. For example, to select a White Balance option in Program mode: Rotate the mode dial to p. -
Page 27: Setting The Display And Sound
Setting the display and sound Learn how to change the basic display information and sound settings. Setting the display type About histograms A histogram is a graph that illustrates how light is distributed You can select a display type for the Shooting or Playback mode. in your photo. -
Page 28: Setting The Sound
Setting the display and sound Setting the sound Turn on or off the sound your camera emits when you perform functions. In Shooting or Playback mode, press [m]. Select U Beep Sound. Select an option. Option Description The camera does not emit any sounds. The camera emits sounds. -
Page 29: Capturing Photos
Capturing photos Learn how to capture photos easily and quickly in Smart Auto mode. Rotate the mode dial to T. Half-press [Shutter] to focus. • A green frame means the subject is in focus. • A red frame means the subject is out of focus. Align your subject in the frame. -
Page 30: Zooming
Capturing photos Zooming Digital zoom p A h M s The Digital zoom is supported by default in Shooting mode. If you You can capture close-up photos by adjusting the zoom. zoom in on a subject in Shooting mode and the zoom indicator is in the digital range, your camera is using the Digital zoom. - Page 31 Capturing photos Smart zoom Setting Smart zoom p A h M You can use 24X Smart zoom which lets you zoom in with less In Shooting mode, press [m]. degradation of picture quality than the Optical zoom and Digital zoom. By using both the Smart zoom and Digital zoom, you can Select a Smart Zoom.
-
Page 32: Reducing Camera Shake (Ois)
Capturing photos Reducing camera shake (OIS) p A h M s v • OIS may not function properly when: - you move your camera to follow a moving subject Reduce camera shake optically in Shooting mode. - you use the Digital zoom - there is too much camera shake - the shutter speed is slow (for example, when you capture night scenes) -
Page 33: Tips For Getting A Clearer Photo
Tips for getting a clearer photo Holding your camera correctly Reducing camera shake • Ensure nothing is Set the Optical Image Stabilization option to blocking the lens, reduce camera shake optically. (p. 31) flash, or microphone. • Select the d mode to reduce camera shake both optically and digitally. - Page 34 Preventing your subject from being out of focus • When you capture photos in low light It may be difficult to get your subject in focus when: there is little contrast between the subject and background (for Turn on the flash. example, when your subject is wearing clothing that is similar in color (p.
-
Page 35: Extended Functions
Extended functions Learn how to capture a photo and record a video by selecting a mode. Using the Smart Auto mode Using the DUAL IS mode ……………… 35 ………………… 47 Using the Scene mode Using the Panorama mode …………………… 37 ………………... -
Page 36: Using The Smart Auto Mode
Using the Smart Auto mode In Smart Auto mode, your camera automatically chooses the appropriate camera settings based on the type of scene it detects. The Smart Auto mode is helpful if you are not familiar with the camera settings for various scenes. Rotate the mode dial to T. - Page 37 Using the Smart Auto mode • If the camera does not recognize an appropriate scene mode, it uses the default settings for the T mode. • Even if it detects a face, the camera may not select a portrait mode depending on the subject's position or lighting.
-
Page 38: Using The Scene Mode
Using the Scene mode In Scene mode, you can capture a photo with options that are preset for a specific scene. Rotate the mode dial to s. Option Description Clearly capture text from printed or electronic Select a scene. Text documents. -
Page 39: Using The 3D Photo Mode
Using the Scene mode Using the 3D Photo mode Using the HDR mode In 3D Photo mode, you can capture scenes with a 3D effect. In HDR(High Dynamic Range) mode, your camera captures two photos with different exposures, and then overlays the bright area Rotate the mode dial to s. -
Page 40: Using The Magic Frame Mode
Using the Scene mode Select a Frame. • The HDR effect may be affected by camera shake, lighting, movement of the subject, and the shooting environment. Select an option. • You cannot use the flash when you use the HDR mode. •... -
Page 41: Using The Beauty Shot Mode
Using the Scene mode Using the Beauty Shot mode Select an option. • For example, increase the face retouch setting to hide more In Beauty Shot mode, you can capture a portrait with options to imperfections. hide facial imperfections. Rotate the mode dial to s. Face Tone Face Retouch Select Beauty Shot. -
Page 42: Using The Zooming Shot Mode
Using the Scene mode Using the Zooming Shot mode In Zooming Shot mode, you can emphasize the center of a photo by blurring the edges. Without Zooming Shot effect With Zooming Shot effect Rotate the mode dial to s. Select Zooming Shot. -
Page 43: Using The Program Mode
Using the Program mode In Program mode, you can set most options, except the shutter speed and aperture value, which the camera sets automatically. Rotate the mode dial to p. Set the desired options. (For a list of options, refer to "Shooting options" starting on page 57.) Align your subject in the frame, and then half-press [Shutter] to focus. -
Page 44: Using The Aperture Priority, Shutter Priority, Or Manual Mode
Using the Aperture Priority, Shutter Priority, or Manual mode Adjust the aperture value or shutter speed to control the exposure of your photos. You can use these options in the Aperture Priority, Shutter Priority, and Manual modes. Aperture value Shutter speed The aperture is a hole that lets light into the camera. -
Page 45: Using The Aperture Priority Mode
Using the Aperture Priority, Shutter Priority, or Manual mode Using the Aperture Priority mode Set options. (For a list of options, refer to “Shooting options” starting The Aperture Priority mode allows you to set the aperture value on page 57.) manually while the camera automatically selects an appropriate shutter speed. -
Page 46: Using The Shutter Priority Mode
Using the Aperture Priority, Shutter Priority, or Manual mode Using the Shutter Priority mode Set options. (For a list of options, refer to “Shooting options” starting The Shutter Priority mode allows you to set the shutter speed on page 57.) manually while the camera automatically selects an appropriate aperture value. -
Page 47: Using The Manual Mode
Using the Aperture Priority, Shutter Priority, or Manual mode Using the Manual mode Rotate the navigation button or press [D/c] to adjust the aperture value or shutter speed. The Manual mode allows you to adjust both the aperture value and the shutter speed manually. Set options. -
Page 48: Using The Dual Is Mode
Using the DUAL IS mode Reduce camera shake and prevent blurred photos with Optical and Digital Image Stabilization functions. Before correction After correction Rotate the mode dial to d. Align your subject in the frame, and then half-press [Shutter] to focus. -
Page 49: Using The Panorama Mode
Using the Panorama mode In Panorama mode, you can capture a wide panoramic scene in a single photo. Capture and combine a series of photos to create a panoramic image. Using the 2D or 3D Panorama mode With [Shutter] pressed, slowly move the camera in the direction that will let it capture the rest of the panorama. - Page 50 Using the Panorama mode • • For best results when capturing panoramic photos, avoid the In 3D Panorama mode, photos are captured in both JPEG and MPO following: file formats. • - moving the camera too quickly or too slowly You can view an MPO file that supports the 3D effect only on an - moving the camera too little to capture the next image MPO-compatible display, such as 3D TV or 3D monitor.
-
Page 51: Using The Action Panorama Mode
Using the Panorama mode Using the Action Panorama mode With [Shutter] pressed, slowly move the camera in the direction that will let it capture the rest of the panorama. In Action Panorama mode, you can capture and combine a series •... -
Page 52: Using The Movie Mode
Using the Movie mode In Movie mode, you can customize settings to record full HD videos of up to 20 minutes in length. The camera saves recorded videos as MP4 (H.264) files. • H.264 (MPEG-4 part10/AVC) is a high-compression video format established by the international standards organizations ISO-IEC and ITU-T. •... - Page 53 Using the Movie mode Pause recording Capturing still images while recording a video The camera allows you to temporarily pause a video while You can capture still images while recording a video without recording. With this function, you can record separate scenes as switching to the photo shooting modes (up to 6 photos).
-
Page 54: Recording High-Speed Videos
Using the Movie mode Rotate the mode dial to v. Recording high-speed videos • v mode only allows you to record a high-speed video. You can record high-speed videos by setting frame rates. High-speed videos will be played in slow motion at 30 FPS, Press [Q], and then select a frame rate. -
Page 55: Using The Smart Scene Detection Mode
Using the Movie mode Using the Smart Scene Detection mode Icon Description In Smart Scene Detection mode, your camera automatically Landscapes chooses the appropriate camera settings based on the scene it Sunsets has detected. Blue skies Rotate the mode dial to v. Forested areas Press [m]. -
Page 56: Using The Creative Movie Maker Mode
Using the Creative Movie Maker mode In the Creative Movie Maker mode, you can easily make movies from the photos and videos stored on your memory card. Making a movie with the Creative Movie • You cannot select photos captured in Panorama mode, videos made Maker in Creative Movie Maker mode, videos recorded with some Smart Filter effects (Miniature, Vignetting, Half Tone Dot, Sketch, or... -
Page 57: View A Movie Made In Creative Movie Maker Mode
Using the Creative Movie Maker mode View a movie made in Creative Movie Maker mode Rotate the mode dial to K. Press [D/c] to select a movie. Press [o] to play the movie. To view the movie in Playback mode, press [P]. (p. 85) Extended functions...
Need help?
Do you have a question about the WB150 and is the answer not in the manual?
Questions and answers