Table of Contents
Advertisement
Owner's Manual
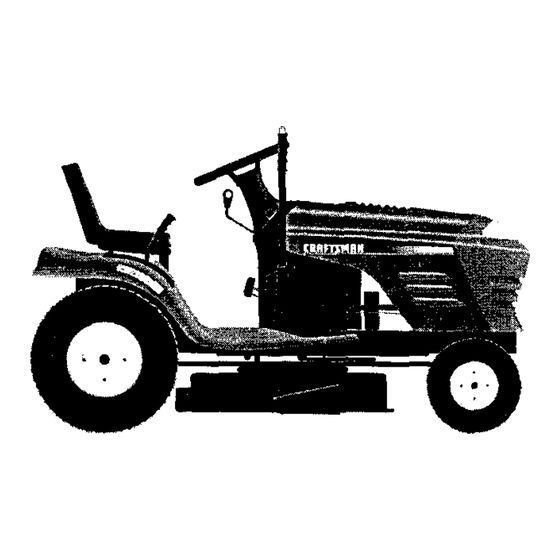
ICRAFTSMAN°J
16HP
ELECTRIC START
42" MOWER
6 SPEED TRANSAXLE
LAWN TRACTOR
Model No.
917.272051
• Safety
• Assembly
• Operation
• Maintenance
• Repair Parts
This product has a low emission engine which operates
differently from previously built engines. Before you start the en-
gine, read and understand this Owner's Manual.
CAUTION:
Read and follow all Safety
Rules and Instructions before
operating
this equipment.
For answers to your questions
about this product, Call:
1-800-659-5917
Sears Craftsman
Help Line
5 am - 5 pro, Mort - Sat
Sears, Roebuck and Co., Hoffman
Estates, II 60179
Visit our Craftsman website:www.sears.com/craftsman
Advertisement
Table of Contents

Subscribe to Our Youtube Channel
Related Manuals for Craftsman LAWN TRACTOR 917.272051


Summary of Contents for Craftsman LAWN TRACTOR 917.272051
- Page 1 CAUTION: Read and follow all Safety Rules and Instructions before operating this equipment. Sears, Roebuck and Co., Hoffman Visit our Craftsman website:www.sears.com/craftsman For answers to your questions about this product, Call: 1-800-659-5917 Sears Craftsman Help Line 5 am - 5 pro, Mort - Sat...
- Page 2 LIMITED TWOYEAR WARRANTY ON CRAFTSMAN RIDING EQUIPMENT For two (2) years from the date of purchase, if this Craftsman Riding Equipment is maintained, lubricated and tuned up according to the instructions manual, Sears will repair or replace, free of charge, any parts found to be defective in material or workmanship.
-
Page 3: General Operation
IMPORTANT: This cutting machine is capable of amputating throwing objects. Failure to observe the following safety instructions could result in serious injury or death. I. GENERAL OPERATION • Read, understand, and follow all instructions in the manual and on the machine before starting. - Page 4 hi. CHILDREN Tragic accidents can occur if the operator is not alert to the presence of children. Children are often attracted to the machine and the mowing activity. Never assume that children will remain where you last saw them. • Keep children out of the mowing area and under the watchful care of another responsible adult.
- Page 5 • Use slow speed. Choose a low gear so that you will not have to stop or shift while on the slope. • Avoid starting or stopping on a slope. If tires lose traction, disengage the blades and proceed slowly straight down the slope.
- Page 6 PRODUCT SPECIFICATIONS GASOLINE 1.25 GALLONS CAPACITY UNLEADED _,NDTYPE: REGULAR OILTYPE SAE 10W30 (ABOVE 32°F) API-SF-SJ): SAE 5W-30 (BELOW 32°F) :)IL CAPACITY: W/FILTER: 4.0 PINTS W/OFILTER: 3.5 PINTS ;PARK PLUG: CHAMPION RC12YC 3AP: .040") _ROUND SPEED FORWARD: 'vlPH): 2 N° 3R° REVERSE: TIRE PRESSURE;FRONT: 14PSI...
- Page 7 Steering Wheel Steering Wheel Insert (1) Hex Bolt (1) Lock washer 3/8 3/8-16 x 1 (1) Locknut 5/t6-18 Steering Boot _," Steering Wheel Adapter Seat _(1) For Future Usa Slope Sheet (1) Large Flat Washer {1) Hex Belt 5/16-18 x 1-1/4 Extension Shaft teering...
-
Page 8: Tools Required For Assembly
Your new tractor has been assembled at the factory with exception of those parts left unassembled for shipping purposes. To ensure safe and proper operation of your tractor all parts and hardware you assemble must be tightened securely. Use the correct tools as necessary to insure proper tightness. -
Page 9: Install Seat
Label Terminal Battery Door INSTALL SEAT Adjust seat before tightening adjustment knob. 1. Remove adjustment knob and flat washer securing seat to cardboard packing and set aside for assembly of seat to tractor. 2, Pivot seat upward and remove from the cardboard packing. - Page 10 INSTALL MULCHER PLATE (If previously removed) 1. Raise and hold deflector shield in upright position. 2. Place front of mulcher plate over front of mower deck opening end slide into place, as shown. 3. Hook front latch into hole on front of mower deck.
- Page 11 These symbols may appear on your tractor or in literature supplied with the product, Learn and understand their meaning. BATTERY CAUTION REVERSE WARNING ENGINE ENGINE OIL PRESSURE FUEL CHOKE MOWER HEIGHT r 'l R N H L ATTACHMENT REVERSE NEUTRAL CLUTCH ENGAGED ATTACHMENT IGNITION...
- Page 12 KNOWYOURTRACTOR READ THIS OWNER'S MANUAL AND SAFETY RULES BEFORE OPERATING YOUR TRACTOR Compare the illustrations with your tractor te familiarize yourself with the Iocatiens ef various controls and adjustments. Save this manual for future reference. Gearshift Our tractors conform to the safety standards of the American National Standards Institute.
- Page 13 The operation of any tractor can result in foreign objects thrown into the eyes, which can result in severe eye damage. glasses or eye shields while operating your tractor or performing any adjustments or repairs. We recommend a wide vision safety mask over spectacles or standard safety glasses.
-
Page 14: To Operate On Hills
• The average lawn should be cut to approximately 2-1/2 inches during the cool season and to over 3 inches during hot months. For healthier and better looking lawns, mow often and after moderate growth. • For best cutting performance, grass over 6 inches in height should be mowed twice. - Page 15 TOWING CARTS AND OTHER ATTACHMENTS Tow only the attachments that are recommended by and comply with specifications of the manufacturer of your tractor. Use common sense when towing, Too heavy of a load, while on a slope, is dangerous. Tires can lose traction with the ground and cause you to lose control of your tractor.
-
Page 16: Cold Weather Starting
COLD WEATHER STARTING ( 50+ F and below) 6. When engine starts, allow engine to run with the throttle control in the choke position until the engine runs roughly, then move throttle control to fast position. This may require an engine warm-up pedod from several seconds to several minutes, depend- ing on the temperature,... -
Page 17: Maintenance Schedule
MAINTENANCE SCHEDULE 1. ChBP,gl _re oltert wh#n oporat _ _ I-_avy _d _ _ I_g_ am_ 2. S._icl Oft_ _ opomhng in d.dy or du_t_ coPd_ion5 3. If equipped w_thoH filter, char, go _1 _ 50 ho,Jr_ R_p_e bl_dos mot _ ofl_a whe_ mo_r,g In _ar,4y _.¢_1 GENERAL RECOMMENDATIONS The warranty on this tractor does not cover... - Page 18 TRACTOR Always observe safety rules when performing any maintenance. BRAKE OPERATION If tractor requires more than six (6) feet stopping distance at high sp.eed in highest gear, then brake must be ad- justed. (See "TO ADJUST BRAKE" in the Service and Adjustments section of this manual).
- Page 19 • Keep battery and terminals clean. • Keep battery bolts tight. • Keep small vent holes open. • Recharge at 6-10 amperes for 1 hour. NOTE: The original equipment battery on your tractor is maintenance free. Do not attempt to open or remove caps or covers. Adding or checking level of electrolyte not necessary.
-
Page 20: Specifications
Every 100 hours o f operation (more often under extremely dusty, dirty conditions), remove the blower housing and other cooling shrouds. Clean the cooling fins and external surfaces as necessary. Make sure the cooling shrouds are reinstalled. NOTE: Operating the engine with a blocked grass screen, dirty or plugged cooling fins, and/or cooling shrouds removed will cause engine damage due... - Page 21 CLEANING Clean en_]ine, battery, seat, finish, etc. i of all foreign matter. Keep finished surfaces and wheels free of all gasoline, oil, etc. • Protect painted surfaces with automo- CAUTION: BEFORE PERFORMING 1. Depress clutch/brake pedal fully and set parking brake. 2.
- Page 22 TO LEVEL MOWER HOUSING Adjust the mower while tractor is parked on level ground or driveway. Make sure tires are propedy inflated (See "PROD- UCT SPECIFICATIONS" section of this manual), if tires are over or underinflated, you will not properly adjust your mower.
- Page 23 TO REPLACE MOWER BLADE DRIVE BELT •The mower blade drive belt may be rel_laced without tools. Park the tractor on level surface. Engage parking brake. BELT REMOVAL- 1. Remove mower from tractor (See "TO REMOVE MOWER" in this section of this manual).
- Page 24 TRANSAXLE GEAR SHIFT LEVER NEUTRAL ADJUSTMENT The transaxle should be in neutral when the gear shift lever is in neutral (N) (look gate) position. The adjustment is preset at the factory; however, if adjustment is needed, proceed as follows: 1. Make sure transaxle is in neutral (N), NOTE;...
- Page 25 Positive Terminal Negative Terminal Battery Negative Terminal Positive Terminal REPLACING BATTERY _CAUTION: Do not short battery terminals by allowing a wrench or any other object to contact both terminals at the same time. Before connecting battery, remove metal bracelets, wristwatch bands, rings, etc.
- Page 26 ENGINE Maintenance, repair, or replacement of the emission control devices and systems, which are being done at the customers expense, may be performed by any non-read engine repair establishment or individual. Warranty repairs must be performed by an authorized engine manufacturer's service outlet. TO ADJUST THROTTLE CONTROL CABLE The throttlecontrol has been preset at the...
- Page 27 Immediately prepare your tractor for storage at the end of the season or if the tractor will not be used for 30 days or more. CAUTION; Never store the tractor ' with gasoline in the tank inside a building where fumes may reach an open flame or spark.
-
Page 28: Troubleshooting Chart
TROUBLESHOOTING CHART PROBLEM CAUSE Will not start 1. Out of fuel. 2. Engine not "CHOKED" properly. 3. Engine flooded. 4. Bad spark plug. 5. Dirty air filter. 6. Dirty fuel filter. Water in fuel. 8. Loose or damaged wiring. 9. Carburetor out of adjustment 10.Engine valves out of adjustment. - Page 29 TROUBLESHOOTING CHART PROBLEM CAUSE Less of power Cutting too much grass/too fast. 2. Throttle in "CHOKE" position. 3. Build-up of grass, leaves and trash under mower. 4. Dirty air filter. 5. Low oil level/dirty oil. 6. Faulty spark plug. 7. Dirty fuel filter. 8.
- Page 30 TROUBLESHOOTING CHART PROBLEM CAUSE Mower blades will 1. Obstruction in clutch not rotate mechanism. 2. WorWdamaged drive belt. 3. Frozen idler pulley. 4. Frozen blade mandrel. Poor grass 1. Engine speed too slow. discharge 2. Travel speed too fast. 3. Wet grass. 4.
- Page 31 TRACTOR - - MODEL NUMBER 917.272051 SCHEMATIC BAT'_'ERY o2o--- FUSE AMMETER (OPTIONAL) w"irE (PEDAL UP) CLUTCH / BRAKE (NOT OCCUPIED) SEAT SWITCH ,E, i ,©_ --_-'-':--:} _ ,o.,T,o. r,_c_^Tr,= ILUE ____PRESENCE IGNITION SWITCH RELAY SO',-ENX){O _o,:T :o_--_ STARTER _rtE i eLUE B UE (CLUTCH OFF) FUELSHUT-OFF...
- Page 32 TRACTOR - - MODEL NUMBER 917.272051 ELECTRICAL...
- Page 33 TRACTOR - - MODEL NUMBER 917.272051 ELECTRICAL KEY PART DESCRIPTION 163465 Battery 74760412 Bolt Hex Hd 1/4-2Ounc x 3/4 156417 Case Battery 161343 Switch, Intedock 166182 Harness Asm Light W/4152J 4152J Bulb Light #1156 4799J Cable Battery 6 Ga 11" red 146147 Cable Battery 6 Ga w/16 wire red 175158...
-
Page 34: Chassis And Enclosures
TRACTOR - - MODEL NUMBER 917.272051 CHASSIS AND ENCLOSURES 2011... - Page 35 TRACTOR - - MODEL NUMBER 917.272051 CHASSIS AND ENCLOSURES PART DESCRIPTION 174619 ChasSis 176554 Drawbar 17060612 Screw 155272 Bumper Hood/Dash 168337X013 Dash STD533710 Bolt, Carriage 155927 Panel, Dash, LH. 145660 Clip Tinnerrnan Gdlle P/L 172107X010 Panel, Dash, R.H. 17490608 Screw Thdd 3/8-16 x 1/2 144983X558 Hood Assembly 126938X...
-
Page 36: Ground Drive
TRACTOR - - MODEL NUMBER 917.272051 GROUND DRIVE... - Page 37 TRACTOR - - MODEL NUMBER 917.272051 GROUND DRIVE PART DESCRIPTION Trarlsaxle (See Breakdown) Peedess 206-545C 146682 Spdng, Return, Brake 123666X Pulley, Transaxle 12000C_6 Ring, Retainer 121520X Strap, Torque 17660512 Screw 5/16-18 x 3/4 165866 RodShlfter Fender STLT STD561210 Pin, Cotter 105701X Washer, Shift Plate 74550412...
-
Page 38: Steering Assembly
TRACTOR - - MODEL NUMBER 917.272051 STEERING ASSEMBLY... - Page 39 TRACTOR - - MODEL NUMBER 917.272051 STEERING ASSEMBLY KEY PART 139768 154427 169840 169839 6266H 121748X 19272016 12000(_9 3366,9 175121 BTD551137 136518 145212 177876 126847X 19131416 17060612 ST[To61210 130465 155099 152927 139769 19133812 BTD541537 100711L 145054)(428 121749X 153720 121232X 6855M STD541431 74780520 STD523710...
-
Page 40: Optional Equipment
TRACTOR-- MODEL NUMBER 917.272051 ENGINE OPTIONAL EQUIPMENT Spark Arrester PART DESCRIPTION 170548 Control, Throttle 17720410 Screw, Hex Head, Thread Cutting 1/4-20 x 5/8 Engine, (See Breakdown) Kohler Model CV461-26504 174667 Muffler 12-041"03 Gasket 148456 Tube Drain Oil Easy STD551237 Washer 169837 Shield Bm/Obr Guard 137180... -
Page 41: Seat Assembly
TRACTOR - - MODEL NUMBER 917.272051 SEAT ASSEMBLY KEY PART DESCRIPTION 140123 Seat 140551 Bracket Pnt Pivot Seat (blk) 71110616 Bolt Fin Hex 3/8-16unc X 1 19131610 Washer 13/32 X 3/4 X 10 Ga 145006 Clip Push In H_ngecl STD541437 Nut Hex Lock w/Ins 3/8-16 Unc 124181X Spdng Seat Cprsn 2 250 SIk Zi... -
Page 42: Wheels And Tires
Decal, Hood, L.H. 138047 Decal, Battery 133644 Decal, Customer Maintenance 177368 Decal, HP Engine 172331 Decal, Mower Srs 163204 Decal, Fender, Craftsman 156439 Decal, Fender Danger WHEELS &TIRES 4,10 KEY PART DESCRIPTION 177325 Decal, Hood Side 146046 Decal, V-Belt Ddve Schematic... -
Page 43: Lift Assembly
TRACTOR - - MODEL NUMBER 917.272051 LIFT ASSEMBLY KEY PART DESCRIPTION 159460 Washer Asm Inner Spring W/ Plunger 159471 Shaft Asm. Lilt 105767X Pin Groove 12000Q32 E Ring #5133-62 19211621 Washer 21/32 x 1 x21 Ga. 120183X Beahng NyJong 125631X Gdp Handle Fluted 122365X Button Plunger Read... -
Page 44: Mower Deck
TRACTOR - - MODEL NUMBER 917.272051 MOWER DECK • 111 114 118_ 106_ ,o,d/<;-",'jlJ> ,o+<_. -j,j+, l +01_+_,.+,+,_1 102/ >21... - Page 45 TRACTOR - - MODEL NUMBER 917.272951 MOWER DECK KEY PART DESCRIPTION 165892 Mower Deck Assembly, 42" STD533107 Doff 138017 Bracket Assembly,Sway Bar, Front 165460 Dracket Sway Bar 38/42, Deck STD624008 RetainerSpdng 130632 Arm, Susgension, Rear 850657 Bolt, Hex 3/ff-24 x 1.25 Gr. ff STD551137 Washer, Lock 140296...
- Page 46 TRACTOR - - MODEL NUMBER 917.272051 PEERLESS TRANSAXLE - - MODEL NUMBER 206-545C O -- 180_ NUMBERS HERE...
- Page 47 TRACTOR - - MODEL NUMBER 917.272051 PEERLESS TRANSAXLE - - MODEL NUMBER 206-545C PART DESCRIPTION 772147 Transaxle Cover 789(_5A Needle Beadng 5/8" 770128 Transaxle Case 776395 Countershaft 776409 Output Shaft 778364 Spur Gear (38 teeth) 778369 Spur Gear (15 teeth) 778330 Spur Gear (11 teeth) 792180...
- Page 48 TRACTOR - - MODEL NUMBER 917.272051 KOHLER ENGINE-MODEL NUMBER CV461, TYPE NUMBER 26504 CYLINDER HEAD, VALVE BREATHER "1o _---L...
- Page 49 TRACTOR - - MODEL NUMBER 917.272051 KOHLER ENGINE-MODEL NUMBER CV461, TYPE NUMBER 26504 CYLINDER HEAD/VALVE/BREATHER PART DESCRIP_ON 25-351-01-S Lifter, valve (2) 12-755-94-S }<it, cylinder head (Includes 3-17, Gaskets 12 041 Ol-S (Qty. 2),12 041 02-S, & 12 041 03-S) 12-411-03-S Rod, push (2) 12-041-08-S Gasket, cylinder head...
- Page 50 TRACTOR -- MODEL NUMBER 917.272051 KOHLER ENGINE-MODEL NUMBER CV461, TYPE NUMBER 26504 IGNITION/ELECTRICAL AIR INTAKE BLOWER HOUSING AND BAFFLES l _--5...
- Page 51 TRACTOR -- MODEL NUMBER 917.272051 KOHLER ENGINE-MODEL NUMBER CV461, TYPE NUMBER 26504 IGNITION/ELECTRICAL PART DESCRIPTION 12-086-14-6 Screw, hex. flange M1Ox1.5x46 12-468-03-S Washer, plain 3/8" 24-162-03-S Screen, grass 25-086-47-S Bolt, shoulder M6xl.0x16 12-157-03-S X-42-15-S 12-025-15-S Flywheel 12-155-09-S Connector M-548025-S Screw, hex. cap M5x0.8x25 12-085-0g-s _tator M-545020-S...
- Page 52 TRACTOR - - MODEL NUMBER 917.272051 KOHLER ENGINE-MODEL NUMBER CV461, TYPE NUMBER 26504 STARTING SYSTEM ENGINE CONTROLS :_IL PAN / LUBRICATION...
- Page 53 TRACTOR - - MODEL NUMBER 917.272051 KOHLER ENGINE-MODEL NUMBER CV461, TYPE NUMBER 26504 STARTING SYSTEM PART DESCRIPTION M-839070-S Screw, hex. flange MEx1.25x70 (2) 25-098-07-S Starter assembly (Includes 3-8) 12-755-54-S K_, drive end 12-227-t8-S Cap, drive end 12.170-05-S Armature 12-221-01-S Kit, brush & spring 12-227-13-S Cap, commutator end 12-211-01-S...
- Page 54 TRACTOR - =MODEL NU MBER 917.272051 KOHLER ENGINE-MODEL NUMBER CV461, TYPE NUMBER 26504 EXHAUST J CRANKSHAFT FUELSYSTEM...
- Page 55 TRACTOR - - MODEL NUMBER 917.272051 KOHLER ENGINE-MODEL NUMBER CV461, TYPE NUMBER 26504 FUEL SYSTEM PART DESCRIPTION M-641060-S Nut, hex. flange M6xl.0 (2) X-22-11-S Washer, lock 1/4" M-629116-S Stud M6x1.0x116 (2) 12-853-68-S Kit, carburetor w/gasket (Includes 5,6,7 qty 1) Gasket, air cleaner 12-041-02-S Carburetor assembly 12-053-68...
- Page 59 SUGGESTED GUIDE FOR SIGHTING greater than 15°), never across the face. Make turns gradu- Operate your Tractor up and down the face of slopes (not ally to prevent tipping or loss of control. Exercise extreme SLOPES FOR SAFE OPERATION ONLY RIDE UP AND DOWN HILL, NOT ACROSS HILL...
- Page 60 Get it fixed, at your home or ours! For repair of major brand appliances no matter who made it, no matter who sold it! 1-800-4-MY-HOME (1-800469-4663) www.sears.com To bring in products such as vacuums, lawn equipment and electronics for repair, call for the location of your nearest Sears Parts &...
Need help?
Do you have a question about the LAWN TRACTOR 917.272051 and is the answer not in the manual?
Questions and answers