Table of Contents
Advertisement
Advertisement
Table of Contents

Related Manuals for Sonicware SmplTrek


Summary of Contents for Sonicware SmplTrek
- Page 1 Reference Manual Rev.1 TRK-010-UM-04-EN...
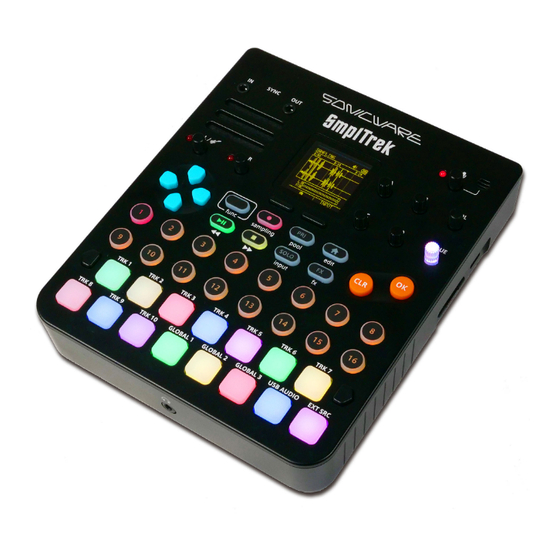
- Page 2 Introduction Thank you very much for purchasing a SONICWARE SmplTrek. The SmplTrek is a battery-powered hand-held sampler that can easily capture sounds whenever and wherever using the built-in mic, audio inputs and USB audio sources, for example. A single song (project) can have up to 16 scenes, and each scene has a 10-track sequencer.
- Page 3 Use these for recording vocals and other performances that continue through a song, for example. Perform live anywhere Lightweight, compact and battery-powered Compact and weighing only 550 grams, the SmplTrek is easy to carry around. With battery power, music production and streaming are possible any- time anywhere.
- Page 4 Audio interface Numerous connectors The SmplTrek can be used as Along with SYNC IN/OUT jacks, MIDI IN/ a 2-in/2-out audio interface OUT connectors can be used with exter- by connecting it by USB to a nal MIDI devices. Other connectors in- smartphone or PC/Mac.
-
Page 5: Table Of Contents
Contents Names of parts …………………………… Opening the sample pool ……………… Pool basic operations ………………… Connection example …………………… Creating songs with the SmplTrek Loading files ……………………………… Folder structure on cards …………… Basic operations — General ………… Preparing a power supply……………… Importing loops from Starting up …………………………………... - Page 6 Selecting and editing drum kits …… Overview …………………………………… Real-time recording …………………… Connecting a smartphone, PC or Mac to Step recording …………………………… the SmplTrek by USB ………………… Clip setting(Importing SMF) ………… Playing audio from a smartphone, PC or Drum kits …………………………………… Mac …………………………………………...
- Page 7 Contents Basic mixer screen operation (PRM Automatic power off function ………… VALUE) …………………………………… Resetting the unit to the factory default Making specific EQ settings ………… state ………………………………………… Muting tracks …………………………… Checking system version information 192 Effects ……………………………………… 148 Card functions …………………………… 193 Insert effects ………………………………...
-
Page 8: Names Of Parts
Names of parts Selection buttons Control knobs Mic gain knob Select items shown at Adjust items A – Adjusts input gain of bottom of screen D on screen built-in mic VOL knob Adjusts head- phone/speaker Input level gain knobs Adjust gain of INPUT L and R VALUE knob... -
Page 9: Connection Example
Connection example SYNC SYNC LINE LINE MIDI MIDI DC9V IN IN MEMORY ASSIGN 1 ASSIGN 2 DIMENSION VALUE bank speed sweep range KICK SNARE LEVEL OTHERS MIXER kick 1 snare 1 tune hat 1 hat 2 BASS DRUM LINE IN RATE PITCH DEPTH RELEASE & GATE M.GUN DUCKING FX AMOUNT KICK 1/ ex 1 SN 1/... -
Page 10: Creating Songs With The Smpltrek
Creating songs with the SmplTrek One project corre- Project (one song) sponds to one song. Intro Verse A Ending Scene Scene Scene Scene Track 1 Each project has 16 Clip Clip Clip Type: LOOP Guitar …… scenes. Sample Sample Sample... -
Page 11: Basic Operations - General
( → P.189) Starting up Press and hold the POWER switch until SmplTrek appears on the display. Turning the unit off Press and hold the POWER switch until the display turns off. -
Page 12: Preparing Preset Data And
Preparing preset data and formatting cards Preset data, including drum kits, instrument sound sources and demo projects, are stored inside the SmplTrek. First of all, prepare a blank card and execute FORMAT & DUPLICATE on it. Compatible cards SDHC up to 32 GB (CLASS 10 or higher) ※... - Page 13 Preparing preset data and formatting cards Select YES, and press • Duplicating files takes a few minutes. • Be careful because this will erase all data on the card. • It is also possible to duplicate preset data without formatting ( →...
-
Page 14: Important Tips To Know Before Use
Important tips to know before use Direction, OK and CLR buttons To keep this manual from becoming too complex, not every item that can be operated using the direction, OK and CLR buttons is ex- plained. On many screens, the direction, OK and CLR buttons can be used in addition to knobs. -
Page 15: Playing Projects And Playing Scenes
Important tips to know before use Playing projects and playing scenes The SmplTrek has two types of playback: project and scene. Their features are as follows. Project playback Scene playback Starting playback Press Press – for the desired scene. Repetition... -
Page 16: Lengths
Important tips to know before use Relationship between scene and clip lengths Scene lengths are given priority over clip lengths. For this reason, clips will be adjusted to match the scene length. The playback of clips will be looped if the scene is longer or cut off if the scene is shorter. -
Page 17: Basic Operations - Home Screen
Basic operations — Home Screen Current location Tempo Speaker/built-in mic status Project name Scene number Select with Master level direction buttons Track type Track with input data Turn LAUNCH mode Set tempo on/off Stop playback Adjust This stops playback of the project/scene. Press the master level again to return to the beginning of the project. - Page 18 Basic operations — Home Screen LED pad status Selected Lit white Playing Blinking white Recording Lit red Recording standby Blinking red Playback standby/ Blinking green paused Playing Gently blinking green Data loaded Lit in set color Empty Unlit Scene button status Data loaded Lit yellow Playing...
-
Page 19: Changing The Launch Mode
Basic operations — Home Screen Changing the LAUNCH mode The LAUNCH mode used by the SmplTrek can be turned on/off. When on, pressing LED pads and scene buttons will start play- back of tracks and scenes immediately. Turn it on for live performance, and turn it on/off as necessary during production. -
Page 20: Master Level Adjustment
Basic operations — Home Screen Master level adjustment Turn on the Home Screen. This adjusts the master level. Master level... -
Page 21: Setting The Tempo/Metronome
Basic operations — Home Screen Setting the tempo/metronome Press the right button on the HOME Screen to TEMPO/ open the TEMPO Screen. Turn to adjust the tempo. The tempo can also be set by tapping the right TAP TEMPO button with a steady rhythm. It will be set to the average tapping speed. -
Page 22: Copying On The Home Screen
Basic operations — Home Screen Copying on the Home Screen Select a track, scene or clip to copy, and press Select the copy destination, and press • When a track or scene is selected, the entire track or scene will be copied. -
Page 23: Clearing On The Home Screen
Basic operations — Home Screen Clearing on the Home Screen Select a track, scene or clip to clear, and press Select YES. • When a track or scene is selected, the entire track or scene will be cleared. • Clearing is also possible from the track ( → P.212) and •... -
Page 24: Project
Project Selecting projects Press In the PROJECT MENU, select SELECT/NEW. Turn to select a project, and press... -
Page 25: Saving Projects
Project Saving projects Press In the PROJECT MENU, select SAVE. Select YES. -
Page 26: Copying Projects And Saving With New Names
Project Copying projects and saving with new names Press In the PROJECT MENU, select SAVE AS. Select (EMPTY), and press Input the name, and press the right OK button. -
Page 27: Project
Project Renaming projects Press to open the PROJECT MENU Screen. Select RENAME, and press Change the name, and press the right OK button. -
Page 28: Deleting Projects
Project Deleting projects Press to open the PROJECT MENU Screen. Select DELETE, and press Select YES, and press • Be careful because deletion cannot be undone. -
Page 29: Changing Led Pad Colors (Track Color)
Project Changing LED pad colors (TRACK COLOR) Press to open the PROJECT MENU Screen. Select SETTING > TRACK > TRACK COLOR. Set each item. Track Color Track selected for color changing Color type... -
Page 30: Scene
Scene Scene settings Press for the desired scene to open its SCENE SETTING Screen. • Playback will stop if another scene or a project is playing. • It is also possible to select a scene with direction buttons and press to enter the SCENE SETTING Screen. - Page 31 Scene Set each item. SCN Setting (1/2) Change the scene length in bars Change the scene time signa- TIME SIG ture Set how many times the current REPEAT scene is repeated during project playback Turn the scene on/off ENABLE When off, it will be skipped during project playback SCN Setting (2/2)...
-
Page 32: Sampling
This is sampling on the EDIT Screen using a LOOP track ( → P.56). Looper recording (live sampling) While playing scenes on the Home Screen, loops can be recorded one after another to LOOP tracks ( → P.58). Resampling Sound being played back by the SmplTrek can be sampled ( → P.37). -
Page 33: Sampling Settings
Sampling Sampling settings Monitoring Monitoring level Recording source Normalize Recording source settings Auto recording Start sampling Threshold Level meter Auto save Select a save location Sampling Selecting the Monitoring recording source ON/OFF (→ P.38) Recording source Normalize settings ON/OFF (→ P.38) Auto recording Start sampling ON/OFF... -
Page 34: Sampling The Source
Sampling Sampling the source Press , set each of the sampling settings. Press to start sampling. Sampling can be interrupted by pressing the left CANCEL button. Press again to stop. Enter a name and press the right OK button • This screen will not be shown when automatic saving is on. - Page 35 Sampling Select whether to load the sample to a track or to chop it. Refer here ( → P.162) to use the CHOP function. To sample again, select “DONE”. • This screen will not be shown if the POOL is the save destina- tion.
-
Page 36: Quick Sampling
Sampling Quick sampling Without setting the track type, press down the PAD for the track to be used for sampling. • When LAUNCH mode is off ( → P.19), quick sampling is possi- ble even if the track type has been set. Press to start sampling. -
Page 37: Resampling
Sampling Resampling Press to open the SAMPLING Screen, and use to select resampling. to select the track to use. Press or track PAD to play the track to be resampled. Press to start resampling. -
Page 38: Selecting The Recording Source
Selecting the recording source Press . (The button lights orange.) Turn to select the input source. Rec Src Connectors Explanation used Built-in mic Hi-Z with guitar, Gain INPUT L bass, etc. control Gain Dynamic mic INPUT R control Stereo line input INPUT L/R ON/OFF Mono line input... -
Page 39: Pool
Pool Opening the sample pool Press to open the POOL Screen, and select file types. to select a folder that contains samples, and press Pool Option Explanation PRESET Preset sample folder Folder where all samples that can be POOL used in projects are saved Folder that only contains samples used in PROJECT... -
Page 40: Pool Basic Operations
Pool Pool basic operations Open the SAMPLE POOL Screen and select any sample. Favorite Cursor (on card) Favorite (in project) Preview playback Move cursor up/down or turn for same operation OK button • Open sample folder Move • Work with file cursor up, or open menu down, lef t... -
Page 41: Loading Files
Pool Loading files Open the POOL Screen and select any file. Press to open a pop-up menu, and select LOAD. Select the track for loading the sample and press or the right LOAD button. For SAMPLE, following instructions on screen, select the track type and the interval used. -
Page 42: Folder Structure On Cards
Pool Folder structure on cards The folder structure on cards used in the SmplTrek is as follows. Card SmplTrek This folder is for saving samples, drum kits and MIDI Pool files that can be used in all projects Audio Sampled audio data... -
Page 43: Importing Loops From Pc/Mac Computers
> Pool > Audio folder, and insert the card in the unit again. • For KIT, copy files to the card > SmplTrek > Pool > KIT folder. For SMF, copy files to the card > SmplTrek > Pool > SMF folder. -
Page 44: Basic Operations - Track
Basic operations — Track Track types LOOP tracks These are designed for sampling performances with drums, guitars and other instruments and looping them in the scene. SHOT tracks Use these to play one-shot samples, such as sound effects and crash cymbals, once. Sequence patterns can also be made using one-shot samples. -
Page 45: Setting Track Types
Basic operations — Track Setting track types Select an empty track, and press Select the desired track type from the pop-up menu, and press • A maximum of 4 DRUM tracks and 4 INST tracks can be used at the same time. -
Page 46: Switching Tracks
Basic operations — Track Switching tracks When the Home Screen is open, press to open the EDIT Screen. On the EDIT Screen, press track PAD to switch tracks. • While pressing , the selected track will be lit white and other tracks will be lit with their set colors. -
Page 47: Opening The Track Settings Menu
Basic operations — Track Opening the track settings menu When the Home Screen is open, press + the PAD for the desired track. • The SETTING screen can also be opened by moving the cursor to the desired track and pressing Make settings according to the menu shown. -
Page 48: Basic Operations - Clip
Basic operations — Clip Opening the clip settings menu When the Home screen is open, use direction buttons to select the desired clip and press to enter the EDIT Screen. Press again to enter the SETTING Screen and follow the menu displayed. -
Page 49: Loop Tracks
LOOP tracks Overview These are designed for sampling performances with drums, guitars and other instruments and looping them in the scene. -
Page 50: Loop Track Editing Screen
LOOP tracks LOOP Track Editing Screen Track type - Scene number Current location/clip length Audio waveform Clip level Edit start position Load samples Open/close pop-up screen / Play clip Menu selection Loop Track (Edit) - Common left Play clip right Open/close pop-up screen / Menu selection Open clip menu Audition state... -
Page 51: Loop Track Editing Screen (Seq)
LOOP tracks LOOP Track Editing Screen (SEQ) Length Note length Open/close pop-up screen / Menu selection Loop Track (EDIT)- SEQ Length NOTE Note length LOOP Track Editing Screen (SAMPLE) Sample tuning LoFi ON / OFF Open/close pop-up screen / Menu selection Loop Track (EDIT)- SAMPLE TUNE Adjust pitch (100 cent steps at a time) -
Page 52: Loading Samples
LOOP tracks Loading samples Press the on the EDIT Screen. Select the desired sample and press • Samples can also be loaded from the POOL Screen ( → P.41) and the clip SETTING Screen ( → P.48) . Set the interval used for the sample, and press or right NEXT button. - Page 53 LOOP tracks Audio Loader Start point in sample End point in sample (AB POINT) Move zoomed waveform display Zoom waveform display Select/change BPM items Confirm BPM item selection left Quit right Open next menu page • Determining interval freely (AB POINT) Start point End point Number of bars...
- Page 54 LOOP tracks • Determining interval by tempo, note length and number of steps (BPM NOTE STEP) Tempo Note length Number of steps Select the time stretch process. Do not time stretch Use time stretching suitable for melodic MELODIC content Use time stretching suitable for RHYTHMIC rhythmic content...
-
Page 55: Editing Start Position
LOOP tracks Editing start position Press the START POS on the EDIT Screen. Set each item. Start Position Loop start point Left Preview playback Move waveform Right Confirm display Zoom waveform display • If the start position is changed, the start position will be shifted, but the set loop interval will be the same during playback. -
Page 56: Recording In Real Time
LOOP tracks Recording in real time ● ❷ ● ❸ ● ❹ ● ❶ ● ❶ Select the clip to use for recording, and press Press twice to start recording standby. Press to start recording. - Page 57 LOOP tracks When the last step is reached, recording will stop and loop play- back will start. Press to stop playback. Audition state Recording state...
-
Page 58: Looper Recording (Live Sampling)
LOOP tracks Looper recording (live sampling) Set the type to LOOP to use a clip for looper recording. Press , and select LOOP REC. Press – to start scene playback. Press for the LOOP track to start recording standby. Recording will start automatically according to the SYSTEM MENU ( →... - Page 59 LOOP tracks LED pad status Selected Lit white Playing Gently blinking green Recording Gently blinking red Data loaded Lit in set color Empty Unlit Scene button status Data loaded Lit yellow Playing Lit green Playback paused Blinking green Selected Lit orange Unavailable/empty Unlit...
-
Page 60: Shot Tracks
SHOT tracks Overview Use these to play one-shot samples, such as sound effects and crash cymbals, once. SHOT tracks have a PAD performance mode and a SEQUENCE mode. (→ P.70) Samples are played when LED PAD performance pads are pressed. This is ideal mode for live performance. -
Page 61: Shot Track Editing Screen
SHOT tracks SHOT Track Editing Screen TIMING REC ON/OFF Number of steps Length of 1 step Duplicate SWING setting Menu selection Shot Track (Edit)- SEQ Number of steps (16 steps at a time) Number of steps (1 steps at a time) TIMING REC TIMING REC ON/OFF NOTE... -
Page 62: Shot Track Editing Screen
SHOT tracks SHOT Track Editing Screen (AUTOMATION) Track type - Scene number Current location/clip length Speaker/built-in mic status Sample playback steps Initialize automation of shown parameter Editing item (All steps) Automation Play clip Menu selection Initialize automation of current location Shot Track (Edit)- AUTOMATION Switch editing item Move by 1 step... -
Page 63: Loading Samples
SHOT tracks Loading samples Press on the EDIT Screen. Select SELECTT SAMPLE and press Select the desired sample, and press... - Page 64 SHOT tracks Set the interval used for the sample. Audio Loader Start point in sample End point in sample (AB POINT) Move zoomed waveform display Zoom waveform display Select/change BPM items Confirm BPM item selection left Quit right Open next menu page...
- Page 65 SHOT tracks • Determining interval freely (AB POINT) Start point End point • If the tempo is known (BPM BARS) Tempo Number of bars • Determining interval by tempo, note length and number of steps (BPM NOTE STEP) Tempo Note length Number of steps •...
-
Page 66: Recording In Real Time
SHOT tracks Recording in real time ● ❷ ● ❸ ● ❶ ● ❶ ● ❹ Select the clip to use for recording, and press • This shows visibly the steps where audio starts. • Changing pages will move 16 steps at a time. If steps 1–16 are shown, changing pages will show steps 17–32. - Page 67 SHOT tracks To record without quantization, press to enable TIMING REC. Press to start recording standby. Press to start recording. Press at the desired input times. • Sound triggers can be input directly on steps by pressing their buttons. On the EDIT (AUTOMATION) Screen, turn to select ON TIMING, and edit the input timing of each note.
-
Page 68: Step Recording
SHOT tracks Step recording ● ❷ ● ❶ ● ❶ ● ❸ Select the clip to use for recording, and press Press to start recording standby. Press for the step to input. Press for a step that has already been input to clear it. -
Page 69: Recording Pad Performances (Shot Rec)
SHOT tracks Recording pad performances (SHOT REC) Using this function, multiple SHOT tracks can be used to perform, creating sequences on each track. Prepare SHOT tracks with samples assigned to them beforehand, and select the scene to record. Press , and select SHOT REC. This puts the unit into recording standby. -
Page 70: Track Setting (Switching Between Se
SHOT tracks Track setting (Switching between sequence and pad performance modes) When the Home Screen is open, press + the PAD for the desired track to open the SETTING Screen. Turn SEQUENCE to turn this mode on/off. Sequence Sequence mode Pad performance mode •... -
Page 71: Adjusting Swing
SHOT tracks Adjusting swing When the Home Screen is open, press + the PAD for the desired track to open the SETTING Screen. Turn SWING to adjust the swing for the entire track. On the EDIT (SEQ) Screen, turn to adjust the swing for an indi- vidual clip. -
Page 72: Clip Setting(Adjusting Sample Intervals
SHOT tracks Clip setting (Adjusting sample intervals) Select POSITION on the CLIP SETTING Screen( → P.48), and press Set each item. Position Move the start point Start point in without changing the sample interval End point in Left Preview playback sample Move wave- Right... -
Page 73: Clip Setting (Sample Setting)
SHOT tracks Clip setting (sample setting) Select SAMPLE SETTING on the CLIP SETTING Screen, and press Sample Setting PITCH Pitch adjustment (100 cent steps at a time) PITCH Pitch adjustment (1 cent steps at a time) LoFi Lofi ON/OFF... -
Page 74: Inst Tracks
INST tracks Overview Use these to play phrases in a scale on the keyboard with samples of single notes from pianos, guitars and other real instruments. -
Page 75: Inst Track Editing Screen
INST tracks INST Track Editing Screen Track type - Scene number Current location/clip length Keyboard Selected key Input note data Play clip Open/close pop-up screen / Menu selection Inst Track (Edit)- Main Move between Move between pages while steps pushing left Play clip Move note position... -
Page 76: Inst Track Editing Screen(Seq
INST tracks INST Track Editing Screen (SEQ) TIMING REC ON/OFF Number of steps Length of 1 step Duplicate SWING setting Open/close pop-up screen / Menu selection Inst Track (Edit)- SEQ Number of steps (16 steps at a time) Number of steps (1 steps at a time) TIMING REC TIMING REC ON/OFF NOTE... -
Page 77: Envelope
INST tracks INST Track Editing Screen (ENVELOPE) Attack time Release time Open/close pop-up screen / Menu selection Inst Track (Edit)- ENVELOPE ATTACK Attack time RELEASE Release time • Can also be set from the TRACK SETTING Screen ( → P.47). -
Page 78: Inst Track Editing Screen
INST tracks INST Track Editing Screen (AUTOMATION) Initialize automation of shown parameter Editing item (All steps) Automation Initialize automation of Open/close pop-up screen / current location Menu selection Inst Track (Edit)- AUTOMATION Initialize parame- Switch editing item ter (in steps) Move note Initialize editing item position... -
Page 79: Selecting Samples
INST tracks Selecting samples Press the right button on the EDIT Screen to move to INST. Turn to select the sample. Inst Track (Edit)- INST Select folders Select samples Adjust pitch (100 cent steps at a time) Adjust pitch (1 cent steps at a time) ・... -
Page 80: Real-Time Recording
INST tracks Real-time recording ● ❷ ● ❸ ● ❶ ● ❶ ● ❺ ● ❹ Select the clip to use for recording, and press To record without quantization, press to enable TIMING REC. - Page 81 INST tracks Press to start recording standby. Press to start recording. Play to input notes. Press to end recording. On the EDIT (AUTOMATION) Screen, turn to select ON TIMING/OFF TIMING, and edit the input timing of each note. ON TIMING OFF TIMING...
-
Page 82: Step Recording
INST tracks Step recording ● ❷ ● ❹ ● ❶ ● ❸ Select the clip to use for recording, and press Press to start recording standby. to move to the step for input. Press to input a note. Press these again to clear input notes. •... -
Page 83: Track Setting (Setting Intervals Used And Loop Points For Samples
INST tracks Track setting (Setting intervals used and loop points for samples) When the Home Screen is open, press + the INST track open the SETTING Screen. Press POSITION SETTING. Set each item. Position Start point in Switch between START/ END and LOOP editing. -
Page 84: Track Setting(Setting The Base Note
INST tracks Track setting (Setting the base note) When the home Screen is open, press + the INST track PAD to open the SETTING Screen. Turn to adjust SAMPLE NOTE. -
Page 85: Track Setting (Lofi Setting)
INST tracks Track setting (LoFi setting) When the home Screen is open, press + the INST track PAD to open the SETTING Screen. Press the right button to move to pare 2, turn LoFi to change it. -
Page 86: Clip Setting (Setting The Keyboard Scale
INST tracks Clip setting (Setting the keyboard scale) Select the desired clip on the HOME Screen, and press to open the EDIT Screen. Press again to open the SETTING Screen, and select SCALE SETTING. Set each item. Scale SCALE Change the scale Change the key ... -
Page 87: Clip Setting(Importing Smf
INST tracks Clip setting (Importing SMF) Select the desired clip on the HOME Screen, and press to open the EDIT Screen. Press again to open the SETTING Screen, and select IMPORT SMF. Select the desired file from the POOL Screen. •... -
Page 88: Drum Tracks
DRUM tracks Overview Use these to create drum patterns using drum sounds, including bass, snare and hi-hat, that have been prepared in advance in a drum kit. Original drum kits can also be made from samples. -
Page 89: Drum Track Editing Screen
DRUM tracks DRUM Track Editing Screen Track type - Scene number Current location/clip length Pads Input note data Play clip Open/close pop-up screen / Menu selection Drum Track (Edit)- Main Move between Move between pages while steps pushing left Play clip Move note position Open/close pop- right... -
Page 90: Drum Track Editing Screen (Seq
DRUM tracks DRUM Track Editing Screen (SEQ) TIMING REC ON/OFF Number of steps Length of 1 step Duplicate SWING setting Open/close pop-up screen / Menu selection Drum Track (Edit)- SEQ Number of steps (16 steps at a time) Number of steps (1 steps at a time) TIMING REC TIMING REC ON/OFF NOTE... -
Page 91: Drum Track Editing Screen (Automation
DRUM tracks DRUM Track Editing Screen (AUTOMATION) Initialize automation of shown parameter Editing item (All steps) Automation Initialize automation of Open/close pop-up screen / current location Menu selection Drum Track (Edit)- Automation Initialize parame- Switch editing item ter (in steps) Move note Initialize editing item position... -
Page 92: Loading Preset Patterns
DRUM tracks Loading preset patterns On the EDIT (KIT) Screen, turn to select a preset pattern. • If is turned to enable “LINK”, the preset kit will also be changed automatically according to the preset pattern when the pattern is changed. •... -
Page 93: Selecting And Editing Drum Kits
DRUM tracks Selecting and editing drum kits On the EDIT (KIT) Screen, turn to select a folder. Then, turn to select a kit. When the EDIT (INST) Screen is open, press a pad to select an instrument. Then, adjust its parameters. •... - Page 94 DRUM tracks Inst level Inst pitch Inst pan Inst send level Open/close pop-up screen / Menu selection DRUM TRACK (EDIT)- KIT INST Setting the level of each inst Setting the pitch of each inst (100 cent steps at a time) Setting the pitch of each inst (1 cent steps at a time) Setting the pan of each inst...
-
Page 95: Real-Time Recording
DRUM tracks Real-time recording ● ❷ ● ❸ ● ❶ ● ❶ ● ❺ ● ❹ Select the clip to use for recording, and press To record without quantization, press to enable TIMING REC. - Page 96 DRUM tracks Press to start recording standby. Press to start recording. Play to input notes. Press to end recording. On the EDIT (AUTOMATION) Screen, turn to select ON TIMING, and edit the input timing of each note.
-
Page 97: Step Recording
DRUM tracks Step recording ● ❷ ● ❹ ● ❶ ● ❶ ● ❸ Select the clip to use for recording, and press Press to start recording standby. to move to the step for input. Press or the desired to input a note. -
Page 98: Clip Setting(Importing Smf
DRUM tracks Clip setting (Importing SMF) Select the clip to edit, and press Press again to open the SETTING Screen, and select IMPORT SMF. Select the desired file from the POOL Screen. • SMF format types 0 and 1 are supported. Only note on/off data is imported. -
Page 99: Drum Kits
Drum kits Editing drum kits Open the KIT EDIT Screen. To edit the kit that is currently selected On the Editing Screen, press and select EDIT DRUM KIT. • Editing is also possible from the track SETTING screen ( → P.47). •... - Page 100 Drum kits Select menu items as necessary, and press Assign samples to individual LED INST PRM pads and adjust LEVEL, PAN and other parameters ( → P.101) Set the KIT LEVEL and turn LoFi KIT PRM ON/OFF ( → P.103) PAD COLOR Set LED pad colors ( →...
-
Page 101: Adjusting Individual Instruments On Led Pads (Inst Prm
Drum kits Adjusting individual instruments on LED pads (INST PRM) Select INST PRM on the KIT EDIT Screen, and press Select the LED pad to be set and change each item. • The following table shows the maximum length in seconds of samples that can be assigned to each instrument. - Page 102 Drum kits Inst Prm (1/3) Select samples in the current folder FILE Select samples from the SAMPLE SELECT POOL Clear selected sample LEVEL Level adjustment PAN adjustment Left Return to previous menu Right Open next page Inst Prm (2/3) FX SEND Adjust effect send amount PITCH Adjust pitch...
-
Page 103: Adjusting Drum Kit Levels And Lofi Settings (Kit Prm)
Drum kits Adjusting drum kit levels and LoFi settings (KIT PRM) Select KIT PRM on the KIT EDIT Screen, and press Set each item. Kit Prm Level Adjust the kit level LoFi Turn the lofi effect on/off... -
Page 104: Adjusting Drum Kit Led Pad Colors
Drum kits Adjusting drum kit LED pad colors (PAD COL- Select PAD COLOR on the KIT EDIT Screen, and press to select the track to change, and turn change the color. Pad Color COLOR 30 pad colors can be selected... -
Page 105: Checking Drum Kit Sounds With Reverb (Send Fx For Check)
Drum kits Checking drum kit sounds with reverb (SEND FX FOR CHECK) Select SEND FX FOR CHECK on the KIT EDIT Screen, and press Set each item as necessary. • The parameters set in step 2 are only for the sound check and will not be saved. - Page 106 Drum kits Kit Send FX (1/2) ON / OFF Turn the send effect on/off SEND Adjust effect send amount TYPE Change the effect type Tempo or effect mix level TEMPO / MIX (depends on TYPE) left Return to previous menu right Open next page Kit Send FX (2/2)
-
Page 107: Drum Kit Menu
Drum kits Drum kit menu Press and select KIT to open the KIT POOL Screen. Select the desired DRUM KIT, and press Edit drum kits and LED pads EDIT (→ P.99) Load drum kits LOAD (→ P.41) Name and save drum kits SAVE AS (→... -
Page 108: Naming And Saving Drum Kits
Drum kits Naming and saving drum kits Press and select KIT to open the KIT POOL Screen. Select the desired DRUM KIT, press , and select SAVE AS. Input the name, and press the right OK button. -
Page 109: Renaming Drum Kits
Drum kits Renaming drum kits Press and select KIT to open the KIT POOL Screen. Select the desired drum kit, press , and select RENAME. Change the name, and press the right OK button. -
Page 110: Copying Drum Kits To Projects
Drum kits Copying drum kits to projects Press and select KIT to open the KIT POOL Screen. Select the desired DRUM KIT in the PROJECT folder, press , and select COPY TO PROJECT. Select YES and press... -
Page 111: Copying Drum Kits To Pool
Drum kits Copying drum kits to pool Press and select KIT to open the KIT POOL Screen. Select the desired DRUM KIT in the PROJECT folder, press , and select COPY TO POOL. Select YES and press... -
Page 112: Deleting Drum Kits (Delete)
Drum kits Deleting drum kits (DELETE) Press , and select KIT to open the KIT POOL Screen. Select the desired drum kit, press , and select DELETE. Select YES, and press • Be careful because deleted kits cannot be restored. -
Page 113: Midi Tracks
MIDI tracks Overview These are piano-role type sequencer tracks for creating phrases to use with external MIDI equipment. In addition to note on/off, automation can be used to send four types of control change data. MIDI channel and other settings are configured in MIDI SETTING in the SYSTEM menu ( →... -
Page 114: Midi Track Editing Screen
MIDI tracks MIDI Track Editing Screen Track type - Scene number Current location/clip length Keyboard Input note data Play clip Open/close pop-up screen / Menu selection Midi Track (Edit)- Main Move between Move between pages while steps pushing left Play clip Move note position Open/close pop- right... - Page 115 MIDI tracks Midi Track (Edit)- SEQ Number of steps (16 steps at a time) Number of steps (1 steps at a time) TIMING REC TIMING REC ON/OFF NOTE Length of 1 step Duplicate the sequence to double the length SWING settings ( → P.71) SWING TRK: Apply setting for entire track 0 –...
-
Page 116: Midi Track Editing Screen
MIDI tracks MIDI Track Editing Screen (AUTOMATION) Initialize automation of shown parameter Editing item (All steps) Automation Initialize automation of Open/close pop-up screen / current location Menu selection Midi Track (Edit)- Automation Initialize parame- Switch editing item ter (in steps) Move note Initialize editing item position... -
Page 117: Real-Time Recording
MIDI tracks Real-time recording ● ❷ ● ❸ ● ❶ ● ❶ ● ❺ ● ❹ Select the clip to use for recording, and press To record without quantization, press to enable TIMING REC. - Page 118 MIDI tracks Press to start recording standby. Press to start recording. Play to input notes. Press to end recording. On the EDIT (AUTOMATION) Screen, turn to select ON TIMING / OFF TIMING, and edit the input timing of each note. ...
-
Page 119: Step Recording
MIDI tracks Step recording ● ❷ ● ❹ ● ❶ ● ❶ ● ❸ Select the clip to use for recording, and press Press to start recording standby. to move to the step for input. Press or the desired to input a note. -
Page 120: Track Setting (Setting Midi Cc Numbers
MIDI tracks Track setting (Setting MIDI CC numbers) In addition to notes, MIDI tracks can also transmit up to four types of control change data per step using automation. In this case, the control change numbers specified by MIDI CC A–D are used. -
Page 121: Clip Setting(Setting The Scale
MIDI tracks Clip setting (Setting the scale) Select the clip to edit, and press Press again to open the SETTING Screen, and select SCALE SETTING. Set each item. Scale Setting SCALE Change the scale Change the key • LED pads will become light blue for notes that are outside the scale. -
Page 122: Clip Setting(Importing Smf
MIDI tracks Clip setting (Importing SMF) Select the clip to edit, and press Press again to open the SETTING Screen, and select IMPORT SMF. Select the desired file from the POOL Screen. • SMF format types 0 and 1 are supported. Only note on/off data is imported. -
Page 123: Clearing Only Sequence Or Automation Data
Clearing only sequence or automation data Select the clip to clear, and press to open the Editing Screen. Press again to open the SETTING Screen, and select CLEAR THIS CLIP. Select the item to clear from the pop-up menu, and select YES. Clear This Clip Clear the clip itself SEQUENCE... -
Page 124: Global Tracks
Use these for recording vocals and other performances that continue through a song, for example. The SmplTrek has 3 GLOBAL tracks, and each of these has 3 virtual (V) takes. In the middle of a song, the3 V takes can be switched and their levels adjusted. -
Page 125: Global Screen Basic Operations
GLOBAL tracks GLOBAL Screen basic operations GLOBAL tracks must be enabled for them to be used. Select the desired GLOBAL track clip and press Track type Speaker/built-in mic status Bars Beats Recording track Waveform display V takes 1–3 MUTE tracks Editing items Global track editing Move between bars... -
Page 126: Recording
GLOBAL tracks Recording ● ❺ ● ❸ ● ❹ ● ❶ ● ❶ ● ❷ Select the GLOBAL track clip to use for recording, and press Press – to select the V take to use for recording. - Page 127 GLOBAL tracks Press twice to start recording standby. Press to start recording. Press to end recording. Global Track (Recording) Audition state is active. The sound is passing through the global track channel. Use this to practice before recording. The unit is in recording standby or recording.
-
Page 128: Splitting Regions
GLOBAL tracks Splitting regions Select the GLOBAL track clip to edit, and press Turn to move to the desired division point. Press to split the region. -
Page 129: Switching Take Assignments
GLOBAL tracks Switching take assignments Select the GLOBAL track clip to edit, and press If necessary, record V takes and split regions beforehand. ( → P.126 〜→ P.128) to move to the region with the take to be switched. Selected take Region to select the V take (or MUTE track) to use. -
Page 130: Joining Regions
GLOBAL tracks Joining regions Select the GLOBAL track clip to edit, and press to select the area of a split region. Split Press 2 times to enable recording standby. Then, press to join the selected region with the region just before it. -
Page 131: Adjusting Individual Region Levels
GLOBAL tracks Adjusting individual region levels In addition to switching V take assignments, splitting regions enables precise level adjustments for each region. Select the GLOBAL track clip to edit, and press to select a region to adjust. Turn to adjust the level. -
Page 132: Usb Audio Track
USB AUDIO track Overview Using the audio interface function, music can be quickly live-streamed using a connected smartphone, PC or Mac. Audio on the other device can also be played back and sampled. -
Page 133: Connecting A Smartphone, Pc Or Mac To The Smpltrek By Usb
USB AUDIO track Connecting a smartphone, PC or Mac to the SmplTrek by USB ● ❶ Connect a smartphone, PC or Mac to the SmplTrek by USB. USB icon appears • Connecting an iPhone/iPad requires an Apple Lightning to USB Camera Adapter. -
Page 134: Mac
● ❶ ● ❷ Connect a smartphone, PC or Mac to the SmplTrek by USB. Press Play the audio on the smartphone, PC or Mac. • The USB AUDIO track level and send level for the SEND FX can be adjusted with the MIXER. -
Page 135: Hold/Gate
USB AUDIO track HOLD/GATE The behavior of the USB AUDIO PAD can be changed. When the home Screen is open, press to open the USB SETTING Screen. Turn to switch between HOLD and GATE. Press the pad once to enable the USB AUDIO track and begin receiv- HOLD ing audio from the smartphone, PC... -
Page 136: Clearing Settings
USB AUDIO track Clearing settings When the home Screen is open, press to open the USB SETTING Screen. Press CLEAR SETTING. Select YES, and press... -
Page 137: Ext Src
EXT SRC Overview Using EXT SRC, while playing a project on the SmplTrek, mics or syn- thesizers, for example, can be connected to the inputs and used for live performance. Audio files can also be played, allowing a SmplTrek project to be faded in while sound effects are being output before a live performance, for example. -
Page 138: Setting The Input Source
EXT SRC Setting the input source When the home Screen is open, press to open the EXT SETTING Screen. Turn to switch the SOURCE. Audio from the device connected INPUT to the inputs will be output. AUDIO FILE An audio file will be played. -
Page 139: Selecting Audio Files
EXT SRC Selecting audio files When the home Screen is open, press to open the EXT SETTING Screen. Turn to switch SOURCE to AUDIO FILE. Press FILE SELECT, and select the desired file from the SAMPLE POOL. -
Page 140: Making Audio File Settings
EXT SRC Making audio file settings When the home Screen is open, press to open the EXT SETTING Screen. Press the right 2/2 button to open the second page. Set LOOP and LoFi as necessary. LOOP Turn looping on/off LoFi Turn the lofi effect on/off This looping function replays the file from the beginning after reaching the end. -
Page 141: Hold/Gate
EXT SRC HOLD/GATE The behavior of the EXT SRC PAD can be changed. When the home Screen is open, press to open the EXT SETTING Screen. Turn to switch between HOLD and GATE. Press once to enable the EXT SRC track and begin receiving audio from HOLD the smartphone, PC or Mac. -
Page 142: Cross-Fading The External Source (Ext Src) And The Project Sound
EXT SRC Cross-fading the external source (EXT SRC) and the project sound The sound input as the EXT SRC can be output with project play- back. The level balance can be set for this. Press on the HOME Screen to open the pop-up menu. Turn to adjust the balance between the project and the ex- ternal input. -
Page 143: Clearing Settings
EXT SRC Clearing settings When the home Screen is open, press to open the EXT SETTING Screen. Press CLEAR. Select YES, and press... -
Page 144: Mixer
Mixer Basic mixer screen operation (level meters) Press Selected track type Speaker/built-in mic status Track level Panning Effect send level EQ status Track level meters Project level meters Selected track Switch between level meter and parameter screens Mixer (level meters) Open Parameter Track/project level Screen... -
Page 145: Basic Mixer Screen Operation (Prm Value)
Mixer Basic mixer screen operation (PRM VALUE) Press the right PRM VALUE button or – to open the PRM VALUE Screen. Selected track type Speaker/built-in mic status Track level Panning Effect send level EQ status Track parameters Switch between level meter and parameter screens Mixer (level meters) Track level... -
Page 146: Making Specific Eq Settings
Mixer Making specific EQ settings Press EQ on the MIXER Screen. Press Set each item. EQ Settings EQ types FREQ Frequency AMOUNT/GAIN Amount/Gain... -
Page 147: Muting Tracks
Mixer Muting tracks Press to open the Mixer Screen. Press for the track to be muted. Press again to unmute it. • Muted tracks appear dimmer on this screen and the Home Screen. -
Page 148: Effects
Effects Insert effects Press to open the EFFECTS Screen. Select INSERT. Adjust the items on the settings screen that opens. Insert Fx (1/2) ON/OFF Turn the effect on/off TYPE Change the effect type Select the track or input to use TARGET the effect on Sound is sampled be-... - Page 149 Effects Insert effects list Effect name CHORUS RATE DEPTH FLANGER RATE DEPTH FEEDBACK PHASER RATE STAGE INVERT DELAY TIME FEEDBACK BPM SYNC BALANCE ANLG DELAY TIME FEEDBACK BPM SYNC VIBRATO RATE DEPTH BPM SYNC AUTO WAH FILTER TYPE SENS DEPTH TREMOLO RATE DEPTH...
-
Page 150: Send Effects
Effects Send effects Press to open the EFFECTS Screen. Select SEND. Adjust the items on the settings screen that opens. On the Mixer Screen, turn for each track to adjust their SEND levels. Send Effects (1/2) ON / OFF Turn the effect on/off TYPE Change the effect type Items depend on selected effect... - Page 151 エフェクト Send effects list Effect name SEND DLY TIME BPM SYNC FEEDBACK PINGPONG TIME BPM SYNC FEEDBACK RVS DLY TIME BPM SYNC FEEDBACK TAPE ECHO TIME BPM SYNC FEEDBACK ROOM MIX * PLATE MIX * HALL MIX * ARENA MIX * TUNNEL MIX * INFINITY...
-
Page 152: Side-Chain Compression (Sc Comp)
Effects Side-chain compression (SC COMP) Press to open the EFFECTS Screen. Select SEND. Turn , and select SC COMP as the TYPE. Turn to select the track to use as the trigger for side-chain compression. • The compressor will be applied when triggered to all tracks that have SEND set to any value other than 0 on the Mixer Screen... -
Page 153: Master Effects
Effects Master effects Press to open the EFFECTS Screen. Select MASTER. Adjust the items on the settings screen that opens. Master Fx (1/2) ON / OFF Turn the effect on/off TYPE Change the effect type Items depend on selected effect Items depend on selected effect Master Fx (2/2)... - Page 154 Effects Master effects list Effect name PRE GAIN / VINYL FLUTTER NOISE BAND WIDTH * FILTER TYPE * CASSETTE FLUTTER CUTOFF NOISE PRE GAIN M.B. COMP BAND1 BAND2 BAND3 LEVEL EQ&LIMIT BAND1 BAND2 BAND3 LIMITER MAXIMIZER THRESHOLD ON MASTER FX PAGE 1...
-
Page 155: Automation
Automation Automation is a function that prepares various parameters in individ- ual clips on tracks to be changed with the desired timing. Using automation enables an even greater range of sound creation. For example, volume can be increased gradually and panning can be moved for specific pitches and samples to change their stereo posi- tions. -
Page 156: Basic Automation Procedure
Automation Basic automation procedure Select the clip to automate, and press Press the right button to move to AUTOMATION. to move the cursor to the step where you want to change automation. – to set each item. - Page 157 Automation Automation Select automation parameter Clear current automation parameter (all steps) Adjust automation parameter for current step Clear currently selected automation parameter (current step only) Automation parameter list SHOT INST DRUM MIDI track track track track VELO ◯ ◯ ◯ ◯...
- Page 158 Automation Automation parameters (all track types) VELO Velocity strength ON TIMING Timing of when sound starts OFF TIMING Timing of when sound stops LEVEL Volume (excluding MIDI tracks) Left-right position (excluding MIDI tracks) SEND Effect send level (excluding MIDI tracks) Automation (SHOT tracks) PLAY LEN Time sound output continues...
-
Page 159: Mixdown/Stem
Select AUDIO EXPORT, and press Select MIX DOWN, and press Input the name, and press the right OK button. • The mixdown file will be created in the following location: card > SmplTrek > Project > project folder name > Audio > MixDown folder. -
Page 160: Exporting Stem Files
Mixdown/Stem Exporting stem files Press to open the PROJECT MENU Screen. Select AUDIO EXPORT, and press Select INDIVIDUAL TRACKS, and press Press , select the tracks to export, and press the right button. • The stem file will be created in the following location: card > Sm- plTrek >... -
Page 161: Tuner
Tuner Press Press the right TUNER button. Tuning TYPE Chromatic, Guitar, Bass CALIB 435 – 445 Hz... -
Page 162: Editing Samples
Editing samples Chopping (automatic slicing) Press , and select SAMPLE to open the SAMPLE POOL Screen. Select the desired sample, press , and select CHOP. On the CHOP/SLICE Screen, press Press the LED pads to check the slices assigned to them. ... - Page 163 Editing samples Turn to adjust the sensitivity of automatic slicing. Chop (Auto Slice) Select slice Move slice Move waveform display Zoom waveform display in/out Adjust sensitivity • By pressing , the selected slice can be deleted. Deleting all slices will restore it to the state it was before chopping. Press the right NEXT/BACK to select the processing for the sliced sample.
- Page 164 Editing samples To create a drum kit (CREATE DRUM KIT) Press LED pads to assign all the chopped sounds, and press the right NEXT button. • By pressing the right SKIP button, the assignment of individual samples can be skipped. Input the name, and press the right OK button.
- Page 165 Editing samples To create split files (CREATE SPLIT FILES) • The split files will be automatically saved at the same level as the original file. To save to the current project (STORE TO THIS PRJ) Press – and assign slices. Then, press the right button.
-
Page 166: Chopping (Manual Slicing)
Editing samples Chopping (manual slicing) Press , and select SAMPLE to open the SAMPLE POOL Screen. Select the desired sample, press , and select CHOP. On the CHOP/SLICE Screen, press the left TO MANUAL button. Press , and while playing the sample, press at the desired position or press an LED pad to slice. - Page 167 Editing samples Use the following to adjust slices precisely. Chopping Select slice Move slice Move waveform display Zoom waveform display in/out Move slice position Add slice Clear slice Use the same procedures as in step 6 for chopping ( → P.162).
-
Page 168: Trimming
Editing samples Trimming Press , and select SAMPLE to open the SAMPLE POOL Screen. Select the desired sample, press , and select TRIMMING. Set the interval used for the sample. At the AB POINT position, press to select it. Then, turn to change the interval setting method (AB POINT, BPM BARS or BPM NOTE STEP). - Page 169 Editing samples Trimming Start point in sample End point in sample (AB POINT) Move zoomed waveform display Zoom waveform display Select/change BPM items Confirm BPM item selection Left Quit Right Open next menu page Press the right button to execute the changes. EXECUTE The SAMPLE POOL Screen will reopen.
-
Page 170: Time Stretching
Editing samples Time stretching Press , and select SAMPLE to open the SAMPLE POOL Screen. Select the desired sample, press , and select TIME STRETCH. Select the type of time stretching. Algorithm suitable for melodies and simi- MELODIC lar phrases Algorithm suitable for drums and other RHYTHMIC phrases capturing short sounds... - Page 171 Editing samples Time Stretch (MODE - BARS) MODE BARS mode Change tempo Change time signa- TIMESIG ture Change number of BARS bars Return to previous Left BACK screen Right EXECUTE Execute Time Stretch (MODE - STEPS) MODE STEPS mode Change tempo NOTE Length of note STEPS...
-
Page 172: Normalizing
Editing samples Normalizing Press , and select SAMPLE to open the SAMPLE POOL Screen. Select the desired sample, press , and select NORMALIZE. Select the type of normalization − 0.3dB Normalize so the peak becomes − 0.3dB − 3.0dB Normalize so the peak becomes − 3.0dB −... -
Page 173: Mono Mixing
Editing samples Mono mixing Press , and select SAMPLE to open the SAMPLE POOL Screen. Select the desired sample, press , and select MONO. Select the MONO type. L ONLY Use only left channel sound MONO MIX Make stereo channels mono R ONLY Use only right channel sound •... -
Page 174: Reverse
Editing samples Reverse Press , and select SAMPLE to open the SAMPLE POOL Screen. Select the desired sample, press and select REVERSE. • Executing will save a file named“original file name_rev.wav”. The original file will not be overwritten. -
Page 175: Renaming Samples
Editing samples Renaming samples Press , and select SAMPLE to open the SAMPLE POOL Screen. Select the desired sample, press , and select RENAME. Change the name, and press the right OK button. -
Page 176: Copying Samples To Projects
Editing samples Copying samples to projects Press , and select SAMPLE to open the SAMPLE POOL Screen. Select the desired sample in the POOL folder, press , and se- lect COPY TO PROJECT. Select YES, and press... -
Page 177: Copying Samples To The Sample Pool
Editing samples Copying samples to the sample pool Press , and select SAMPLE to open the SAMPLE POOL Screen. Select the desired sample in the PROJECT folder, press , and select COPY TO POOL. Select YES, and press... -
Page 178: Deleting Samples
Editing samples Deleting samples Press , and select SAMPLE to open the SAMPLE POOL Screen. Select the desired sample, press , and select DELETE. Select YES, and press • Be careful because deletion cannot be undone. -
Page 179: Audio Interface
By connecting a smartphone or PC/Mac and using the audio inter- face functions, you can quickly live stream music you have made. In addition, the SmplTrek can output and sample audio from smart- phones, PCs and Macs. Connecting as an audio interface Connect the SmplTrek USB port to a smartphone or PC/Mac. -
Page 180: Launch Mode Setting
LAUNCH MODE setting Setting quantization This quantization sets the start timing of track playback and record- ing when LED pads and are pressed. Press to open the SYSTEM MENU Screen. Select LAUNCH MODE, and press Turn to set it. Playback and recording start with quarter-note 1/4 BAR timing 1/2 BAR... -
Page 181: Connecting With Other Devices
Clock synchronization with external devices Multiple devices, including external synthesizers and drum machines, can be connected to the MIDI and SYNC connectors, allowing them to be synchronized and used together. Connecting with other devices Connect other device to the MIDI and SYNC connectors. SYNC SYNC LINE... -
Page 182: Setting The Clock
Clock synchronization with external devices Setting the clock Press to open the SYSTEM MENU Screen. Select CLOCK, and press Adjust the items on the settings screen that opens. - Page 183 Clock synchronization with external devices Clock INTERNAL Use the built in clock. The SmplTrek will operate as the master when used by itself or synchronizing other devic- MIDI SOURCE The SmplTrek will synchronize with MIDI clock received through the MIDI...
-
Page 184: Midi
MIDI Setting track MIDI channels MIDI channel numbers can be set for every SmplTrek track. Press to open the SYSTEM MENU Screen. Select MIDI, and press to open the MIDI SETTING Screen. Select TRACK, and press to select the track to change, and turn to change the channel. -
Page 185: Setting Midi Channels For The Unit
MIDI Setting MIDI channels for the unit Press to open the SYSTEM MENU Screen. Select MIDI, and press to open the MIDI SETTING Screen. Select CHANNEL, and press Midi Channel This channel is for receiving project level PROJECT MIDI and other parameters related to the CHANNEL project AUTO... -
Page 186: Making Other Midi Settings
MIDI Making other MIDI settings Press to open the SYSTEM MENU Screen. Select MIDI > CONFIG. Set each item. Midi Config 1/3 Set connectors used to receive INPUT FROM MIDI Set connectors used to send OUTPUT TO MIDI TX NOTE Turn note transmission on/off Turn control change transmis- TX CC... -
Page 187: Setting Midi Note Numbers For Individual Pads On The Drum Track
MIDI Setting MIDI note numbers for individual pads on the drum track Press + the DRUM track to open the SETTING Screen. Press PAD NOTE NUMBER. to select a pad to change. Turn to change the note number. -
Page 188: System Settings
System settings Pad sensitivity setting Press to open the SYSTEM MENU Screen. Select PAD VELOCITY, and press Turn to adjust it. Pad Velocity VELOCITY Set pad sensitivity 1 – 127 Velocity is always at this fixed value. This is best for people who play with a SOFT light touch. -
Page 189: Battery Setting
System settings Battery setting Press to open the SYSTEM MENU Screen. Select BATTERY, and press Turn to adjust it. Battery BATTERY Select battery type ALKALINE Alkaline batteries NiMH Nickel-metal hydride batteries LITHIUM Lithium batteries... -
Page 190: Automatic Power Off Function
System settings Automatic power off function Press to open the SYSTEM MENU Screen. Select AUTO POWER OFF, and press Turn to adjust it. Auto Power Off Set time until power turns off au- AUTO POWER OFF tomatically... -
Page 191: Resetting The Unit To The Factory Default State
Resetting the unit to the factory default state Press to open the SYSTEM MENU Screen. Select RESET, and press Select YES, and press • Be careful because this will reset all settings in the SmplTrek to their factory defaults.. • This will not format the card. -
Page 192: Checking System Version Information
System settings Checking system version information Press to open the SYSTEM MENU Screen. Select INFORMATION, and press... -
Page 193: Card Functions
Card functions Card reader mode Connect to PC/Mac with USB cable. Press to open the SYSTEM MENU Screen. Select CARD, and press Select CARD READER, and press Select YES, and press... -
Page 194: Duplicate Presets
Card functions Duplicate presets Press to open the SYSTEM MENU Screen. Select CARD, and press Select DUPLICATE PRESETS and press Select the item to be duplicated and press... -
Page 195: Testing Card Performance
Card functions Testing card performance The performance of the card being used can be measured to determine whether it can be used with the SmplTrek. Press to open the SYSTEM MENU Screen. Select CARD, and press Select PERFORMANCE TEST and press Press to start the test. -
Page 196: Firmware Updates
Firmware updates Updating the firmware Copy the downloaded firmware (.bin) to the root folder on the card. While pressing , press and hold the power button. When the update Screen opens, select SYSTEM UPDATE, and press Select YES, and press to start the update. -
Page 197: Reference
Reference Relationship between built-in speaker and mic The built-in speaker is automatically turned off under the following conditions. Speaker/built-in mic status Built-in speaker on -When monitoring is on ( → P.38) Recording source -EXT SRC is ON ( → P.137) is built-in mic -LOOP or GLOBAL is auditioning or recording... -
Page 198: Differences Between Monitoring And External Source (Ext Src) Sounds
Reference Differences between monitoring and external source (EXT SRC) sounds Sound is different as follows when input monitoring is enabled on the REC SRC Screen, when EXT SRC is set to INPUT, and when record- ing or auditioning loop and global tracks. Insert Reverb Level... -
Page 199: Specs
Data Format: WAV Recording Resampling, auto-slicing, time-stretching, pitch-changing functions *SmplTrek requires an SD card for sampling. Supported SD cards are SDHC cards up to 32 GB. (SDXC cards are not supported.) Recommended SD card:Samsung EVO Plus SDHC 32GB V10 U1 Full size... - Page 200 Specs STEREO LINE OUTPUTS (Max +6.5dBV) *The above jacks are all balanced 1/4" TRS Jack Connectors PHONES jack (stereo 3.5mm mini jack type) USB port (micro USB Type-B) [USB Audio] USB 2.0 Full Speed, 48kHz-16bit Input: 2 channels, Output: 2 channels [USB MIDI] [Mass Storage Class] USB2.0 High Speed Connectors...
- Page 201 SONICWARE will bear no responsibility for any errors depicted in this docu- ment. SONICWARE will bear no responsibility for any losses resulting from the use of this information, functions or per- formance, regardless of contracts, lack of caution or other conduct.
- Page 202 Do not do anything that could exceed the ratings of outlets and other electrical wiring equipment. Disconnect the AC adapter from the outlet when lightning occurs and when not using it for a long time. • Operation using batteries Use-commercially available 1.5V AA dry cell batteries. Carefully read the precautions of the batteries being used.
-
Page 203: Appendix
Appendix The functions on the following pages can be substituted with different operations that are more convenient, so they might be removed in future updates. Setting project parameters Press to open the PROJECT MENU Screen. Select SETTING > PROJECT PRM. ... -
Page 204: Copying Tracks Using The Project Menu
Appendix Copying tracks using the PROJECT MENU Press to open the PROJECT MENU Screen. Select SETTING > TRACK > COPY. to select the copy source and destination tracks, and press to execute. Copy Tracks Copy source Copy destination... -
Page 205: Clearing Tracks Using The Project Menu
Appendix Clearing tracks using the PROJECT MENU Press to open the PROJECT MENU Screen. Select SETTING > TRACK > CLEAR. Select tracks to clear, and press... -
Page 206: Changing How Many Times Scenes Repeat
Appendix Changing how many times scenes repeat Press to open the PROJECT MENU Screen. Select SETTING > SCENE > REPEAT. Adjust each item Scene Repeat Scene selection Number of repetitions... -
Page 207: Copying Scenes Using The Project Menu
Appendix Copying scenes using the PROJECT MENU Press to open the PROJECT MENU Screen. Select SETTING > SCENE > COPY, and press to select the copy source and destination scenes, and press to execute. Copy Scene Copy source scene selection Copy destination scene... -
Page 208: Clearing Scenes Using The Project Menu
Appendix Clearing scenes using the PROJECT MENU Press to open the PROJECT MENU Screen. Select SETTING > SCENE > CLEAR. Select the scene to be cleared, and press to clear it. • Be careful because cleared scenes cannot be restored. -
Page 209: Copying Scenes Using The Scene Menu
Appendix Copying scenes using the SCENE MENU Press for the scene to be copied to open its Scene Set- tings Screen. Press the right 2/2 button to open the second page. Turn to select the copy destination. Press COPY TO, and select YES. -
Page 210: Clearing Scenes Using The Scene Menu
Appendix Clearing scenes using the SCENE MENU Press for the scene to be cleared. Press the right 2/2 button to open the second page. Press CLEAR, and select YES. This clears the scene. -
Page 211: Copying Tracks Using The Track Menu
Appendix Copying tracks using the TRACK MENU Press for the track to be copied. Press the right button to open the next page, if COPY TO is not displayed. Turn COPY TO to set the copy destination. Press COPY TO, and select YES. -
Page 212: Clearing Tracks Using The Track Menu
Appendix Clearing tracks using the TRACK MENU Press for the track to be cleared. Press the right button to open the next page, if CLEAR THIS TRK is not displayed. Press CLEAR THIS TRK, and select YES. -
Page 213: Copying Clips Using The Clip Menu
Appendix Copying clips using the CLIP MENU Select the clip to copy, and press to open the Editing Screen. Press again to open the SETTING Screen, and select COPY THIS CLIP. Turn to set the copy destination. Press COPY TO, and select YES to copy.
Need help?
Do you have a question about the SmplTrek and is the answer not in the manual?
Questions and answers