Table of Contents
Advertisement
Quick Links
Advertisement
Table of Contents

Summary of Contents for MP Biomedicals MPQuant
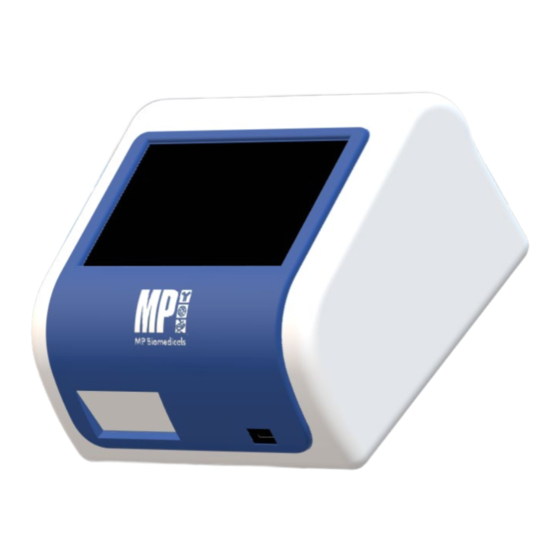
- Page 1 USER MANUAL Immunofluorescence Analyzer MPQuanti™ For the in-vitro quantitative detection of various biomarkers in human serum, plasma, and whole blood with specific diagnostic test kits. Cat. No. 07IMA001 Customer Service: diagnostics@mpbio.com www.mpbio.com...
-
Page 2: Table Of Contents
USER MANUAL: MPQuanti™ TABLE OF CONTENTS Introduction ............3 1.1 Intended Use . -
Page 3: Introduction
Immunofluorescence Analyzer MPQuanti™ offers the advantages of high accuracy, strong stability and fast results. The analyzer should only be used with in-vitro diagnostic tests manufactured by MP Biomedicals Germany GmbH as per package insert provided with specific test kits used. -
Page 4: Components And Parameters
USER MANUAL: MPQuanti™ COMPONENTS AND PARAMETERS 2.1 Standard Equipment List After unpacking, check whether components are missing or damaged according to the following packing list. Power Adapter Power Cord Analyzer MPQuanti™ GSM60A24-P1J Touch Pen User Manual Print Paper Roll QC Test Cassettes 57*30mm ATTENTION Check the components according to above list. -
Page 5: Transportation And Storage Conditions
Parameter Description Dimension 220 mm x 190 mm x 120 mm (L x W x H) Analyzer net weight 2 kg Screen size 7 inches Windows-Compatible proprietary program Memory 10,000 records Printer Built-in thermal printer Ports LAN x 1, USB x 2, COM x 1 2.3 Transportation and Storage Conditions 2.3.1 Packaging Packing cases should be reinforced with shockproof liners and moisture-proof... -
Page 6: Operating Conditions
USER MANUAL: MPQuanti™ 2.4 Operating Conditions Adapter input: 100 - 240 VAC, 50/60 Hz. Power: 60 W. Environment temperature: 10 °C ~ 30 °C. Relative humidity: ≤85%. Atmospheric pressure: 86 kPa ~ 106 kPa. PRINCIPLE AND STRUCTURE 3.1 Operating Principle This analyzer excites the reacted test cassette which is a based on europium microspheres marked fluorescence immunoassay with a UV LED light source, then collects, analyzes and calculates the signal from the test cassette, and gives the test... - Page 7 (A) Power Switch: Power on or off the analyzer. (B) Power Interface: Connect the power adapter, as shown in Fig. 3.2.3. (C) LAN Port: Connect network cables. (D) USB Port: To upgrade and export data with USB disk, or connect a scanner.
-
Page 8: Analyzer Installation
USER MANUAL: MPQuanti™ ANALYZER INSTALLATION 4.1 Environment MPQuanti™ should be used on flat indoor surfaces. Specific installation environment requirements are as follows: The table top is flat, the area is sufficient for the installation of the analyzer and has sufficient strength, and the surrounding environment is free from mechanical vibration. -
Page 9: Installation Precautions
connect the power cord to the power supply socket. There must be good grounding protection, and the grounding resistance should meet the relevant national standards. There should be independent and reliable ground cables in the room, and they should not share the same line with high-power electrical equipment. 4.3 Installation Precautions Please choose a suitable place according to the environment, power supply and space requirements. -
Page 10: Instructions For Use
USER MANUAL: MPQuanti™ INSTRUCTIONS FOR USE 5.1 Power On Turn on the power switch . The main interface is displayed after analyzer initialization (Fig. 5.1.1). Fig. 5.1.1 Start Screen NOTE The identifier of “- ” means ON, “O” means OFF. 5.2 QC Test Select the button on the main interface, to enter the quality control interface,... - Page 11 Touch the “QC Test” button to start quality control test, and the results are shown in Fig. 5.2.5. Fig. 5.2.4 Open History Fig. 5.2.5 Result QC Test View the quality control record Touch the “History” button on the main interface of quality control test to view the record, as shown in Fig.
-
Page 12: History
USER MANUAL: MPQuanti™ 5.3 History Touch the button to enter history interface where the test result stored. Search by Name: Enter the patient’s name in the search bar and touch the to search, all the test results of the patient can be queried, as shown in Fig. 5.3.1. Name query Fig. - Page 13 Search by Test Items: Enter the test item in the search bar and touch the button to search for all test results under the items, as shown in Fig. 5.3.3. Item query Fig. 5.3.3 Search by Test Item Search by Test Date: Select the calendar icon on the history interface to enter the calendar interface (as shown in Fig.
-
Page 14: Settings
USER MANUAL: MPQuanti™ 5.4 Settings Touch the setting button on the main screen “About”, “System Setting”, “Time setting”, “Factory Reset” can be operated in this interface, as shown in Fig. 5.4.1. Fig. 5.4.1 About About Enter the setting interface and select “About” button to view the software version number, as shown in Fig. - Page 15 Auto Print Select “On” or “Off” button to turn automatic printing on or off. On: Print the result automatically after a test finished. Off: Do not print the result after a test finished automatically. Fig. 5.4.4 Auto Print Brightness Select “+” button to increase screen brightness. Select “-”...
- Page 16 USER MANUAL: MPQuanti™ Fig. 5.4.8 USB is missing During the data export process, the button “Export Data to” turns gray (see Fig. 5.4.9). When the export is completed, the color of the button will be restored and a message indicating that the data export is successful will display, as shown in Fig. 5.4.10.
- Page 17 Fig. 5.4.12 Time Setting Set year, month, day, hour, minute, and second based on the current time zone. After setting, select “Set” button to save setting. Touch the “Clear” button will clear the settings and restore the current time. Factory Reset Select “Factory Reset”...
-
Page 18: Test
USER MANUAL: MPQuanti™ 5.5 Test Item Information Import Step 1 Insert the ID card (Fig. 5.5.1) into the ID Card Slot, as shown in Fig. 5.5.2. Fig. 5.5.1 ID Card Fig. 5.5.2 ID Card Slot Step 2 The ID card information import interface will be displayed , as shown in Fig. 5.5.3. - Page 19 Fig. 5.5.5 Editing Interface Step 2 Edit “Sample ID”; “ Name”; “Sex”; “ Age”; “Operator”. The sample ID can be entered manually or scanned with a scanner. Ages “Y”, “M” and “D” are units, such as 12M for a 12-month-old baby. Step 3 Touch “YES”...
- Page 20 USER MANUAL: MPQuanti™ Step 4 Confirm the Sample Type: On the pops up interface, select “Sample Type” and touch “YES”. NOTE When switching items, a window will pop up to confirm the sample type. Fig. 5.5.7 Confirm Sample Type Step 5 Display Results: Wait a few seconds, the test result will be displayed, as shown in Fig.
- Page 21 Fig. 5.5.9 Item Information Frame Step 4 Confirm the Sample Type: On the pop up interface, select “Sample Type” and touch “YES” and a countdown will appear, as shown in Fig. 5.5.10 and Fig. 5.5.11. Fig. 5.5.10 Confirm Sample Type Fig.
- Page 22 USER MANUAL: MPQuanti™ interrupted, the test cassette slot will pop up. If you select the “Cancel” button, the test will continue. Fig. 5.5.12 Discard Step 5 Result Display: After the countdown, the test result will be displayed, as shown in Fig. 5.5.8. At the same time, the test cassette slot will pop up to realease the test cassette.
- Page 23 NOTE When the memory exceeds 8,000, the system will prompt “Test records exceed 80%” (as shown in Fig. 5.5.15); when the memory is full of 10,000, the system will prompt “Data storage is full” (as shown in Fig. 5.5.16). Fig. 5.5.15 Data Storage 80% Full Fig.
-
Page 24: Maintaining
USER MANUAL: MPQuanti™ MAINTAINING 6.1 Attention Analyzer and other components must be inspected regularly by manager. Ensure that the power socket is reliably grounded. If not, replace the power socket. Visually check whether the power cord is deformed, or broken. If yes, it may cause fire due to electric leakage. -
Page 25: Precautions And Identification
Use test kits manufactured by MP Biomedicals and supplied by authorized distributors of MP Biomedicals only. Do not use the assay test from other manufacturer, it may lead inaccurate test result. The customer must prepare for the installation according to the instructions. -
Page 26: Identification
USER MANUAL: MPQuanti™ Always wear approved protective equipment when operating or maintaining the system. Protective equipment must include (but not limited to) approved protective gloves, waterproof lab coat, protective masks, and goggles. If biohazardous material spills onto the analyzer, it should be cleaned immediately, washed with residual material, and disinfected with disinfectant. -
Page 27: Trouble Shooting, Service And Disposal
Description of security warning symbols Caution: Indicates a danger that may cause infection. Biohazard, contact test samples, calibration products, quality control products should wear gloves, otherwise it may lead to infection. Beware of electric shock: Do not touch the internal power supply, circuit board and wire of the analyzer when it is powered on. -
Page 28: Service And Disposal
The analyzer that confirmed to maintain the essential safety and effectiveness after maintaining and repair, can be used normally. MP Biomedicals declares that the above service guarantee can only be obtained under the condition of complete... -
Page 29: Explanation Of Symbols
Otherwise, MP Biomedicals will not take any responsible. This product is required to comply with the European Unions’ Waste Electrical & Electronic Equipment (WEEE) Directive. If you wish to discard electrical and electronic equipment (EEE), please contact your dealer or supplier for further information. -
Page 30: Appendix
During the stated one (1) year period, MP Biomedicals will replace with reconditioned comparable unit or, at MP Biomedicals option, repair a unit that is found to be defective. This warranty includes parts and labor at MP Biomedicals’ facilities. It does not apply to the other materials included with the analyzer. -
Page 31: Warranty Card
Disclaimer of Warranties Information in this document is subject to change without notice. MP Biomedicals Germany GmbH makes no warranty of any kind with regards to this material, including, but not limited to, the implied warranties or merchantability and fitness for a particular purpose. - Page 32 Need more information for your MPQuanti™? Visit our website! MP BIOMEDICALS www.mpbio.com EUROPE: +49 5651.921.186 diagnostics@mpbio.com AMERICAS: 800.854.0530 custserv.na@mpbio.com APAC: +65 6775.0008 custserv.ap@mpbio.com...
Need help?
Do you have a question about the MPQuant and is the answer not in the manual?
Questions and answers