Advertisement
Available languages
Available languages
Owner's
Manual
CRAFTSMAN°
6.75 Horsepower
Power-Propelled
21" Multi-Cut
Model No.
917.378920
Espa5o[, p. 19
CAUTION:
Read and follow a[[
Safety Rules and Instructions
before operating this equipment
Sears, Roebuck and Co., Hoffman Estates, IL 60179
Visit our Craftsman website: www.sears.com/craftsman
U.S.A.
Advertisement
Table of Contents

Related Manuals for Craftsman 917.37892


Summary of Contents for Craftsman 917.37892
- Page 1 Manual CRAFTSMAN° 6.75 Horsepower Power-Propelled 21" Multi-Cut Model No. 917.378920 Espa5o[, p. 19 CAUTION: Read and follow a[[ Safety Rules and Instructions before operating this equipment Sears, Roebuck and Co., Hoffman Estates, IL 60179 Visit our Craftsman website: www.sears.com/craftsman U.S.A.
- Page 2 For two years from date of purchase, lubricated, and tuned up according owner's manual, Sears will repair free of charge If this Craftsman Lawn Mower applies for only 90 days from the date of purchase. This Warranty does not cover: Expendable items which...
-
Page 3: Slope Operation
L GENERAL OPERATION * Read, understand, and follow all instructions on the machine manual(s) before starting. Be thoroughly familiar with the controls and the proper use of the machine before starting. Do not put hands or feet near or under rotating parts. - Page 4 1.6 Quarts (Unleaded Regular) SAE 30 (above 32°F); SAE 5W-30 20 Ounces Champion RJ19HX 35-40 ft. Ibs. will be found on a decal on the rear of the lawn mower number and date of purchase (below 32°F) in space provided above.
-
Page 5: Lawn Mower Maintenance
Repair Congratulations on making a smart chase. Your new Craftsman® designed and manufactured for years dependable operation. But like all prod- ucts, it may require repair from time to time. That's when having a Repair tion Agreement can save you money aggravation. -
Page 6: How To Set Up Your Lawn Mower
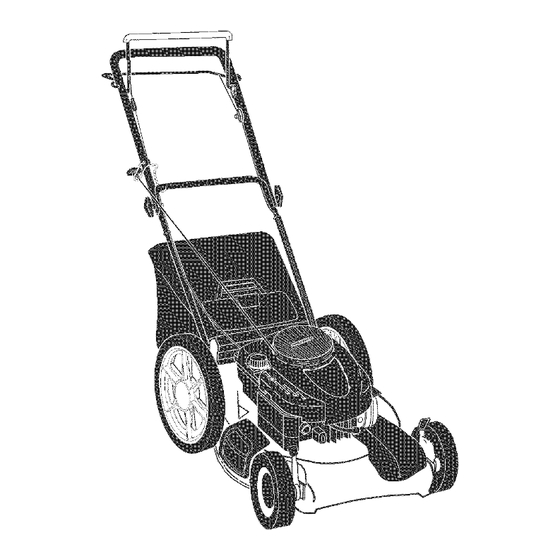
Catcher frame handle cables. sec- position. raise up- knobs. TO mNSTALL ATTACHMENTS bar to upper Your lawn mower was shipped used as a mubher. bagging or discharging, and Adjust- VERT MOWER" of this manual. Mowing position Lower handle GRASS... - Page 7 LAWN MOWER READ THIS OWNER'S MANUAL AND ALL SAFETY RULES BEFORE OPERATING YOUR LAWN MOWER. Compare the illustrations with your lawn mower to familiarize yourself with the location of various controls and adjustments. future reference. These symbols may appear on your lawn mower or in literature product.
- Page 8 We recom- mend a standard safety glasses vision safety mask worn over spectacles. HOW TO USE YOUR LAWN MOWER ENGmNESPEED The engine speed was set at the factory for optimum performance. Speed adjustable. ENGmNE ZONE CONTROL...
- Page 9 Your lawn mower was shipped used as a mubher. To convert or discharging: REAR BAGGING ', Lift rear door of the lawn mower place the grass catcher frame onto the door pivot pins. ,, To convert to mulching or discharging...
- Page 10 TO EMPTY GRASS CATCHER Lift up on grass catcher using the frame handle. Remove grass catcher with clippings from under lawn mower handle. Empty clippings from bag using frame handle and bag handle. NOTE: Do not drag the bag when...
- Page 11 For best results, attempt- cutting height so that the lawn mower priming cuts off only the top one-third grass blades. will be necessary cut to reduce from overloading...
-
Page 12: Maintenance Schedule
Use a scraper to clean under deck 5 - And after each 5 hours of use. GENERAL RECOMMENDATIONS The warranty on this lawn mower does not cover items that have been subjected operator abuse or negligence. full value from the warranty,... - Page 13 TO REMOVE BLADE Disconnect spark plug wire from spark plug and place wire where come in contact with plug. Turn lawn mower on its side. Make sure air filter and carburetor Use a wood block between mower housing to prevent...
-
Page 14: Spark Plug
Tighten securely each time you check TO CHANGE ENGINE NOTE: Before tipping lawn mower to drain oil, empty fuel tank by running fuel tank is empty. Disconnect spark plug wire from spark plug and place wire where come in contact with plug. -
Page 15: Lawn Mower
Disconnect spark plug wire from spark plug and place wire where cannot come in contact with plug. Clean the underside of your lawn mower by scraping to remove build-up and trash. Clean engine often to keep trash from accumulating. A clogged... - Page 16 Replace if necessary. Touch up all rusted or chipped surfaces; sand lightly before HANDLE You can fold your lawn mower storage. NOTE: The upper handle has an "anti-fold" bracket located on the right side of the handle. This bracket...
- Page 17 Plastic cannot Never cover mower while areas are still warm. Never store the lawn mower a building to cool before directed air filter. clean gasoline. clean gasoline. wire to plug.
-
Page 18: Troubleshooting
Contact crankshaft. qualified Depress upper handle pulling the starter Contact crankshaft. qualified broken. Replace Move lawn mower to cut in grass. grass or to hard surface. height too low. Raise cutting Replace not venting air. Clean Raise cutting is too low. - Page 19 GARANTiA LIMITADA DE DOS ANOS PARA LA SEGADORA A MOTOR CRAFTSMAN Por dos (2) afios, a partir de la fecha de compra, cuando esta Segadora Craftsman se mantenga, lubrique y afine segun las instrucciones duefio, Sears reparara" gratis todo defecto en el material y la mano de obra.
- Page 20 L OPERACION ° Antes de empezar, debe famHiarizarse compbtamente con bs controbs correcto de Uamaquina. Para esto, debe her y comprender todas Uasinstrucciones aparecen en Uamaquina yen Uosmanuabs de operaci6n. No ponga Uasmanos o bs pies cerca o debajo de Uaspartes rotatorias. Mantengase sbmpre bjos de Uaabertura de Uadescarga.
- Page 21 o Nunca repostar la maquina al interior de un local. Nunca guardar la maquina o el contenedor de gasolina donde hay una llama abierta, chispa o luz piloto como una caldera u otros dispositivo& Nunca llenar contenedores en un vehiculo, en un cami6n o caravana con un forro de plastico.
-
Page 22: Mantenimiento
Acuerdos Congratulaciones per su buena compra. nuevo producto Craftsman® est,. disefiado y fabricado para funcionar de mode fiabUe per muchos aSos. Pete come todos Uosproductos, puede necesitar aUguna reparaci6n de tanto en tanto. En este case tenet un Acuerdo de Protecci6n para UaReparaci6n puede hacerUes ahorrar dinero y fastidios. - Page 23 Lea estas instrucciones y este manuaH compHeo tamente antes de tratar de montar u operar su segadora nueva. iiVlPORTANTE: Este cortac6sped viene SiN ACEHTE O GASOLHNA en el motor. Su segadora nueva ha sido montada en Ha fabrica con Haexcepci6n de aquellas partes que se dejaron sin montar por razones de envio.
- Page 24 FAMmUARICESE CON SU SEGADORA LEA ESTE MANUAL DEL DUENOY SEGADORA. Compare las ilustraciones con su segadora para familiarizarse los diversos controles y ajustes. Guarde este manual para referencia en el futuro. Estos s_mbolos pueden apareser producto. Aprenda y comprenda ATTENCION MOTOR MOTOR ADVERTENCIA...
- Page 25 Laoperaci6n d ecuaUqwer segadora puedehacerque saUten objetos extrafios dentro de susojos,[oquepuedeproducir dafiosgraves en6stos. S iempre useanteojos deseguridad o protecci6n para [osojosmientras o peresusegadora o cuando hagaajustes o reparaciones. Recomendamos galaso unamascara deseguridad devisi6n ampHa d eseguridad usada sobre[asgafas. COMO USAR SU SEGADORA VELOCmDAD DELMOTOR LaveUocidad de[motor se estaMec[6...
- Page 26 PARA CONVERTmR LA SEGADORA Su segadora fue enviada Uistapara usarse como acoUchadora de capa vegetal convertMa a una operaci6n de ensacado o de descarga: SEGADORAS CON DESCARGA TRASERA o Levantar Uapuerta trasera de cortac6sped y coUocar Uosganchos deUarmaz6n de Ua recoUectora de hierba en Uospasadores deU quicio de Uapuerta.
- Page 27 Mango de la bolsa ANTES DE HACER ARRANCAR MOTOR AGREGUE ACEtaTE Su segadora fue enviada sin aceite en eHmotor. Para eHtipo yeH grado dell aceite a utHizar, yea eH"MOTOR" en Hasecci6n dell Mantenimiento de este manual _PRECAUCl6N: NO sobrellene el motor con aceite, o fumar_, pesa demante del silenciador cuando Io valla a arrancar.
-
Page 28: Para Parar El Motor
PARA PARAR EL MOTOR o Para parar ei motor, sueite Habarra de con= troles que exigen Hapresencia dell operador. PARA HACER ARRANCAR EL MOTOR AVISO: Debido a Hascapas protectoras dell mo- tor, una cantidad pequeSa de humo puede eso tar presente durante ei uso iniciai dell producto y se debe considerar normal Para hacer arrancar un motor frio, empuje ei cebador tres (3) veces antes de tratario. -
Page 29: Antes De Cada Uso
PROGRAMA MANTENIMIENTO Revisar si hay Sujetadores Sueltos Limpiar/Inspeccionar el Recogedor de C6sped * Controlar los Neumaticos Controlar las Ruedas Motrices *** Limpiar la Segadora Limpiar debajo la Cubierta de la Transmisi6n Revisar las Correas y las Poleas Impulsadas Revisar / Afilar / Cambiar la Cuchilla Lubricaci6n Limpiar / Recargar... - Page 30 SEGADORA Siempre observe UasregUas de seguridad cuo ando haga eUmantenimiento. LLANTAS o Mantenga UasHantas sin gasoHna, aceite o substancias quimicas para controU de inseco tos que pueden da_ar Uagoma. o Evite Uostocones, Uaspiedras, Uasgrietas pro° fundas, Uosobjetos afHados y otros peHgros que pueden dafiar a UasHantas.
- Page 31 CAJADEENGRANAJES Para mantener eU sistema funcionando en forma adecuada, engranajes y eUArea aUrededor de UaimpuUsi6n tienen que mantenerse Hmpias y sin acumuo Uaci6n de basura. Limpie debajo de Uacubierta de UaimpuUsi6n dos veces por temporada. La caja de engranajes se Hena con Uubricante hasta eUniveUadecuado en UafAbrica.
- Page 32 UMPIEZA IMPORTANTE: Para obtener eUmejor rendimineto, mantenga Uacaja de Uasegadora sin acumuUacion de cesped y basura. Limpb Uaparte de abajo de su segadora despues de cada uso. Ai_PREOAUOI6N: Desconecte eUaUambre de Uabujia y p6ngab en donde no pueda entrar en contacto con 6sta.
- Page 33 '\.J Mango GIRAR I_IOTOR VELOCmDAD DEL MOTOR La veUocidad deUmotor ha sido ajustada en la fabrica. No trate de aumentar la velocidad del motor pues se pueden producir lesiones personales. Si cree que el motor esta funcio° Inmediatamente prepare su segadora para el almacenamiento al final de cada temporada o si la unidad no se va a usar pot 30 dias o mas.
- Page 34 MOTOR SISTEMA DE COMBUSTIBLE IMPORTANTE: Es importante evitar que se formen depositos de coma en partes fundamentaUes deUsistemade combustibUe taUes como eUcarburador, eUfHtro deUcombustiMe, Uamangura deUcombustiMe o en eUestanque durante eUaUmacenamiento. Los combustibUes mezdados con aUcohoU (conocido come gasohoU o que tienen etanoU o metanoU) Pueden atraer humedad, Uoque conduce a Ua separacion y a Uaformaci6n de acidos durante eUaUmacenamiento.
- Page 35 SOLUCI6N DE PROBLEiViAS oVea est_ dirigido a un centro de servico PROBLEIV1A CAUSA Faita de CucMHa desgastada, doMada fuerza o sueUta. AUtura de Uasruedas dispareja. Vebcidad deUmotor bnta. AcumuUaci6n de c6sped, hojas o basura debajo de Uasegadora. Demasiado aceite en motor. Vebcidad de recorrido demasiado ra"...
- Page 36 CRAFTSMAN ROTARY LAWN MOWER o - MODEL NUMBER 917.378920...
- Page 37 175053X004 Selector Spring 73800500 Nut, Hex 5/16-18 ROTARY LAWN MOWER ° - MODEL (See Breakdown) Available accessories not included with lawn mower: NOTE: All component dimensions given in U.S. inches. NUMBER 917.378920 PART DESCRmPTION 180412X004 Axle Arm Assembly, LR 150635X428...
- Page 38 CRAFTSMAN ROTARY LAWN MOWER - - MODEL NUMBER 917.378920 © ',1 J...
- Page 39 CRAFTSMAN PART DESCRIPTION 189182 Vad-Speed Drive Control Assembly 169911 Bearing, Wheel Adjuster 175262 Pan Head Tapping Screw #10-24 x 2-3/4 185681 Screw 169778 V-Belt 188975 Bar, Control, Drive 751152 Nut, Hex 77400 Hubcap 145212 Locknut 188292 Pinion Assembly, LH 180773 Wheel &Tire Assembly...
- Page 40 BRJGG$ & $TRATTON 4=CYCLE ENGINE MODEL NUMBER 125K02-0303-E1 8471 1019 LABEL KIT I 383_ 718_ 146_ _...
- Page 41 BRJGG$ & $TRATTON 4=CYCLE 358 ENGINE GASKET 20 _ 842_ 524_ 617_ 977 CARBURETOR GASKET SET 7_633 276_ 121 CARBURETOR OVERHAUL [_._ 633 @ lO4_ 276_ 127 _ ENGINE MODEL NUMBER 125K02-0303-E1 443_ 127_ 130 95 276_...
- Page 42 BRmGGS & STRATTON 4=CYCLE 969 1 DESCRIPTION 697322 Cylinder Assembly 399269 Kit-Bushing/Seal 299819 • SeaI-Oil (Magneto Side) 493279 Sump-Engine 691160 Head-Cylinder 692249 Gasket-Cylinder Head 695250 Breather Assembly Gasket-Breather 699472 691125 Screw (Breather Assembly) Tt.ibe-Breather 691781 Gasket-Crankcase 692232 690912 Screw (Cylinder Head) ENGmNE MODEL NUMBER 125K02-0303-E1 1036 EMISSIONS...
- Page 43 BRmGGS & STRATTON 4+CYCLE PART DESCRmPTmON 499424 Rod-Connecting 691664 Screw (Connecting Rod) 695759 Screw (Connecting Rod) 262651 Valve-Exhaust 262652 Valveqntake 691270 Spring-Valve dntake) 691270 Spring-Valve (Exhaust) 694086 Guard-Flywheel 692194 Retainer-Valve 691997 Slinger-Governor/Oil 690548 Tappet-Valve 691449 Camshaft 498829 Short Block 497465 Manifoldqntake 272199 + Gasketqntake...
- Page 44 For repair - in your home - of all major brand appliances, lawn and garden equipment, no matter who made it, no matter For the replacement owner's manuals that you need to do-it-yourself. For Sears professional and items like garage door openers and water heaters. 1-800-4-MY-HOME (1-800-469-4663) www.sears.com...
Need help?
Do you have a question about the 917.37892 and is the answer not in the manual?
Questions and answers