
Related Manuals for SEP RSD


Summary of Contents for SEP RSD
- Page 1 NEP RSD System Installation Quick Guide “Quick Guide” to assist installer during installation. Prerequisites include; NEP site design review, Formal online training Rev. 8/9/23...
- Page 2 4. Mount Gateway Hardware 12. Build New NEPViewer Site 5. Connect Homeruns 13. Commissioning and Mapping 6. Test String Voltages 7. Turn System On 8. Test System Voltages/RSD On/Off Welcome to NEP! If any questions, call NEP Hotline for Technical Support: 888-598-9901...
- Page 3 northernep.com Part 1 | Hardware...
- Page 4 northernep.com 1: Mount PVG Option 1: Frame Mount ● Carefully remove PVG from packaging. DO NOT pull on MC4 head leeds by hand, carefully cut the zip ties without damaging wiring ● Attach module frame mount to PVG Mounting Bracket ●...
- Page 5 northernep.com 1: Mount PVG Option 2: Rack Mount ● Mount PVG to rail using standard rail mounting hardware available from the racking supplier...
- Page 6 northernep.com 2: Collect and Build S/N Sticker Map ● It is crucial to peel off the barcode from each PVG unit. Creat a sticker map showing location and orientation of each module. ● This practice ensures accurate mapping of the system during the commissioning step. Serial number stickers for each PVG unit...
- Page 7 northernep.com 3: Connect PVG to Modules ● PVGs must be connected to PV modules before connecting homeruns ● When there is an odd number of modules in a string, there must be a module connected to “PV-1” and any other inputs must be shorted to itself as shown below left.
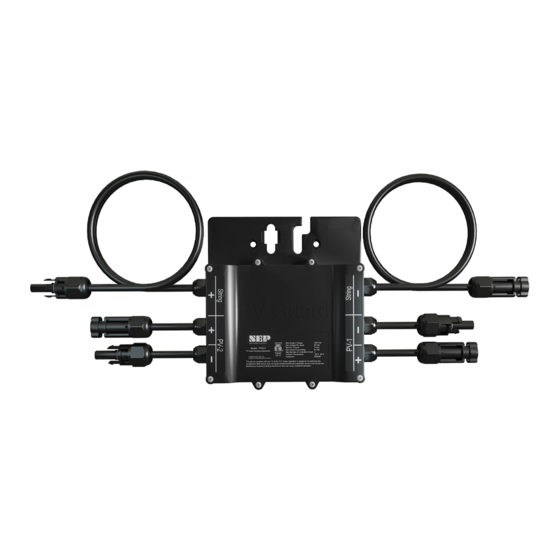
- Page 8 northernep.com 4: Mount Gateway and Extra Hardware Option 1: PVG-O ● Enclosure must be mounted within 10' of the string inverter, and each string inverter must have its own dedicated PVG-M/O. ● Consider input voltage range (208Vac to 277Vac) when mounting PVG-M/O on the roof or ground.
- Page 9 northernep.com 4: Mount Gateway and Extra Hardware Option 1: PVG-O...
- Page 10 northernep.com 4: Mount Gateway and Extra Hardware Option 2: PVG-M PVG-M Diagram with Cellular Option (if not wifi, or Ethernet) Optional transformer (if only 480Vac source to Drop to 277Vac for Gateway)
- Page 11 northernep.com 4: Mount Gateway and Extra Hardware Option 2: PVG-M...
- Page 12 5: Connect Home Runs ● RSD’s must be connected to PV modules before connecting home runs to avoid damage ● Ensure that the positive and negative conductors of homeruns belonging to the same PV string are kept in close proximity, ideally within a twisted pair configuration in cable tray ●...
- Page 13 northernep.com 6: Test String Voltages ● Plug string to test into String + and - ● Push and turn button counter-clockwise ● Test Voltage across Test Port + and - ● Turn on PVG-T with red rocker switch ● Voltage should not change ●...
-
Page 14: Turn On System
After all strings of the site have been tested inverters may be turned on. ● String current should be checked to confirm correct operation after commissioning. ● RSD’s must be “ON” in order to test string voltages, and the correct operation of the inverters. - Page 15 7: Test voltages/RSD on/off For entire system ● Test each string one by one at the inverter. This may be done while the RSD’s are connected. ● Since PVG’s are not activated, string voltage should be: (Voc of PV module * # of panels in the string) ●...
- Page 16 Part 2 | Gateway, Data, and Connectivity Screenshot “NEPViewer” Module and RSD Functioning...
-
Page 17: Connect To Internet
northernep.com 8: Connect to Internet Plug in Booster near router, and connect an ethernet cable between them. Connect an ethernet cable between your router and the bottom of the BDG-256 Optional cellular is pre- configured out of the box. -
Page 18: Scanning Barcodes
northernep.com 9: Scanning Barcodes ● To use the scanner, plug it into the gateway's USB port and ● navigate to the COM ID screen in the setting menu. ● Scan the barcode of the desired module into the Inverter1 cell, and repeat until all serial numbers have been input. -
Page 19: Create Account
northernep.com 10: Create Account ● If you are new to using NEP products, please visit our registration page at https://user.nepviewer.com/pv_manager/re gister.php?lang=en to create an account for yourself or your company. ● Once you have registered, please contact NEP Support via email at support@northernep.com or by calling (888) 598-9901 to have your account upgraded to an installer account. - Page 20 northernep.com 11: Build New NEPViewer Site ● Access your installer account on the NEP website using your registered email and log in to your account. ● Click on the "Add Site" button to create a new site. ● Fill out all the necessary fields in the site creator, including the serial number of the gateway, which can be found on the top-left of the...
- Page 21 northernep.com 11: Build New NEPViewer Site ● Provide a name for the site and enter its accurate coordinates to receive precise weather data on the following page ● If multiple sites with the same company, it is recommended to name them “CompanyName_xxx”...
- Page 22 northernep.com 12: Commissioning and Mapping ● Click on the site to access its information and then click on "Open Viewer." The site's production data should now be visible on the first page. Data population may take up to a few hour for the gateway and inverters to fully register with the website.
- Page 23 northernep.com 12: Commissioning and Mapping ● Verify all modules are reporting and operating normally ● You can customize and map the site layout by navigating to Layout > Manage Layout. ● From here, you can drag modules as needed and change their orientation.
- Page 24 12. Build New NEPViewer Site 5. Connect Homeruns 13. Commissioning and Mapping 6. Test String Voltages 7. Turn System On 8. Test System Voltages/RSD On/Off Congratulations! Your RSD implementation should be ready If any questions, call NEP Hotline for Technical Support: 888-598-9901 Rev. 8/9/23...
Need help?
Do you have a question about the RSD and is the answer not in the manual?
Questions and answers