
Related Manuals for Rinnai HydraHeat RHPN361A275E20


Summary of Contents for Rinnai HydraHeat RHPN361A275E20
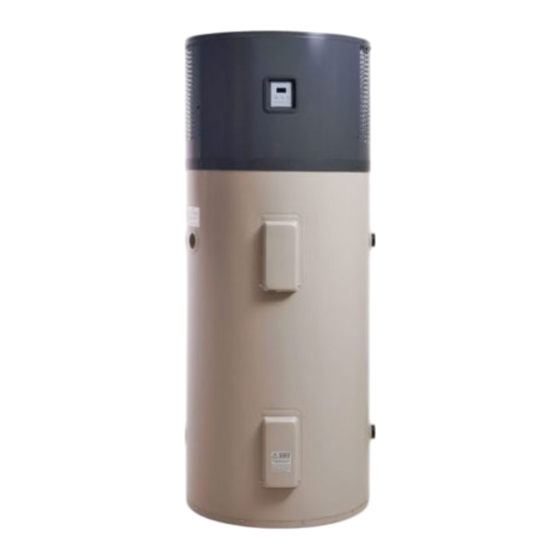
- Page 1 ME275685E20H RHPN361H RHPN361A275E20 HydraHeat™ Hot Water Heat Pump Installation guide...
- Page 2 For more information about buying, using, and servicing of Rinnai appliances call: 0800 RINNAI (0800 746 624). Rinnai New Zealand Limited...
-
Page 3: Table Of Contents
Contents Important information..........4 Before you start ............5 Specification ............6 Dimensions (mm) ..........7 Data labels............8 Schematic .............9 Location ..............10 Clearances ............12 Connections and plumbing arrangement .....13 Storage and delivery temperatures ......16 Water quality ............17 Electrical supply and connections ......19 Wiring diagram header unit ........20 Wiring diagram cylinder ........21 Connecting the header and cylinder .....22 Commissioning .............25... -
Page 4: Important Information
Important information WARNING Installation and service to be carried out by a licensed tradesperson. DO NOT operate this system before reading the operation and installation information. DO NOT place articles on or against this appliance. DO NOT store chemicals or flammable materials near this appliance. DO NOT operate with panels or covers removed from this appliance. -
Page 5: Before You Start
Electrical supply Rinnai does not endorse the use of power supplies that supply clipped waveform AC power to the appliance and will not warrant any product connected to such a supply. Similarly if an appliance is supplied with an over-voltage / overcurrent supply, this is also not warrantable. -
Page 6: Specification
Specification Product description Designed and made in New Zealand, the Rinnai HydraHeat is designed primarily for outdoor installations. It may be possible to install the HydraHeat internally if the proposed location is not an occupied space as defined by AS/NZS 5149, refer p.10 for more information. -
Page 7: Dimensions (Mm)
Dimensions (mm) Condensate connection Inlet/outlet ports Inlet/outlet ports HydraHeat cylinder has dual plumbing connections. Hot, cold, and drainage connections all ¾ “ (20 mm) Outlet port TPR port Outlet port Inlet port Inlet port Hot water recovery rate = 89 L/h Recovery rate calculated at Eco 55, 19 °C ambient temperature, 41 °C temperature rise. -
Page 8: Data Labels
TPR valve pressure rating (kPa) TPR valve rating (kW) Maximum thermostat setting (°C) Vitreous enamel class Ingress protection rating IPX4 Made in China for, and to the specification of Rinnai NZ Ltd Rinnai Hot Water Heat Pump Model RHPN361H Refrigerant R290 Refrigerant operating pressure 2.5 MPa maximum... -
Page 9: Schematic
Schematic • Two piece design, MEPS rated, dual handed outdoor hot water cylinder, corrosion proof plastic heat pump base • Flexible hose connection tank-top module plus single mains rated connector (reduced connections for the installer) • All weather OLED (organic light emitting diode) display, capacitive (uses conductive touch of a human finger) Evaporator Main PCB... -
Page 10: Location
Location As the heat pump contains flammable refrigerant, ensure the installation location complies with the requirements of AS/NZS 5149. DO NOT install the unit in a location that may be WARNING exposed to combustible gas leaks. If combustible gas accumulates around the unit, it may cause a fire. - Page 11 Noise Ensure that the installation location complies with local noise regulations regarding neighbouring properties. The location must consider noise impact on living areas. Avoid positioning near bedrooms or neighbours bedrooms. Although the running noise level is low it can be expected that the heat pump will run during the night. The timer function can be used to limit operating hours if noise is a concern.
-
Page 12: Clearances
Clearances (mm) 400 Min 10 Min 400 Min 2250 Min 500 Min 400 Min 400 Min 12 | HydraHeat installation guide: 31114-B... -
Page 13: Connections And Plumbing Arrangement
Connections and plumbing arrangement The cylinder component of the system must be installed in accordance with G12/AS1, and AS/NZS 3500.4:2018. For service and maintenance, please allow sufficient room for access to covers and valves. All hot water pipe work should be insulated with polythene foam or equivalent insulation to optimise performance and energy efficiency. - Page 14 TPR valve (850 kPa, 99 °C, 10 kW) The supplied TPR valve must be installed to ensure safe operation. Failure to do so can potentially cause injury and damage the unit. The TPR valve should be connected to a vertical discharge pipe that enables water to flow downwards at all times.
- Page 15 55 °C* to sanitary fixtures for personal hygiene, shower, bath, basin, bidet * 50 °C to new sanitary fixture installations from Nov 2024 Cold to building Cold inlet To drain Union Expansion control valve 700 kPa Temperature & pressure relief valve 850 kPa Shut-off valve Pressure reducing valve 500 kPa Tempering valve...
-
Page 16: Storage And Delivery Temperatures
Storage and delivery temperatures Storage temperature To meet the New Zealand Building Code requirement to disinfect water for legionella bacteria, the system has been set to ‘Standard’ mode, continually heating the water, using the heat pump, to 60 °C. If the system operates as a normal electric tank (in element only mode), the factory thermostat preset temperature is 70 °C, with a range of 65-75 °C. -
Page 17: Water Quality
Water quality Water chemistry has a direct impact on hot water heaters, affecting corrosion protection measures, or causing scale buildup. Water quality MUST: 1. Meet the Water Services (Drinking Water Standards for New Zealand) Regulations 2022, or the relevant Drinking Water Standard at the time; AND 2. -
Page 18: Electrical Supply And Connections
Electrical supply and connections The electrical connection must be carried out by a qualified person in accordance with the latest version of AS/NZS 3000 Wiring Rules. It MUST have the supply terminals connected to an independent, fused AC 230 V 50 Hz power supply with an isolating switch installed at the switch board, which shall effectively isolate all active supply conductors from the circuit. - Page 19 This page intentionally blank...
-
Page 20: Wiring Diagram Header Unit
Temperature Discharge Condensor Temperature Suction Condensor Temperature Condensor PUMP Water Pump Fan Motor Reversing Valve Electronic Expansion Valve Pressure Transducer Digital Input Compressor Rinnai BLUE BLUE REVERSING VALVE (C) W PR 1 (R) U COMPRESSOR (S) V MARK DESCRIPTION Black... -
Page 21: Wiring Diagram Cylinder
Wiring diagram cylinder Mark Descrip�on Electric Element 2kW max Earth Tag Outer Jacket Earth Tag Inner Tank Tank High Voltage Power Tank Low Voltage Control Thermostat 240 VAC 30A G W R Tank Thermistor Lower Tank Thermistor Upper Black Blue Green Green/yellow White p/n 31100-55 Issue B... -
Page 22: Connecting The Header And Cylinder
Connecting the header and cylinder As the system is supplied as two separate components there will be a requirement to connect the header heat pump unit to the cylinder. This is a simple process but will initially require two people to lift the header onto the tank. - Page 23 Header front panel removed to expose hand Cylinder connector housing flap down and flap holds and connector housing. open. Leave closed until head unit is fitted. Heat pump hoses and electrical connections Cylinder supplied as a stand alone component, ready for connection to cylinder. but ready for connection to the heat pump.
- Page 24 • Fix head to cylinder using the four supplied self drilling screws (9316). • Use a Phillips driver in a battery drill. • DO NOT OVERTIGHTEN. 24 | HydraHeat installation guide: 31114-B...
-
Page 25: Commissioning
Commissioning Commissioning, filling and draining must only be carried out by an authorised person. Make sure the cylinder is full of water before energising the system. Failing to do this can cause irreparable damage to the element and sensors. Filling the system 1. - Page 26 Hot water return (left hand hose) is warm, do this by lightly touching the hose • Display is operating with no fault conditions If the system cannot be made to perform correctly please contact Rinnai. NOTE Customer handover Explain to the customer about the use, care, service and maintenance of the system, and ensure they understand the instructions.
-
Page 27: Error Codes
15 seconds. The most common installation errors are electrical connection faults, T1, S8, and S9 faults, for which rectification actions are detailed below. If other error codes are detected contact Rinnai for advice and additional troubleshooting actions. Fault... - Page 28 For the below error codes, contact Rinnai for advice and additional troubleshooting actions. Fault Even / fault description Possible cause Action code No active fault Contact Rinnai Real time clock fault, not reading Flat battery and power Call an electrician or Rinnai service to replace correctly the battery (not a user serviceable part).
-
Page 29: Manual Purging Procedure
Manual purging procedure Required where a T1 fault has occurred on startup due to an airlock in the system. 1. Remove the top cylinder cover to expose the hoses and cylinder flange. 2. Turn off the isolation valve to the hot water cylinder, and relieve the pressure via the TPR. Unscrew the hot water flexible hose—the one with the straight end as shown below. -
Page 30: Appendix: Commercial Plumbing Arrangements
Appendix: Commercial plumbing arrangements HydraHeat ringmain 55 ºC* to sanitary fixtures for personal hygiene: shower, bath, basin, bidet Point of use tempering valve Optional 60 ºC supply to kitchen / laundry Cold to building Small Electric Storage Cylinder Set 60°C Circulating pump such as: Grundfos UP2560N Power from a timer... - Page 32 Rinnai.co.nz Tel: 0800 746 624 http://www.youtube.com/rinnainz http://facebook.com.rinnainz Rinnai HydraHeat installation guide 31114-B (02-23)
Need help?
Do you have a question about the HydraHeat RHPN361A275E20 and is the answer not in the manual?
Questions and answers