
Summary of Contents for Audemo SYSTEMS Dante DPM-2500A
- Page 1 USER MANUAL DPM-2500A Digital-Audio-Matrix ©2023 by AUDEMO-SYSTEMS®, Schatzbogen 62, 81829 München V3...
-
Page 2: Table Of Contents
CONTENTS 1. General ------------------------------------------------------------------------------------------- 3 2. Safety Instructions ------------------------------------------------------------------------------- 4 3. Technical Features ------------------------------------------------------------------------------- 6 4. Operational Controls ----------------------------------------------------------------------------- 7 5. Programming DPM 2500x (digital paging module) -------------------------------------- 9 6. Setting up speaker lines (Speaker Line) --------------------------------------------------- 10 6.1) DMS-2021A ------------------------------------------------------------------------------- 10 6.2) DMS-2061A ------------------------------------------------------------------------------- 11 6.3) DMS-2068A ------------------------------------------------------------------------------- 12 6.4) DAA-235XX -------------------------------------------------------------------------------- 13... -
Page 3: General
1. General This operation manual includes important notes on safe operation of the unit. Please read all instructions and safety regulations. Keep these instructions for future reference. Take care that the operation manual is available to all users. Our products are subject to continuous development. Therefore, any technical modification subject to change without notice. -
Page 4: Safety Instructions
Do not use this unit near water or moisture. Take care that no liquid penetrates into the unit. 11. The installation must be carried out only with accessories recommended by AUDEMO SYSTEMS®. All options could only be assembled ex works in terms of warranty. - Page 5 DANGER! Risk of electric shock of dangerous voltage within the units enclosure Within the units enclosure there are uninsulated parts with high electric tension. Do not remove the cover. There are no user serviceable parts inside. DANGER! Risk of electric shock by short circuit Always use properly earthed mains connections.
-
Page 6: Technical Features
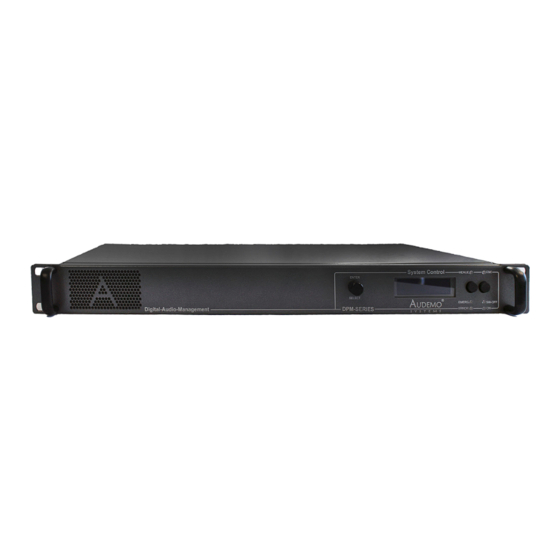
3. Technical Features The Digital Paging Management Unit DPM-2500 A is a digital signaling audio control unit used to initiate/ manage live paging, audio signal routing and playing pre-recorded audio messages. The unit is ideal for different audio applications including the voice alarm, mass notification (general alarm), background music and professional public address. -
Page 7: Operational Controls
4. Operational Controls Front Panel: Function Key MENU Push the key to enter the next submenu. Function Key ESC Push the key to leave the submenu to the next higher operating level. SELECT-Turning Encoder with ENTER-Key Function Rotate the encoder to change the menu items. The menu driven handling is indicated on the integrated LCD-display. - Page 8 Rear Panel: DPM-2500 A DPM-2500M ® AUDEMO SPDIF IN REM-SWITCH REL 1 REL 2 MIC 3 MIC 5 NF OUT 2 EMERG-MIC 2 REM-MIC S Y S T E M S SHLD LIFT +24V SIG NO COM SHLD SHLD SHLD AC 230V FUSE 13.15A RS-232...
-
Page 9: Programming Dpm 2500X (Digital Paging Module)
5. Programming DPM 2500x (digital paging module) The programming is different depending on the internally installed or externally connected modules. Overview in the Pades2000 Config Tool Example figure: Tree View Tab Note: DPM2500 will appear always as DPM-2500B even for DPM-2500A. Serial number will define the version 5.1) Highlight the serial number under the device displayed Example figure: Tree view tab with serial number marked 5.2) Select the device you want to configure in the Config Tool. -
Page 10: Setting Up Speaker Lines (Speaker Line)
6. Setting up speaker lines (Speaker Line) 6.1) DMS-2021A • Click on the TAB SpeakerLine - • Double click on the first free row in the main window. • The following window appears: • Look for your device under Device Type. In this case DMS-2021A •... -
Page 11: Dms-2061A
• Check “Enabled” to activate the line you have configured. • Note: The “uses in LineGroup” display does not show any line groups when speaker lines are set up for the first time. This only fills up when you have created line groups, see point 7. •... -
Page 12: Dms-2068A
Example image: After setting up several speaker lines Note: Repeat the process as described in point 6.2 until you have set up all your speaker lines. 6.3) DMS-2068A • Click on the TAB SpeakerLine - • Double click on the first free row in the main window. •... -
Page 13: Daa-235Xx
Example image: After setting up several speaker lines Note: Repeat the process as described in point 6.3 until you have set up all your speaker lines. 6.4) DAA-235XX • Click on the TAB SpeakerLine - • Double click on the first free row in the main window. •... -
Page 14: Daa-236Xx
Example image: After setting up several speaker lines Note: Repeat the process as described in point 6.4 until you have set up all your speaker lines. 6.5) DAA-236XX • Click on the TAB Speaker Line - • Double click on the first free row in the main window. •... -
Page 15: Daa-237Xx
Example image: After setting up several speaker lines Note: Repeat the process as described in point 6.5 until you have set up all your speaker lines. 6.6) DAA-237XX • Click on the TAB Speaker Line - • Double click on the first free row in the main window. •... -
Page 16: Setting Up Line Groups (Line Group)
Example image: After setting up several speaker lines Note: Repeat the process as described in point 6.6 until you have set up all your speaker lines. 7. Setting up line groups (Line Group) 7.1) DMS-2021A Here you have the option of grouping together the individual speaker lines that you set up under point 6, for example to play announcements or background music throughout or in parts of the building. -
Page 17: Installing The Controller
• Click on “Enabled” so that your group, which you are now defining, becomes active • Give your group a unique name in “GroupName”. This is important so that you can later assign your groups accordingly. Example: “All Call” for All speaker lines if they select all •... -
Page 18: Connections And Additional Possibilities
9. Connections and additional Possibilities 9.1) Connection of loudspeaker lines Take care for correct phase relation when you connect any loudspeaker. Danger! Beware of short circuits and earth fault. Adjust each speaker with the preset power as noticed in the cabling diagram. Test each single loudspeaker line by a measurement of line impedance at 1000 Hz (Z-Meter with tone-signal) with exact protocolling of the result. -
Page 19: Technical Specifications
11. Technical Specifications Frequency range 20- 20000Hz Gain Control -42 dB Signal-to-noise ratio >92 dB Harmonic distortion < 0.01 % DSP resolution 32 bit Dynamic range ( DSP ) 192 dB D/A converter – resolution 24 bit Dynamic range ( D/A converter) 118 dB A/D converter –...
Need help?
Do you have a question about the Dante DPM-2500A and is the answer not in the manual?
Questions and answers