Table of Contents
Advertisement
Quick Links
Advertisement
Table of Contents

Subscribe to Our Youtube Channel
Related Manuals for Fujitsu AirStage ASHA18GATH


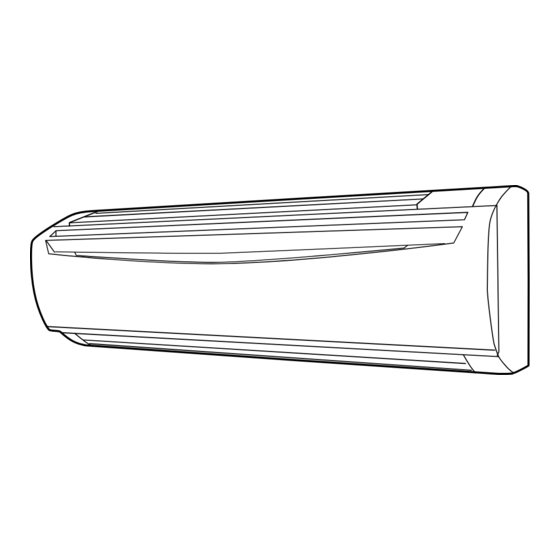
Summary of Contents for Fujitsu AirStage ASHA18GATH
- Page 1 INSTALLATION MANUAL INDOOR UNIT (Wall Mounted Type) For authorized service personnel only. ASYA18GATH / ASHA18GATH ASYA24GATH / ASHA24GATH ASYA30GATH / ASHA30GATH Refer to the rating label with the serial number. MADE IN THAILAND PART NO. 9373370321...
-
Page 2: Table Of Contents
INSTALLATION MANUAL This mark indicates procedures which, if improperly performed, might CAUTION possibly result in personal harm to the user, or damage to property. PART NO. 9373370321 VRF system indoor unit (Wall mounted type) Read carefully all security information before use or install the air conditioner. Contents Do not attempt to install the air conditioner or a part of the air conditioner by yourself. -
Page 3: Accessories
2.3. Accessories 3. INSTALLATION WORK Correct initial installation location is important because it is diffi cult to move unit after it is WARNING installed. For installation purposes, be sure to use the parts supplied by the manufacturer or other 3.1. Selecting an installation location prescribed parts. -
Page 4: Installing The Unit
Wall hook bracket 3.3. Installing the unit WARNING Install the air conditioner in a location which can withstand a load of at least 5 times the weight of the main unit and which will not amplify sound or vibration. If the installation location is not strong enough, the indoor unit may fall and cause injuries. -
Page 5: Pipe Installation
[For 1 Rear piping, 2 Right piping and 3 Bottom piping] Thicknesses of Annealed Copper Pipes (R410A) • The drain hose and drain cap are used as they are. [For 4 Left bottom piping, 5 Left piping and 6 Center piping, 7 Left rear Pipe outside diameter [mm (in)] Thickness [mm] piping]... -
Page 6: Forming The Drain Hose And Pipe
Pipe outside diameter Width across flats of Width across [mm (in)] Flare nut [mm] fl ats 6.35 (1/4) Cloth tape (Accessories) 9.52 (3/8) 12.70 (1/2) 15.88 (5/8) Pipe (Top) 19.05 (3/4) 1 Rear piping 2 Right piping 4.3.2. Bending pipes •... -
Page 7: Electrical Wiring
6. ELECTRICAL WIRING 6.1. Electrical requirement Voltage rating 230 V WARNING 198 to 264 V (50 Hz) Operating range 198 to 253 V (60 Hz) Electrical work must be performed in accordance with this Manual by a person certifi ed under the national or regional regulations. Be sure to use a dedicated circuit •... -
Page 8: Wiring Method
WARNING 6.2. Wiring method When using solid core cables, do not use the attached ring terminal. If you use the solid core cables with the ring terminal, the ring terminal's pressure bonding may malfunction Example and cause the cables to abnormally heat up. Outdoor unit or RB unit *1 B. -
Page 9: Wiring
6.3.3. Remote controller cable 6.4. Wiring Remote controller cable modifi cation. Connect the end of the connection cable fully into the terminal block. (1) Use a tool to cut off the terminal on the end of the remote controller cable, and then Wired remote controller remove the insulation from the cut end of the cable. - Page 10 Input select P.C.B Use either one of these types of terminal according to the application. (Both types of terminals cannot be used simultaneously.) ● Apply voltage terminal ([CNA01], [CNA03]) CNA02 When a power supply must be provided at the input device you want to connect, use the Apply voltage terminal ([CNA01], [CNA03]).
-
Page 11: Field Setting
● When function setting is “Forced stop” mode. (3) Connection methods [In the case of “Edge” input] • Wire modifi cation Remove insulation from wire attached to wire kit connector. Connector Input signal Command Remove insulation from fi eld supplied cable. Use crimp type insulated butt connector to join fi... - Page 12 Intake Rotary switch Rotary switch Ex- Example: “0” grille ample: “0” Mounting shaft Intake grille Bearing Knob Front panel Front panel removal. (1) Remove intake grille (Refer to the item of intake grille removal.) (2) Remove 6 screws. CAUTION (3) Push the [▲] part on the lower part of the body upwards with your thumb of both hands to detach the 2 hooks, and then pull the front panel forward to remove it.
-
Page 13: Custom Code Setting
Setting Setting range Type of switch 7.3. Function setting Setting Remote control- 0 to 15 WARNING example ler address Please make this setting after completing all construction works. RC AD • FUNCTION SETTING can be performed with the wired or wireless remote controller. Example If 4 indoor units are connected. -
Page 14: Finishing
(Example) ADDRESS : 30 Function Setting Function Default Details number number 1 cycle 12 sec ○ 00 All OPERATION Change the target for reporting er- indicator lamp Display 1.0s 1.0s 1.0s 1.0s 1.0s 1.0s 1.0s Error report rors. Errors can either be reported in (Green) only on target... -
Page 15: Installing
(For Left bottom piping, Left piping, Center piping and Left rear piping) (2) Hook the fi ttings of the indoor unit to the 2 bottom hooks while lowering the unit and pushing it against the wall. • Wrap the area which accommodates the rear piping housing section with cloth tape. •... -
Page 16: Test Run
Check that: 11. ERROR CODES • The top and bottom hooks are hooked fi rmly and the indoor unit does not move to the front and rear or left and right. If you use a wired type remote controller, error codes will appear on the remote controller display. - Page 17 Wired Remote Controller Display UTY-RNKY / UTY-RNKG / UTY-RNKYT (3-wire type) Error code UTY-RNRY / UTY-RNRG / UTY-RNRYZ1 / UTY-RNRGZ1 (2-wire type) Touch the [Next Page] (or [previous page]) Error icon to switch to other indoor unit information. Touch the [Status]. Touch the [Error Information].
Need help?
Do you have a question about the AirStage ASHA18GATH and is the answer not in the manual?
Questions and answers