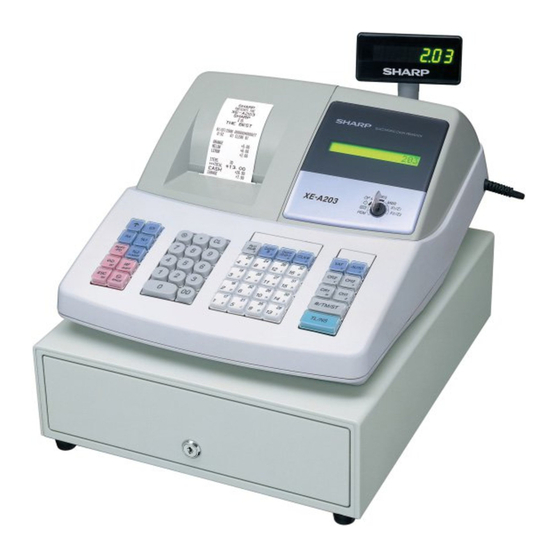
Sharp XE-A203 Quick Start Manual
Hide thumbs
Also See for XE-A203:
- Instruction manual (454 pages) ,
- Programming manual (31 pages) ,
- Service manual (31 pages)
Table of Contents
Advertisement
Available languages
Available languages
Quick Links
XE-A203 Quick Start Guide
The following describes how to get the cash register ready to operate. Follow these steps before you use the cash register for the first time.
Before you set up the cash register, prepare three new alkaline batteries LR6 ("AA" size) which are necessary for memory backup. Find a stable and flat surface not subject to direct radiation, to place the cash register.
1
Initializing the Cash
Register
To ensure the cash register operates properly,
please use the following procedure:
1. Make sure the power cord is unplugged and batteries
are not installed on the register.
2. Insert the manager (MA) key into the mode switch and
turn it to the REG position.
REG
OPX/Z
MGR
OFF
X1/Z1
X2/Z2
VOID
PGM
3. Insert the plug of the power cord into the AC outlet.
The buzzer will sound three times.
IMPORTANT:
This operation must be performed
without batteries installed.
4. The cash register has now been initialized.
The register display will show "0.00" with "
".
2
Installing the Batteries
1. Push the printer cover forward and
detach it.
2. Open the battery
compartment cover next
to the paper roll cradle.
3. Install three new alkaline
batteries LR6 ("AA" size) as
shown at the right. (Batteries
are not supplied with the cash
register.) Make sure that
positive (+) and negative (–)
poles of each battery are
properly oriented.
4. When the batteries are properly installed, "
" on
the display will disappear. Close the battery
compartment cover.
3
Installing the Paper
(for receipt printing)
If you want to use a paper roll for journal printing, please refer
to GETTING STARTED section of the instruction manual.
1. Lift up the print roller
Print roller arm
release lever to unlock
and open the print roller
arm.
Print roller release lever
2. Set a paper roll in the paper roll cradle as illustrated below.
NOTE: When setting a new
paper roll in the paper roll
To the printer
cradle, be sure to cut the
paper end behind the taped
Correct
Incorrect
(or pasted) point in advance.
3. Feed the end of the paper along
with the paper positioning guides as
illustrated at the right.
Paper positioning
guides
4. While holding down the paper,
slowly close the print roller arm,
and push down the arm until you
hear a click locking the arm.
Make sure securely you push
down the center of the wing part
of the arm as illustrated at the
right. The paper will be fed
automatically.
5. Cut off the excess paper using
the edge of the inner cover, and
replace the printer cover. Press
the
F
key to make sure the
paper end comes out of the
printer cover and clean paper
appears.
NOTE: If the print roller arm is not securely locked, the unit will not
print correctly. If this problem occurs, open the arm, and close the
arm as instructed above.
4
Basic Programming
Set the mode switch to the PGM position.
Setting the Date
Enter the date in 8 digits using the month-day-year format.
Then press
s
.
Example:
08262006 s
Date (August 26, 2006)
Setting the Time
Enter the time in 4 digits ("hhmm" format) using the 24 hour
To the printer
system. Then press
s
.
Example:
1430 s
Time (2:30 p.m.)
Setting Tax Rates (%)
NOTE: If you are in an area that uses a tax table for tax
calculation, please refer to the programming section in
the instruction manual.
Specify a tax rate (%) for calculation of tax on each taxable
subtotal using the following sequence:
s
9
@
➔
➔
➔ Tax number (1 to 4)* ➔
@
s
A
➔
➔ Q ➔
➔
where
R: Tax rate (0.0000% to 100.0000%)
Q: Minimum taxable amount (0.01 to 999.99)
(Smallest amount for which tax must be collected.)
*Up to 4 types of tax are programmable.
Example:
s 9@
1@ 6P25@ 12 s A
Tax 1
Tax rate (6.25%)
Min. taxable
amount ($0.12)
Other Programming
While the cash register is pre-programmed so it can be used
with minimal set-up, it does provide you optional features.
For details, please refer to the instruction manual.
Initial settings:
Department 1 to 10:
Taxable 1
Department 11 to 99: Non-taxable.
5
Now, you are ready!
Before Starting Entries
REG
OPX/Z
MGR
• Set the mode switch to the REG position.
OFF
X1/Z1
VOID
X2/Z2
PGM
Registration Example
(when selling department items by cash)
1. Enter your clerk code. (By default, clerk code 1 is
assigned.)
2. Enter the price for the first department item.
For example for 5.00, enter
appropriate department key.
For department 17 to department 32, press
first before pressing the department key.
For department 33 and above, enter the
department code using numeric keys, and press
d
, then enter the price and press
3. Repeat step 2 for all the department items.
4. Press
s
to display the amount due.
5. Enter the amount received from the customer.
(You can omit this step if the amount tendered is
the same as the subtotal.)
6. Press
A
, and the change due is displayed
(when the amount received was not entered, total
@
➔ R
amount is displayed) and the drawer is opened.
7. Tear off the receipt and give it to the customer
with his or her change.
8. Close the drawer.
Key operation example
1L 5:!
Clerk code
Price and dept.1
825D"
Price and dept. 18
s 2:0 A
Amount tendered
When an error occurs:
When an error occurs with an alarm sound, press
to clear the error. If you do not clear the error, press
E
twice. The transaction will be finalized in subtotal
void or cash sale.
Printed in China / Impreso en China
English
REG
OPX/Z
MGR
OFF
X1/Z1
X2/Z2
VOID
PGM
5:
, and press the
D
d
again.
l
(TCADH2507RCZZ) 1
Advertisement
Table of Contents

Subscribe to Our Youtube Channel
Related Manuals for Sharp XE-A203


Summary of Contents for Sharp XE-A203
-
Page 1: Basic Programming
XE-A203 Quick Start Guide The following describes how to get the cash register ready to operate. Follow these steps before you use the cash register for the first time. Before you set up the cash register, prepare three new alkaline batteries LR6 (“AA” size) which are necessary for memory backup. Find a stable and flat surface not subject to direct radiation, to place the cash register. Initializing the Cash Installing the Paper Register... - Page 2 Guía de inicio rápido de la XE-A203 A continuación se describe la forma de dejar preparada la caja registradora para el funcionamiento. Siga estos pasos antes de emplear la caja registradora por primera vez. Antes de configurar la caja registradora, prepare tres pilas alcalinas nuevas LR6 (tamaño “AA”) que serán necesarias para respaldar la memoria. Prepare una superficie plana y estable que no esté sujeta a los rayos directos del sol, para colocar la caja registradora.
Need help?
Do you have a question about the XE-A203 and is the answer not in the manual?
Questions and answers