Table of Contents
Advertisement
Quick Links
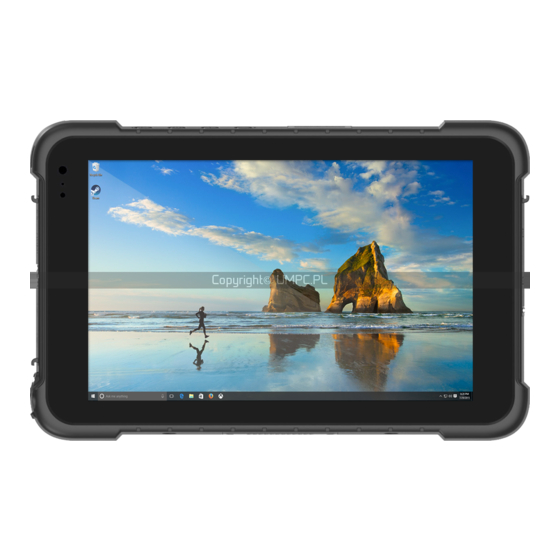
Rugged Tablet PC EM-I86/I86H
Win10 OS Product Manual
Thank you for choosing Emdoor Info products.
This manual serves to enable users to get to know our product as soon as possible. This document
mainly introduces the I86/I86H project fuselage interface and system usage instructions, through
the picture instructions to enable users to quickly understand the product usage. If you encounter
problems that cannot be solved during use, please contact us.
Advertisement
Table of Contents

Related Manuals for Emdoor EM-I86


Summary of Contents for Emdoor EM-I86
- Page 1 Rugged Tablet PC EM-I86/I86H Win10 OS Product Manual Thank you for choosing Emdoor Info products. This manual serves to enable users to get to know our product as soon as possible. This document mainly introduces the I86/I86H project fuselage interface and system usage instructions, through the picture instructions to enable users to quickly understand the product usage.
- Page 2 • This manual applies the following models: EM-I86/I86H Rugged Tablet PC. • The illustrations in this manual may be different from the product...
-
Page 3: Table Of Contents
Content Ⅰ. File version information ..............Ⅱ. Device performance structure ............Ⅲ. Device initialized setting ..............Ⅳ. Desktop layout ................. 1. Windows10 start ............2. Charm menu bar ............3. APP Interface introduction .......... Ⅴ. System setting .................. 1. Display application icon ..........2. -
Page 4: Ⅰ. File Version Information
Ⅰ. File version information EM-I86/I86H Win10 OS Product Manual File Name File No. 0001 Version V1.0 Publishing Date 2017-10-30 Pages Update Records Update Name Version Date Content Department Service FAE YDXX-01 V1.0 2017-10-30 First published department - 4 -... -
Page 5: Ⅱ. Device Performance Structure
Ⅱ. Device performance structure Device front (touch screen/display screen/front camera/ charge indicator light/light sense) Front camera/Indicator/light sensor - 5 -... - Page 6 Device back (screw hole of strap/rear camera/NFC zone) Rear camera Screw hole of strap NFC zone - 6 -...
- Page 7 Device top Scan key Volume+ 1D/2D Scan window Power Volume- Device bottom POGO pin Positioning hole of charging docking Device left side HDMI USB2.0 Headphone jack Micro USB Device right side TF card SIM card - 7 -...
-
Page 8: Ⅲ. Device Initialized Setting
Ⅲ. Device initialized setting 1.User setup wizard 1)Language setting A. Click“Yes”to go to the next step depending on the language you want. B. Select the area of use according to language. - 8 -... - Page 9 2)Keyboard layout and language setting A. choose the keyboard layout and language you like, click "yes" to enter the next step. B. If one keyboard cannot be satisfied, add a second keyboard or skip here. - 9 -...
- Page 10 3)Network setting Choose the network you want to connect and enter your password. (It is recommended to skip the network connection , otherwise it may take too long for the system to check for updates.) 4)User license agreement This is the Microsoft software license agreement, click“accept”to enter the next step.
- Page 11 5)Username and password settings A. Setting the username and go to the next step. B. Enter the password, click “next” the device will restart, do not do anything else during the device restart. (Do not need to set password and click the “next”).
- Page 12 6)Personalized setting A. Making Cortana as your personal assistant. B. Choose privacy settings for your device. - 12 -...
- Page 13 7)Complete setting Wait for the system to enter the desktop and do not shut down the computer. - 13 -...
-
Page 14: Ⅳ. Desktop Layout
Ⅳ. Desktop layout 1.Windows10 start ① ② ③ ④ ⑤ ⑥ ⑦ ①start icon —— Quick launch of installed applications. ②search for —— Enter the key character search page or open the application. ③task view —— Open multiple tasks to quickly switch applications with this icon. ④IE browser ⑤file explore ——... -
Page 15: Charm Menu Bar
2.Charm menu bar Pressing the Start button to open the charm menu bar, which including: Start, Device, Settings, and Search program. ① ② ③ ④ ⑤ ⑥ ⑦ ⑧ - 15 -... - Page 16 ①battery level —— View the system of battery voltage. ②network —— View the status of device management network connections. ③sound —— Control audio and adjust volume. ④pen —— Pen and Windows ink settings. ⑤keyboard —— Touch keyboard button. ⑥language —— Set up and manage the current input method. ⑦time/date ——...
-
Page 17: App Interface Introduction
3.APP Interface introduction Click "Operation Center"——"Tablet Mode" as shown in the picture below, you can see many programs fixed on the screen, these applications are displayed in the form of "tiles", and can be accessed with one click. You need to log in to your Microsoft account before the application is working. - Page 18 ① ② ③ ④ ⑤ ⑥ ①start ④user ②pinned tiles ⑤setting ③all apps ⑥power Add "magnet" file:All app —— select the application icon, mouse with right key ——pin to start —— return to the fixed magnet to view the application. Delete magnet file:fixed magnet, mouse with right key ——...
-
Page 19: Ⅴ. System Setting
Ⅴ. System setting 1.Display application icon A. Click on the right mouse key and select“personalize”, as below picture. B. Personalize window, click “theme” with the mouse left key. - 19 -... - Page 20 C. Click“Desktop icon setting”with the mouse left key. D. Tick in front of the computer icon and click OK. - 20 -...
-
Page 21: System Information
2.System information Click the right mouse key or touch the computer icon to open the extension option. Click on “properties” to view system information, Windows system version, hardware configuration information, computer name, Windows activation, etc. - 21 -... -
Page 22: Quick Start
3.Quick start Click the right mouse button or click the touch to start the icon, open the advanced boot interface, and open the corresponding function. 1.Apps and features —— Manage installed applications and drivers, update drivers and applications. 2.Mobility center —— Adjust the screen brightness, volume size, detect battery power, and set the direction of the screen. -
Page 23: System Setting
4.System setting 1.System —— Display settings, notifications & action, power & sleep, battery, storage, tablet mode, multitasking, projecting to this PC, shared experiences, about, remote desktop (Windows10 HOME version is not supported). 2.Device —— Bluetooth & other devices, printer & scanner, mouse, typing, pen &Windows ink, auto play, USB. -
Page 24: Quick Start And Setup
5.Quick start and setup 1)Open show touch keyboard button —— more touch on the taskbar or mouse with right key to choose it. 2)System Activation —— the device cannot be activated during networking, please refer to the right picture, and then try to activate again after synchronizing the time zone. -
Page 25: Ⅵ. Special Module Description
Ⅵ. Special module description 1.Remove battery cover I86 and I86H are built-in Screw batteries, it is not recommended to remove the battery cover. If you want to repair or solve other problems. Remove the 20 screws. 2.Waterproof state 1)HDMI, USB, Ethernet, protection plugs must be closed to be waterproof. - Page 26 3.The operation of Power key shut down Press and hold the power key about 5S, appears silde to shut down your PC. The position of the triangle symbol slides down and the device shuts down automatically. Slide down 4.Language installation 1)Connect to the network and open: All setting Time &...
- Page 27 2)As shown in the right picture, select the language you want to install. 3)choose options download. 4)After download, select set as default, restart device language conversion completed, Chinese and English language systems generally do not need to download. - 27 -...
- Page 28 5.Instructions for the use of a stylus 1)before Frequency modulation , make sure the battery is full, and install the battery in the direction as the below picture. 2)to pressing the FM Hole , it can change the frequency of pen. if the changed frequency is the same as the screen , the pen can work normally.you could press the hole one time, then try to touch the screen.if it fail ,you could press the hole again until the pen work on the screen normally.
- Page 29 6.Keystroke custom description F function key can be customized. For example, press F key can quickly start the application, note: with barcode scanning module machine, F key is generally used to start barcode scanning. 1)In the RuggedPad22HX64 folder directory, double click FKeyService_i22H_x64 for installation. ①Installation interface.
- Page 30 2)Configure the APP application path. ①Double-click the desktop icon FKeyService, ②Install listening F function key: click Install to open the app application. to install. ③Browse for shortcuts to exe programs or ④Click Confirm to confirm the settings for programs called with F key, and then link files. StartAppPath.
- Page 31 7.NFC function test 1)Copy NFC-test to desktop. 2)Open the folder and install vs_isoshell, vs_isoshelladditional and vs_isoshellLP. 3)Open NXP SPB Package 8.0.0.7 folder , install setup. When installing, select the second item and install the driver software. - 31 -...
- Page 32 4)Return NFC-test, to run proxyTAP1.6.6. 5) The magnetic card is close to the NFC antenna recognition area, the safe distance is 1 cm, the best distance is 3 cm. 6)Green is pass, and grey is NG. - 32 -...
- Page 33 8.After-sale clause Any purchase of emdoor information products, from the date of purchase within one year warranty. 9.Common problem asked 1)SIM card could not be recognized. Check the direction of the SIM card, the direction is consistent with the icon, the latch should be locked.
Need help?
Do you have a question about the EM-I86 and is the answer not in the manual?
Questions and answers