Advertisement
Quick Links
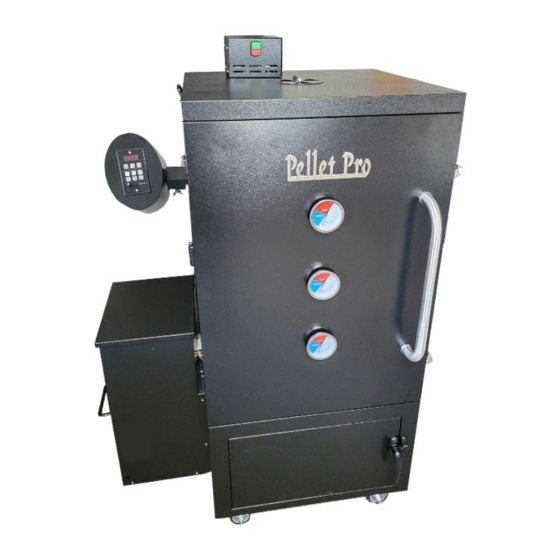
Pellet Pro® Vertical Pellet Smoker
1)
Remove all parts from the inside of the smoker and remove all cellophane.
2)
Flip the smoker on its back side and attach the four casters to the bottom
corners of the smoker using the smaller bolts provided. It is optional to
attach the swiveling casters on the left or right side.
3) Once the casters are attached to the bottom of the smoker, flip the
smoker upright.
4) Insert the hopper assembly to the side of the cabinet and connect the
(4) corresponding color-coded Molex connectors. Then, connect the
ground wire to the bottom of the cabinet. See pictures below.
Installation Manual
Advertisement

Summary of Contents for PELLET PRO 2300
- Page 1 Pellet Pro® Vertical Pellet Smoker Installation Manual Remove all parts from the inside of the smoker and remove all cellophane. Flip the smoker on its back side and attach the four casters to the bottom corners of the smoker using the smaller bolts provided. It is optional to attach the swiveling casters on the left or right side.
- Page 2 5. Using the (4) Large M6 Bolts and Washers provided, secure the hopper assembly to the cabinet from the inside of the cabinet. (This is easiest with two people.) 6. Locate the PID Controller Housing and remove the mounting piece by loosening the large set screw. 7.
- Page 3 10. Remove the bolts and washers that are attached to the door handle and side handle. Using the separate longer bolts and washers provided, attach the door handle and side handle to the cabinet. 11. Install the Heat Diffuser, Drip Pan, and Hopper Safety Guard as shown below. 12) Attach the side vent and dampener as shown using the (6) bolts that are already threaded into the side wall.
- Page 4 Circulation Fan When mounting the circulation fan, remove the fan housing and attach the fan to the top corner of the cabinet using the four screws provided. Once mounted, re-attach the housing. Install fan onto the end of the shaft and secure with the REVERSE THREAD nut.