
Summary of Contents for PICOLAS LDP-CWL 90-10
- Page 1 User Manual LDP-CWL 90-10 (preliminary) PicoLAS GmbH Burgstr. 2 52146 Würselen Germany Phone: +49 (0) 2405-64594-60 Fax: +49 (0) 2405-64594-61 E-mail: info@picolas.de Web: www.picolas.de Rev. 2201...
-
Page 2: Table Of Contents
The Serial Text Interface ......................... 17 Structure ..............................17 Commands for the serial text interface ....................18 If an Error Occurs ............................ 19 The PicoLAS Protocol ..........................20 Structure ..............................20 General Commands ..........................21 Commands for the Driver ........................22 Register Description .......................... -
Page 4: Description Of Connections
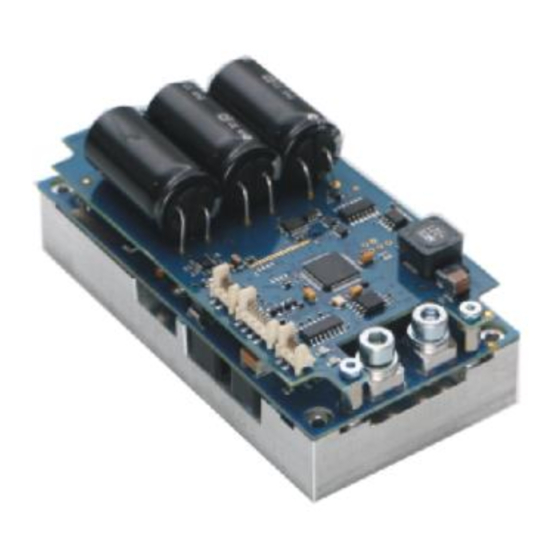
Description of Connections All connectors on the LDP-CWL 90-10 are protected against ESD as described by the human body model. The following drawing shows all connections that are available to the user. 4 holes for heat sink (3.1 mm trough) -
Page 5: Pin Assignments And Description Of The Molex Pin Header
Pin Assignments and Description of the MOLEX Pin Header The connector is a MOLEX_908140008, a suitable female connector would be a MOLEX - 90327-0308 like Farnell 673160. Pin Number Description Direction Comments 1 (marked in red) reserved Do not connect! reserved Do not connect! I-Soll... - Page 6 The connector is a MOLEX_908140004, female connector MOLEX - 90327-0304 like Farnell 673146. Pin Number Description Direction Comments 1 (marked in red) +12 V Output Only for the use with the PLB-21, prevent any overload or short! (max. 100 mA) RS-232 standard serial interface RS-232 standard serial interface 4 (left)
-
Page 7: How To Get Started (Quick Start Without Plb-21)
How to get started (quick start without PLB-21) Step What to do Note Unpack your device. Connect a load to the output. For tests the load might be a resistor Screw connectors are on the right side. or a dummy diode. Pay attention to the polarity when connecting a diode. -
Page 8: Dos And Don'ts
▪ LDP-CWL 90-10 or LDP-CWL 90-10-S50 yields the standard unit with the scaling 5 V = 90 A ▪ LDP-CWL 90-10-S33: Input scaling is 0 .. 3.3 V correspond to 0 .. 90 A. The first units were shipped with this scaling. If you require this furthermore, please order with the -S33 option. -
Page 9: Current Regulator
Current Regulator The driver is equipped with a linear current regulator, which can drive up to 90 A. The following diagram gives a simplified technical overview: As shown in the diagram a DC-DC converter is used to generate the voltage required to drive the laser diode. -
Page 10: External Setpoint
External Setpoint An external voltage can be applied to the driver which defines the setpoint current. The scaling of this voltage depends on the version of the driver. See datasheet for more information. In order to switch between external and internal setpoint the bit 6 of the LSTAT register must be altered. -
Page 11: Over Temperature Shutdown
Over temperature Shutdown To protect itself, the driver automatically shuts down if its temperature rises above 80 °C. This condition is latched and the appropriate bit in the ERROR register is set. To re-enable the driver the ENABLE pin must be toggled (set low and then high). -
Page 12: Mechanical Dimensions
Mechanical Dimensions All dimensions are in millimetres (mm). Position Dimension (mm) Position (horizontal) Dimension (mm) (vertical) 59.6 55.9 51.7 18.3 38.1 20.6 22.8 34.8 45.2 16.2 32.8 113.3... -
Page 13: Power On Self Test
If the driver is connected to a PC, all operating parameters can be accessed via a serial RS- 232 terminal program or the PicoLAS protocol. For a detailed description of the serial text protocol and the PicoLAS protocol see below. -
Page 14: Controlling The Driver Using A Plb-21
Controlling the Driver using a PLB-21 When the PLB-21 is connected the first time to the driver, the user is asked to download a new firmware driver. This must be confirmed with “yes” in order for the PLB-21 to work properly. -
Page 15: If An Error Occurs
When the driver is connected to a PC, it allows communications over a serial text interface as well as the PicoLAS protocol. While the text interface is designed for communication with a terminal program, the PicoLAS protocol is designed as a system interact protocol. -
Page 16: Description Of The Rs-232 Interface
The switching between the two protocols occurs automatically as soon as the driver receives a certain sequence. The corresponding commands are: • PING for the PicoLAS protocol • “init” followed by <Enter> for the text interface Description of the RS-232 Interface The driver implements a standard RS-232 interface. -
Page 17: The Serial Text Interface
The Serial Text Interface The following section describes the structure and the commands of the text interface. Structure Every command that is sent to the driver must be completed with a CR (Carriage Return = Enter). It consists of a command word followed by one or more parameters. If the command has been executed successfully a “00”... -
Page 18: Commands For The Serial Text Interface
Commands for the serial text interface The following table contains a command reference for the driver. Command Parameter Answer Description scur Current in A Sets the pulse current to the indicated value. A dot is used as decimal point. No more then one decimal place is used! (12.225 is the same as 12.2) gcur Current in A... -
Page 19: If An Error Occurs
Command Parameter Answer Description gtemphys Temperature in Returns the temperature at which the °C device will restart after thermal shutdown gtempwrn Temperature in Returns the temperature at which the °C device will warn about reaching its thermal limit gadcidiode Current in [A] gadcudiode Voltage in [V] Returns the actual measured... -
Page 20: The Picolas Protocol
The PicoLAS Protocol The following section describes the structure and valuable commands of the PicoLAS protocol. Structure Each transmission consists of 12 bytes – called a frame in the following – that must be sent consecutively. Otherwise the system times out and the transmission must start again from the beginning. -
Page 21: General Commands
General Commands The following list contains an overview of the general commands that are supported by every product from PicoLAS making use of this protocol. The explanation of the individual commands is given further below. Command Name Sent Frame Answer Frame... -
Page 22: Commands For The Driver
Commands for the Driver The following table contains a list of the commands which the LDP-CW supports in addition to the generally applicable commands. An explanation of the individual commands and its parameters follows afterwards. Command Sent Frame Received Frame Command Parameter Command... - Page 23 Command Sent Frame Received Frame SETCURLIMIT 0x0504 Refer to 0x8500 16 bit unsigned description integer GETCURLIMIT 0x0505 0x8500 16 bit unsigned integer GETCURLIMITMIN 0x0506 0x8500 16 bit unsigned integer GETCURLIMITMAX 0x0507 0x8500 16 bit unsigned integer GETADCUDIODE 0x0600 0x8600 16 bit unsigned integer GETADCIDIODE 0x0601...
- Page 24 Description of the individual Commands GETTEMP The return value contains the actual measured temperature of the driver. It represents the maximum of the tree individual sensors, which can also be monitored. It is scaled in 0.1 °C. GETTEMP1 The return value contains the actual measured temperature of the first temperature sensor. It is scaled in 0.1 °C.
- Page 25 SETVCAP This command sets the current setpoint to the given value in steps of 0.1 V. The value must be within the borders defined by the minimum and maximum current values given by the GETVCAPMIN and GETVCAPMAX command. The return value contains the actual set point value. SETCUR This command sets the current setpoint to the given value in steps of 0.01 A.
- Page 26 GETADCIDIODE The return value contains the actual measured output current of the driver. It is measured in steps of 0.1 A. Please note that this is not an independent measurement and cannot be used to verify the output current. GETADCVCAP The return value contains the actual measured capacitor voltage.
-
Page 27: Register Description
Register Description Description of the LSTAT Register The following list contains a description of the individual LSTAT bits. These can be read with GETLSTAT and written with SETLSTAT. With SETLSTAT a complete 32 bit word must always be written. Thus, to change individual bits, first the register must be read out with GETLSTAT, and then the desired bits changed and finally passed back to the driver with SETLSTAT. -
Page 28: Description Of The Error Register
Description of the ERROR Register The following list contains a description of the individual bits in the ERROR register. If the bit is a “1” it will deactivate the unit output. The bits 1-3 and 5 are set during the power on self test. They can not be cleared by the ENABLE pin or the CLEARERROR command. - Page 29 Name Read/Write Meaning I2C_DAC_FAIL Read Indicates that there is an internal I2C bus error. If this error persists after a power cycle the device must be repaired. I2C_WR_FAIL Read Indicates that there is an internal I2C bus error. If this error persists after a power cycle the device must be repaired.
Need help?
Do you have a question about the LDP-CWL 90-10 and is the answer not in the manual?
Questions and answers