
Subscribe to Our Youtube Channel
Related Manuals for TM Tech Measure 1000


Summary of Contents for TM Tech Measure 1000
- Page 1 Tech Measure 1000 USER MANUAL Tm1000 User Manual Ver. 4.10 Techno-Matic A/S Tel: +45 96987711 tm@techno-matic.dk Granlidevej 22, Hornum Fax: +45 98661822 www.techno-matic.dk DK-9600 Aars Denmark...
- Page 2 Tm1000 Usermanual Ver.4.10.doc 21-09-05...
-
Page 3: Table Of Contents
Contents: Introduction ........................ 5 An overview of the function keys: ................6 Main Screen: ......................7 Editing presets:......................9 Diameter Calibration:....................11 Editing the calibration table: ..................12 Length Calibration: ....................13 General parameters:....................14 Manoeuvre Parameter:.................... 17 Roller Pressure:....................... 24 Proportional upper knives.................. - Page 4 Tm1000 Usermanual Ver.4.10.doc 21-09-05...
-
Page 5: Introduction
Introduction - Congratulations on your new Tech Measure 1000-measuring system ! Tech Measure 1000 is a very precise measuring system, designed to make your work as easy and efficient as possible. The system has a robust construction and has the facility to write out all relevant data on paper by means of a printer. -
Page 6: An Overview Of The Function Keys
An overview of the function keys: 0 to 9 used F1 to F4 activates the to enter sub roll-down menu. numbers F5 to F9 activates 1. to 5. menu- points. (Arrow DOWN and ENT can be used instead A newly entered value is 1) ESC leaves the accepted with ENT. -
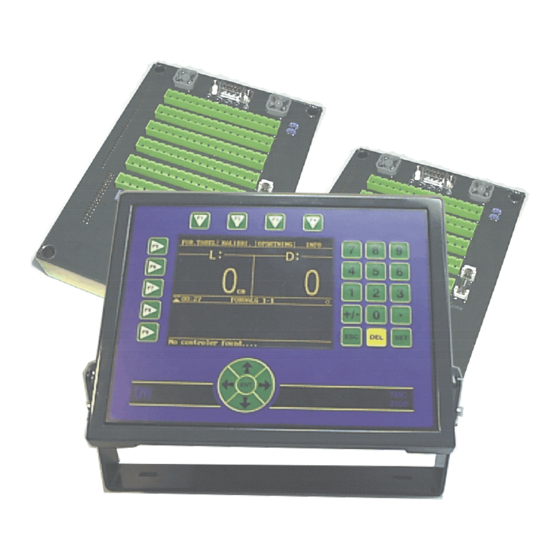
Page 7: Main Screen
Main Screen: On the ”Main Screen” you will find the most important information, you need. Please note that some functions, not available on your system, might be explained as well. Function keys F1 to F4’s functions Diameter.See below. Length. See below. (Here 320mm) ctive preset Hour glass, which... - Page 8 Length: The large number shows the actual length, at which the saw is situated at the moment (set to zero every time it cuts). If a small number is shown (e.g. L: 400 cm), the system is running according to that. When/If this goal is met then the number is displayed “inverted”...
-
Page 9: Editing Presets
Editing presets: Press F1 for ”Preset Table”. Press e.g. F5 for “Table 1”. Number of cubic meters of cut timber in this preset table. Number of cubic meters of wasted timber in this preset table. Active preset is marked by a star “... - Page 10 Number of cubic meters in this preset. Choose type by means of “SET” Changing the measurements: Press “SET” and enter the value wanted. Accept by means of “ENT” or “SET” or regret by “ESC” Choose the colour code by means of “SET”. Zero setting of production Printing out the settings for the preset: in this preset.
-
Page 11: Diameter Calibration
Diameter Calibration: Press “F2” for “CALIBRATION” Press “F5” for “DIAMETER” After which the following box is indicated in which the measured diameter must be entered. Means of calibration: First, a suitable tree is felled (without too many branches and preferably straight). Afterwards run further than the distance between the point of measurement (knives/rollers) and saw. -
Page 12: Editing The Calibration Table
Editing the calibration table: Press F2 for Calibration Press F7 for diameter table Table no. The coordinates of the point chosen (no. of pulses; diameter in mm). Points of the table. Point chosen (square is filled out). In the above example three points have been put into the diameter calibration table of which the middlemost point has been chosen (the square is filled in). -
Page 13: Length Calibration
Length Calibration: Press F2 for calibration. Press F6 for length. Box to key in the measured length (in cm.) How to carry out length calibration. First fell a suitably large tree, run 20-30 cm forwards and cut of the root swelling, run thereafter forwards 3-5 meters, after which the length run through is measured and must be entered into the box (in cm.). -
Page 14: General Parameters
General parameters: Press F3 for SET UP. Press F5 for GENERAL. When the menu ”Tree profile” is highlighted, the sub-points will be shown by pressing the ARROW –TO-THE-RIGHT,, and hidden again upon pressing the ARROW- TO-THE-LEFT. Sub-points to the “Tree profile”. The Calibration-table, according to which the measuring is done (and which can be viewed/ adjusted under “CALIBRATION”... - Page 15 Task No.: Is selected here. If you want to change to another task number, press SET and a box will appear, enabling you to choose, whether or not you want to reset all presets and G15 time. Machine no.: Is selected here Accept minimum tolerance and Accept maximum tolerance: Here you can enter the minimum and maximum...
- Page 16 Display contrast (not shown): The contrasts (light strengths) on the screen can be entered as a number from 1 to 100. 100 is equivalent to the yellow colour lighting up powerfully. 1 is equivalent to the yellow colour lighting up faintly. Bright light should be avoided, unless the light conditions make it absolutely necessary!!! Due to the fact that it is a very strongly lit display, the choice of a high light strength can result in the points on the screen, which are in use the whole time (or almost the whole time) will “stay...
-
Page 17: Manoeuvre Parameter
Manoeuvre Parameter: Press F3 for SET UP. Press F6 for MANOEUVRE. The following display is shown. Forward parameter (settings) is display- ed by pressing on ARROW-down, until “Forward” is displayed and thereupon pressing ENT (See next page). Same procedure with the reverse- parameters. - Page 18 head, i.e. when the tree is pulled through from the root swelling to the top. Tm1000 Usermanual Ver.4.10.doc 21-09-05...
- Page 19 Reaction-length: Minimum speed: Maximum speed: ”Speed” Reaction 100 % length Maximum speed Minimum speed ”Proportional” Against top of tree Length Adjust minimum / maximum speed: By pressing ENT, when this menu is highlighted, the rollers are activated and the desired minimum/ maximum speed can be adjusted. Conclude by pressing ENT.
- Page 20 Toggle forwards When "toggle forwards" is activated, you must push once on the forward-button and the rollers will continue to target. When you push again on forwards or reverse, if there are no pulses from the measuring wheel or knives/rollers are open, the rollers will stop. Tm1000 Usermanual Ver.4.10.doc 21-09-05...
- Page 21 Machine parameters: Press F3 for SET UP. Press F7 for MACHINE. The following screens come up: HARVESTING HEAD- settings, KNIFE-STEP- settings, KNIVES OPEN AT ROLLER- ACTIVATION: Settings for rollers forward and rollers reverse respectively ROLLER PRESSURE Here you set the pressure wanted * PROP.
- Page 22 HARVESTING HEAD: Distance from saw to point-of-measuring The distance from the saw to the knives e.g. 60 cm. Length factor: Length calibration e.g. 5.70 pulses/cm from the length encoder. Diameter Open Harvester: Diameter when the harvesting head is fully open. RESET DIAMETER ENCODERS When deactivation of the measuring wheel takes place, when a certain dia-...
- Page 23 KNIFE-STEP: The knives can ”be kept on the go”. See figure. Use with rollers forwards: Use with rollers backwards: Here is determined when the knife-step is to be applied. Knife step open time: Knife step closure time: E x.: 30/100s ec . 30/100s ec .
-
Page 24: Roller Pressure
Roller Pressure: Here the harvesting head producer has chosen one of the adjustment principles, shown below. Adjustment principle 1: Here the rollerpressure is controlled with a proportionally controlled pressure reduction. On the curve there are 2 points, one for minimum pressure and one for maximum pressure. -
Page 25: Proportional Upper Knives
Proportional upper knives. : The pressure used to Opening pressure open upper knives. : The pressure used to Closing pressure close upper knives. Max. delimbing pressure: Min. delimbing pressure: Min. Diameter and Max. Diameter are used for setting the correct pressure in proportion to the actual diameter. - Page 26 The adjustable parameters for knives and rollers: Tm1000 Usermanual Ver.4.10.doc 21-09-05...
-
Page 27: Colour Code
(see following page), you must key in a “Time”, which is long enough to never be exceeded, not even by the trees taking the longest time to saw. Techno-Matic A/S Tel: +45 96987711 tm@techno-matic.dk Granlidevej 22, Hornum Fax: +45 98661822 www.techno-matic.dk DK-9600 Aars Usermanual rev. 4.04... -
Page 28: Auto Tilt
Auto Tilt The function "Tilt" offers you a lot of possibilities. If you e.g. choose "No" to both Auto tilt up and tilt down, the tilt function works completely manually. If you choose "Yes" to both, it all works automatically. You can also choose a combination (semi-automatic). -
Page 29: Aut. Reverse If Stuck
Extra pulses by the tree: In order to be sure that the tree is sawn completely through. Extra pulses by the pieces: In order to ensure that the saw cuts completely through the single pieces, when they are cut off, a number of EXTRA saw-pulses, that the saw is to run, can be entered here. - Page 30 By pushing ENT, when this bar is highlighted, a window appears, in which you can enter a new value. The new value is accepted by pushing ENT. Every time you saw, the machine opens for oil to the saw during this period. TM1000 Usermanual Ver.
- Page 31 Print out types: Press F3 for SET UP. Press F8 for PRINT. The following screen comes up: Print out types: Preset tables: When this text is marked and ENT is pressed, the set up’s for all the active preset tables are written out on paper (see enclosure).
-
Page 32: Indication Of Errors
Indication of errors: Press F3 for SET UP. Press F9 for ERRORS. The following screen comes up: ERROR INDICATION SET UP: OUTPUT ERROR – settings MALFUNCTION-Here you can enter, whether you want indication of the following errors: Rollers – length-pulses Open/Close left diameter-pulses Open/Close right diameter-pulses Saw out... - Page 33 OUTPUT ERRORS – settings: You can indicate here which errors you want shown on the display, if they are detected. YES means: Show error. NO means: Do not show error. If the indicator to the left of the line flashes, it indicates that the error in question is present at that moment.
- Page 34 LENGTH ENCODER-settings: Sequence error: On-/off choice of whether a sequence error should give a warning indication on the screen. Sequence diff.: The number of sequence errors that are tolerated before a warning indication is finally given on the screen. Pulse error: On/off choice of whether a pulse error should give a warning indication on the screen.
- Page 35 LEFT-HAND DIAMETER ENCODER-settings: Please see description on the previous page to “LENGTH ENCODER” SAW ENCODER-settings: Please see the description on the previous page to ”LENGTH ENCODER” 21-09-05 Tm1000 Usermanual Ver.4.10.doc...
- Page 36 See encoder-details: For each of the four encoders (“pulse emitters”) details are shown regarding the pulse counts. Each encoder has two exits (A and B), which send pulses (according to a staggered pattern) to the module/control box on the felling head. P: Position for the relevant movement (is controlled from A and B).
-
Page 37: Searching Can-Net
Searching CAN-net: For the inter-connection of the 3 units: “TMHH 2081” (Tech Measure Harvesting-head. Sensor-inputs, and outputs for hydraulic valves) “TMUI 2081” (Tech Measure User Interface. Servicing the control-buttons on the seat) “TMHS 1000” (Tech Measure Harvesting System. The display-box. Type: TMC2400 ) We use the international standard connection-system: CAN (Controller Area Network),... -
Page 38: Good To Know
GOOD TO KNOW !!! It is a good idea to take back-up and a print-out of your production and data every day. Should the system “get stuck”, meaning that the main screen does not appear when turning on the system, you can retrieve your data in the following way: Turn off the system, connect the printer, keep the 0-key pressed down, while turning on the system. -
Page 39: Examples Of Printer Write-Outs
Examples of printer write-outs: ---------------------------------------- Date: 16/02/01 Time: 13:53:25 No: 7 ---------------------------------------- Preset ---------------------------------------- Timber type: Cut to length Length: 415 cm Preset ---------------------------------------- Timber type: Cut to length Length: 248 cm Payment length: 240 cm Min. length: 245 cm Max. - Page 40 Print out of ”Activated Calibration table”, example: ---------------------------------------- Date: 16/02/01 Time: 14:39:42 No: 7 ---------------------------------------- Length factor: 5.70 pulses/cm ---------------------------------------- Pulses Diameter -> 500 mm -> 336 mm -> 314 mm -> 282 mm -> 230 mm -> 207 mm ->...
- Page 41 Print out of ”Total number of pieces and volume”, example: ---------------------------------------- Date: 16/02/01 Time: 14:40:43 No: 7 ---------------------------------------- Preset Piece: Volume: 17.74 20.88 16.21 5.68 0.00 0.00 0.00 ---------------------------------------- Total: 60.51 Waste: 12.36 Number of Trees: G15 time: 4hrs 42min ---------------------------------------- 21-09-05 Tm1000 Usermanual Ver.4.10.doc...
- Page 42 Print out of ”Summary of preset table…”, example: ---------------------------------------- Date: 16/02/01 Time: 14:41:52 No: 7 ---------------------------------------- Preset Piece: Volume: 17.74 20.88 16.21 ---------------------------------------- Total: 54.83 Waste: 12.15 No. Of trees: G15 time: 4hrs 42min ---------------------------------------- TM1000 Usermanual Ver. 4.10 21-09-05...
Need help?
Do you have a question about the Tech Measure 1000 and is the answer not in the manual?
Questions and answers