Advertisement
Quick Links
Royale
Installation and Operating Instructions
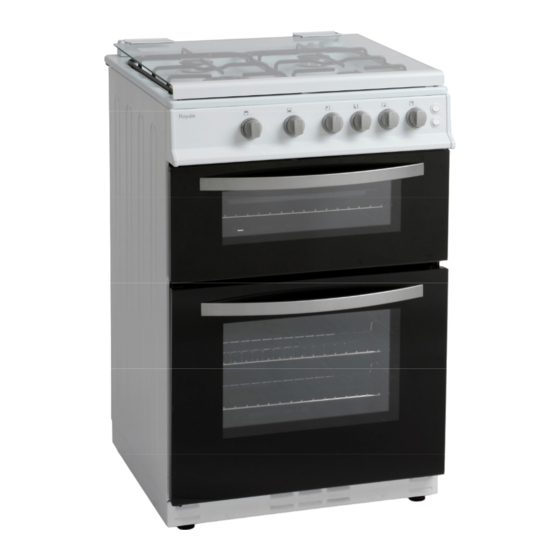
MODEL: RY60DGW
White Free-Standing 60cm Gas Double Oven
(White Model shown for indicative purposes only)
Please read these instructions carefully before attempting to install or use this
appliance. It is advisable to keep these instructions in a safe place for future reference.
N.B. Should your appliance require attention, our service agents will not be able to
book a service call without your unique serial number which can be found on the
last page of this manual.
Advertisement

Related Manuals for Royale RY60DGW


Summary of Contents for Royale RY60DGW
- Page 1 Royale Installation and Operating Instructions MODEL: RY60DGW White Free-Standing 60cm Gas Double Oven (White Model shown for indicative purposes only) Please read these instructions carefully before attempting to install or use this appliance. It is advisable to keep these instructions in a safe place for future reference.
- Page 2 Introduction Thank you for choosing this Royale branded appliance . It has been designed to give years of trouble-free use provided it is installed and maintained correctly. Please read these instructions carefully before installing or using your appliance. It is advisable to keep your purchase and installation receipts with these instructions in a safe place for future reference.
- Page 3 Your 1 year Manufacturer's guarantee THIS DOES NOT AFFECT YOUR STATUTORY RIGHTS. Your new Royale appliance carries a free guarantee which protects you against the cost of repairs during the first 12 months from date of purchase provided that: Any claim is accompanied by evidence of the model reference, model serial number and proof of purchase, such as a Sales Receipt, showing that the appliance was purchased within the 12 months prior to the date of claim.
- Page 4 Description Of The Appliance 1. Glass Lid 2. Hotplate with 4 x Burners 3. Control Panel 4. Grill/Small Oven Compartment with Glass Door 5. Main Oven with Glass Door 6. Adjustable Feet (Picture indicative of model supplied) (N.B. Model supplied my not have all features shown in this User Manual).
- Page 5 CONTENTS: Section 1. Installation Section 2. Safety Advice Section 3. Operating the Appliance Section 4. Maintenance...
- Page 6 Section 1. Installation This appliance must be installed by a ‘Gas Safe’ gas engineer. Remove all packaging, protective film and securing tape from the appliance. Position the appliance in a dry atmosphere. The following dimensions are provided as a guide for installation –...
- Page 7 Adjust the height and stability of the cooker by adjusting the two front feet as shown below. Rotate in a clockwise direction to decrease the height and in an anti-clockwise direction to increase the height. 1.2. Electrical Connection This appliance can be fitted with a 13 Amp plug and plugged into a standard, switchable 13 Amp socket.
- Page 8 1.3. Gas Connection THE GAS CONNECTION MUST BE CARRIED OUT BY A ‘GAS-SAFE’ REGISTERED GAS ENGINEER! Connection to the gas supply should be with either rigid or semi-rigid pipe, i.e. steel or copper. The connection should be suitable for connecting to RC 1/2 (1/2 BSP male thread). When the final connection has been made, it is essential that a thorough leak test is carried out on the cooker and installation.
- Page 9 1.4. Technical Specifications Power supply: 230v – 50Hz...
- Page 10 Section 2. Safety Advice - This appliance must be installed by a ‘Gas Safe’ approved gas engineer. Please read this booklet thoroughly before installing and switching on the appliance. The manufacturer accepts no responsibility for incorrect installation and usage. This appliance is guaranteed for Domestic Use Only. The appliance is not intended for use by persons (including children) with reduced physical, sensory or mental capabilities, or lack of experience and knowledge, unless they have been...
- Page 11 Section 3. Operating the Appliance 3.1. Control Panel (N.B. Model supplied my not have all features shown in this User Manual). 1. Grill/Small Oven Control Knob 2. Main Oven Control Knob 3. Left Hand Rear Burner Control Knob 4. Left Hand Front Burner Control Knob 5.
- Page 12 3.2.2. Operating the Oven/Grill 3.2.2.1. Grill/Small Oven Open the grill compartment door. Push and turn the grill knob (1) to the required setting (oven or grill) whilst pressing the ignition button. Release the control knob once the burner has lit. Now set the control knob to the required heat level, Low or High as indicated on the control knob &...
- Page 13 3.2.2.2. Main Oven To light the oven, push and turn the control knob (2) to the minimum position whilst pressing the ignition button. Release the control knob once the burner has lit. Now set the required temperature by turning the control knob between 1 and maximum noting the approximate temperature guide shown in the table below.
- Page 14 Section 4. Maintenance Before any maintenance or cleaning work is carried out, DISCONNECT the appliance from the ELECTRICITY supply and ensure that the appliance is completely cool. 4.1. Cleaning the Ovens Clean spillages from inside the oven as soon as possible after use. Always ensure that the surfaces have cooled down before cleaning.
- Page 15 difficult to remove. After cleaning, be sure to wipe dry with a soft cloth and ensure they are refitted correctly prior to igniting the burner. The electric ignition is obtained through a ceramic "electrode" and a metal electrode. Keep these components very clean, to avoid lighting difficulties, and check that the burner crown holes are not obstructed.
- Page 16 Important Note: This appliance is marked according to the European directive 2002/96/EC on Waste Electrical and Electronic Equipment (WEEE). By ensuring this product is disposed of correctly, you will help prevent potential negative consequences for the environment and human health, which could otherwise be caused by inappropriate waste handling of this product.
Need help?
Do you have a question about the RY60DGW and is the answer not in the manual?
Questions and answers