Table of Contents
Advertisement
Quick Links
Advertisement
Chapters
Table of Contents

Related Manuals for CLIVET HWM-2-XMi 140


Summary of Contents for CLIVET HWM-2-XMi 140
- Page 1 HWM-2-XMi 140 High Temperature Hydro Module for VRF MV6R series...
- Page 2 Dear Customer, Congratulations for having chosen this product. Clivet has been working for years to offer the market systems able to assure maximum and long-lasting wellbeing with high reliability, efficiency, quality and safety. The company aim is that to offer its customers developed systems that assure the best comfort, reduce energy consumptions and installation and maintenance costs for the enti re life-span of the system.
- Page 4 Page intentionally left blanck...
- Page 5 MD19I-010AW(DZ)
- Page 6 Page intentionally left blanck...
-
Page 7: Table Of Contents
CONTENTS Accessories DEFINITIONS Meanings of Warnings and Symbols GENERAL SAFETY PRECAUTIONS OVERVIEW Introduction Combinations and Options Application Scope of the Manual Specification UNIT APPEARANCE Structural Dimensions Center of Gravity Installation Space General Precautions about the Water System Checking, Handling, and Unpacking the Unit Installation Diagram UNIT INSTALLATION 6 APPLICATION EXAMPLES... -
Page 8: Accessories
Accessories Name Shape Purpose Installation Manual User Manual Connecting pipe assembly Connected to the water-outlet (Including safety valve) pipe side Connected to the outlet of Water discharge hose the drainage pan Control the unit Wired controller Detecting water tank Water temperature sensor temperature Connected to the water-inlet Y-shaped filter... -
Page 9: Definitions
1 DEFINITIONS DANGER Electric shock 1.1 Meanings of Warnings and Before removing the maintenance panel of the Symbols electric control performing connections or touching an electric part, please shut down all the power. Warnings in this document are classified according to severity and the likelihood of occurrence. -
Page 10: Combinations And Options
3.2 Combinations and Options Rated Water outlet : 45°C, Heating inlet 40°C capacity The Hydro Module unit can be connected to the V6R Outdoor air : 7C DB / ODU only. 6C WB The wired controller with an indoor constant temperature Sound pressure level Nom. -
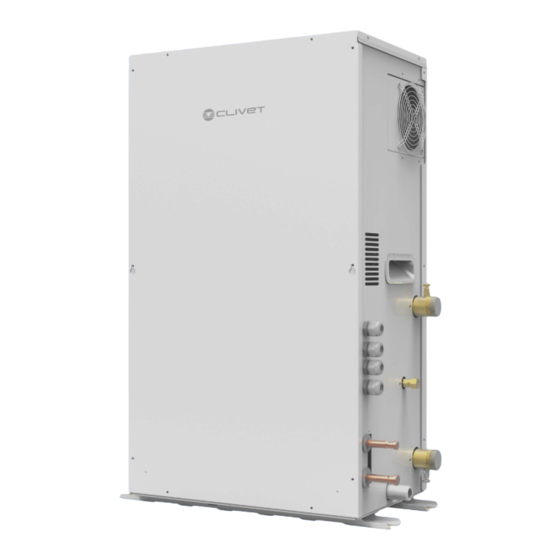
Page 11: Unit Appearance
4 UNIT APPEARANCE 4.1 Structural Dimensions (unit: mm) Hydro module unit (top view) 4.2 Center of Gravity (unit: mm) M0WU00002-00... -
Page 12: Installation Space
4.3 Installation Space Space Air outlet Air inlet Anti-vibration material Hydro module unit Space Space for installing piping (on the right side) Space for installation and maintenance (in the front) Anti-vibration material Concrete base 3 or more screw Support H-Beam supporter threads of the 2 bolts must be shown 75(2-15/16) -
Page 13: General Precautions About The Water System
WARNING In an airtight space, excessively high concentration of the refrigerant may lead to insufficient oxygen. Do not climb, sit on, or stand on the unit. Do not place any article or equipment on the top of the unit (top panel of the unit). Do not install the unit in a workshop, for example, a construction site, because at construction sites, the equipment will be covered in dust. -
Page 14: Checking, Handling, And Unpacking The Unit
Propylene Glycol Modification coefficient Quality of Freezing Cooling capacity Power Water Water flow glycol/% point/°C modification modification resistance modification 1.000 1.000 1.000 1.000 0.000 0.976 0.996 1.071 1.000 -3.000 0.961 0.992 1.189 1.016 -7.000 0.948 0.988 1.380 1.034 -13.000 0.938 0.984 1.728 1.078... -
Page 15: Unit Installation
Liquid pipe (connected to the ODU) Gas pipe (connected to the ODU) Water discharge pipe (drainage pan) Y-shaped filter Access hole (for charging/discharging refrigerant) Water discharge pipe (safety valve) Safety valve Discharge valve Drain valve Water inlet Water outlet 5 UNIT INSTALLATION To open the electric control box and operate the interior of the electric control box, open the electric control box cover plate. - Page 16 Main parts of the unit 12 11 Compressor Service pot Discharge temperature sensor Water inlet temperature sensor Liquid pipe temperature sensor at the outlet on the Plate heat exchanger used as condenser R410A refrigerant side Low pressure sensor Electronic expansion valve on the R410A loop High pressure sensor High pressure switch Water flow switch...
- Page 17 Use screw thread to connect the pipe on the water system side. Tighten the pipe to avoid water leakage. Brazing is required on the refrigerant side. STATEMENT Precautions about brazing In the event of brazing, please use nitrogen for sweeping. This can prevent the occurrence of oxidation inside pipes. Oxidation will have adverse effects on the valves and compressors in the cooling system, and may hamper normal operations.
- Page 18 When the external wire enters the interior of the unit through a waterproof cable connector, you need to separate the strong-current cable from the weak-current cable for cabling. For details, see the diagram. Inside the unit, wires should be fixed by using a cable tie through the overpass-shape component. The signal cables X1/X2 and P/Q/E must be fitted with a magnetic ring, and then all cables fixed on the overpass-shaped component by using a cable tie.
- Page 19 Group control connection method/KNX gateway connection method. The hydro module can provide the function of group control so that one module can control multiple units. In the entire system, only one master wired controller can be deployed to control units. Each unit can connect one slave wired controller for data query.
- Page 20 Three-way valve installation Check the three-way valve type. Connect it to the electric control board. For instructions on how to connect ports and wires, see page 15. INFORMATION Before installing the three-way valve, check the port opening direction. Allowed (O) Not allowed (X) Allowed (O) multiple set point 1...
- Page 21 Buckling position Back cover Front cover Straight head screwdriver 1. Insert the tip of a straight head screwdriver into the bending location at the bottom of the wired controller. lower left side Raise the screwdriver to pry open the rear cover. wire outlet INFORMATION Pay attention to the direction when prying open...
-
Page 22: Application Examples
6 APPLICATION EXAMPLES Only heating mode is available and the heating mode operates in water outlet temperature control mode. Equipment room Indoors Outdoors Water pump (Field supply. For model selection, see page 22.) Drain valve (Field supply) Hydro module Water replenishing valve (Field supply) Water flow switch Wired controller (Accessory) Water collector (Field supply) - Page 23 Only heating mode is available and the heating mode operates in room temperature control mode. Outdoors Equipment room Indoors Water pump (Field supply. For model selection, see page 22.) Drain valve (Field supply) Hydro module Water replenishing valve (Field supply) Water flow switch Water collector (Field supply) Wired controller (Accessory)
- Page 24 Only DHW mode is available Indoors Equipment room Outdoors Access hole Water pump (Field supply. For model selection, see Hydro module page 22.) Water flow switch Discharge valve (Field supply) Wired controller (Accessory) Water tank (Field supply) Y-shaped filter (Accessory) Temperature sensor of the water tank (Accessory) Tap (Field supply) Check valve (Field supply)
- Page 25 Heat Mode and DHW Mode Indoors Equipment room Outdoors ---- Water collector (Field supply) Water expansion tank (Field supply. For model Hydro module selection, see page 22.) Terminals. The unit can connect to the floor heating device FHL (25 °C-45 °C), fan coil FCU (45 °C-60 °C), Water flow switch and radiator (60 °C-80 °C), which have different temperature requirements.
- Page 26 On-site settings of the wired controller: MENU FOR SERVICEMAN OPERATION PARAMETER 1. DHW MODE SETTING FOR SERVICEMAN 2. HEAT MODE SETTING 3. WEATHER TEMP.SETTING 4. MULTIPLE SET POINT SETTING 5. HOLIDAY AWAY SETTING 6. SERVICE CALL ENTER SCROLL ENTER SCROLL 2.
- Page 27 Enabling the multiple set point of the wired controller: When only heating mode is available, the settings are the same as those described above. Multiple set point settings are as follows: MENU FOR SERVICEMAN 4. MULTIPLE SET POINT SETTING OPERATION PARAMETER 1.
- Page 28 Outdoors Equipment room Indoors Master unit Water replenishing valve (Field supply) Water pump (Field supply. For model selection, see Hydro module page 22.) Water flow switch Discharge valve (Field supply) Wired controller (Accessory) Water tank (Field supply) Temperature sensor of the water tank (Accessory) Y-shaped filter (Accessory) Tap (Field supply) Check valve (Field supply)
-
Page 29: Pump Model Selection
Notes: Assume that the performance curve of the selected water pump is as shown in the black figure. When total 1. When the water system side of multiple hydro water resistance in the water system is P1, the flow rate modules are connected in parallel and heat water for a is Q1. -
Page 30: Domestic Hot Water Tank
9 DOMESTIC HOT WATER TANK 11 MAINTENANCE AND SERVICE A domestic hot water tank(with or without booster heater) can be connected to the unit. To guarantee the best usage of the unit, you must The requirement of the tank is different for different unit regularly check the unit and on-site wiring. - Page 31 ANNEX A:Error code Error code Content Undefined address error EEPROM error PL protection appears three times in 100 minutes EEPROM mismatch Inverter module protction P2 protection appears three times in 60 minutes P4 protection appears three times in 100 minutes Electronic expansion valve 1 connection error Electronic expansion valve 2 connection error Communication error between hydro module and wired controller...
- Page 32 M0WU00002-00 MD19U-010AW...
- Page 33 M0WU00002-00...
- Page 34 CONTENTS GENERAL SAFETY PRECAUTIONS About the documentation For the user A GLANCE OF THE USER INTERFACE The appearance of the wired controller Status Icons USING HOME PAGES MENU BASIC APPLICATION Unlocking the Screen Enabling/Disabling Mode and Setting Temperature FUNCTIONS HEAT MODE DOMESTIC HOT WATER (DHW) SCHEDULE Function OPTIONS...
-
Page 35: General Safety Precautions
1 GENERAL SAFETY 1.2 For the user PRECAUTIONS If you are not sure how to operate the unit, contact your installer. 1.1 About the documentation The appliance is not intended for use by persons, including children, with reduced physical, sensory The precautions described in this document cover or mental capabilities, or lack of experience and very important topics, follow them carefully. -
Page 36: Glance Of The User Interface
2 A GLANCE OF THE USER INTERFACE 2.1 The appearance of the wired controller Enable or disable the heat mode, or Enter the menu enable or disable structure from DHW mode in the the home page menu Navigate the cursor on the display/navigate in the menu structure/adjust... -
Page 37: Using Home
3 USING HOME PAGES The hydro module features the heating function and DHW function, which can be classified into the hydro module that supports heat mode only (''FOR SERVICEMAN'' > ''Heat mode setting'' > ''HEAT MODE=YES'' and ''FOR SERVICEMAN'' > ''DHW mode setting'' >... - Page 38 Scenario 2 Only heat mode is available and the hydro module operates in room temperature control mode. (For more information, please read the Installation Manual.) Note: The wired controller must be installed indoors, where heating is required. The wired controller is equipped with a temperature sensor for detecting room temperature.
- Page 39 Scenario 4 Both heat mode and DHW mode are available. (For more information, please read the Installation Manual.) ---- 04:27 27-05-2019 MAIN °C °C TANK Indicates leaving water Sets the desired water tank temperature control. temperature, ranging from 25°C to 80°C. Sets the desired leaving water temperature, ranging from 25°C to...
- Page 40 Scenario 5 Only heat mode is available and there are multiple set points for the heat mode. (For more information, please read the Installation Manual and see ''Multiple Set Points'' on Page 14 in this document.) The settings of multiple set points do not affect the main interface. The temperature of multiple set points is set through the menu of the wired controller, while only the space 0 room temperature is set on the main interface.
- Page 41 Scenario 6 Group control of the hydro module. When multiple hydro modules heat water in one water tank, the group control function of the hydro module should be used. (For more information, please read the Installation Manual.) The group control function is only valid for the DHW mode. Notes: 1.
-
Page 42: Menu
4 MENU On the main interface, press MENU. The following interface is displayed. MENU MENU HEAT MODE OPERATION PARAMETER DOMESTIC HOT WATER (DHW) FOR SERVICEMAN SCHEDULE OPTIONS CHILD LOCK SERVICE INFORMATION ENTER SCROLL ENTER SCROLL 5 BASIC APPLICATION 5.1 Unlocking the Screen If the icon is displayed on the screen, it indicates that the wired controller has been locked. -
Page 43: Enabling/Disabling Mode And Setting Temperature
On the main interface, if you press the ON/OFF key, you cannot enable/disable any function, and the following prompt is displayed: Press ▲ to enter main interface settings. Press ► or ◄ to select the mode to be set. 04:27 27-05-2019 04:27 27-05-2019... - Page 44 Room temperature control Press ON/OFF to turn on/off heat mode. In room temperature control mode, set the desired room Press ON/OFF Press ON/OFF temperature. The hydro module will control the operating of the hydro module according to the room temperature ON/OFF ON/OFF collected by the wired controller.
- Page 45 Assume that the temperature adjustment function in DHW mode or mode on/off function are locked on the wired controller. adjust temperature 04:27 27-05-2019 enable/disable a mode, the following interface is displayed: HEAT MODE ON/OFF FUNCTION IS LOCKED BY If you press NO, you will return to the main interface. If CENTRALIZED CONTROLLER.
-
Page 46: Functions
6 FUNCTIONS HEAT MODE PRESET WEATHER MULTIPLE 6.1 HEAT MODE SET POINT TEMP. TEMP. SET TIME TEMP. In heat mode, PRESET TEMP.\WEATHER TEMP. SET\MULTIPLE SET POINT are available. 00:00 45°C √ 6.1.1 PRESET TEMP. √ 00:00 45°C PRESET TEMP. is used to set different desired water 45°C 00:00 √... - Page 47 4. The preset temperature is only valid for the water HEAT MODE outlet temperature control of heat mode. If ROOM TEMP. is set to YES on the wired controller, the following PRESET WEATHER MULTIPLE information is displayed: TEMP. TEMP. SET SET POINT HEAT MODE TIMER function is on.
- Page 48 You can set the following 4 parameters in FOR If Weather TEMP.SET is enabled, you cannot set the SERVICEMAN. (See ''FOR SERVICEMAN''.) desired water outlet temperature. If you press ▼ or ▲, the following interface is displayed. H_weather _Twout 04:27 27-05-2019 Shift L_weather...
-
Page 49: Domestic Hot Water (Dhw)
Notes: Choose MENU > DOMESTIC HOT WATER > DISINFECT. Press OK. The following interface is 1. The hydro module can meet the control requirements displayed. at different water temperatures. You must connect an external third-party temperature reduction device to the DOMESTIC HOT WATER (DHW) circuits of space1 and space2. - Page 50 Note: Move to ''■'', press '' OK '' to select or unselect. ( √ When the hydro module operates in disinfection mode, if timer is selected. the timer is unselected.) you press the On/Off key, the pressing is invalid and the following interface is displayed.
-
Page 51: Schedule Function
3. If DHW PUMP RUNNING TIME=NON, choose MENU If the start time is later than the end time, the following > DOMESTIC HOT WATER > DHW PUMP. Press OK. interface is displayed. The following interface is displayed. SCHEDULE DOMESTIC HOT WATER (DHW) WEEKLY SCHEDULE CANCEL... - Page 52 6.3.2 WEEKLY SCHEDULE Timer and weekly schedule cannot take effect at the same time. The time which is set later will take effect first. If the weekly schedule is set, the icon will be displayed on the main interface. Choose MENU > SCHEDULE > WEEKLY SCHEDULE . Press OK. The following interface is displayed. SCHEDULE SCHEDULE WEEKLY...
- Page 53 6.3.4 CANCEL TIMER Go to ''MENU'' > ''SCHEDULE'' >''CANCEL TIMER''. Press ''OK''. The following page will appear: SCHEDULE WEEKLY SCHEDULE CANCEL TIMER SCHEDULE CHECK TIMER Do you want to cancel the timer and weekly schedule ? CONFIRM SCROLL Use ''◄ '', ''► '', ''▼'', ''▲'' to move to ''YES''. Press ''OK'' to cancel the timer. If you want to exit CANCEL TIMER, press ''BACK''. If TIMER or WEEKLY SCHEDULE is activated, the timer icon '' '' or weekly schedule icon '' '' will display on the home...
-
Page 54: Options
6.4 OPTIONS OPTIONS menu contents as follows: 1) SILENT MODE 2) HOLIDAY AWAY 3) HOLIDAY HOME 6.4.1 SILENT MODE The silent mode is used to reduce the noise of the hydro module, which may degrade the capability of the hydro module. You can set the hydro module to always operate in silent mode or to enter silent mode within a period of time. - Page 55 6.4.2 HOLIDAY AWAY SETTING VALUE If holiday away mode is enabled, the icon will be HOLIDAY AWAY displayed on the main interface. DHW MODE The holiday away mode can prevent water from freezing DISINFECT during holidays and start heating and water heating HEAT MODE before you are back home, thus guaranteeing comfort and hot water at home.
-
Page 56: Child Lock
6.4.3 HOLIDAY HOME Mode Notes: 1. If both HOLIDAY AWAY and HOLIDAY HOME are set In holiday home mode, the hydro module can operate to ON, FROM and UNTIL set on the HOLIDAY AWAY according to the schedule settings of the holiday mode page cannot coincide or overlap with those set on the without affecting the normal schedule. -
Page 57: Service Information
Use ''▼'' and ''▲'' to scroll and'' ON/OFF'' to select LOCK or UNLOCK. The heat/DHW temperature can't be adjusted when the HEAT TEMP. ADJUST/DHW TEMP. ADJUST is locked. If you want to adjust the heat/DHW temperature when heat/DHW temperature is locked, the following page will appear: The heat/DHW mode can't turn on or off when the HEAT/DHW MODE ON/OFF is locked. -
Page 58: Operation Parameters
Press OK to show the mean of the error code: SERVICE INFORMATION SERVICE ERROR PARAMETER DISPLAY CALL CODE 04:27 27-05-2019 BUZZER HB01# E1 Communication fault between controller and hydro SCREEN LOCK TIME 300 SEC box. Please contact your dealer. CONFIRM ON/OFF SCROLL ON/OFF... - Page 59 The parameters of ODU units are as follows: OPERATION PARAMETERS OPERATION PARAMETERS 25°C HYDRO BOX OUTDOOR UNITS 25°C 25°C 25°C SCROLL ENTER SCROLL OPERATION PARAMETERS OPERATION PARAMETERS 25°C ODU1_INV 0 HZ 25°C ODU1_PC 25°C ODU1_PE 25°C ODU1_DSH 0 °C 25°C ODU1_T4 25°C 25°C...
- Page 60 Parameter Content OPERATION MODE Operation Mode CURRENT Current COMPRESSOR FREQUENCY Compressor frequency COMP. RUN TIME 1 Current compressor operation time COMP. RUN TIME 2 Last compressor operation time COMP. RUN TIME 3 Last two compressor operation time COMP. RUN TIME 4 Compressor total operation time EXPANSION VALVE 1 Electronic expansion valve 1...
-
Page 61: User Settings
6.8 User Settings Default Min. Max. Adjustment Code Description Unit Value Value Value Step Water outlet temperature of heating mode TwoutS °C set on the main interface Room temperature of heating mode set on °C the main interface Water tank temperature of DHW mode set TtankS °C on the main interface... - Page 62 Default Min. Max. Adjustment Code Description Unit Value Value Value Step Pipeline water return pump timer on/off: DHW PUMPTIMER1-16 OFF = 0, ON = 1 DHW PUMP START 1-16 0:00 0:00 23:50 1/10 h/min Pipeline water return pump start time: 1-16 TIMER1-TIMER6 Timers 1-6 on/off: 0 = Off,1 = On TIMER1-TIMER6 START...
-
Page 63: On-Site For Serviceman Settings
6.9 On-site FOR SERVICEMAN 6.9.4 Settings of Special Functions Settings 6.9.4.1 Max. Power Limitation Function This function can limit the power consumption of the 6.9.1 About FOR SERVICEMAN hydro module. Choose MENU > FOR SERVICEMAN > POWER INPUT LIMITATION. Press OK. The following FOR SERVICEMAN is used for installers and service interface is displayed. - Page 64 6.9.5 Meanings of Each Setting Item Default Min. Max. Adjustment Code Description Unit Value Value Value Step DHW MODE DHW mode on/off: 0 = NON, 1 = YES DISINFECT Disinfection on/off: 0 = NON, 1 = YES MODE Water heating priority on/off: 0 = NON, DHW PRIORITY 1 = YES DHW MODE...
-
Page 65: Menu Structure: Overview
7 MENU STRUCTURE: OVERVIEW 7.1 STRUCTURE MENU Heat mode DHW MODE Domestic hot water(DHW) Disinfect mode Schedule DHW priority Options dTtankSH Child lock TtankS_DI Service information t_DI_HIGHTEMP. Operation parameter t_DI_MAX For serviceman DHW PUMP RUNNING TIME HEAT MODE LEAVING WATER TEMP. Preset temp. -
Page 66: Maintenance
8 MAINTENANCE NOTE Before repair and maintenance, ensure that the hydro module is powered off. ● Water pressure Check if the water pressure is above 0.3 bar. Add water if necessary. ● Water filter Clean the water filter. ● Water pressure relief valve Check for correct operation of the pressure relief valve by turning the red knob along the valve counter-clockwise: 1. -
Page 67: Error Codes
8.1 Error Codes Error code Content Undefined address error EEPROM error PL protection appears three times in 100 minutes EEPROM mismatch Inverter module protction P2 protection appears three times in 60 minutes P4 protection appears three times in 100 minutes Electronic expansion valve 1 connection error Electronic expansion valve 2 connection error Communication error between hydro module and wired controller... - Page 68 ARGO MMINISTRATORE DELEGATO CLIVET S.P.A. - Via Camp Lonc, 25 - Z.I. VILLAPAIERA - 32030 FELTRE (BL) – ITALIA Cap.Soc. Eur 20.000.000 i.v. C.F. e Reg.Impr. BL n°.00708410253 – R.E.A. n°.66577 – P.I. /VAT:IT 00708410253 Tel. +39 0439 3131 - Fax +39 0439 313300 –Web: www.clivet.it...
- Page 69 Page intentionally left blanck...
- Page 70 Page intentionally left blanck...
- Page 71 Page intentionally left blanck...
- Page 72 SUSTAINABLE COMFORT AND THE WELL-BEING OF PEOPLE AND THE ENVIRONMENT www.clivet.com sales and assistance M0WU00002-00 - 13-05-2020 CLIVET SPA Via Camp Lonc 25, Z.I. Villapaiera 32032 Feltre (BL) - Italy Tel. +39 0439 3131 - Fax +39 0439 313300 info@clivet.it...
Need help?
Do you have a question about the HWM-2-XMi 140 and is the answer not in the manual?
Questions and answers