Table of Contents
Advertisement
Quick Links
Advertisement
Table of Contents

Related Manuals for harma dbx 286s

Summary of Contents for harma dbx 286s
- Page 1 ® Mic Preamp/Processor User Manual Professional Audio Equipment...
- Page 2 IMPORTANT SAFETY INFORMATION WARNING FOR YOUR PROTECTION READ THE FOLLOWING: READ THESE INSTRUCTIONS. KEEP THESE INSTRUCTIONS. HEED ALL WARNINGS. FOLLOW ALL INSTRUCTIONS. The symbols shown above are internationally accepted symbols that warn of potential hazards with electrical products. The lightning flash with DO NOT USE THIS APPARATUS NEAR WATER.
- Page 3 IMPORTANT SAFETY INFORMATION SAFETY INSTRUCTIONS DECLARATION OF CONFORMITY NOTICE FOR CUSTOMERS IF YOUR UNIT IS EQUIPPED WITH A POWER CORD. WARNING: THIS APPLIANCE SHALL BE CONNECTED TO A MAINS SOCKET OUTLET WITH A PROTECTIVE declares that the product: EARTHING CONNECTION. Product name: dbx286S Note: Product name may be suffixed by a combination of the letters EU, M, or V.
- Page 4 CONSIGNES DE SÉCURITÉ IMPORTANTES AVERTISSEMENT POUR VOTRE SÉCURITÉ LIRE ATTENTIVEMENT : LIRE CES CONSIGNES. CONSERVER CES CONSIGNES. RESPECTER TOUS LES AVERTISSEMENTS. SUIVRE TOUTES LES CONSIGNES. Les symboles illustrés ci-dessus sont des symboles acceptés NE PAS UTILISER CET APPAREIL PRÈS DE L’EAU. internationalement qui avertissent des dangers potentiels relatifs à...
- Page 5 CONSIGNES DE SÉCURITÉ IMPORTANTES CONSIGNES DE SÉCURITÉ DÉCLARATION DE CONFORMITÉ NOTICE ADRESSÉE AUX CONSOMMATEURS ÉQUIPÉS D’UN MATÉRIEL AVEC CORDON D’ALIMENTATION FOURNI. AVERTISSEMENT : CET APPAREIL DOIT ÊTRE BRANCHÉ SUR UNE PRISE SECTEUR DOTÉE D'UNE PROTEC- TION PAR MISE À LA TERRE. Nom du produit : dbx286S Remarque : Nom du produit peut être suffixé...
-
Page 6: Table Of Contents
286s Table of Contents Section 1 - Introduction ........1 1.1 Service Contact Info ........2 1.2 Warranty ............3 Section 2- Operating Controls ........4 2.1 Rear Panel ...........4 2.2 Front Panel ..........5 Section 3 - Basic Operation ........10 3.1 Connecting the 286s to Your System ....10 3.2 Understanding the 286s Mic Preamp ....10 Section 4 - Problems, Possible Causes, Solutions ..16 Section 5 - Technical Support and Factory Service ..18... -
Page 7: Section 1 - Introduction
Introduction Section 1 - Introduction Congratulations on choosing the dbx 286s Mic Preamp/Processor. The 286s is a powerful, user-friendly unit, providing concise and intuitive controls for all your mic processing needs, whether you use a microphone to record vocals and acoustic instruments, sample acoustic sounds, or for a public address system installation. -
Page 8: Service Contact Info
286s Section 1 Introduction 1.1 Service Contact Info If you require technical support, contact dbx Customer Service. Be prepared to accurately describe the problem. Know the serial number of your unit - this is printed on a sticker attached to the bottom panel. If you have not already taken the time to fill out your warranty registration card and send it in, please do so now. -
Page 9: Warranty
286s Section 1 Introduction 1.2 Warranty This warranty is valid only for the original purchaser and only in the United States. 1. The warranty registration card that accompanies this product must be mailed within 30 days after purchase date to validate this warranty. Proof-of-purchase is considered to be the burden of the consumer. -
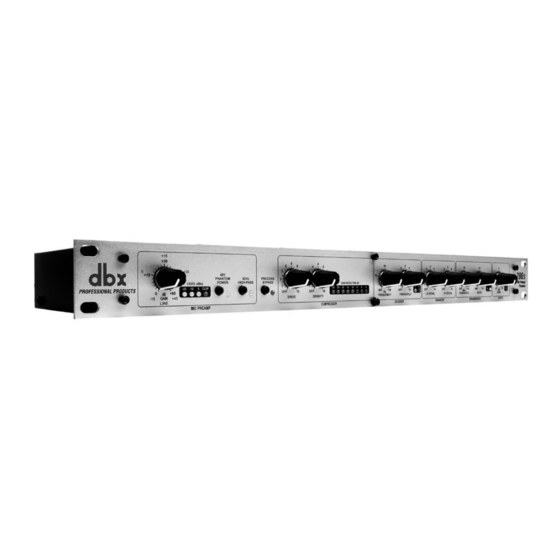
Page 10: Section 2- Operating Controls
286s Section 2 Operating Controls Section 2 - Operating Controls 2.1 Rear Panel MIC INPUT Jack The 286s MIC INPUT jack supports professional and home studio microphones by accepting either balanced or unbalanced signal through an XLR connector. Pins 2 and 3 are symmetrically balanced and floating;... -
Page 11: Front Panel
286s Section 2 Operating Controls To use the INSERT jack to MULT the preamp out (i.e., to provide an output with a buffered version of the signal after the Mic Preamp circuitry, but before the Processing Section), insert a Mono 1/4” plug fully into the INSERT jack, then pull the plug out one click. Plug the other end of the cable to the appropriate load. - Page 12 286s Section 2 Operating Controls of the mic signal and additional gain exceeds the circuit’s capabilities; reduce gain via the MIC GAIN control. Set the MIC GAIN control so that the CLIP LED never lights. The LEVEL LEDs can also be used to check the strength of the input signal. For example, the 286s does not support low level microphones plugged into its 1/4”...
- Page 13 286s Section 2 Operating Controls Compressor DRIVE Control The DRIVE control determines the overall amount of gain reduction by setting the signal level going into the gain control circuitry. Turning DRIVE clockwise will increase the input signal, and therefore increase the amount of applied gain reduction. Turning DRIVE fully counterclockwise (to OFF) allows the compressor to pass all signals unattenuated, effectively bypassing the compressor.
- Page 14 286s Section 2 Operating Controls Enhancer Note: The low and high frequency enhancers are off when their respective DETAIL controls are set to OFF. LF DETAIL Control The 286s Low Frequency enhancement simultaneously applies an 80Hz boost and 250Hz cut to the program.
- Page 15 286s Section 2 Operating Controls Readjust as needed to gate out noise -- external, as well as hiss from the unit. The 286s other processing can add substantial gain to a signal, especially at higher settings, thereby increasing the noise floor. Output GAIN (dB) Control and CLIP LED The OUTPUT GAIN control sets the level at the line output.
-
Page 16: Section 3 - Basic Operation
286s Section 3 Basic Operation Section 3 - Basic Operation 3.1 Connecting the 286s to Your System The 286s can be used with any low-level microphone signal (via the MIC INPUT) or any line-level device (via the LINE INPUT). Some common line-level devices include: mixing consoles, electronic musical instruments, patch bays, and signal processors. - Page 17 286s Section 3 Basic Operation Press the HIGHPASS button In to cut signals below 80Hz by 18dB/octave, effectively filtering out mic proximity effects, hum, rumble, wind and other low frequency “undesirables.” Use the MIC GAIN control to achieve the best definition and character possible from your microphone.
- Page 18 286s Section 3 Basic Operation by blowing air through a constricted (narrow) mouth opening or across the edge of the teeth, as in the “s” and “sh” in “sash.” Sibilants contain predominantly high frequency components with a sharp rise above 1kHz and most of the energy in the 4kHz to 10kHz band, centered on 6kHz to 8kHz.
- Page 19 286s Section 3 Basic Operation to pass. If the input signal is below the threshold, the gate “closes” and the input signal is attenuated. With sufficient attenuation, it effectively cuts that signal off. On the 286s, the amount of attenuation is set with the EXPANSION RATIO control. The 286s gate provides more flexibility than traditional switch gates because it actually functions as a combination gate/expander.
- Page 20 286s Section 3 Basic Operation slow the compressor’s release time, set the DENSITY control to 0. Set the De-Esser frequency control to 4kHz (12:00 position). Adjust the De-Esser THRESHOLD control to reduce the vocalist’s sibilance. Use the HF DETAIL, to taste, to add life to the vocal. Defeat the LF DETAIL by setting it to OFF.
- Page 21 286s Section 3 Basic Operation Enhancer Note: The High and Low Frequency Enhancers are OFF when their respective DETAIL controls are set to the “off” position. Suggested Usage: Female Male Voice Keyboard Guitar Bass Drums Strings/ Club Voice Guitar Horns Sound/DJ ◊...
-
Page 22: Section 4 - Problems, Possible Causes, Solutions
286s Section 4 Problems, Possible Causes, Solutions Section 4 - Problems, Possible Causes, Solutions Always verify that the problem is not in the source material being fed into the 286s, or in the other parts of the system. If you still have problems when using the 286s, consider the following remedies. - Page 23 286s Section 4 Problems, Possible Causes, Solutions signal is adequately restored). This means that you should set the Expander/Gate controls so that the red (-) THRESHOLD LED (located to the right of the EXPANSION RATIO control) does not light until the required signal is finished. Lispy Vocals With higher settings of the De-Esser THRESHOLD or Expander/Gate THRESHOLD controls, a vocal performance can be marred by resultant lisps (i.e., where s and z sounds are heard...
-
Page 24: Section 5 - Technical Support And Factory Service
286s Section 5 Technical Support and Factory Service Section 5 - Technical Support and Factory Service The 286s is an all-solid-state product with components chosen for high performance and excellent reliability. Each 286s is tested and calibrated at the factory and should require no internal adjustment of any type throughout the life of the unit. -
Page 25: Section 6 - Technical Specifications
286s Section 6 Technical Specifications MIC INPUT Floating balanced, Pin 2 Hot Impedance ~ 4.2kΩ Balanced Maximum Level 0.25Vrms, Gain=30dB Gain Adjustment Range +0dB ... +60dB Phantom Power +48VDC, applied to XLR pins 2 and 3 through 6.81kΩ resistors CMRR >40dB, typically 55dB –125dBu, 22Hz-22kHz, 150Ω... - Page 26 286s Section 6 Technical Specifications ENHANCER HF Detail Characteristic Program-controlled shelving equalizer, approximately 15dB maximum HF boost LF detail Characteristic Bell-shaped boost @ 80Hz, bell-shaped cut @250Hz, ratio is approximately EXPANDER/GATE Threshold Range OFF ... +15dBu Expansion Ratio Adjustable 1.5:1 ... 10:1 Maximum Depth >50dB Attack Time...
-
Page 27: Section 7 - Block Diagram
286s Section 7 - Block Diagram... - Page 28 286s User Manual PN: 18-0728V-B Printed in China dbx Professional Products is a registered trademark of HARMAN © 2015 HARMAN All rights reserved...
Need help?
Do you have a question about the dbx 286s and is the answer not in the manual?
Questions and answers