Table of Contents
Advertisement
Advertisement
Table of Contents

Related Manuals for Cocktail Audio N25AMP

Summary of Contents for Cocktail Audio N25AMP
- Page 1 Rev1.0 English...
-
Page 2: Gracenote End User License Agreement
® Gracenote End User License Agreement This application or device contains software from Gracenote, Inc. of Emeryville, California (“Gracenote”). The software from Gracenote (the “Gracenote Software”) enables this application to perform disc and/or file identification and obtain music-related information, including name, artist, track, and title information (“Gracenote Data”) from online servers or embedded databases (collectively, “Gracenote Servers”) and to perform other functions. -
Page 3: Notification Of Gnu General Public License
NOTIFICATION of GNU General Public License This product contains a software which, as a free software, is fully or partly subject to the terms of a license of the GNU General Public License Version 2/Version 3 or GNU Lesser General Public License ("LGPL"). Upon request (nwkoh@novatron.co.kr), you will also receive the software's source code on a customary data storage device. - Page 4 portion of it, either verbatim or with modifications and/or translated into another language. (Hereinafter, translation is included without limitation in the term "modification".) Each licensee is addressed as "you". Activities other than copying, distribution and modification are not covered by this License; they are outside its scope. The act of running the Program is not restricted, and the output from the Program is covered only if its contents constitute a work based on the...
- Page 5 a) Accompany it with the complete corresponding machine-readable source code, which must be distributed under the terms of Sections 1 and 2 above on a medium customarily used for software interchange; or, b) Accompany it with a written offer, valid for at least three years, to give any third party, for a charge no more than your cost of physically performing source distribution, a complete machine-readable copy of the corresponding source code, to distributed under the terms of Sections 1 and 2 above on a medium customarily used for software interchange;...
- Page 6 license would not permit royalty-free redistribution of the Program byall those who receive copies directly or indirectly through you, then the only way you could satisfy both it and this License would be to refrain entirely from distribution of the Program. If any portion of this section is held invalid or unenforceable under any particular circumstance, the balance of the section is intended to apply and the section as a whole is intended to apply in other circumstances.
- Page 7 YOU OR THIRD PARTIES OR A FAILURE OF THE PROGRAM TO OPERATE WITH ANY OTHER PROGRAMS), EVEN IF SUCH HOLDER OR OTHER PARTY HAS BEEN ADVISED OF THE POSSIBILITY OF SUCH DAMAGES. END OF TERMS AND CONDITIONS How to Apply These Terms to Your New Programs If you develop a new program, and you want it to be of the greatest possible use to the public, the best way to achieve this is to make it free software which everyone can redistribute and change under these terms.
- Page 8 rights, we need to prevent others from denying you these rights or asking youto surrender the rights. Therefore, you have certain responsibilities if you distribute copies ofthe software, or if you modify it: responsibilities to respect the freedom of others.For example, if you distribute copies of such a program, whether gratis or for a fee, you must pass on to the recipients the same freedoms that you received.
- Page 9 The “System Libraries” of an executable work include anything, other than the work as awhole, that (a) is included in the normal form of packaging a Major Component, but which is not part of that Major Component, and (b) serves only to enable use of the work with that Major Component, or to implement a Standard Interface for which an implementation is available to the public in source code form.
- Page 10 • b) The work must carry prominent notices stating that it is released under this License and any conditions added under section 7. This requirement modifies the requirement in section 4 to “keep intact all notices”. • c) You must license the entire work, as a whole, under this License to anyone who comes into possession of a copy. This License will therefore apply, along with any applicable section 7 additional terms, to the whole of the work, and all its parts, regardless of how they are packaged.
- Page 11 whether the product has substantial commercial, industrial or non-consumer uses, unless such uses represent the only significant mode of use of the product. “Installation Information” for a User Product means any methods, procedures, authorization keys, or other information required to install and execute modified versions of a covered work in that User Product from a modified version of its Corresponding Source.
- Page 12 covered work in accord with this section, you must place, in the relevant source files, a statement of the additional terms that apply to those files, or a notice indicating where to find the applicable terms. Additional terms, permissive or non-permissive, may be stated in the form of a separately written license, or stated as exceptions;...
- Page 13 claims, to make, use, sell, offer for sale, import and otherwise run, modify and propagate the contents of its contributor version. In the following three paragraphs, a “patent license” is any express agreement or commitment, however denominated, not to enforce a patent (such as an express permission to practice a patent or covenant not to sue for patent infringement).
- Page 14 GNU General Public License, you may choose any version ever published by the Free Software Foundation. If the Program specifies that a proxy can decide which future versions of the GNU General Public License can be used, that proxy's public statement of acceptance of a version permanently authorizes you to choose that version for the Program.
- Page 15 Work that, considered in isolation, are based on the Application, and not on the Linked Version. The “Corresponding Application Code” for a Combined Work means the object code and/or source code for the Application, including any data and utility programs needed for reproducing the Combined Work from the Application, but excluding the System Libraries of the Combined Work.
- Page 16 • a) Accompany the combined library with a copy of the same work based on the Library, uncombined with any other library facilities, conveyed under the terms of this License. • b) Give prominent notice with the combined library that part of it is a work based on the Library, and explaining where to find the accompanying uncombined form of the same work.
-
Page 17: Table Of Contents
3. Turn ON and Start ……………………………………………………………………..………….…..……………...….…. 31 3-1. Wizard Setup (Setup Assistant) …………………………………………….…….…….…..…………..….…..31 3-2. Turn ON for normal use ……………………………………………………….….…….…….…..…………..…….31 3-3. When using N25AMP as an USB Digital to Analog Converter (DAC) …….…………...…. 32 4. SETUP …………………………………………………………………………………………….…….…………………….….….. 32 4-1. Music DB ……………………………………………………………………….…….……….……..……...……..….……33 4-1-1. - Page 18 4-2-3. Auto Rip ………………………………………………………………………..……………………………….. 36 4-3. Audio ………………………………………………………………….………….…….……………………………………36 4-3-1. Player View………………………………………………….……………………………..……………….……..36 4-3-2. Equalizer …………………………………………………………………………………….…………………….37 4-3-2-1. Preset EQ ………………………………………………………………………….……………………37 4-3-2-2. Custom EQ …………………………………………………………………………………………….37 4-3-3. USB/HDMI Audio Out.......... …………………………….….…………..……..37 4-3-4. DSD Signal Type ............……………..…………………..…….…….……38 4-3-5. Analog Out Volume ........................38 4-3-6. Analog Line Out ..........................38 4-3-7.
- Page 19 4-5-2. Network Sharing (Samba Client) ……………….……………………….…..…………………….….47 4-5-3. UPnP Server ……………………………………………………..………………….……….……………..…….49 4-5-4. FTP Server …………………………………………………………………….…..…..…….…………….………49 4-5-5. Shareplay(Airplay) ........................49 4-6. Internet Service ……………………………………………………….………….…..……….…….……..……..…….50 4-6-1. List View ………………………………………………………………………….….…………..…………………50 4-6-2. Thumbnails in Text List ……………………………………………….………….………...………………50 4-6-3. Amazon Music, Qobuz, TIDAL, Deezer, Napster, HighresAudio are available…51 4-7.
- Page 20 4-10. Bluetooth …………………………………………………………………………..………..…….…..……………….60 4-10-1. Bluetooth device name …………………….……………………………………..….………………… 61 4-10-2. Bluetooth Sink(Receiver), Pairing and play music …………………….…..……………… 61 4-10-3. Bluetooth Transmitter(Sender) .………………………………………………….………………….. 62 4-10-4. How to update Bluetooth Sink(Receiver)/Transmitter(Sender) firmware …..… 62 4-10. License for Gracenote ……………………………………………………………….…..…………………….…..63 4-10-1. Limited Gracenote Service ……………………………………………………..….…………….……..63 4-10-2.
- Page 21 9. Multi-room(Group Play) function ……………….…………………….………………..……..…..…….….. 80 9-1. File formats and Sample rate with which Multi-room(Group Play) functions……...…. 80 9-2. Group Play main menu ……………………………………………………………………………….……………..81 9-3. Device name and Host name ……………………………………………………………………………….….. 81 9-4. Basic setup by device ……………………………………………………………………………………………….. 81 9-4-1. How to set a device as server device …………………………………………………………..… 81 9-4-2.
- Page 22 16-2. How to record …………………………………………………………………………………………….………….. 98 16-3. Where is the recorded file stored ………………………………….………………………………………. 98 16-4. How to edit the recorded file ……………………………………………………….……………….………. 99 16-5. How to use N25AMP as USB Digital-to-Analogue Converter(DAC) …….……….……. 100 17. Extra function ……………………………………………………………………………..………..………..….……..……101 17-1. Volume Balancing …………………………………………………………………...…….…………..….…….101 17-2.
-
Page 23: Important Safety Instructions
19. MQA (Master Quality Authenticated) ………………………………………..……………………………….. 114 20. Troubleshooting …………………………………………………………….……………..……….…………..…..….. 114 Important safety instructions For your own safety, please read the following important safety instructions carefully before attempting to connect this unit to the main power supply. They will enable you to get the best performance from the unit. - Page 24 volumes of sound, so after prolonged listening, what sounds ‘normal’ can actually be loud and harmful to your hearing. To guard against this, set your volume to a safe level. Loudspeakers : Before making any connections to loudspeakers, make sure all power is turned off and only use suitable interconnects.
-
Page 25: Product Overview
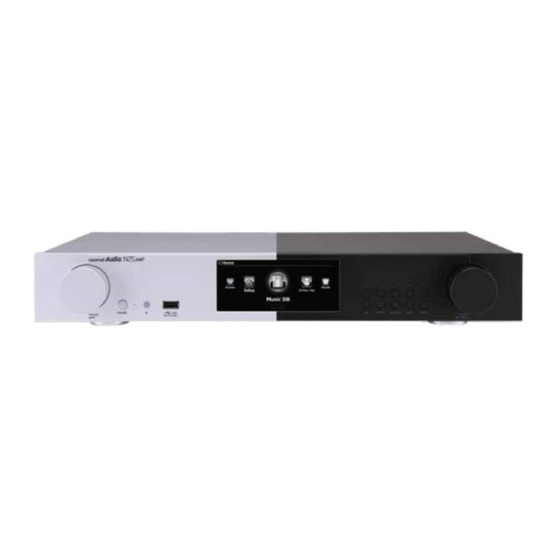
1. Product overview 1-1. Front View: ⑦ User Preset keys ① Volume/Mute Knob ⑧ Function(FN) Key ② Power/STB button ⑨ INPUT ③ Power LED ⑩ RETURN ④ Remote IR Lens ⑪ STOP ⑤ USB Host port ⑫ MENU ⑥ LCD Screen ⑬... -
Page 26: View Of Remote Control And Key Function
1-3. View of Remote Controller and each key’s function POWER: Power ON/OFF HOME: Go to home screen SEARCH: Pop up search menu Alphanumeric: Enter number & alphabet/ Seek at Playing Screen mode NOW PLAYING: Go to Playing Screen STOP: Stop playing MENU: Popup menu screen ARROW: Move cursor to left side OK: Confirmation... -
Page 27: Prepare
2. Prepare 2-1. Check the contents of N25AMP package ⑥ FM Radio Antenna ① N25AMP unit ⑦ DAB Antenna ② Remote controller + AAA batteries x 2EA ③ Power cord ④ Bluetooth Antenna ⑤ User's Guide 2-2. Install AAA batteries into the remote control. -
Page 28: Bluetooth Transmitter
For playing music from N25AMP via Bluetooth speakers or Bluetooth headphones, please install Bluetooth transmitter module to the N25AMP [NOTICE] The BT transmitter module not provided by N25AMP manufacturer will not work properly 2-3-2-2. How to install Bluetooth transmitter module You need Bluetooth transmitter module, Antenna and screwdriver ①... -
Page 29: How To Install Usb Audio Driver Software To Windows Pc
2-4-2. How to install USB Audio Driver Software to Windows PC Unzip the downloaded Driver Software. The USB driver file will show up like below. Click the above USB driver file to start installation. - Page 30 According to Setup Wizard, you can finish installation like below Click the Finish icon to complete like below screen...
-
Page 31: Special Software (Player) For Dsd File On Your Windows Pc
<NOTICE> It will ask for OSD language, Audio Ripping Format, Network Setup, Time setting, etc. 3-2. Turn ON for normal use Switch the unit on at the rear of the N25AMP. The power LED will be ON with green color. Power... -
Page 32: When Using N25Amp As An Usb Digital To Analog Converter (Dac)
N25AMP. The power LED color will be changed to blue and start booting – The N25AMP should take about 30~40 seconds to boot up as it is looking to see if a network is connected. -
Page 33: Music Db
4-1. Music DB Select the Display Mode and confirm with the OK button. 4-1-1. Display Mode You may set one of fourteen (14) options, see below. For example, if you set Title, the Music DB will display the title (song) list when you go into the Music DB. ※... -
Page 34: Append Artist In Album Name
4-1-4. Append Artist in Album View If you set this option as ON, Album name will bring Artist name at the end of album name ※ Default: ON 4-1-5. Append Artist in Album Track View Track Artist will be added at the end of each track in Album if this option is set as ON ※... -
Page 35: Cd Ripping
4-2. CD Ripping [NOTICE] For this function, optional items like an external USB ODD and storage are needed Select CD Ripping and confirm it with the OK button. The below items will be displayed. 4-2-1. Bit Rate and Quality You can select bit rate and the quality level for ripping to MP3 files. There are two (2) items.(This is for ripping a CD to an MP3 file) □... -
Page 36: Audio Format(Audio Rip Format)
4-2-2. Audio Format (Audio Rip Format) You can select one of the following audio formats for CD Ripping; ※ default is WAV 4-2-3. Auto Rip When ripping many CDs at one time, this function will be useful. If Auto Rip is set as ON, N25 will rip CD by itself if you insert CD, and eject CD by itself after finishing ripping without pressing any ※... -
Page 37: Equalizer
※ NOTE: For more detailed explanation, refer to the 17-6. Preset E.Q. and 17-7. Custom E.Q(on page 103). 4-3-3. USB/HDMI Audio Out When USB DAC or HDMI audio device is connected to N25AMP USB Audio Out, the connected devices will be listed here. You may select it here. -
Page 38: Dsd Signal Type
There are many kinds USB DAC(Digital-to-Analog Converter) in the market, which can be connected to N25AMP USB Audio Out. But, some of these DAC can receive 'DSD Native signal', others can receive 'DoP signal' only instead of 'DSD Native signal'. So, we added 'DSD Signal Type' option at SETUP, which gives three (3) options like below. -
Page 39: Digital Out
4-3-8. Digital Out You can set one of three (3) options like 48KHz, 96KHz and 192KHz 1) 48Khz : Max 48KHz frequency 2) 96Khz : Max 96KHz frequency 3) 192Khz : Max 192KHz frequency 4) Passthrough ※ Default: Passthrough 4-3-9. Optical You can set as ON or OFF for Optical output ※... -
Page 40: Speaker Out
You can set as ON or OFF for Speaker Out ※ Default: ON 4-3-12. Gapless Play The N25AMP supports gapless playback function for MP3 files, WAV, FLAC and DSD files only. ※ Default: ON 【 TIP 】 ※LAME-encoded MP3 files only supported ※The Gapless play function works properly on ‘Repeat All’... -
Page 41: Replaygain
4-3-15. Replaygain 4-3-15-1. What’s the Replaygain function It allows N25AMP to equalize and normalize loudness for individual track or album. This avoids the common problem of having to manually adjust volume levels between tracks when playing audio files from albums that have been mastered at different loudness levels. ※ Default: OFF 4-3-15-2. -
Page 42: How To Clear 'Replaygain Info' From Metadata Of Each Music
③ To start writing 'Replaygain info', click 'Skip' or 'No' If Skip is clicked, the device will skip the file which has already Replaygain info without overwriting Replaygain info. If No is clicked, the device will write newly Replaygain info to all music files selected. -
Page 43: Limit Sample Rate In Audio Convert
4-3-17. Power On Volume You can set to preferred volume level of the N25AMP when booting. There are two options. One is 'Last Played Volume', the other is 'Volume Selection'. ※ Default: Volume Selection... -
Page 44: Network
4-4. Network ※ Make sure your Ethernet cable or a USB WiFi dongle is connected. Select Network and press the OK button. ① Select Network and confirm with the OK button. ② Select Wired Setup or Wireless Setup and confirm it with OK button. -
Page 45: Wireless Setup
The follow procedure is same as ‘Open SSID’ 4-4-2-3 WiFi Repeater Roaming function In case that signal strength of the connected AP goes down -45db, the N25AMP will be connected to the AP which has same SSID and better signal strength if it is detected... -
Page 46: Network Info
※ Default: OFF <NOTICE> In case that Wake ON LAN is set as ON, N25AMP Power LED on the front will stay as Blue even though you power it off by remote control or front power button. -
Page 47: Network Sharing (Samba Client)
4-5-2 Network Sharing (Samba Client) You can connect the N25AMP and the storage devices in the same network. If you want to stream the file in remote devices and play it with the N25AMP, you need to do ‘network sharing’ first as below. - Page 48 ⑥ Then, IP address will be shown up in the path ※ In case that IP address doesn't show up, please insert it by keyboard. You can connect USB keyboard into N25AMP ⑦ Place the cursor on the IP address, and click it ⑧...
-
Page 49: Upnp Server
※What you can do with FTP Server function? After installing FTP software like ‘File Zilla’ onto your PC, you can copy, delete or move files or folders between N25AMP hard disk and your PC hard disk. 4-5-5 Shareplay(Airplay) You can set Airplay function as OFF if needed ※Default: ON... -
Page 50: Internet Service
4-6. Internet Service N25AMP integrated Online Music Services into its software. So, you can play Amazon Music, Qobuz, TIDAL, Deezer, Napster and HighresAudio with N25AMP directly if you subscribe for those services and put their user name and password here properly. -
Page 51: Amazon Music, Qobuz, Tidal, Deezer, Napster, Highresaudio Are Available
4-6-3. Amazon Music, Qobuz, TIDAL, Deezer, Napster, HighresAudio are available N25AMP integrated Qobuz, TIDAL, Deezer, Napster, HighresAudio, so you can play them with N25AMP directly if you subscribe for those services and put their user name and password here properly. -
Page 52: Use Rds When Seek All
【 TIP 】 For detailed explanation of Auto Play function, refer to 17-15 Auto Play (Page 106) 4-7-6. Resume Play When you boot up the N25AMP, it will automatically resume playing the music in the Music DB, Browser or i-Radio from where it was last stopped. -
Page 53: Factory Reset
4-7-9. HDD Sleep In case that you connected an external USB HDD into the N25AMP, you can make the connected HDD go to sleep mode by this setting. There are five (5) options like OFF, 10 Min, 20 Min, 30 Min and 1 Hour. -
Page 54: File System Fix
USB storage, you can try this function to remove some error in file system of storages. Select File System Fix and confirm with the OK key. 【 Caution 】 We recommend you NOT to run this function if the file system of the N25AMP hard disk has no problems. -
Page 55: Auto Shutdown
Alarm is set as ‘after 2 days from now’. 4-7-14. Auto Shutdown The N25AMP will be powered off automatically at the assigned time and date. ① Go to SETUP and select System. ② Select Auto Shutdown and confirm with the OK key ③... -
Page 56: Scroll Speed
② go to SETUP > System > User Font: Confirm it with OK key to open menu window like above ③ Select 'Get User Font' to look for the fonts files and load it. ※ To return to 'N25AMP original system font, select 'User System font' and confirm it with OK key. -
Page 57: Browser View
4-7-20. ErP Regulation According to CE Regulation (ErP/Energy Efficiency Regulation), N25AMP will enter Power Off mode or WOL mode automatically after 20 minutes without any working or input signal. You can set this function as ON or OFF ※... -
Page 58: Time
【 TIP 】 Make sure that the N25AMP is connected to network (internet) before you try time setting by Time Set (Internet). ② Select your preferred time and confirm it with OK button. -
Page 59: Firmware
4-9. Firmware You can check the current firmware version of your N25AMP and install the updated new firmware. Select Firmware and confirm with the OK key. 4-9-1. Current Version You can check the current firmware version as shown below. Select Current Version and confirm with the OK key. -
Page 60: What Is Automatic Firmware Update By Network
4-9-4. What is Automatic Firmware Update by network? This function is available only when N25AMP is connected to a network (internet). In the instance that a higher version of the firmware exists at our server system, your N25AMP will check it automatically when it boots up. -
Page 61: Bluetooth Device Name
② Confirm by clicking OK 4-10-2. Bluetooth Sink(Receiver), Pairing and play music When you want to play files in your mobile devices which have BT function(sender) via the N25AMP, you can use N25AMP BT Sink(Receiver) function Left screen shows Bluetooth Sink(Sender) firmware version. -
Page 62: Bluetooth Transmitter(Sender)
4-10-3. Bluetooth Transmitter (Sender) When you want to send songs in the N25AMP to the Bluetooth speakers or Bluetooth headphones, you can use N25AMP BT Transmitter (Sender) function ※ This is optional function. You need to buy 'Bluetooth Transmitter Kits from N25AMP... -
Page 63: License For Gracenote
Gracenote service, you need to pay five (5) EURO per service for one year. Of course, if you don't like to Gracenote service with payment, CD metadata from freedb server and album cover art from Google, Amazon, Bing, etc are available in the N25AMP 4-10-2. How to activate license for Gracenote service ※... -
Page 64: What Is The Cd Database(Music Db) And How To Make It
5. What is the Music database (Music DB) and how to make it To make a Music DB at your N25AMP, you need storage like external USB HDD or NAS which contains music files. Connect them to the N25AMP. Go to the Browser and just place the cursor on the folder containing the music you want for Music DB 5-1. -
Page 65: Priority Media Path And 'My Music' Folder
⑤ The folder scanned for Music DB will be changed to blue color like left screen ⑥ To see Music DB, go to home screen and click the Music DB icon ⑦ You can see the list like left screen. Now you are ready to play it ※NOTE : If you copy files or folders to the ‘My Music’... -
Page 66: 5-4.How To Display Folders In The Music Db
③ Select OK icon and confirm it with OK key to start clearing the Music DB ※ After clearing the Music DB, the N25AMP will reboot by itself to complete Music DB initialization, and will rescan ‘My Music’ folder only. -
Page 67: Automatic Indexing
5-7. Automatic Indexing If you add(copy) music files into the scanned folder (Blue colored), the added(copied) music files will be automatically indexed to the MusicDB. If you edit music file in the folder, the edited contents will be automatically reflected to the MusicDB. Of course, editing in MusicDB will be reflected for original files in the folder. -
Page 68: Rescan Resources(Folder) Function
-. Auto Cursor : If you set ‘Auto Cursor’ as ‘On’, the cursor is automatically positioned as the path you are currently scanning. The path you are currently scanning for will be displayed in blue color like below screen. 5-9. Rescan Resource(folder) function To synchronize contents in Music DB and in folders of storages already scanned to Music DB, please go to SETUP>Music DB>Rescan Resource. -
Page 69: Music Db Storage Selection
5-10. Music DB Storage Selection You can select USB1, USB2, USB3 or NAS as Music DB storage. Go to ‘Setup>Music DB>Storage’ then you can select one of the connected storages. If one of them is selected as Music DB(Main) storage, the color of storage will be green. You can select USB1, USB2, USB3 or NAS as Music DB storage. -
Page 70: How To Use The Music Db(Database)
6. How to use the Music database (Music DB) 6-1. Play music scanned in the Music DB The Music DB contains only metadata and tag info of music files ① Select Music DB icon, confirm with the OK button. The album list is displayed as shown below. ②... -
Page 71: Search Function
【 TIP ④ 】 Playing screen ------- press INFO button ------- Detailed info of current music ①Title / Album of current music. ①Title / Album of current music ②Artist ②Title of previous music ③Album ③Title of current music ④Composer ④Title of next music ⑤Genre ⑤Play mode ⑥Year... -
Page 72: How To Manage Music Db
6-3. How to manage Music DB The N25AMP allows you to manage the Music DB. You can remove music from the Music DB or rename albums, artists and genre. -
Page 73: Album Edit For Multi-Album
6-3-3. Album Edit for Multi-Album There is a Multi-Album which is composed of several CD like C1, C2, C3, C4, etc. You can merge C1, C2, C3 and C4 into folder(album) For example, ※ The 60 Jahre Bravo Hits is a multi-album, which is composed of four(4) CDs. -
Page 74: History Function
6-3-4. History function You can list a maximum of 10 recently played songs from the Music DB using this function. ① Go into the Music DB ② Press the MENU key ③ Select ‘History’ and confirm with the OK key, as shown in the screen shot on the left. -
Page 75: Editing The Tag Information Of The Music In The Music Db
④ Select OK and confirm with the OK button. 【 TIP 】 You can edit scanned music in the Music DB of the N25AMP easily using the WebInterface. 8. Playlist The N25 has three (3) kinds of playlist. The 1 one is just the normal Playlist function, the 2 ‘My Playlist’, and the 3... - Page 76 ② Press the MENU button to show a popup menu, see screen shot below. ③ Select New PLS and confirm with the OK button. The screen below is then displayed. ④ Enter a playlist name and select OK. Confirm the selection with the OK button.
-
Page 77: How To Make A Playlist With Whole Tracks In Album, Genre, Or Artist
8-1-2. How to make a Playlist with whole tracks in album, Genre, or Artist ① For example, go to Album list and place the cursor on the target album ② Press PLAYLIST key of remote control ③ Edit Playlist name as you want, and press OK. Go to Playlist and there will be the playlist like below picture. -
Page 78: How To Play A Playlist
existing playlist ② Press 'PLAYLIST' key of remote control ③ Select the playlist where you want to add the song(s), album, etc ⑤ Press 'OK' key to start adding 8-1-5. How to play a Playlist ① Select the Playlist icon on the remote control or press the PLAY LIST hotkey on the remote control. -
Page 79: My Playlist (Virtual Playlist)
8-2. My Playlist (Virtual Playlist) This is a virtual playlist function. After you have made a My Playlist, it will be removed if you stop playing or power off. This function works only in the Music DB. It will not work in the Browser. ①... -
Page 80: Multi-Room(Group Play) Function
④ When you come across the track, press the AD MY PL key at the ‘Playing Screen, see left. ① The popup menu will appear as shown on the left. ② Select one choice and confirm with the OK key ③... -
Page 81: Group Play Main Menu
9-2. Group Play main menu To set for Multi-room (Group Play), click Group Play icon on the home screen to open it 9-3. Device name and Host name. Give the device a unique name to easily identify the devices in each zone. The device name for Group Play is linked to the Samba Server Host name ①... -
Page 82: Manual Join
9-4-3. Manual Join If you set ‘manual Join’ on the Client device, you can add the device manually as a client later. You can toggle 'Auto Join' or 'Manual Join' with OK key If a client device is set to 'Manual Join', you can add the client device manually to a Group Play after the server device starts playing To add a client device manually to a Group Play... -
Page 83: Look For Devices Available Over A Group Play
9-5-1. Look for devices available over a Group Play Click the 'GroupPlay icon on the MusicX NEO, you can find out all devices available over a Group Play like below screen For example, you can see the three(3) devices of Living Room, Bed Room, Library like below screen. -
Page 84: How To Add Client Devices To Group Play By Manual
You can add the Library device to the Group Play by Manual Join method 9-5-3. How to add client devices to Group Play by manual ① On the above screen of devices list, tapping the area marked with a square on the screen will pop up the setting window. ②... -
Page 85: Control Devices
9-5-4. Control devices. For server device(Living Room) ① Tap the area marked with a square to pop up control window ② You can control volume of all devices including client devices at the same time, and can set channel of the server device as you want like Stereo, Left channel or Right channel. -
Page 86: The Music Streaming Function
Samba Server/Client, you can enjoy various Music Streaming functions with the N25AMP. 10-1. UpnP Server/Client and Samba Server/Client function You can use the N25AMP together with various kinds of devices that support UpnP Server/Client or Samba Server/Client. If the devices are connected to the N25AMP through the same network, you can see the devices through the Browser, see below;... -
Page 87: Internet Radio
11-1. Internet Radio 11-1-1. How to play the Internet Radio. You can enjoy many internet radio stations. The N25AMP Internet radio is based on the Airable server. It provides many stations by genre, by country, etc. 【 TIP 】 When the i-Service icon is highlighted the N25AMP is successfully connected to the network. -
Page 88: Recording From The Internet Radio
※ NOTE 1: We recommend NOT to record continuously for over three (3) hours. ※ NOTE 2: Space required for recording in MP3 format: 1 hour(54MB)/2 hours(108MB)/3 hours(162MB) ※ NOTE 3: N25AMP will record i-Radio by the formats like MP3, AAC or ASF according to the station’s streaming format. 11-1-4-1. How to record ①... -
Page 89: How To Edit The Recorded File
11-1-4-4. How to edit the recorded file You can edit the recorded file easily with the file management function. Place the cursor on the recorded file and press the MENU button to run the following functions: [ TAG Edit ] [ Import to DB ] [ Copy File ] [ Move file ]... -
Page 90: How Does The Reservation Recording Start
N25AMP will start recording the station at 4:00PM and keep recording until 4:03PM. N25AMP will power off automatically by itself as soon as it finishes recording at 4:03PM. 2) In case that you keep N25AMP powered ON after recording setting (e.g. -
Page 91: Fm Radio
(e.g. You set recording at 4:00PM, and you powered off N25AMP at 3:58PM) ※ NOTE: The recorded file will be stored in the ‘IRadio Recording’ folder of hard disk. You can see it through ‘Browser’. You can edit the recorded file with the Tag Edit function. -
Page 92: How To Record Fm Radio
13-1. How to play DAB+ ① Select DAB icon to start ② N25AMP will seek all stations available like below screen <NOTICE> DAB signal is affected very much and easily by neighboring obstacle like wall. So, you need to remove surrounding obstacle to receive DAB signal better. -
Page 93: How To Record Dab
You can use various USB devices like USB memory stick, MP3 Player, USB external hard disk, etc with the USB host port of N25AMP. ① Plug the USB device into the USB host port of the N25AMP. ② Go into the Browser screen. The USB device appears in the browser screen as shown below. -
Page 94: Tag Edit
To check the information on a file, place the cursor on the file and press the INFO key. 15-2. TAG Edit This function is only valid for files not for folders or disks. Place the cursor on the file you would like to edit and press the MENU key. Select Edit Tag and the edit screen is displayed, see below. -
Page 95: Move Files
If you wish to play an individual internet radio station using the N25AMP, you will need to create a PLS or M3U file and put the file(PLS or M3U) onto the storage or USB host of the N25AMP. Once you have created the file you can play the station through the N25AMP Browser, see... -
Page 96: Convert Audio Format
15-7. Convert Audio Format ※ This function works on Browser mode only. ① If you want to convert the format of tracks, ② Place the cursor on the file or folder, and press MENU key. (※ With RIGHT ARROW key, you may select multiple song files) ③... -
Page 97: Create Folder
16-1. How to play an external device via Input As the N25AMP has Digital inputs(Toslink and COAXIAL), you can connect external devices like TV, player, turntable or etc to the N25AMP and record the audio (signal) coming from outside device. ① Connect external device to the N25AMP. -
Page 98: How To Record
Sample Rate time Rate 48KHz 1,319MB/1 Hour 48KHz Year-month-date-time 96KHz 2,638MB/1 Hour 96KHz 192KHz 5,725MB/1 Hour 192KHz 16-3. Where is the recorded file stored? If you start recording, the N25AMP creates the folders automatically where the recorded files are stored. -
Page 99: How To Edit The Recorded File
① Select Browser icon on the home screen, and confirm it with OK key. ② Select HDD1 and confirm it with OK key ③ Select Browser icon on the home screen, and confirm it with OK key. ④ Select HDD1 and confirm it with OK key ⑤... -
Page 100: How To Use N25Amp As Usb Digital-To-Analogue Converter(Dac)
※ The edited file name will be changed to [Album name]+Title 16-5. How to use N25AMP as USB Digital-to-Analogue Converter (DAC) ① Install USB Audio 2.0 Driver Software to your Windows PC(Refer to 2-4 on page 28) ② Install a special software(Player) like... -
Page 101: Extra Function
③ Press RETURN key to save and exit 17-2. External Screen If you want to use an external screen like TV, monitor, etc as a bigger screen for N25AMP, please connect external screen to N25AMP HDMI Out. ※ Default: Both of Internal LCD and HDMI Out are all activated. -
Page 102: Listing By Text Or Album Cover Art
17-4. Listing by Text or Album cover art You can list up all information (like album, title, genre, artist, etc) on the screen of N25AMP by text or album cover art. You can select one of text mode and album cover art mode easily using TEXT/ART button of remote control. -
Page 103: Preset E.q(Equalizer)
17-6. Preset E.Q(Equalizer) When music is playing you can change the Preset equalizer setting by select one of 18 presets at Setup The default setting is Normal. You can select one the followings; Normal, Classical, Club, Concert Hall, Dance, Live, Party, Pop, Reggae, Rock, Soft, Soft Rock, Techno, Bass, Bass &... -
Page 104: How To Assign Key For Stations Or Playlists
FN key + the key 1-5. The machine then starts playback of the stored station/playlist 17-9. Resume Play When you boot up the N25AMP, it will automatically resume playing the music in the Music DB, Browser or i-Radio from where it was last stopped. -
Page 105: Changing The Play Mode
⑥ Repeat All: Play all music in an album or in a folder in sequence and repeatedly 17-12. Alarm set You can set six (6) alarm settings on the N25AMP. ① Go to Alarm at SETUP, and confirm it with the OK key. The following screen will appear. -
Page 106: Auto Shutdown
After 56 minutes, it will go into Sleep mode (power off). 17-15. Auto Play When the power is ON, Auto Play function allows the N25AMP to boot up and start playing automatically the song in the Auto Play folder in the Playlist on the home screen. -
Page 107: Shortcut To Find File In All List Modes
① Navigate to the Playlist to Auto Play. ② Place the cursor on Auto Play and press the MENU button. ③ Select Add Song and press the OK button. ④ Place cursor on the music you would like to Auto Play. ⑤... -
Page 108: How To Set 'Cutting Point' By Auto
17-18-1. How to set 'cutting point' by auto ① Look for recorded file in Browse mode and place the cursor on it ② Press MENU key and confirm 'Multi-Cut to wav...' to start analyzing waveform of the file. There are four(4) spins to set 'cutting point'. ※... -
Page 109: How To Start Cutting
17-18-3. How to start cutting ① Set cutting points properly according to the above procedure ② Press RETURN key, then it will ask 'OK' or 'Cancel' like below ③ Select OK and confirm it. Then, it will start cutting like below ※... - Page 110 -. LEFT/RIGHT: to move Spin to left/right -. MENU: to disable Spin 2-2) When Spin is disabled <Buttons on the front of N25AMP unit> -. OK: to toggle Play/Pause -. JOG spinning: to seek 'current playing point' by the value of forth Spin -.
-
Page 111: Function Of Jump To A Song On Playing Screen
17-19. Function of Jump to a song on Playing Screen We added 'function of Jump to a Song Mode' on Playing Screen. Press CAP/NUM key of remote control to toggle 'Seek to Percent Mode and 'Jump to a Song Mode' * Jump to a Song Mode : Press numeric key to seek a song * Seek to Percent Mode : Press numeric key to go to... -
Page 112: Specification
18.Specification Model name N25AMP Remarks CPU: Dual Core ARM Cortex A9 running at 1.0GHz Host CPU & Main Memory: DDR-1066 1GByte Memory NAND Flash 8GByte Display 4.6" TFT LCD(800 x 320pixels)(* able to connect to ext. screen via HDMI out) Interface Key &... - Page 113 Codec & MQA, PCM 384Khz/32Bit, DSD(DSD64, DSD128, DSD256), Format DXD(24Bit/352.8KHz), HD WAV(24Bit/192KHz), HD supported FLAC(24Bit/192KHz), APE/CUE, WAV, FLAC, ALAC, AIFF, AIF, AAC, M4A, MP3, WMA, CAF, Ogg Vorbis, PCM, M3U, PLS, etc Network UPnP(DLNA) Server/Client/Media Renderer, Samba Server/Client, Protocols FTP Server, Web Server, etc Supported Internet Internet Radio...
- Page 114 The LED light next to MQA logo on the N25AMP screen glows green or blue to indicate that the unit is decoding and playing an MQA stream or file, and denotes provenance to ensure that the sound is identical to that of the source material.
- Page 115 4-3. Check the volume level 4-4. Check Audio settings at SETUP 5. There is a hum coming from the speaker. Make sure that all cable connections are secure.
Need help?
Do you have a question about the N25AMP and is the answer not in the manual?
Questions and answers