Table of Contents
Advertisement
Available languages
Available languages
STYLE SELECTIONS and logo design are trademarks or
registered trademarks of LF, LLC. All rights reserved.
ATTACH YOUR RECEIPT HERE
Serial
Number
Questions, problems, missing parts?
service department at 1-877-888-8225, 8 a.m. - 8 p.m., EST, Monday - Sunday. You could
also contact us at partsplus@lowes.com or visit www.lowespartsplus.com.
AS21633
PROPANE PATIO FIRE PIT
Purchase Date
Before returning to your retailer, call our customer
Lowe's Item No.: 0919105
RONA Item No.: 11875029
MODEL # SRGF11634-11
Français p.25
Advertisement
Chapters
Table of Contents

Related Manuals for Style selections SRGF11634-11


Summary of Contents for Style selections SRGF11634-11
- Page 1 Lowe’s Item No.: 0919105 RONA Item No.: 11875029 PROPANE PATIO FIRE PIT MODEL # SRGF11634-11 Français p.25 STYLE SELECTIONS and logo design are trademarks or registered trademarks of LF, LLC. All rights reserved. ATTACH YOUR RECEIPT HERE Serial Number Purchase Date...
- Page 2 WARNINGS AND CAUTIONS Read the instructions before use. This appliance must be installed in accordance with such regulations as are enforced. DANGER WARNING:For Outdoor Use Only. FIRE OR EXPLOSION HAZARD Installation and service must be If you smell gas: performed by a qualified installer, Shut off gas to the appliance.
-
Page 3: Table Of Contents
TABLE OF CONTENTS Warnings and Cautions..............2, 4-5 Table of Contents...................3 Tools and Parts...................6-7 Assembly Instructions...............8-14 Installation Instructions ................15 Operation..................16-18 Locating Fire Pit For Use..............19 Maintenance and Storage..............20-21 Trouble Shooting..................22 Warranty Information................23 Replacement Parts List................24 REMINDER BEFORE ASSEMBLY Verify that all parts are included with your gas fire pit BEFOR E you begin assembly by checking the Tools and Parts List. -
Page 4: Warnings And Cautions
WARNINGS AND CAUTIONS IMPORTANT SAFETY INFORMATION • The installation must conform with local codes or, in the absence of local codes, with either the Natural Gas and Propane Installation Code, CSA B149.1, or the Propane Storage and Handling Code, CSA B 149.2. •... - Page 5 WARNINGS AND CAUTIONS NOTE: PLEASE READ THE FOLLOWING SAFETY RULES: Perform a leak test with a soapy solution: 1. To check gas connections. 2. After connecting a new cylinder. 3. Upon re-assembly after disassembly. This appliance is designed to operate with a standard 20 Ib propane cylinder with Approved Cylinder Connection.
-
Page 6: Tools And Parts
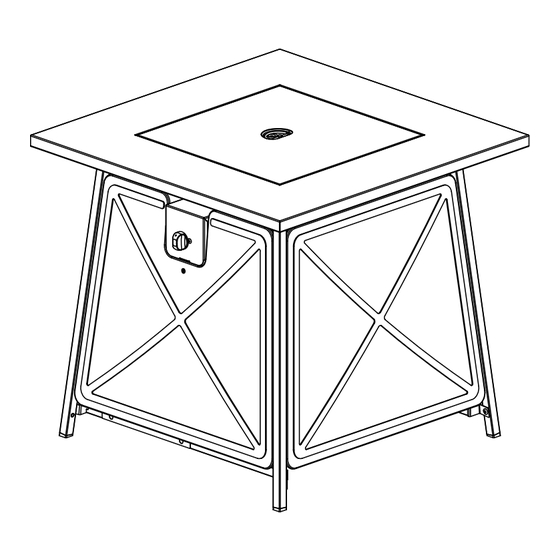
TOOLS AND PARTS TOOLS NEEDED: (NOT INCLUDED) Philips screwdriver Estimated time for assembly: 30 minutes. - Page 7 TOOLS AND PARTS PART DESCRIPTION QUANTITY Table Top Assembly Control Panel Assembly Leg A Cylinder Holder Assembly Front Panel Side Panel Leg B Lava Rock Door Door Handle Cover Lid PVC Cover Cylinder block wire HARDWARE CONTENTS (shown actual size) M5 x 10 M4 x 10 Flat Bolt Bolt Qty.
-
Page 8: Assembly Instructions
Assembly Instructions Choose a good, cleared assembly area and get a friend to help you put your gas fire pit together. Lay cardboard down to protect gas fire pit finish and assembly area. Step 1.1 Step 1.1 Position 1 With assistance, place the table top assembly (A) upside down on a soft, level surface. - Page 9 Assembly Instructions Step 1.3 Step 1.3 Insert the Insulated terminal of electrode wire into the blade connector on the control panel as position 3.1 & 3.2 illustrated. Position 3 Blade Connector Insulated Terminal Electrode Wire Rubber sleeve Electrode Wire...
- Page 10 Assembly Instructions Finally, insert the rubber sleeve to cover the electrode wire as position 3.3 illustrated, then finished as 3.4. Rubber Sleeve Finished...
- Page 11 Assembly Instructions Step 2 Step 2 the leg B legs A Hardware Used Step 3 Step 3 Hardware Used...
- Page 12 Assembly Instructions Step 4 Step 4 Attach the cylinder holder assembly (D) to (3) legs A (C) and the leg B (G) with (4) M5 x 10 bolts (AA) as illustrated. Hardware Used M5 x 10 bolt 4 pcs Step 5 Attach Cylinder block wire (M) to cylinder holder assembly (D) and through the front panel (E) to the leg...
- Page 13 Assembly Instructions Step 6 Step 6 Attach (2) side panels (F) to (3) legs A (C) with (8) M5 x 10 bolts (AA) as illustrated. Hardware Used M5 x 10 bolt 8 pcs...
- Page 14 Assembly Instructions Step 7 Step 7 Screw the door handle (J) to the door (I), then attach the door (I) to the leg A (C) with (4) M4 x 10 flat bolts (BB) as illustrated. Note: With the help of a friend, turn the gas fire pit into upright position after this step finished.
-
Page 15: Installation Instructions
INSTALLATION INSTRUCTIONS lava rocks onto the fire pit. Open the door panel (I) Make sure the valve outlet of cylinder is facing outward. (Fig. 9) 4. Turn the cylinder locking bolt clockwise to secure the gas cylinder. (Fig. 10) Your gas fire pit has been checked at all connections at the factory for leakage. -
Page 16: Operation
OPERATION WARNING: DO NOT ATTEMPT TO OPERATE THE APPLIANCE UNTIL YOU HAVE READ AND UNDERSTAND ALL PRECAUTIONS. FAILURE TO DO SO CAN RESULT IN PROPERTY DAMAGE, SERIOUS INJURY, OR DEATH. WARNING!!! WARNING Do not use an open flame to check for leakage. FOR YOUR SAFETY: Do not smoke during testing. - Page 17 OPERATION WARNING: DO NOT ATTEMPT TO OPERATE THE APPLIANCE UNTIL YOU HAVE READ AND UNDERSTAND ALL PRECAUTIONS. FAILURE TO DO SO CAN RESULT IN PROPERTY ATION DAMAGE, SERIOUS INJURY, OR DEATH. Before Lighting The gas fire pit should be thoroughly inspected before each use, and by a qualified service person at least annually.
- Page 18 OPERATION CAUTION: AVOID INHALING FUMES EMITTED FROM THE GAS APPLIANCE'S FIRST USE. SMOKE AND ODOR FROM THE BURNING OF OILS USED IN MANUFACTURING WILL APPEAR. BOTH SMOKE AND ODOR WILL DISSIPATE AFTER APPROXIMATELY 30 MINUTES. THE GAS APPLIANCE SHOULD NOT PRODUCE THICK BLACK SMOKE. NOTE: The burner may be noisy when initially turned on.
-
Page 19: Locating Fire Pit For Use
LOCATING FIRE PIT FOR USE CAUTION: WHEN CERTAIN MATERIALS OR ITEMS ARE LEFT ABOVE, BESIDE OR UNDER THIS APPLICANCE WHILE IN USE, THEY WILL BE SUBJECT TO RADIANT HEAT AND COULD BE SERIOUSLY DAMAGED. This gas fire pit is primarily used for the heating of outdoor patios, decks, spas, pools and open working areas. -
Page 20: Maintenance And Storage
MAINTENANCE AND STORAGE CLEANING AND MAINTENANCE : To enjoy years of outstanding performance from your WARNING: gas fire pit, make sure you perform the following FOR YOUR SAFETY ; maintenance activities on a regular basis: DO NOT touch or move gas appliance for at least 45 minutes after use. - Page 21 MAINTENANCE AND STORAGE NOTE: Store the fire pit indoors during the winter if it will be subjected to Wait until the appliance is freezing temperatures. cool before covering. Disconnect and remove the cylinder from the appliance before the appliance can be stored indoors. STORAGE Turn the control knob to "OFF"...
-
Page 22: Trouble Shooting
TROUBLE SHOOTING PROBLEM POSSIBLE CAUSE CORRECTIVE MEASURES OBSERVED Gas odor Gas leak Check all gas connections Check gas supply pressure. Low gas pressure. Delayed ignition Clean burner parts--see manual. Clogged or dirty burner ports. "CLEANING AND MAINTENANCE" section. Incorrect burner Incorrect gas supply or pressure. -
Page 23: Warranty Information
Warranty Information The appliance has been manufactured under the highest standards of quality and workmanship. We warrant to the original consumer purchaser that all aspects of this product will be free of defects in material and workmanship for one year from the date of purchase. A replacement for any defective part will be supplied free of charge for installation by the consumer. -
Page 24: Replacement Parts List
REPLACEMENT PARTS LIST For replacement parts, call our customer service department at (877) 888-8225 8 a.m. - 8 p.m., EST, Monday - Sunday. You could also contact us at partsplus@lowes.com or visit www.lowespartsplus.com. PART DESCRIPTION QUANTITY Table Top Fire Bowl Assembly Control Panel Assembly Leg A Cylinder Holder Assembly... - Page 25 Article RONA nº : 11875029 Foyer d'extérieur de terrasse au propane Modèle # SRGF11634-11 STYLE SELECTIONS et le logo sont des marques de commerce ou des marques de commerce déposées de LF, LLC. Tous droits réservés. JOIGNEZ VOTRE REÇU ICI Numéro de série Date d’achat...
- Page 26 AVERTISSEMENTS ET MISES EN GARDE Assurez-vous de lire ces instructions avant d’utiliser l’article. Cet appareil doit être installé conformément aux règlements en vigueur. DANGER AVERTISSEMENT :Pour un usage à RISQUE D'INCENDIE OU D'EXPLOSION l’extérieur seulement. L’installation et Si vous détectez une odeur de gaz : l’entretien doivent être effectués par un Coupez l’alimentation en gaz de l’appareil.
- Page 27 TABLE DES MATIÈRES Avertissements et mises en garde..........26, 28-29 Table des matières................27 Outils et pièces................30-31 Instructions pour l’assemblage............32-38 Instructions pour l’installation...............39 Fonctionnement................40-42 Choix de l’emplacement pour l’utilisation du foyer.......43 Entretien et rangement..............44-45 Dépannage...................46 Renseignements sur la garantie............47 Liste des pièces de rechange...............48 RAPPEL AVANT L’ASSEMBLAGE AVANT de commencer l’assemblage de l’article, vérifiez que toutes les pièces de votre foyer au gaz sont...
-
Page 28: Avertissements Et Mises En Garde
AVERTISSEMENTS ET MISES EN GARDE CONSIGNES DE SÉCURITÉ IMPORTANTES • L’installation de cet appareil doit être conforme aux codes locaux ou, en l’absence de codes locaux, au Code d’installation du gaz naturel et du propane CSA B149.1, ou au Code sur le stockage et la manipulation du propane CSA B149.2. - Page 29 AVERTISSEMENTS ET MISES EN GARDE REMARQUE : VEUILLEZ LIRE LES RÈGLES DE SÉCURITÉ SUIVANTES : Vérifiez la présence de fuites à l’aide d’une solution savonneuse : 1. pour vérifier l’étanchéité des raccords de gaz; 2. lorsque vous installez une nouvelle bouteille; 3.
- Page 30 OUTILS ET PIÈCES OUTILS NÉCESSAIRES (NON INCLUS) Tournevis cruciforme Temps d’assemblage approximatif : 30 minutes.
-
Page 31: Outils Et Pièces
OUTILS ET PIÈCES PIÈCE DESCRIPTION QUANTITÉ Ensemble de plateau Ensemble de panneau de commande Pied A Ensemble de support de la bouteille Panneau avant Panneau latéral Pied B Pierres de lave Porte Poignée de porte Couvercle Housse en PVC Fil de bloc-cylindres QUINCAILLERIE INCLUSE (grandeur réelle) Boulon M5 de 10 mm... -
Page 32: Instructions Pour L'assemblage
INSTRUCTIONS POUR L’ASSEMBLAGE Choisissez un endroit dégagé et propice à l’assemblage de l’article. Demandez à une personne de vous aider à assembler votre foyer au gaz. Déposez un morceau de carton par terre pour protéger le fini du foyer au gaz et l’endroit où vous procéderez à l’assemblage. Étape 1.1 Étape 1.1 Position 1... - Page 33 INSTRUCTIONS POUR L’ASSEMBLAGE Étape 1.3 Étape 1.3 Insérez la borne isolée du fil de l’électrode dans le connecteur à lames situé sur le panneau de commande, tel que l’illustrent les positions 3.1 et 3.2. Position 3 Connecteur à lames Borne isolée Fil de l’électrode Manchon en caoutchouc Fil de l’électrode...
- Page 34 INSTRUCTIONS POUR L’ASSEMBLAGE Enfin, insérez le manchon en caoutchouc afin de couvrir le fil de l’électrode tel que l’illustre la position 3.3, puis terminez l’étape tel que l’illustre la position 3.4. Manchon en caoutchouc Étape terminée...
- Page 35 INSTRUCTIONS POUR L’ASSEMBLAGE Étape 2 Fig. 2 Fixez le pied B (G) à l’ensemble de plateau (A) à l’aide de (3) boulons M5 de 10 mm (AA), puis fixez les (3) pieds A (C) à l’ensemble de plateau (A) à l’aide de (9) boulons M5 de 10 mm (AA), tel qu’il est illustré.
- Page 36 INSTRUCTIONS POUR L’ASSEMBLAGE Étape 4 Fig. 4 Fixez l’ensemble de support de la bouteille (D) au pied A (C) et au pied B (G) à l’aide de (4) boulons M5 de 10 mm, tel qu’il est illustré. Quincaillerie utilisée Boulon M5 de 10 mm Étape 5 Fig.
- Page 37 INSTRUCTIONS POUR L’ASSEMBLAGE Étape 6 Fig. 6 Fixez les (2) panneaux latéraux (F) aux pieds (C) à l’aide de (8) boulons M5 de 10 mm (AA), tel qu’il est illustré. Quincaillerie utilisée Boulon M5 de 10 mm...
- Page 38 INSTRUCTIONS POUR L’ASSEMBLAGE Étape 7 Fig. 7 Vissez la poignée de porte (J) à la porte (I), puis fixez la porte (I) au pied A (C) à l’aide de (4) boulons plats M4 de 10 mm (BB), tel qu’il est illustré. Remarque : Avec l’aide d’une autre personne, remettez le foyer à...
-
Page 39: Instructions Pour L'installation
INSTRUCTIONS POUR L’INSTALLATION INSTALLATION L’aide de deux personnes ou plus facilite l’installation. EMPLACEMENT Installez le foyer sur une surface plane et stable, le plus loin possible des matières et des constructions combustibles. MISE EN PLACE 1. Placez le foyer à l’extérieur sur une surface plane et non combustible. REMARQUE : Ne placez pas le foyer sur de l’herbe ou de la terre pour ne pas entraver la circulation de l’air. -
Page 40: Fonctionnement
FONCTIONNEMENT AVERTISSEMENT : N’UTILISEZ PAS L’APPAREIL AVANT D’AVOIR BIEN LU ET COMPRIS LES CONSIGNES DE SÉCURITÉ. LE NON-RESPECT DE CES CONSIGNES PEUT ENTRAÎNER DES DOMMAGES MATÉRIELS, DES BLESSURES GRAVES OU LA MORT. AVERTISSEMENT! AVERTISSEMENT ● Ne vérifiez jamais la présence de fuites à l’aide d’une POUR VOTRE SÉCURITÉ... - Page 41 FONCTIONNEMENT AVERTISSEMENT : N’UTILISEZ PAS L’APPAREIL AVANT D’AVOIR BIEN LU ET COMPRIS LES CONSIGNES DE SÉCURITÉ. LE NON-RESPECT DE CES CONSIGNES PEUT ENTRAÎNER DES DOMMAGES MATÉRIELS, DES BLESSURES GRAVES OU LA MORT. Avant l’allumage Le foyer au gaz devrait être inspecté à fond avant chaque utilisation e t au moins une fois par année par une personne qualifiée.
- Page 42 FONCTIONNEMENT ATTENTION : ÉVITEZ D’INHALER LES VAPEURS ÉMISES LORS DE LA PREMIÈRE UTILISATION DE L’APPAREIL AU GAZ. LA COMBUSTION DES HUILES UTILISÉES LORS DE LA FABRICATION DÉGAGERA DE LA FUMÉE ET DES ODEURS. CELLES-CI SE DISSIPERONT DANS UN DÉLAI D’ENVIRON 30 MINUTES. IL N’EST PAS NORMAL QUE L’APPAREIL AU GAZ ÉMETTE UNE ÉPAISSE FUMÉE NOIRE.
-
Page 43: Choix De L'emplacement Pour L'utilisation Du Foyer
CHOIX DE L’EMPLACEMENT POUR L’UTILISATION DU FOYER ATTENTION : LES MATÉRIAUX ET LES OBJETS PLACÉS SUR OU SOUS LE FOYER OU À CÔTÉ DE CELUI-CI PENDANT SON UTILISATION SONT EXPOSÉS À UNE CHALEUR RADIANTE ET RISQUENT D’ÊTRE CONSIDÉRABLEMENT ENDOMMAGÉS. Ce foyer au gaz est conçu principalement pour réchauffer les terrasses, les spas, les piscines et les espaces de travail à... -
Page 44: Entretien Et Rangement
ENTRETIEN ET RANGEMENT NETTOYAGE ET ENTRETIEN : Afin d’obtenir le meilleur rendement possible de votre foyer AVERTISSEMENT : au gaz pendant des années, assurez-vous d’effectuer POUR VOTRE SÉCURITÉ : régulièrement les tâches d’entretien suivantes : ÉVITEZ de toucher l’appareil au gaz ou de le déplacer pendant au moins Gardez les surfaces extérieures propres. - Page 45 ENTRETIEN ET RANGEMENT REMARQUE : Rangez le foyer à l’intérieur pendant l’hiver s’il risque d’être exposé Laissez l’appareil se à des températures inférieures au point de congélation. refroidir avant de le couvrir. Débranchez la bouteille de l’appareil et retirez-la avant de l’entreposer à...
-
Page 46: Dépannage
DÉPANNAGE PROBLÈME CAUSE POSSIBLE MESURES CORRECTIVES OBSERVÉ L’appareil dégage Il y a une fuite de gaz. Vérifiez l’étanchéité de tous les raccords une odeur de gaz. de gaz. Vérifiez la pression d’alimentation en Le brûleur La pression de gaz est faible. gaz. -
Page 47: Renseignements Sur La Garantie
Renseignements sur la garantie Cet appareil a été fabriqué selon les normes de qualité les plus strictes. Nous garantissons au consommateur ou à l’acheteur initial que cet article et toutes ses pièces ne présenteront aucun défaut de matériaux ou de fabrication pour une période de un (1) an à compter de la date d’achat. Cette garantie n’est valable que pour le consommateur ou l’acheteur initial et exclut les usages industriel et commercial de l’article. -
Page 48: Liste Des Pièces De Rechange
LISTE DES PIÈCES DE RECHANGE Pour obtenir des pièces de rechange, communiquez avec notre service à la clientèle au 1 877 888-8225, entre 8 h et 20 h (HNE), du lundi au dimanche. Vous pouvez également communiquer avec nous à l’adresse partsplus@lowes.com ou visiter le site www.lowespartsplus.com. PIÈCE DESCRIPTION QUANTITÉ...
Need help?
Do you have a question about the SRGF11634-11 and is the answer not in the manual?
Questions and answers