Table of Contents
Advertisement
Quick Links
Advertisement
Table of Contents
Troubleshooting

Subscribe to Our Youtube Channel
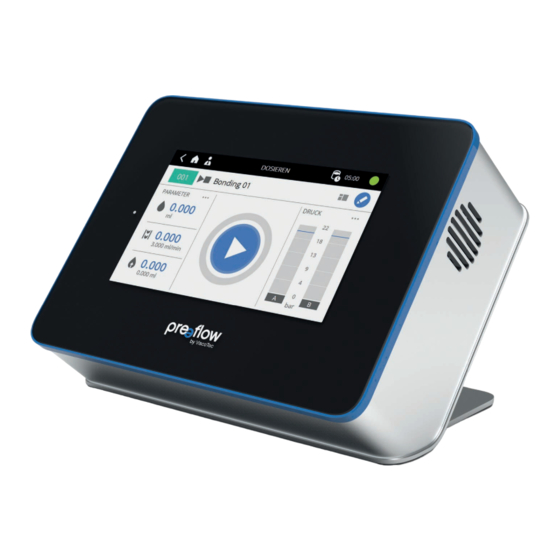
Related Manuals for ViscoTec preeflow eco-CONTROL EC200 2.0

Summary of Contents for ViscoTec preeflow eco-CONTROL EC200 2.0
- Page 1 OPERATION & MAINTENANCE MANUAL eco-CONTROL EC200 2.0...
- Page 2 Power supply A Inlet pressure monitoring A 2-component dispenser eco-DUO Dosing pressure monitoring A...
-
Page 3: Table Of Contents
TABLE OF CONTENTS Introduction ...................... 7 Scope of delivery ..................7 Incoming inspection ................. 7 Safety ........................ 8 Explanation of symbols used ..............8 Intended Use.................... 9 Personnel....................10 2.3.1 Operators................... 10 2.3.2 Maintenance staff ..............10 Informal safety precautions..............11 Preventing damage to equipment ............ - Page 4 TABLE OF CONTENTS Editing a program................... 28 4.9.1 Volume..................29 4.9.2 Flow rate ..................30 4.9.3 Suck-back .................. 30 4.9.4 Pot life (with 2-component dispenser) ........31 4.9.5 Blankshot quantity (with 2-component dispenser) ..... 32 4.9.6 Mixing ratio (with 2-component dispenser) ........ 34 4.9.7 Material density................
- Page 5 TABLE OF CONTENTS 4.15.11 Manual purging ................62 4.15.12 Sensors..................63 4.15.13 External Control unit ..............65 4.15.14 Interfaces ................... 67 4.15.15 IO Test (hardware test).............. 68 4.16 Manual purging (start screen) ..............70 4.17 Help (start screen) ................. 71 Dosing pressure monitoring .................
- Page 6 TABLE OF CONTENTS Cleaning ......................99 Spare parts ..................... 99 Technical specifications................100 11.1 Interface description................100 11.1.1 Interface X1: System I/O............100 11.1.2 Interface X2: Inlet pressure............101 11.1.3 Interface X3: External program selection......... 101 11.1.4 Wiring diagrams for external inputs/outputs ......102 11.1.5 Logical links of the outputs ............
-
Page 7: Introduction
INTRODUCTION Introduction Dear customer, We are delighted that you have decided to purchase a ViscoTec product. We have no doubt that this product will meet all your requirements. We wish you trouble-free and successful operation. The dosing system consists of the eco-CONTROL EC200 2.0 dosing control unit and a 1- or 2-component dispenser. -
Page 8: Safety
SAFETY Safety Explanation of symbols used The following symbols are used in this manual: Work step • List Fig. 1 Legend number, reference to a figure Reference to a comment COMMAND Designations of buttons/switches, menu items and input dialogs The following notices indicate safety instructions and must be followed: DANGER indicates a hazardous situation which, if not avoided, will result in death or serious injury. -
Page 9: Intended Use
SAFETY Intended Use The dosing control unit controls the dispensers in order to convey and precise dispense viscose material. Check the chemical resistance of the materials that are in contact with the material before commissioning. For information on the equipment materials refer to the dispenser operation and maintenance manual. -
Page 10: Personnel
SAFETY Personnel The operating organisation shall ensure that only appropriately qualified and authorised personnel work on this machine. It is responsible for ensuring that operators and maintenance staff possess the necessary qualifications. Personnel must be at least 15 years old. All personnel working with or on the machine must have read and understood this operation manual. -
Page 11: Informal Safety Precautions
SAFETY Informal safety precautions The following documents must be read, understood and followed. They must always be available at the machine's operating location, and must be kept in legible condition: • The operation manual for this product • Generally applicable and local accident prevention and environmental protection regulations •... -
Page 12: Compressed Air Supply
SAFETY Compressed air supply If the pneumatic unit is used, there must be a maintenance unit (pressure regulator and cut-off valve) immediately before the dosing system. Compressed air supply max. 6 bar. Organisational safety measures The necessary personal protective equipment must be provided by the operating organisation. -
Page 13: Residual Risks
SAFETY Residual risks Thorough training, observance of the operation manual and compliance with safety regulations are key to permanently accident-free operation. The following residual risks may occur when operating this machine: DANGER Danger to life from electrical voltage There is a risk of fatal electric shock if equipment covers are removed or cables are defective. -
Page 14: It Safety
All USB sticks must be checked for viruses and malware by up-to-date security software before use. ViscoTec accepts no liability if a USB stick containing malware or an incorrect update file is used. 14 / 120 eco-CONTROL EC200 2.0... -
Page 15: Product Description
PRODUCT DESCRIPTION Product description The dosing control unit has been developed and tested for high-precision work with 1-component and 2-component dispensers. Simultaneous operation of two identical 1-component dispensers is possible. For 2-component dispensers, a dynamic mixer can also be connected. The dosing system has a wide variety of setting options for the dosing quantity and time. -
Page 16: Operation
OPERATION Operation Connections The following connections can be found on the rear. All texts are in English. Fig. 1 Motor 1 Connection for dispenser 1 (component A (resin)) Motor 2 Connection for dispenser 2 (component B (hardener)) Motor 3 Connection for dynamic mixer Dispensing Dosing pressure sensor connection for dispenser 1 Pressure A... -
Page 17: 1-Component Dispenser Connection
OPERATION 4.1.1 1-component dispenser connection Illustrated with non-self-levelling liquid (material/high viscosity material) Motor 1, Dispensing Pressure A (optional), Pressure OUT Fig. 2 Illustrated with self-levelling liquid (low viscosity material) Motor 1, Dispensing Pressure A (optional) Fig. 3 INST-007080 / E eco-CONTROL EC200 2.0 17 / 120... -
Page 18: Connection Of Two 1-Component Dispensers (Synchronous Operation)18
OPERATION 4.1.2 Connection of two 1-component dispensers (synchronous operation) Illustrated with non-self-levelling liquid (material/high viscosity material) Motor 1, Motor 2, Dispensing Pressure A, Dispensing Pressure B, Pressure OUT Fig. 4 Illustrated with self-levelling liquid (low viscosity material) Motor 1, Motor 2, Dispensing Pressure A, Dispensing Pressure B Fig. -
Page 19: 2-Component Dispenser Connection
OPERATION 4.1.3 2-component dispenser connection Illustrated with non-self-levelling liquid (material/high viscosity material) Motor 1, Motor 2, Dispensing Pressure A, Dispensing Pressure B, Pressure OUT Fig. 6 Illustrated with self-levelling liquid (low viscosity material) Motor 1, Motor 2, Dispensing Pressure A, Dispensing Pressure B Fig. -
Page 20: 2-Component Dispenser Connection With Dynamic Mixer
OPERATION 4.1.4 2-component dispenser connection with dynamic mixer Illustrated with non-self-levelling liquid (material/high viscosity material) Motor 1, Motor 2, Motor 3, Dispensing Pressure A, Dispensing Pressure B, Pressure OUT Fig. 8 Illustrated with self-levelling liquid (low viscosity material) Motor 1, Motor 2, Motor 3, Dispensing Pressure A,... -
Page 21: Initial Commissioning
OPERATION Initial commissioning NOTE Isolate the power supply before connecting or disconnecting a dispenser's connection cable. The electronics in the drive motor could be damaged if this precaution is not taken. If the dosing control unit is placed on its glass side, always place a clean, soft cloth underneath to prevent the display from being scratched.? Set the dosing control unit down on its glass side. -
Page 22: Navigation Structure
OPERATION Navigation structure Start screen PROGRAMS FAVORITES MANUAL PURGE Program Manager Dosing Edit program Calibration Copy program Delete program 22 / 120 eco-CONTROL EC200 2.0 INST-007080 / E... - Page 23 OPERATION The following two buttons appear in the header in the top left of every screen (except the start screen): PAGE BACK button is used to move one hierarchy level up. START SCREEN button takes you directly back to the start screen. HELP SETTINGS User management...
-
Page 24: Icons
OPERATION Icons The following explains the various icons that appear on the individual screens. Icon Function Icon Function List of stored dispenser Help programs Manual purging Settings Delete Edit program Copy program Loading a program Page back / forward Back to start screen Input confirmation Start/stop dosing Quantity dosing... -
Page 25: Start-Up Process
OPERATION Start-up process Operating the POWER ON/OFF switch on the rear switches on the dosing control unit and starts (boots) it up. Fig. 11 Fig. 12 If a user or administrator has been set up, the login screen appears. The user or administrator must be selected (Fig. 12) and the release code entered (Fig. 13). Fig. -
Page 26: First-Time Start-Up
OPERATION First-time start-up Based on the order placed, the software is pre-installed in the dosing control unit at the factory for a 1-component or 2-component dispenser. The software automatically detects which dispenser is connected, and makes an initial program available. This program is not adapted to the desired dosing and the conveyed material. -
Page 27: Quick Start
OPERATION Quick start There are two ways to start a dosage quickly: 1. Programs – Button – START/STOP-button 2. Favorites – START/STOP-button Fig. 18 Fig. 19 Fig. 20 NOTE The prerequisite for this is that the selected program has been edited to match the conveyed material, the connected dispenser and the desired dosing.? Depending on the settings, either the set quantity is dosed (quantity dosing) or dosing... -
Page 28: Editing A Program
OPERATION Editing a program Fig. 21 Each program must be edited to adapt it to the desired dosing (Fig. 21). The following fields must be edited and set to your desired dosing. The number of fields displayed varies depending on the connected dispenser and whether a dosing pressure sensor is connected. -
Page 29: Volume
OPERATION 4.9.1 Volume Quantity dosing If a precisely defined quantity is to be dosed, select “Quantity” (Fig. 22) and enter the desired dosing quantity in millilitres* (ml) or in grams (g). Switch from (ml) to (g) using the field UNITS. Depending on the dispenser and the material being used, it is possible to set very small amounts per dose. -
Page 30: Flow Rate
OPERATION 4.9.2 Flow rate The dispenser flow rate (Fig. 24) is the quantity that can be conveyed per time unit. For the dispensers it is indicated in millilitres (ml) per minute (min). The maximum flow rate is stored in the dosing control unit for each dispenser. The values for the minimum and maximum flow rate can be found in the operation and maintenance manual for the dispenser, in the “Technical Data”... -
Page 31: Pot Life (With 2-Component Dispenser)
OPERATION 4.9.4 Pot life (with 2-component dispenser) It is essential to enter the pot life when using a 2-component dispenser. The pot life defines the time that may elapse from the first contact of the two components A (resin) and B (hardener) to the final processing of the components (Fig. -
Page 32: Blankshot Quantity (With 2-Component Dispenser)
OPERATION 4.9.5 Blankshot quantity (with 2-component dispenser) By an blank shot, the mixed material, which is in the mixer, is renewed immediately after the pot life has expired. This prevents hardening in the mixer. The quantity for the blank shot should be 1.1 to 1.5 times the mixer size used. After the blank shot, the pot life begins again. - Page 33 OPERATION Blank shot display With the beginning of the lead time (Page 32), the blank shot display is displayed on the screen (Fig. 30) with the most important parameters for the blank shot. The blank shot display can be opened or closed at any time by clicking the pot life icon or countdown.
-
Page 34: Mixing Ratio (With 2-Component Dispenser)
OPERATION 4.9.6 Mixing ratio (with 2-component dispenser) For the mixing ratio (Fig. 31) of components A (resin) and B (hardener), the specifications according to the product data sheet or recommendation of the manufacturer of the material must be observed. The mixing ratio is displayed here volumetrically (according to volume) or gravimetrically (according to weight). -
Page 35: Calibration
OPERATION 4.9.8 Calibration This field can be used to calibrate each dispenser (Fig. 33). This is described in detail in Section 4.10 (page 39). Fig. 33 4.9.9 Save location The save location is automatically issued by the control unit. For external program selection (see chapter 7.3.1 (page 90)) a different program number (Fig. -
Page 36: Dosing Pressure Max. (With Dosing Pressure Sensor)
OPERATION 4.9.10 Dosing pressure max. (with dosing pressure sensor) If a dosing pressure sensor is connected to the dosing control unit and activated (see Section 4.15.12 (page 63)), the maximum dosing pressure for overpressure switch-off can be set here (Fig. 35). If one of the set pressures is exceeded, both dispensers are stopped immediately. -
Page 37: Dynamic Mixer (For 2-Component Dispensers)
OPERATION 4.9.12 Dynamic mixer (for 2-component dispensers) SETTINGS field can be used to adjust the dynamic mixer, which is connected to the “Motor 3” connection. The extensive variety of settings for the dynamic mixer is described in Section 6 (page 86). “Mixer active”... -
Page 38: Changing Field Values
OPERATION 4.9.13 Changing field values When you click on a field (Fig. 38) an input field pops up. Alternatively, you can change the value using the +/- buttons. Touch and hold the +/- button to make the value change more rapidly. The input field can be closed by the red field (Fig. -
Page 39: Calibration
OPERATION 4.10 Calibration NOTE The time interval for the calibration must be defined by the system's operating organisation, depending on necessary process security. The operating organisation stipulates whether calibration is to be carried out before a shift starts, after cleaning, or on changing the batch or program, for example.? Provide the following aids for the calibration:... - Page 40 OPERATION Fig. 44 Fig. 45 Strip off the beaker from the end piece (dosing needle) or calibration adapter and then weigh it. Enter the measured actual quantity (Fig. 45). The procedure can be repeated at will, e.g. for comparative measurements (the measuring cup must be tared for each measurement).
- Page 41 OPERATION Change values for the calibration For the calibration, the values “Flow rate”, “Density” and “Units” can be adjusted. Press the button “Advanced Settings” (Fig. 48) and enter the desired values (Fig. 49). The changes to the flow rate and the units remain active only during calibration. The change of the material density is applied to the program.
-
Page 42: Duplicating A Program/Creating A New Program
OPERATION 4.11 Duplicating a program/creating a new program You can duplicate an existing program, make changes to it and save it under a new name. Or you can create a completely new program. Proceed as follows: Select the program you want to duplicate and press the Copy Icon. - Page 43 OPERATION Click on the name (Fig. 53). You can clear the preset name using the arrow button. Touch and hold the arrow key to clear the name more rapidly. Fig. 53 Fig. 54 Assign and confirm a new name (Fig. 54). ...
-
Page 44: Dispense Screen
OPERATION If you have created a new program, you must re-enter all the settings for the desired dosing. When copying an existing program, you can accept or edit the existing values. By clicking on the left/right arrow key on the screen, you can access the individual fields (Fig. -
Page 45: Dispense Screen - Selecting Parameters
OPERATION 4.12.1 Dispense screen – Selecting parameters A number of parameters are displayed on the left and right side of the DISPENSE screen (Fig. 60). You can set other parameters here too. Max. three parameters can be selected on each side. On the right side the pressure display (Fig. 61) can additionally be selected. Due to the pressure display, no further parameters are possible. -
Page 46: Dispense Screen - Changing The View
OPERATION 4.12.2 Dispense screen - Changing the view You can change the view in the DISPENSE screen (Fig. 64). Choose either a three-column or two-column layout (e.g. for 2-component control). Fig. 64 Fig. 65 If an active dosing pressure sensor is connected to the dispenser and monitoring units have been defined for the program, a special two-column dosing window will appear (see Section 5.7 (page 83)). -
Page 47: Choosing Favourites
OPERATION 4.13 Choosing favourites You can set up to three favourites on the start screen. The sequencing of the favourites is determined by the order in which you click on them. Fig. 68 Fig. 69 Fig. 70 Fig. 71 INST-007080 / E eco-CONTROL EC200 2.0 47 / 120... -
Page 48: Deleting A Program
OPERATION 4.14 Deleting a program Do the following to delete a program. Select program (Fig. 73) Press the delete icon (Fig. 74) Confirm or cancel the delete operation (Fig. 75) Fig. 72 Fig. 73 Fig. 74 Fig. 75 4.15 Settings In the... -
Page 49: User Management
OPERATION 4.15.1 User management (password assignment, access rights, changing user and screen lock) Assign password We recommend setting passwords for administrators and users in the user management system (Fig. 78). This will protect access to the dosing control unit and its settings. It will rule out the possibility of unintentionally changing settings. - Page 50 OPERATION Access rights for users The administrator can assign users the following access rights. This enables the specific rights that a user has to be determined. Fig. 79 Fig. 80 Access rights Description Programs The user is allowed to use programs. Purging The user is allowed to perform a manual purge.
- Page 51 OPERATION Change of user When users are set up, an icon representing the person currently logged in is always displayed in the header. Click the icon to quickly change between administrator and user. Fig. 81 Fig. 82 Fig. 83 Fig. 84 Screen lock The screen lock can be activated by clicking the administrator or user icon in the header (Fig.
-
Page 52: System Information
OPERATION 4.15.2 System Information Software Update / installing new licences / licences (information) This area contains system information such as software updates, installing new licences, information about the licenses and the operating hours counter (Fig. 87). Fig. 87 Fig. 88 Software Update / installing new licences You can obtain a software update or a new licence from your contract partner or, on request, from the manufacturer. - Page 53 OPERATION The new software and, if applicable, the licence key are listed on the left. It may be that an update (new licence) comprises multiple software packages (e.g. dosing control unit and pressure monitor). The individual software packages have to be installed one after another. ...
- Page 54 OPERATION Licences (information) Here you will find information on the software being used. The licence text of the dosing control program is displayed. Fig. 94 Operating hours counters The operating hours are recorded at the bottom of the system information screen. Fig.
-
Page 55: Program Management
OPERATION 4.15.3 Program Management Fig. 96 Fig. 97 In the program manager you can edit, duplicate and delete the individual programs. You can also save all installed programs simultaneously to a USB stick (Fig. 97). This makes it possible to create a backup copy. Use the DOWNLOAD button (Fig. -
Page 56: Error Messages
OPERATION 4.15.4 Error messages Error messages can be accessed in three ways: 1. Directly from the header (Fig. 99). 2. If the “Schema” view is set in the “Dispense” screen, some errors are indicated graphically. If you click on the image, you will be taken to the error message (Fig. 99). 3. - Page 57 The complete error list can be saved to a USB stick as a log file (Fig. 105). This function is required if an error log file is requested by ViscoTec for service purposes. Fig. 105 INST-007080 / E eco-CONTROL EC200 2.0...
-
Page 58: Display & Sounds
OPERATION Clearing individual errors Confirmed errors can be cleared individually (Fig. 106). Even when the error has been deleted, the error remain stored on the device for subsequent checks. Fig. 106 4.15.5 Display & Sounds The dosing control can be individually adapted. The brightness and volume can be adjusted. Fig. -
Page 59: Start-Up Window
OPERATION 4.15.6 Start-Up Window This selection can be used to specify whether the dosing control unit starts after the start process with the start screen (see page 25) or selects the program last used and switches directly to the Dispense screen (see page 45). Fig. -
Page 60: Language
OPERATION 4.15.8 Language A range of different languages are stored in the dosing control unit. In the basic configuration, German and English are available. Other languages are possible on request. Fig. 113 Fig. 114 4.15.9 Units The available units for pressure are bar and psi. The available units for temperature are °C and °F. -
Page 61: System Calibration
OPERATION 4.15.10 System Calibration NOTE Administrator rights are needed to make changes here. Any changes made here, the affect all saved programs. When changing program, this can lead to a negative dosing result.? System calibration is a simple way of recalibrating the dosing control unit without having to edit or change the programs. -
Page 62: Manual Purging
OPERATION 4.15.11 Manual purging The mixer can be purged via SETTINGS – Manual Purge. Fig. 119 Fig. 120 The purge quantity and the flow rate can be individually set for each component. Manual purging is started by pressing the START/STOP-button. The mixer is purged with the quantity of the selected component (Fig. -
Page 63: Sensors
OPERATION 4.15.12 Sensors All connected pressure and level sensors can be set here. The settings apply to all programs. Only those sensors are displayed which are connected to the device. Fig. 121 Fig. 122 The current measurement value is displayed in the “Value” column. Evaluation of the sensor data is activated using the icon in the “Active”... - Page 64 OPERATION cannot exceed the value for the minimum voltage value of the calibration. The settings for monitoring the “Max. dosing pressure” are made in the EDIT PROGRAM window (see page 36). If the set maximum value is exceeded, the dosing process is stopped and an error message is generated (see section 4.15.4 (page 56)).
-
Page 65: External Control Unit
OPERATION 4.15.13 External Control unit NOTE Administrator rights are needed to make changes here. Any changes made here directly affect the entire dosing control unit.? The external control unit is activated and controlled via these settings. Fig. 125 Analog Input The flow rate of the connected dispensers is regulated proportionally to the analog signal applied. - Page 66 OPERATION If the voltage 0–10V input is activated (Fig. 126), a V is displayed in the header. When the Current 4–20mA input is activated (Fig. 127), an A is displayed in the header. Fig. 126 Fig. 127 Digital - IO The digital inputs are factory set to PNP.
-
Page 67: Interfaces
OPERATION RS232 - Commands Communication and data exchange with a higher-level control unit, such as a PLC, can be carried out via the external RS232 interface. If the interface is activated (Fig. 129), a RS232 icon is displayed in the header. A separate manual describes the interface and commands in detail. -
Page 68: Io Test (Hardware Test)
OPERATION 4.15.15 IO Test (hardware test) By clicking the “IO TEST” button (Fig. 133), you can access further pages on which you can test the interfaces X1 or X2/X3, the motor connections and the connections of the dosing pressure sensors. Fig. - Page 69 OPERATION IO Test Motors The connected motor is displayed (Fig. 136). For the dosing pressure sensor, the applied voltage is displayed (Fig. 136). The polarity of the digital IO connections X1, X2 and X3 (PNP or NPN) is displayed below the dosing controller. Fig.
-
Page 70: Manual Purging (Start Screen)
OPERATION 4.16 Manual purging (start screen) You can select MANUAL PURGE directly from the start screen (Fig. 137). A quantity can be defined in the dosing control unit which is to be conveyed during manual purging. Manual purging is started and stopped by pressing the START/STOP-button. If the Quantity option is deactivated, purging continues until the START/STOP-button is pressed again. -
Page 71: Help (Start Screen)
OPERATION 4.17 Help (start screen) You can select HELP directly from the start screen (Fig. 139). The information from the user manual starting from the “Operation” chapter is displayed on the dosing control unit. Fig. 139 Fig. 140 Clicking on Search (Fig. -
Page 72: Dosing Pressure Monitoring
DOSING PRESSURE MONITORING Dosing pressure monitoring If a dosing pressure sensor is connected to the dispenser and activated (see Section 4.15.12 (page 63)), the dosing pressure monitoring can be set via the TEACH-IN field (see Section 4.9.11 (page 36)). The image section of the diagram can be shifted to the left or right by touching and holding the grey background. - Page 73 DOSING PRESSURE MONITORING The following icons are available when a TEACH-IN dosing operation has been carried out. Icon Function Five monitoring units (see Section 5.2 (page 75)): Envelope (see Section 5.2.1 (page 76)) Integral (see Section 5.2.2 (page 77)) Control box for rising edge (see Section 5.2.3 (page 78)) Control box for falling edge (see Section 5.2.3 (page 78)) Control box in general (see Section 5.2.3 (page 78)) Status display of the Teach-In dosing operation.
-
Page 74: Teach-In Dosing
DOSING PRESSURE MONITORING Teach-In dosing Fig. 142 shows the Teach-In screen after three Teach-In dosing operations have been carried out in a row. In this example, a bead dosing operation, a dot dosing operation, and a dot and bead dosing operation were carried out via an external control unit. The pressure trend of the last dosing operation is shown with a thick blue line, while previous pressure trends are shown with a thin light blue line (see detailed view). -
Page 75: Monitoring Units
DOSING PRESSURE MONITORING Monitoring units The following specifications apply to all five types of monitoring units: • At least one Teach-In dosing operation must have been carried out. • By clicking on one of the five icons, the desired monitoring unit is placed in the middle of the diagram. -
Page 76: Envelope Curve
DOSING PRESSURE MONITORING 5.2.1 Envelope curve The envelope monitors the pressure trend within a specified time interval to determine the relative deviation from the mean value of all Teach-In dosing operations. The arithmetic mean is formed from all Teach-In dosing operations. Then a relative tolerance is added symmetrically up and down from the mean pressure trend. -
Page 77: Integral
DOSING PRESSURE MONITORING 5.2.2 Integral The integral monitors the dosed quantity within a specified time range. The quantity is calculated based on the time and the measured pressure. In contrast to the envelope, the check is not carried out throughout the entire time interval, but only when the end point is reached. -
Page 78: Control Box
DOSING PRESSURE MONITORING 5.2.3 Control box The control box can be used to check whether a pressure trend runs through or avoids the region covered by the control box. There are three different control boxes (for a rising edge, for a falling edge and for the general control box) to choose from. - Page 79 DOSING PRESSURE MONITORING The margin conditions can only be changed in the pop-up window. The pop-up window can be opened via the pencil icon Here you can use the corresponding icons to select the margins and define how they are used (Fig.
-
Page 80: Teach-In Settings
DOSING PRESSURE MONITORING Teach-In settings Fig. 151 Fig. 152 Consecutive incorrect dosages until error message Required number of consecutive dosing operations outside of tolerance before an error is triggered. “Outside of tolerance” means that the conditions of at least one monitoring unit have not been met. -
Page 81: List Of Teach-In Dosing Operations And Monitoring Units
DOSING PRESSURE MONITORING List of Teach-In dosing operations and monitoring units The list with all Teach-In dosing operations and monitoring units can be displayed here. Pressure measurements and monitoring units can be deleted here; monitoring units can also be edited via “Edit”. Fig. -
Page 82: Component Signal
DOSING PRESSURE MONITORING Component signal The component signal allows the pressure trend of several Start-Stop dosing operations to be saved in one measurement. The component signal is a digital signal, which is switched via interface X1, digital input 18. If the signal is “high”, pressure recording is not stopped when dosing is stopped. -
Page 83: Dosing Window - View With Monitoring Units
DOSING PRESSURE MONITORING Dosing window – view with monitoring units If monitoring units have been saved in a program, the two-column dosing window with the print view is opened by default when the program is run (Fig. 155). Dosing pressure monitoring using the envelope, integral and control boxes is only active in this window! The overpressure switch-off, on the other hand, is always active. - Page 84 DOSING PRESSURE MONITORING The “gear button” takes you to settings relating to the display of the diagrams. The following settings can be configured: Fig. 157 Fig. 158 Scale time-axis dynamically / Diagram start-time / Diagram end-time If dynamic scaling of the time axis is active, the axis is stretched up to a time of 30 seconds. For dosing operations over 30 seconds, the frame moves to show the last 30 seconds of the dosing operation.
- Page 85 DOSING PRESSURE MONITORING Pressure data via RS232 Live feed of dosing pressure data via RS232 interface. This is only possible if control via RS232 commands is inactive. At intervals of 0.5 s, the pressure data from both sensors is saved in the format STX,244,<Time>,<PressureA>,<PressureB>,ETX. If one of the two sensors is not connected, nothing is sent in place of the pressure value.
-
Page 86: Dynamic Mixer
DYNAMIC MIXER Dynamic mixer If a dynamic mixer has been connected and activated, it can be adjusted using the SETTINGS field (see Section 4.9.12 (page 37)). Fig. 159 Fig. 160 Speed The speed (10 to 1000 rpm) for dispensing and suck-back can be set here. If the “Reverse during dosing”... - Page 87 DYNAMIC MIXER (De-)activation The lead time and trailing time for the dynamic mixer can be saved here. In the case of the lead time, the dosing does not start until the set time has elapsed (max. 5 seconds). In the case of the trailing time, the dynamic mixer continues to run in the suck-back movement for the set time (max.
-
Page 88: Explanations Of The Operating Modes
EXPLANATIONS OF THE OPERATING MODES Explanations of the operating modes Dosing can be carried out in three different operating modes, as described below. Dosing manually Manual dosing is carried out using the touch display on the dosing control unit. Dosing is initiated by pressing the START/STOP-button (Fig. -
Page 89: Dosing With The Foot Switch (Optional)
EXPLANATIONS OF THE OPERATING MODES Dosing with the foot switch (optional) A foot switch can be connected to the dosing control unit. A suitable foot switch is available (see Section 13 “Accessories” (Page 110)). The dosing system reacts to the foot switch being activated as follows: Press the foot switch ... -
Page 90: Dosing Using External Control Unit
EXPLANATIONS OF THE OPERATING MODES Dosing using external control unit External operation is activated using the digital input X3.11. The user interface switches to the last program used and is locked. In this mode, the user can no longer perform any manual operations and the operating elements (e. - Page 91 EXPLANATIONS OF THE OPERATING MODES Pin X3 Pin X3 10 3 10 3 Prog. No. Prog. No. INST-007080 / E eco-CONTROL EC200 2.0 91 / 120...
-
Page 92: Signal Forms And Levels
EXPLANATIONS OF THE OPERATING MODES 7.3.2 Signal forms and levels The digital outputs X1.2 and X1.12 can be used to ensure a reliable program change and start of dosing. Make sure that the digital input X3.11 is set for at least 1 second before changing the programme. -
Page 93: Troubleshooting With External Control Unit
EXPLANATIONS OF THE OPERATING MODES If the “Set program number active” (X1.2) and “Dosing” (X1.12) digital outputs cannot be evaluated by the master control unit, the following delay times can be used. 12-24V X3.4 Set_PRG >90 ms >150 ms + t 12-24V X1.16 External start... -
Page 94: Maintenance
MAINTENANCE Maintenance In the event of a fault, or if there is any doubt that the machine/system is not completely ready for operation, it must be shut down immediately and inspected by competent maintenance staff before operation continues. WARNING Maintenance and cleaning work may only be carried out when the machine has been shut down safely and secured against unauthorised restarting. - Page 95 MAINTENANCE Error message Possible cause Action No dispenser No dispenser is connected to the Connect a dispenser to the device connected. device. and check the cable connection. A system error has occurred. Switch the unit off and back on again. The dispenser type could not be Change the dispenser.
- Page 96 MAINTENANCE Error message Possible cause Action Pressure outlet - cable Sensor cable damaged or sensor Check the cable connection to the break faulty. pneumatic unit and if necessary replace the pneumatic unit. Load program An error occurred when loading the Switch the device off and back on program parameters.
- Page 97 MAINTENANCE Error message Possible cause Action The flow rate is too The flow rate is too high due to Adjust the flow rate in the program. high. calibration. The suck-back speed is The suck-back speed is too high Adjust the suck-back flow rate in too high.
- Page 98 MAINTENANCE Error message Possible cause Action The dosing pressure At least one of the monitoring units Bleed pump, check material. runs outside the toler- violated the pressure limits. ance range defined by Air in the material. the monitoring units. Dosing needle blocked. Change dosing needle.
-
Page 99: Cleaning
CLEANING Cleaning WARNING Cleaning work may only be carried out when the machine has been shut down safely and secured against unauthorised restarting. Otherwise, serious injuries may result. • Switch off the dosing control unit. • Disconnect the dosing control unit's power cable from the power supply If the dosing control unit is dirty, clean it using a soft, damp cotton cloth with a few drops of pH-neutral cleaning agent (e.g. -
Page 100: Technical Specifications
TECHNICAL SPECIFICATIONS Technical specifications 11.1 Interface description NOTE Digital inputs respond to 24V with PNP polarity or to GND with NPN polarity.? 11.1.1 Interface X1: System I/O (Wago 713-1110) Type Designation +24 V Positive supply connection Dig.Output Program change active (Set_PRG_active) Dig.Output Error message active (Error active) Dig.Output... -
Page 101: Interface X2: Inlet Pressure
TECHNICAL SPECIFICATIONS 11.1.2 Interface X2: Inlet pressure (Wago 713-1103) Type Designation +24 V Positive supply connection Analog Input Inlet pressure sensor B (0-10V) Negative supply connection +24 V Positive supply connection Analog Input Inlet pressure sensor A (0-10V) Negative supply connection 11.1.3 Interface X3: External program selection (Wago 713-1106) -
Page 102: Wiring Diagrams For External Inputs/Outputs
TECHNICAL SPECIFICATIONS 11.1.4 Wiring diagrams for external inputs/outputs +24V +24V Set_PRG_active Dosing Error_active Ready Warning blank Level alarm shot Reserved Reserved +24V +24V Level sensor A External start Quit Error Level sensor B Reserved Component signal External speed control 0-10V External speed control 4-20mA +24V +24V... - Page 103 TECHNICAL SPECIFICATIONS +24V +24V Bit 1 Bit 0 Bit 3 Bit 2 Bit 5 Bit 4 Set_PRG Bit 6 Ext. control unit +24V +24V +24V Set_PRG_active Dosing Error_active Ready Warning blank Level alarm shot +24V +24V Reserved Reserved Level sensor A External start Quit Error Level sensor B...
- Page 104 TECHNICAL SPECIFICATIONS +24V +24V Inlet pressure sensor A (0-10V) Inlet pressure sensor B (0-10V) Bit 1 Bit 0 Bit 3 Bit 2 Bit 5 Bit 4 Set_PRG Bit 6 Ext. control unit +24V Fig. 169 104 / 120 eco-CONTROL EC200 2.0 INST-007080 / E...
-
Page 105: Logical Links Of The Outputs
TECHNICAL SPECIFICATIONS 11.1.5 Logical links of the outputs Dosing (X1.12) The output has H-level during the dosing process, otherwise it has L-level. Program change active (X1.2) When switching to a different program, the output has an H-level, otherwise an L-level. Level alarm (X1.14) The output is activated following successful initialisation (H-level). -
Page 106: Eu Declaration Of Conformity
11.2 EU Declaration of Conformity within the meaning of EC Directive 2006/42/EC on machinery Annex II A ViscoTec Pumpen- u. Dosiertechnik GmbH Amperstraße 13 D-84513 Töging am Inn, hereby declares, that the machine designated below complies with the relevant underlying safety and health protection requirements of the EU Directive on the basis of its design and type of construction and in the form in which it is sold by us. -
Page 107: Technical Data
TECHNICAL SPECIFICATIONS 11.3 Technical data eco-CONTROL EC200 2.0 Dimensions (W× H× D) 235 × 177 × 85 mm Weight approx. 2.9 kg Power supply 110 to 230 V AC / 50/60 Hz Power consumption maximum 100VA Compressed air supply 0 to 6 bar (option) Operating modes Start/Stop dosing and quantity dosing Display... -
Page 108: Disposal
ViscoTec Pumpen- u. Dosiertechnik GmbH assumes responsibility for its products and recycles them once they have reached the end of their useful life. For equipment that was used for commercial purposes or in public institutions (known as B2B equipment), we provide a return and disposal scheme for you. - Page 109 DISPOSAL Returning and disposing of waste equipment ViscoTec Pumpen- u. Dosiertechnik GmbH itself primarily takes back the actual electrical devices it manufactured as electronic waste at the end of their service life. We assume the costs of handling, recycling and recovering the electronic waste that was taken back, but do not assume shipping or transportation costs.
-
Page 110: Accessories
ACCESSORIES Accessories Art.no. Designation 20313 “Extender” cable extension 5m cpl. (for one drive motor) 20314 “Extender” cable extension 10m cpl. (for one drive motor) 21878 Holder for eco-CONTROL EC200 2.0 dosing control unit 21882 Mounting set for installation in control cabinet 22257 Pneumatic unit 22373... -
Page 111: Mounting Of The Holder
ACCESSORIES 13.1 Mounting of the holder The holder (Art.no. 21878) is attached to 4 sleeves on the rear (Fig. 170). The bracket can be mounted on a mounting profile. Wall mounting is possible. You will need to choose the appropriate fixings for this yourself. They are not supplied. -
Page 112: Cabinet Installation
ACCESSORIES 13.2 Cabinet installation The mounting set (Art.no. 21882) is required for installing the dosing control unit in a control cabinet. The mounting set consists of 6 clamps, which fix the dosing control unit. DANGER Danger to life from electrical voltage Work and repairs on live parts may only be carried out by competent maintenance staff. - Page 113 ACCESSORIES Remove the frame (5). Unscrew the two M5 screws (6) (Fig. 173). Remove the frame (7). Insert the dosing control unit in the cut-out in the cabinet. Insert the six clamps (8) in the slots on the side (A). ...
-
Page 114: Installation Of The Pneumatic Unit
ACCESSORIES 13.3 Installation of the pneumatic unit The dosing control unit can be retrofitted with a pneumatic unit (Art.no. 22257). DANGER Danger to life from electrical voltage Work and repairs on live parts may only be carried out by competent maintenance staff. •... -
Page 115: Keyword Index
KEYWORD INDEX Keyword index Dispense screen ..... 44, 45, 46, 83 Access rights for users ...... 50 Disposal .......... 108 Accessories ........110 Dosing manually ....... 88 Acknowledge error ......57 Dosing pressure max......36 Adjusting the brightness ....58 Dosing pressure monitoring .... - Page 116 KEYWORD INDEX Interface RS232 ........ 67 Save location ......35, 36, 37 Interface X1 ........100 Saving the error list ......57 Interface X2 ........101 Scope of delivery ........ 7 Interface X3 ........101 Screen lock ........51 IO Test (hardware test) ..... 68 Setting the date .........
- Page 117 KEYWORD INDEX Warning message ......94 Wiring diagrams ......102 INST-007080 / E eco-CONTROL EC200 2.0 117 / 120...
- Page 118 NOTES Notes 118 / 120 eco-CONTROL EC200 2.0 INST-007080 / E...
- Page 119 eco-CONTROL EC200 2,0...
- Page 120 Notes eco-CONTROL EC200 2.0 Project number: 14X-XX-XXXX Order number: 14X-XX-XXXX © Copyright 2023 ViscoTec Pumpen- u. Dosiertechnik GmbH Amperstraße 13 D-84513 Töging am Inn Germany This document is protected by copyright. It must not be modified, extended, reproduced or distributed to third parties without written consent.
Need help?
Do you have a question about the preeflow eco-CONTROL EC200 2.0 and is the answer not in the manual?
Questions and answers