Table of Contents
Advertisement
Quick Links
Owner's Manual
IC..FTSMeWl
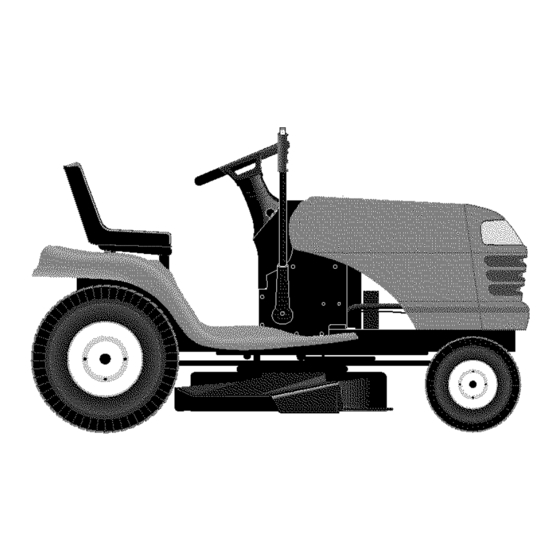
LAWN TRACTOR
18.0 HP, 42" Mower
Electric Start
Automatic Transmission
Model No.
917.273160
[_
This product has a low emission engine which operates
differently from previously built engines. Before you start the
engine, read and understand this Owner's Manual.
IMPORTANT:
Read and follow all Safety
Rules and Instructions
before
operating
this equipment.
For answers to your questions
about this product, Call:
1-800-659-5917
Sears Craftsman Help Line
5 am - 5 pm, Mon- Sat
Sears, Roebuck and Co., Hoffman Estates, IL 60179 U.S.A
Visit our Craftsman website:www.sears.com/craftsman
Advertisement
Table of Contents

Related Manuals for Craftsman 917.27316


Summary of Contents for Craftsman 917.27316
- Page 1 IMPORTANT: Read and follow all Safety Rules and Instructions operating this equipment. Sears, Roebuck and Co., Hoffman Estates, IL 60179 U.S.A Visit our Craftsman website:www.sears.com/craftsman For answers to your questions about this product, Call: before 1-800-659-5917 Sears Craftsman Help Line...
- Page 2 30 days of purchase, there will be no charges to replace the battery at your HOME. After the first 30 days, for your convenience, able but a trip charge will apply. This charge will be waived if the Craftsman product is dropped off at an authorized Sears location. For the nearest authorized Sears location, please call 1-800-4-MY-HOME®.
-
Page 3: General Operation
IMPORTANT: This cutting machine is capable of amputating hands and feet and throw- ing objects. Failure to observe the following safety instructions could result in serious injury or death. _WARNING: In order to prevent ac- cidental starting when setting up, trans- porting, adjusting or making repairs, always disconnect spark plug wire and place wire where it cannot contact spark... - Page 4 • Mow up and down slopes, not across. • Remove obstacles such as rocks, tree limbs, etc. • Watch for holes, ruts, or bumps. Un- even terrain could overturn the machine. Tall grass can hide obstacles. • Use slow speed. Choose a low gear so that you will not have to stop or shift while on the slope.
- Page 5 • Be sure the area is clear of other people before mowing. Stop machine if anyone enters the area. • Never carry passengers or children even with the blades off. • Do not mow in reverse unless abso- lutely necessary. Always look down and behind before and while backing.
-
Page 6: Specifications
Sears service center (See REPAIR PARTS section of this manual). REPAIR PROTECTION AGREEMENTS Congratulations chase. Your new Craftsman® designed and manufactured dependable operation. But like all prod- ucts, it may require repair from time to time. That's when having a Repair Protec- tion Agreement can save you money and aggravation. - Page 7 Steering Wheel Insert 1/2-20 (1) Locknut Steer, Boot Slope Sheet Steering Wheel (1) Large Flat Washer (1) Locknut 1/4-28 Steering Wheel Adapter (_Washer 17/32 x 1-3/16 x 12 Gauge _(1) Knob For Future Use Keys Video Cassette (1) Hex Bolt 1/4-28 x 1-1/4 Extension Shaft...
-
Page 8: Install Steering Wheel
Your new tractor has been assembled at the factory with the exception of those parts left unassembled for shipping purposes. To ensure safe and proper operation of your tractor all parts and hardware you assemble must be tightened securely. Use the correct tools as necessary to insure proper tightness. - Page 9 3. Place seat on seat pan so head of shoulder bolts are positioned over the large slotted holes in pan. 4. Push down on seat to engage shoul- der bolts in slots and pull seat towards rear of tractor. 5. Pivot seat and pan forward and as- semble adjustment knob and flat washer loosely.
- Page 10 INSTALL MULCHER PLATE (If previously removed) 1. Raise and hold deflector shield in upright position. 2. Place front of mulcher plate over front of mower deck opening and slide into place, as shown. 3. Hook front latch into hole on front of mower deck.
- Page 11 These symbols may appear on your tractor or in literature supplied with the product. Learn and understand their meaning. REVERSE NEUTRAL HIGH ENGINE OFF LIGHTS ON ENGINE ON OVER TEMP FUEL OIL PRESSURE LIGHT ATTACHMENT ATTACHMENT CLUTCH ENGAGED CLUTCH DISENGAGED FREE WHEEL (Automatic Models only)
- Page 12 KNOW YOUR TRACTOR READ THIS OWNER'S MANUAL AND SAFETY RULES BEFORE OPERATING YOUR TRACTOR Compare the illustrations with your tractor to familiarize yourself with the locations of various controls and adjustments. Attachment Clutch Lever Ammeter Throttle/Choke Control Clutch/Brake Pedal Freewheel Control Our tractors conform to the safety standards of the American National Standards...
-
Page 13: Ground Drive
The operation of any tractor can result in foreign objects thrown into the eyes, which can result in severe eye damage. or eye shields while operating your tractor or performing any adjustments or repairs. We recommend standard safety glasses or a wide vision safetyl mask worn over spectacles. - Page 14 TO ADJUST GAUGE WHEELS Gauge wheels are properly adjusted when they are slightly off the ground when mower is at the desired cutting height in operating position. Gauge wheels then keep the deck in proper position to help prevent scalping in most terrain conditions. NOTE: Adjust gauge wheels with tractor on a flat level surface.
-
Page 15: Before Starting The Engine
TOWING CARTS AND OTHER ATTACH- MENTS Tow only the attachments that are recom- mended by and comply with specifications of the manufacturer of your tractor. Use common sense when towing. Too heavy of a load, while on a slope, is dangerous. Tires can lose traction with the ground and cause you to lose control of your tractor. - Page 16 AUTOMATIC TRANSMISSIONWARM UP Beforedrivingthe unit in cold weather, the transmissionshould be warmed up as follows: 1. Be sure the tractor is on levelground. 2. Placethe motioncontrol lever in neutral.Releasethe parking brake and let the clutch/brakeslowly return to operatingposition. 3. Allow one minutefor transmissionto warm up.This can be done during the engine warm up period.
-
Page 17: Mowing Tips
MOWING TIPS • Mower should be properly leveled for best mowing performance. LEVEL MOWER HOUSING" in the Service and Adjustments section of this manual. • The left hand side of mower should be used for trimming. • Drive so that clippings are discharged onto the area that has already been cut. -
Page 18: General Recommendations
MAINTENANCE SCHEDULE AS YOU COMPLETE REGULAR SERVICE Check Brake Operation Check Tire Pressure Check Operator Presence Interlock Systems Check for LooseFasteners Sharpen/Replace Mower Blades Lubrication Chart Check Battery Level C_ean Battery and Terminals Check Transaxle Cooling Check V-Belts Check Engine Oil Leve_ Change Engine... - Page 19 TRACTOR Always observe safety rules when per- forming any maintenance. BRAKE OPERATION If tractor requires more than six (6) feet stopping distance at high speed in highest gear, then brake must be adjusted. (See "TO ADJUST BRAKE" in the Service and Adjustments section of this manual).
- Page 20 NOTE:The original equipmentbattery on your tractor is maintenancefree. Do not attemptto open or removecaps or covers. Adding or checking levelof electrolyteis not necessary. TO CLEANBATTERYANDTERMINALS Corrosionand dirt on the battery and terminals can causethe batteryto "leak" power. 1. DisconnectBLACKbattery cable first then RED battery cable and remove battery from tractor.
- Page 21 ENGINE OIL FILTER Replace the engine oil filter every season or every other oil change if the tractor is used more than 100 hours in one year. AIR FILTER Your engine will not run properly using a dirty air filter. Clean the foam pre-cleaner after every 25 hours of operation or every season.
- Page 22 ARNING: TO AVOID SERIOUS INJURY, BEFORE PERFORMING VICE OR ADJUSTMENTS: 1. Depress clutch/brake 2. Place motion control lever in neutral (N) position. 3. Place attachment clutch in "DISENGAGED" 4. Turn ignition key to "STOP" and remove key. 5. Make sure the blades and all moving parts have completely stopped. 6.
-
Page 23: Belt Removal
TO LEVEL MOWER HOUSING Adjust the mower while tractor is parked on level ground or driveway. Make sure tires are properly inflated (See "PROD- UCT SPECIFICATIONS" section of this manual). If tires are over or underinflated, you will not properly adjust your mower. SIDE-TO-SIDE ADJUSTMENT •... - Page 24 Mandrel Pulley Mandrel Pulley TO CHECK AND ADJUST BRAKE Your tractor is equipped with an adjustable brake system which is mounted on the right side of the transaxle. If tractor requires more than five (5) feet to stop at highest speed in highest gear on a level, dry concrete or paved surface, then brake must be checked and adjusted.
- Page 25 Engine Pulley----- Clutching Idler -""I Keeper TRANSAXLE MOTION CONTROL LEVER NEUTRAL ADJUSTMENT The motion control lever has been preset at the factory and adjustment should not be necessary. 1. Loosen adjustment bolt in front of the right rear wheel, and lightly tighten. 2.
-
Page 26: To Attach Jumpercables
If "jumpercables"are used for emergency starting, follow this procedure: IMPORTANT:Yourtractor is equipped with a 12 volt system.The other vehicle mustalso be a 12 volt system.Do not use your tractor battery to start other vehicles. TO ATTACH JUMPERCABLES - 1. Connect one end of the REDcable to the POSITIVE(+) terminal of each battery(A-B),taking care not to short against tractorchassis. - Page 27 ENGINE Maintenance, repair, or replacement of the emission control devices and systems, which are being done at the customers ex- pense, may be performed by any non-road engine repair establishment or individual. Warranty repairs must be performed by an authorized engine manufacturer's outlet.
- Page 28 Immediately prepare your tractor for stor- age at the end of the season or if the trac- will not be used for 30 days or more. WARNING: Never store the tractor with gasoline in the tank inside a building where fumes may reach an open flame or spark.
-
Page 29: Troubleshooting
TROUBLESHOOTING CHART: See appropriate section in manual unless directed to Sears service center PROBLEM CAUSE Will not start Out of fuel. Engine properly. Engine Bad spark plug. Dirty air filter. Dirty fuel filter. Water in fuel. Loose or damaged wiring. Carburetor out of adjustment. - Page 30 TROUBLESHOOTING CHART: See appropriate section in manual unless directed to Sears service center PROBLEM CAUSE Loss of power Low oil level/dirty oil. continued) Faulty spark plug. 7. Dirty fuel filter. 8. Stale or dirty fuel. Water 10. Spark plug wire loose. 11.
- Page 31 TROUBLESHOOTING CHART: See appropriate section in manual unless directed to Sears service center PROBLEM CAUSE Poor grass Engine speed too slow. discharge Travel speed too fast. Wet grass. Mower deck not level. Low/uneven tire air pressure. Worn, bent or loose blade. Buildup of grass, leaves and trash under mower.
- Page 33 TRACTOR SCHEMATIC (NOT OCCUPIED SEAT SWITCH IGNITION SWITCH POSITION CIRCUIT "MAKE" M+G+A1 NONE RUN/LIGHT B+A1 A2+L 8+A1 NONE RELAY START 3 + S + A1 NONE - - MODEL NUMBER 917.273160 °LACK BATTERY BLUE A_'ME_T CLUTCH • I 85 86 ] BLUE I 85 86 I PRESENCE...
- Page 34 TRACTOR ELECTRICAL - - MODEL NUMBER 917.273160 // i...
- Page 35 TRACTOR ELECTRICAL NOTE: All component dimensions given in U.S. inches - - MODEL NUMBER 917.273160 PART DESCRIPTION 163465 Battery 74760412 Bolt Hex Hd 1/4-20unc x 3/4 176689 Box Battery 176137 Switch, Interlock 183759 Harness Asm Light W/4152j 4152J Bulb Light #1156 4799J Cable Battery 6 Ga 11"...
- Page 36 TRACTOR - - MODEL NUMBER 917.273160 CHASSIS AND ENCLOSURES ,.64 ,145...
-
Page 37: Chassis And Enclosures
TRACTOR CHASSIS AND ENCLOSURES NOTE: All component dimensions given in U.S. inches - - MODEL NUMBER 917.273160 PART DESCRIPTION 174619 Chassis 176554 Drawbar 17060612 Screw 3/8-16 x 3/4 155272 Bumper Hood/Dash 168337X013 Dash STD533710 Bolt, Carriage 3/8-16 x 3/4 174996 Panel, Dash, LH. -
Page 38: Ground Drive
TRACTOR - - MODEL NUMBER 917.273160 GROUND DRIVE t6 3_... - Page 39 TRACTOR GROUND DRIVE PART DESCRIPTION Transmission (See Breakdown) Hydro Gear Model 314-0510 165866 Rod, Shift STD561210 Pin, Cotter 1/8 x 1 STD551125 Washer Lock 1/4 74490544 Bolt Hex FIghd 5/16-18 Gr. 5 73800500 Nut, Lock Hex w/Ins 5/16-18 unc 73800600 Nut Lock Hex w/Ins 3/8-16 130564 Knob...
-
Page 40: Steering Assembly
TRACTOR - - MODEL NUMBER 917.273160 STEERING ASSEMBLY ._39 •... - Page 41 TRACTOR STEERING ASSEMBLY NOTE: All component dimensions given in U.S. inches - - MODEL NUMBER 917.273160 PART DESCRIPTION 184704X428 Steering Wheel 172393 Axle Assembly Cast Iron 169840 Spindle Assembly, L.H. 169839 Spindle Assembly, R.H. 6266H Bearing, Race, Thrust, Hardened 121748X Washer 25/32 x 1-5/8 x 16 Gauge 12000029...
- Page 42 TRACTOR ENGINE OPTIONAL Spark PART DESCRIPTION 170548X505 Control, Throttle 17720408 Screw, Hex Head, Thread Cutting 1/4-20 x 1/2 Engine, (See Breakdown) Kohler Model CV492-27506 174667 Muffler 12-001-03 Gasket 148456 Tube Drain Oil Easy STD551237 Washer 169837 Shield Brn/Dbr Guard 137180 Arrestor, Spark 184900 Tank, Fuel...
-
Page 43: Seat Assembly
TRACTOR SEAT ASSEMBLY \\\\ KEY PART NO, NO. DESCRIPTION 180597 Seat 180166 Bracket Pnt Pivot Seat (blk) 71110616 Bolt Fin Hex 3/8-16unc X 1 19131610 Washer 13/32 X 3/4 X 10 Ga 145O06 Clip Push In Hinged STD541437 Nut Hex Lock w/Ins 3/8-16 Uric 124181X Spring Seat Cprsn 2 250 BIk Zi 17000616... -
Page 44: Wheels And Tires
Decal, Hood, LH. 138047 Decal, Battery 133644 Decal, Customer Maintenance 177374 Decal, HP Engine 172331 Decal, Mower Srs 186282 Decal, Fender, Craftsman 156439 Decal, Fender Danger 186283 Decal, Panel Side 146046 Decal, V-Belt Drive Schematic 177350 Decal, Dash Panel WHEELS &TIRES... -
Page 45: Lift Assembly
TRACTOR LIFT ASSEMBLY PART DESCRIPTION 159460 Washer Asm Inner Spring W/ Plunger 159471 Shaft Asm. Lift 105767X Pin Groove 1200O002 E Ring #5133-62 19211621 Washer 21/32 x 1 x 21 Ga. 120183X Bearing Nylong 125631X Grip Handle Fluted 122365X Button Plunger Read 139865 Link Asm Lift L.H. -
Page 46: Mower Deck
TRACTOR - - MODEL NUMBER 917.273160 MOWER DECK 0 ,'/67 113 111 118 _._ _ 10.--- _112 42 D m_n-t-path stir 3. - Page 47 TRACTOR - - MODEL NUMBER 917.273160 MOWERDECK PART DESCRIPTION 165892 Mower Deck Assembly, 42" STD533107 Bolt 138017 Bracket Assembly, Sway Bar, Front 165460 Bracket Sway Bar 38/42" Deck STD624008 Retainer Spring 178024 Bar Sway Deck 850857 Bolt, Hex 3/8-24 x 1.25 Gr. 8 STD551137 Washer, Lock 140296...
- Page 48 122- _128 _127 Z r- -" ",,1...
- Page 49 TRACTOR-- HYDRO GEAR TRANSAXLE PART DESCRIPTION 170351 Main Housing, Assembly 170352 Side Housing, Assembly 170353 Center Section, Assembly 170354 Swashplate, Trunion Machined 169898 Block - Assembly 170355 Sealant 10.50z 170356 Hex Flange Screw 1/4-20 x 1.25 170357 Stud, 5/16-24 Hex Double End 170358 Shaft, Input 170359...
- Page 50 TRACTOR KOHLER ENGINE-MODEL NUMBER CV492,TYPE CYLINDER HEAD, VALVE BREATHER YLmNDRE DIRIGE SOUPAPE ET RENIFLARD CRANKCASEJ CARTER=MOTEUR 23 22 "i a%N__ _- _ _..-t4 - - MODEL NUMBER 917.273160 NUMBER 27506...
- Page 51 TRACTOR-- KOHLER ENGINE-MODEL NUMBER CV492,TYPE CYLINDER HEAD/VALVE/BREATHER PART DESCRIPTION 25-351-01-S Lifter, valve (2) 12-755-94-S Kit, cylinder head (Includes 3-17, Gaskets 12 041 01-S (Qty. 2), 12 041 02-S, & 12 041 03-S) 12-411-03-S Rod, push (2) 12-041-10-S Gasket, cylinder head 12-017-01-S Valve, intake (Std.) 12-017-02-S...
- Page 52 TRACTOR - - MODEL NUMBER 917.273160 KOHLER ENGINE-MODEL NUMBER CV492,TYPE NUMBER 27506 BLOWER HOUSING AND BAFFLESI_ IGNITION/ELECTRICAL ALLUIViAGE ELECTRIQUE HABiTATiON DE SOUFFLEUR ET DECALENT]...
- Page 53 TRACTOR KOHLER ENGINE-MODEL NUMBER CV492,TYPE IGNITION/ELECTRICAL PART DESCRIPTION 12-086-14-S Screw, hex. flange M10x1.5x46 12-468-03-S Washer, plain 3/8" 24-162-03-S Screen, grass 25-086-47-S Bolt, shoulder M6x1.0x16 12-157-06-S X-42-15-S 12-025-15-S Flywheel 12-155-09-S Connector M-548025-S Screw, hex. cap M5x0.8x25 237878-S Kit, stator M-545020-S Screw, hex. flange M5x0.8x20 (2) 12-154-06-S Clip, cable (2)
- Page 54 TRACTOR-- MODEL NUMBER 917.273160 KOHLER ENGINE-MODEL NUMBER CV492,TYPE NUMBER 27506 STARTING SYSTEM ENGINE CONTROLS DEMARRANT D£LESYST_ME MOTEUR CONTROLE OIL PAN / LU BR]CATION D E L A HU!LE PAN D E LA LUBB!FICATIO N _ _io...
- Page 55 TRACTOR KOHLER ENGINE-MODEL NUMBER CV492,TYPE STARTING SYSTEM PART DESCRIPTION M-839070-S Screw, hex. flange M8x1.25x70 (2) 25-098-07-S Starter assembly (Includes 3-8) 12-755-54-S Kit, drive end 12-227-18-S Cap, drive end 12-170-05-S Armature 12-221-01-S Kit, brush & spring 12-227-13-S Cap, commutator end 12-211-01-S Bolt, hex.
- Page 56 TRACTOR - - MODEL NUMBER 917.273160 KOHLER ENGINE-MODEL NUMBER CV492, TYPE NUMBER 27506 EXHAUST CRANKSHAFT| ECHAPPEMENT| VlLEBREQUIN !)-' FUELSYSTEM_...
- Page 57 TRACTOR-- KOHLER ENGINE-MODEL NUMBER CV492,TYPE FUEL SYSTEM PART DESCRIPTION M-641060-S Nut, hex. flange M6x1.0 (2) M-629116-S Stud M6x1.0xl 16 (2) 12-853-118-S Kit, carburetor w/gasket (Includes 4,5,6 qty 1 Tie, cable 12-454-03-S, Terminal 25-452-20-S) 12-041-02-S Gasket, air cleaner 12-053-118 Carburetor assembly (For informationonly not available separately) (In cludes Kit, float 12-757-02-S...
- Page 59 SUGGESTED ¢.o GUIDE FOR SIGHTING SLOPES FOR SAFE OPERATION down the face of slopes, never across the face. Do not mow ARNING: To avoid serious injury, operate your tractor up and slopes greater than 15 degrees. Make turns gradually to prevent tipping or loss of control.
- Page 60 Get it fixed, at your home or ours! For repair - in your home - of all major brand apphances, lawn and garden equipment, no matter who made it, no matter who sold it! For the replacement owner's manuals that you need to do-it-yourself. For Sears professional and _tems hke garage door openers and water heaters.
Need help?
Do you have a question about the 917.27316 and is the answer not in the manual?
Questions and answers