Table of Contents
Advertisement
Advertisement
Table of Contents

Related Manuals for Element EATW2537CW


Summary of Contents for Element EATW2537CW
- Page 1 Product may vary. Please refer to the actual product...
-
Page 2: Table Of Contents
TOP LOADING WASHER Contents Introduction ............. . Important Safety Instructions . -
Page 3: Important Safety Instructions
SAFETY and PRECAUTIONS Top-Load Washer Important Safety State of California Proposition 65 Warnings Instructions WARNING: Cancer and Reproductive Harm -www.P65Warnings.ca.gov. SAVE THESE INSTRUCTIONS WARNING Do not store or use gasoli ne or other flammable vapors and This User Guide contains important information on liquids in the vicinity of this or the installation, use, and care of your appliance. - Page 4 SAFETY and PRECAUTIONS Keep the area underneath and around your 5 Do not pull or excessively bend the power cord. Do not twist or tie the power cord. appliance free of combustible materials (lint, paper, rags, and so on), gasoline, chemicals, and 6 Do not hook the power cord over a metal object, other flammable vapors and liquids.
- Page 5 SAFETY and PRECAUTIONS 5 Make sure to remove the packaging (sponge, 19 Disconnect this appliance from the power styrofoam) attached to the bottom of the supply before attempting any user washer before using it. maintenance. Pressing the Power button does not disconnect this appliance from the 6 Do not insert your hand or a metal object under power supply.
- Page 6 SAFETY and PRECAUTIONS...
-
Page 7: Features
INSTALLATION INSTRUCTIONS Features Package contents Make sure that the following items came with your washer: Filter Clamp Hose Drain hose holder User Guide... -
Page 8: Main Components
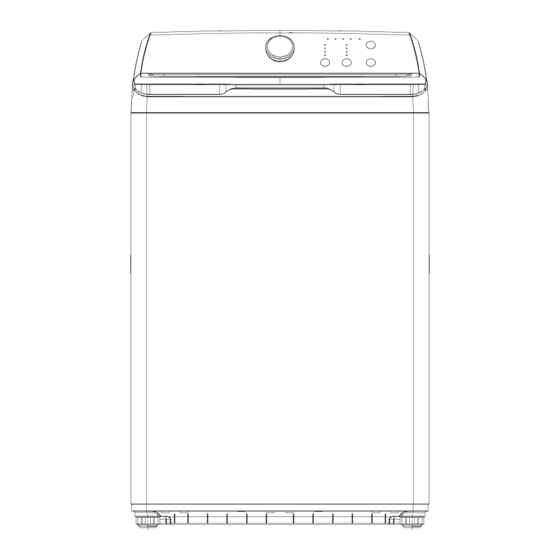
Main components Faucets and water inlet Drain hose and hoses (not included) holder Power cord Control panel Water inlet Top lid valves (on the back) Attach hose clamp to predrilled holes Cabinet Drain hose outlet Two adjustable legs Fabric softener Detergent compartment compartment... -
Page 9: Unpacking Your Washer
Unpacking your washer Warning • Packing materials can be dangerous to children. Keep all packing materials (plastic bags, polystyrene, and so on) well out of the reach of children. • Do not operate your washer on the foam base cushion. Doing so will result in serious vibration, which could cause equipment damage or result in physical injury. -
Page 10: Choosing A Location
INSTALLATION INSTRUCTIONS Choosing a location Warning • Do not install your washer in areas where water may freeze, because your washer always retains some water in its water valve, pump, and hose areas. Frozen water can damage the belts, pump, hoses, and other components. - Page 11 INSTALLATION INSTRUCTIONS If you install your washer in an alcove or closet, the front of the closet must have two unobstructed air openings for a combined minimum total area of 72sq.in. (465 sq.cm) with a minimum clearance of 3in. (7.6 mm) at the top and bottom.
-
Page 12: Electrical Requirements
INSTALLATION INSTRUCTIONS Installing in an alcove or closet Minimum clearances between your washer and adjacent walls or other surfaces are: • Either side: 1 in. (2.5 cm) • Rear: 6 in. (15.2 cm) • Closet Front: 2 in. (5.1 cm) •... -
Page 13: Water Requirements
INSTALLATION INSTRUCTIONS Water requirements To fill your washer in the correct amount of time, the water pressure needs to be between 14 and 116 psi (100 to 800kPa). If the water pressure is less than 14psi (100kPa): • The water valve may fail or may not shut off completely. •... -
Page 14: Installing Your Washer
INSTALLATION INSTRUCTIONS Installing your washer Tools you will need Phillips Flat-head Level screwdriver Wrench Pliers screwdriver Washer inlet hoses Step-by-Step instructions Step 1: Select a location Before you install your washer, make sure that the location: • Is a hard, level surface without carpeting or soft flooring that can obstruct ventilation. •... - Page 15 INSTALLATION INSTRUCTIONS 2 Tighten the hose and faucet things by hand until they are snug, then tighten them an additional two-thirds of a turn with pliers or a wrench. Pull the water supply hoses downwards to make sure that they are connected securely.
- Page 16 INSTALLATION INSTRUCTIONS 4 Connect the ends of the water supply hoses to the water supply intake connections at the top of the washer. Make sure that the rubber washers are in place. The water supply hose connected to the hot faucet must be connected to the hot water supply intake and the water hose connected to the cold faucet must be connected to the cold water supply intake.
- Page 17 INSTALLATION INSTRUCTIONS Step 3: Connect the drain hose Caution • Failure to slide the drain hose completely over the washer’s drain pipe may result in water leakage. • Failure to move the clamp or hoop onto the washer’s drain pipe will result in water leakage.
- Page 18 INSTALLATION INSTRUCTIONS 4 Fasten the drain hose to the washer frame at the indicated locations with the hose clamp provided, using pliers. 5 Position the other end of the drain hose (the loose end) in one of the following ways: Caution Make sure that the connection between the drain hose and the wash basin, standpipe, or laundry tub is not airtight.
- Page 19 INSTALLATION INSTRUCTIONS • In a laundry tub - The laundry tub must be no shorter than 39-in. (99 cm) and no higher than 96-in (244 cm) maximum. Hose holder 96-in. max 39-in. min Cable Step 4: Level your washer Caution Do not use your washing machine without leveling.
- Page 20 INSTALLATION INSTRUCTIONS 3 If your washer is not level, carefully tilt your washer just enough to adjust the leveling feet on the bottom of your washer. Extend the feet only as much as is necessary. If the feet are extended too much, your washer may vibrate.
-
Page 21: Control Panel
OPERATING INSTRUCTIONS Control panel ITEM DESCRIPTION Press to turn on your washer. Press again to turn off your washer. If you leave your washer on and do not press the /Start Pause button within 10 minutes, your washer automatically /Power button turns off. -
Page 22: Using Your Washer
OPERATING INSTRUCTIONS Using your washer Washing a load of laundry WARNING – To reduce the risk of fire, electric shock, or injury to persons, read the IMPORTANT SAFETY INSTRUCTIONS before operating this appliance. Selecting a detergent Your washer is designed to use high efficiency (HE) detergents. •... - Page 23 OPERATING INSTRUCTIONS Loading the bleach compartment (liquid bleach only) • Add chlorine bleach to the bleach compartment. Do not over-fill the compartment. • There is no water inlet to the bleach dispenser, so the bleach will directly load into the tub when you pour it in. Caution •...
- Page 24 OPERATING INSTRUCTIONS Step 6: Start your washer 1 Press the /Start Pause button. Note As your washer moves from stage to stage in the wash cycle, the related light turns on (such as Rinse or Spin). 2 If you need to pause the cycle (for example to add or remove items or adjust the load), press the /Start Pause button, then open the lid.
-
Page 25: Washer Options And Settings
OPERATING INSTRUCTIONS Washer options and settings Options and settings table of NS-TWM35W1: • For best washing performance, we suggest the loading weight be less than 15.4 lbs. (6.99 kg) (Dry clothes) • Bolded options are initial settings. (dots) indicate optional functions you can select. Program Water Level Wash Temp. -
Page 26: Maintaining Your Washer
USER MAINTENANCE INSTRUCTIONS Maintaining your Cleaning the tub The Tub Clean cycle is a self-cleaning cycle that washer removes the causes of odors that may occur inside your washer without using a cleaning agent. We suggest cleaning the tub about once a month. Caution Caution Turn off... - Page 27 USER MAINTENANCE INSTRUCTIONS PROBLEM SOLUTION Washer vibrates or is • Make sure that your washer is set on a level surface. If the surface is not level, adjust your too noisy washer’s feet to level your washer. • Make sure that your washer is not touching any other object. •...
-
Page 28: Understanding The Error Codes
2.When error is happening, the buzzer will beep 5 seconds and repeat once per 15 minutes. After 24 hours, machine will power off automatically. Specifications TYPE EATW2537CW Dimensions 42.2 in.x 25.2 in. x 27 in. (H x W x D) (107 cm x 64 cm x 68.4 cm)
Need help?
Do you have a question about the EATW2537CW and is the answer not in the manual?
Questions and answers
Can I hook it up to my kitchen sink My mom did it that way with an adapter because she didn't have a washer Hook up