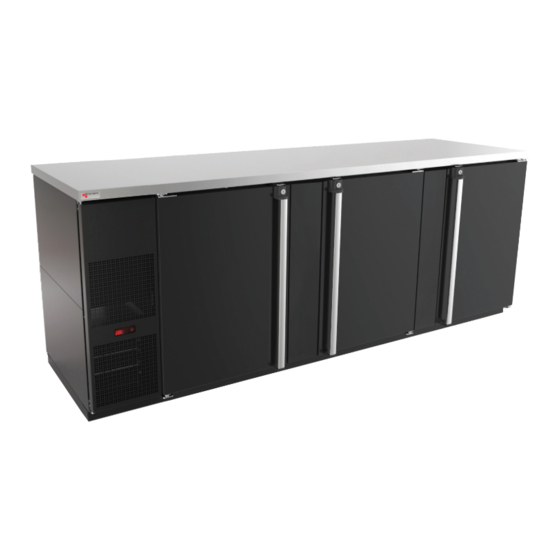
Summary of Contents for Micro Matic Pro-Line MDD58W-E-E
- Page 1 USER MANUAL & SET UP GUIDE PRO-LINE E-SERIES SAFETY FIRST! READ INSTRUCTIONS COMPLETELY Before getting started please read this user manual and at all times follow the important safety instructions. VERSION 1.0...
-
Page 2: Table Of Contents
TABLE OF CONTENTS 1. GENERAL INFORMATION ......................4 2. RECEIVING AND INSPECTING ....................5 3. SPECIFICATIONS ........................6 4. INSTALLATION ........................7-8 4.1 UNCRATING ........................7 4.2 SEALING ..........................7 4.3 LOCATION ........................... 7 4.4 TAPPING INSTRUCTIONS ....................8 4.5 DATA PLATE ........................8 4.6 ELECTRICAL CONNECTIONS .................. - Page 3 MDD78S-E As Shown MICROMATIC.COM SUPPORT (866) 327-4159...
-
Page 4: General Information
All rights reserved. Any - including, but not limited to - duplication, dissemination and other uses of the texts, graphics or other representations without the consent of the manufacturer. Contact Information: Micro Matic USA, Inc. 2364 Simon Court Brooksville, FL 34604 1.4 CUSTOMER SERVICE... -
Page 5: Receiving And Inspecting
A NOTE FROM OUR QUALITY CONTROL MANAGER Congratulations on your new purchase. We would like to welcome you to the Micro Matic family. The unit in front of you is a great piece of equipment that will become one of your... -
Page 6: Specifications
SPECIFICATIONS & KEG FOOTPRINTS DIRECT DRAW MODELS CRATED REFRIGERANT MODEL DOORS TOWER* FAUCETS KEGS WEIGHT LENGTH WIDTH HEIGHT CHARGE (LBS) (R-134 A) MDD17-E 17.5" 30" 38" 5.3 oz MDD23-E 25" 30" 40.5" 5.64 oz MDD36-E 36 3/4" 29 1/2" 36 7/8" 6.35 oz MDD58-E 59 1/2"... -
Page 7: Installation
INSTALLATION 4.1 UNCRATING Cut and remove the outer packaging. Unscrew and remove the "L" brackets that secure the refrigerator to the skid. If machine was laid down during this operation leave the cabinet up right for 24 hours before plugging into power source. 4.2 SEALING WHEN SANITATION CODES REQUIRE SEALING TO FLOOR, THIS METHOD MAY BE USED 1. -
Page 8: Tapping Instructions
4.4 TAPPING INSTRUCTIONS The D-Style valve keg is the most available and easiest of all to tap. The type of keg and tap you use will depend on the brand of beer your purchase. Your beer distributor can provide additional instructions and tips on how to maintain the beer to your satisfaction. -
Page 9: Operations
4.7 INSTALLING SHELVING IN THE UNIT (IF APPLICABLE) Instructions: 1. Hook shelf rails onto shelf pilasters 2. Position shelf rails equal in distance from the floor for level shelves. 3. Wire shelves are oriented so that cross support bars are facing down. 4. -
Page 10: Description Of Buttons On The Controller
5.2 DESCRIPTION OF BUTTONS ON MODELS WITH DIGITAL CONTROLLER The Pro-Line™ dispenser is designed to maintain keg temperature within the most desirable range of 34° to 38°F. You can expect the Pro-Line™ unit to maintain temperature with the proper temperature control setting and in a normal environment. If a different setting is desired, follow these instructions to adjust the thermostat. -
Page 11: Electronic Temperature Control
5.3 ELECTRONIC (DIGITAL) TEMPERATURE CONTROL How To See The Set Point 1. Push and immediately release the key, the set point will be displayed. 2. Push and immediately release the key or wait about five (5) seconds to return to normal display. -
Page 12: Cleaning The Condenser Coil
6.2 CLEANING THE CONDENSOR COILS DANGER Power must be turned off and disconnected from the power source whenever performing maintenance, repair or cleaning the condensing unit. Disconnect unit from power supply. Open access door to expose condensing unit. The condenser coil requires regular cleaning;... -
Page 13: Installing Air Channel(S) And Draft Tower(S)
6.4 PROCEDURE TO INSTALL THE DRAFT TOWERS AND AIR SUPPLY HOSE (ONLY “DD” MODELS) Models: MDD17-E, MDD23-E, MDD58-E, MDD68-E, MDD78-E and MDD94-E This procedure describes how to install the air channel needed to provide cold air directly into the beer towers. Tools needed: Philips screwdriver STEP 1 Locate the gaskets and bolts included in with your Tower. -
Page 14: Wiring Diagrams
WIRING DIAGRAMS MDD23-E | 14 PRO-LINE E-SERIES REFRIGERATION USER GUIDE AND SET UP MANUAL... - Page 15 MDD/BB36-94-E LINE NEUTRE Red Display Electronic dixell XR02CX Controller COM/VC PROBES NTC NEUTRE JUNCTION SIGNAL FROM CONTROLLER COMP BROWN BROWN ROCKER SWITCH BLUE EVAP COND BLUE YELLOW LIGHT SWITCH LAMP's BLUE WHITE Piloto BLUE NOTE: THE LAMP IS ONLY INCLUDED FOR GLASS DOOR MODELS, CHECK WITH YOUR SALES REPRESENTATIVE.
-
Page 16: Warranty
Warranty is in effect. FOR MORE INFORMATION, TROUBLESHOOTING OR SERVICE PLEASE CALL SUPPORT AT (888) 864-9400 OR EMAIL SERVICEREQUEST@NORDON.COM | 16 01939-D1018 ©2018 Micro Matic USA, Inc. All Rights Reserved. Micro Matic reserves the right to change specifications without notice.


Need help?
Do you have a question about the Pro-Line MDD58W-E-E and is the answer not in the manual?
Questions and answers