Table of Contents
Advertisement
Quick Links
OWNER'S MANUAL
125cc ATV
Always wear a helmet: It could save your life!
NEVER permit children under age 10 to operate this ATV.
Do not remove the owner's manual from this vehicle.
Please obtain, review and follow provincial/municipal government acts and
regulations pertaining to owning and operating an off-road vehicle.
1
Advertisement
Table of Contents

Summary of Contents for PPS UT125-8
- Page 1 OWNER’S MANUAL 125cc ATV Always wear a helmet: It could save your life! NEVER permit children under age 10 to operate this ATV. Do not remove the owner’s manual from this vehicle. Please obtain, review and follow provincial/municipal government acts and regulations pertaining to owning and operating an off-road vehicle.
- Page 2 Failure to follow the age recommendations for this ATV. Failure to supervise children under 10 on ATV models intended for their use. Use by children of ATVs that are not recommended for their age can lead to severe injury or death of the child.
- Page 3 Congratulations on your purchase of 125cc Utility ATV from dealers of Ricky Power Sports,LLC. Your ATV is warranted to be free of manufacturing defects in material and workmanship for a period of 90 days from the date of purchase. During the warranty period Ricky Power Sports, LLC will at its option, repair, provide replacement parts or replace your 125cc Utility ATV at no charge.
- Page 4 Operation of this ATV by children of under 10 age can be hazardous. Use by children of under 10 can lead to their severe injury or death. Children under age 10 may not have the size, strength, skill of judgment needed to operate this ATV safely. Do not allow any child under age 10 to ride this ATV.
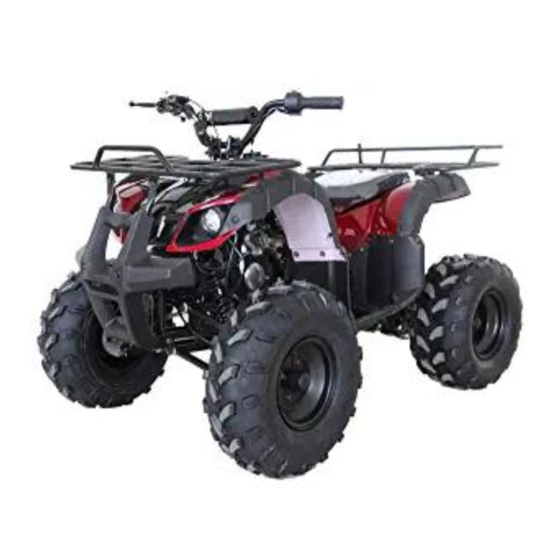
- Page 6 PRS 125cc Utility ATV Headlight Handle bar Taillight Front wheel Foot shock Rear wheel Front rest Rear shock Seat Air filter Throttle lever Exhaust muffler Rear brake pedal Front bumper...
- Page 7 HOW TO READ THIS MANUAL Please read this manual and follow all instructions carefully. To emphasize the special information, the symbol and the words WARNING or CAUTION have some special meanings. Pay great attention to the messages. NOTE: Indicating special information which is to make maintenance easier or instructions clearer.
-
Page 8: Table Of Contents
Table of Contents NOTICE TO USERS.....................10 FUEL AND OIL.....................13 LOCATION OF LABELS AND SERIAL NUMBERS..........14 LABEL........................15 HANDLEBAR & CONTROL LAYOUT..............17 LEFT HANDLEBAR.....................17 RIGHT HANDLEBAR....................17 FUEL VALVE......................18 FUEL TANK CAP....................19 SEAT LOCK......................21 WHAT YOU SHOULD KNOW BEFORE RIDING..........21 INSPECTION BEFORE RIDING................23 BREAK-IN......................24 WARNINGS......................26... - Page 9 DRIVE CHAIN......................63 DRIVE CHAIN CLEANING AND OILING .............64 TIRES........................66 BRAKES .......................70 FRONT BRAKE ADJUSTMENT................70 REAR DISC BRAKE....................71 GENERAL LUBRICATION..................73 TROUBLESHOOTING...................73 TRANSPORTING....................75 CLEANING PROCEDURE..................76 WASHING YOUR ATV....................77 STORAGE PROCEDURE..................78 SPECIFICATIONS....................79 CIRCUIT DIAGRAM....................81 EMISSION CONTROL SYSTEM WARRANTY .............82...
-
Page 10: Notice To Users
NOTICE TO USERS We believe in conservation and protection of the earth’s natural resources. We encourage every vehicle owner and operator to do the same by obeying posted signs and riding only in areas designated and approved for off-road recreational use. NOTICE TO PARENTS THIS ATV IS BUILT FOR USE BY CHILDREN AGE 16 AND OLDER, BUT THE USERS MANUAL IS WRITTEN FOR ADULTS WHO WILL BE SUPERVISING THE CHILDREN, WE STRONGLY RECOMMEND , THEREFORE, THAT YOU REVIEW THIS ENTIRE... - Page 11 A Category Y-12+ ATV is a youth model ATV that is intended for use by children age 12 or older. Category T (Transitional Model) ATV. A Category T ATV is an ATV of appropriate size that is intended for recreational use by an operator age 14 or older under adult supervision, or by an operator age 16 or older.
- Page 12 · Always follow proper procedures for climbing hills as described in this manual. Check the terrain carefully before you start up any hill. Never climb hills with excessively slipper or loose surfaces. Shift you weight forward. Never open the throttle suddenly or make sudden gear changes. Never go over the top of any hill at high speed.
-
Page 13: Fuel And Oil
· Never exceed the stated load capacity for an ATV. Cargo should be properly distributed and securely attached. Reduce speed and follow instructions in this manual for carrying cargo. Allow greater distance for braking. · The combined weight of the rider and any accessories or cargo must never exceed the vehicle’s max load capacity of 187 lbs (85 kg). -
Page 14: Location Of Labels And Serial Numbers
CHECKING THE OIL Check the engine oil level prior to each use. 1. Start the engine and let it idle for a few minutes. 2. Stop the engine and put the vehicle on level ground. 3. After a few minutes remove the oil fill cap / dipstick, wipe it clean, and reinsert the dipstick without screwing it in. -
Page 15: Label
LABELS: Read and follow all of the warning labels on your ATV. Make sure you understand all the labels. Keep the labels on the ATV. Do not remove them for any reason. If a label comes off or becomes difficult to read, you should get a replacement by your dealer or Ricky Power Sports,LLC. - Page 16 Following label is affixed to the left rear fender Following label is affixed to the left front fender...
-
Page 17: Handlebar & Control Layout
HANDLEBAR & CONTROL LAYOUT Left Handle Bar Engine Stop Switch: With this switch in the “RUN” position, the engine can be started. The engine will not start with this switch in the “OFF” position. Start Button: When the ignition key is in and turned to the “ON” position, the Engine Stop Switch is in the “RUN”... -
Page 18: Fuel Valve
Notice: This ATV was shipped from the factory with the CDI governor set to not allow the ATV to travel over 15mph (24km/h) out of the crate. Any change of CDI should be done by the dealer you purchase from, or a qualified service tech, working under the ATV or motorcycle service center. -
Page 19: Fuel Tank Cap
“OFF” position “ON” position The fuel valve set to “OFF”; fuel The fuel valve set to “ON”; fuel cannot flow. Use this position when can flow to the engine. The normal the engine is not running. Operating position To open the fuel tank, remove the vent tube from the cap and rotate it counterclockwise. To replace the cap, turn it clockwise and tighten it securely. -
Page 21: Seat Lock
WHAT YOU SHOULD KNOW BEFORE RIDING Before riding, you should read all the following information carefully. If you are properly prepared, you will have a more enjoyable ride. Before riding, you should find a good place to practice the skills. Find a flat, open area with enough space to practice the new skills. - Page 22 are not trespassing. Call the police if you don’t know where you can ride. Protect your riding areas. When you are riding, remember to keep the terrain in good condition. Don’t destroy plants, trees or other vegetation. Don’t litter and don’t bother wildlife. With your help, your riding area can remain open for use in the future.
-
Page 23: Inspection Before Riding
INSPECTION BEFORE RIDING ITEM TO CHECK CONTENT Steering Smoothness; No restriction of movement; No play or looseness Brakes Proper brake lever free play; enough brake force; Parking brake effectiveness Tires Proper air pressure; Enough tread depth; No cracks, rips, or other damages Fuel Enough fuel for the intended trip;... -
Page 24: Break-In
You could be severely injured if your hands or clothing get caught in moving ATV parts. Shut the engine off when performing maintenance checks, except checking the engine stop switch and throttle. BREAK-IN The first month is the most important in the life of your vehicle. Proper operation during this break-in period will be helpful for assuring maximum life and performance of your new vehicle. - Page 25 initial service includes proper adjustments, tightening of all bolts & nuts, and replacement of dirty oil. Timely performance of this service will help you get the best service life and performance of the engine.
-
Page 27: Safety Gear
SAFETY GEAR A DOT approved motorcycle helmet is the most important part of your safety gear. A DOT approved motorcycle helmet can help prevent a serious head injury. Choose a helmet that fits snugly. Motorcycle or ATV dealers can help in selecting a good quality helmet which fits it properly. -
Page 31: Basic Movement And Shifting
BASIC MOVEMENT AND SHIFTING STARTING THE ENGINE Before attempting to start the engine, make sure to follow these steps. 1. Insert the ignition key and turn it to the “ON” position. 2. Turn the fuel valve to “ON”. 3. Place the engine stop switch in the “RUN” position. 4. -
Page 32: Braking
BRAKING Rear Brake Pedal To stop the ATV, please release the throttle lever and use rear brake pedal which is located on the foot board of right side. Front Brake Lever To stop the ATV when ATV runs at the low speed, please use front brake lever which is located on the right side of the handle grip. -
Page 33: Turning
TURNING Turning improperly ATV could go out of control, causing a collision or overturn. Always follow proper procedures for turning as described in the owner’s manual. Practice turning at low speed before attempting to turn at faster speed. Do not turn at excessive speed. To turn the ATV, the rider must use the proper technique. - Page 34 travel a longer distance that the inside rear wheel. To make this happen, the rider must create less traction for the inside wheel, allowing it to skid. This allows it to travel a shorter distance than the outside wheel. This happens even though both wheels are still turning at the same speed.
-
Page 35: Operation Of Hills
OPERATION OF HILLS... -
Page 36: Climbing A Hill
To climb a hill with the ATV, follow the directions below. 1. Speed up and maintain a steady speed before reaching the top of the hill. Remember that you must ride at a steady speed all the way to the top of the hill. 2. - Page 37 To ride down a hill with the ATV, follow the instructions below. 1. Check the terrain carefully for any obstacles before you go down the hill. 2. Point the ATV straight down the hill. 3. Transfer your body to the rear by sliding back on the seat. 4.
-
Page 38: Riding Over Obstacles
Lock parking brake, after you are stopped. If you begin rolling backwards: Keep weight uphill. Never apply the rear brake while rolling backwards. Apply the front brake. When fully stopped, apply rear brake as well, and then lock the parking brake. Dismount on uphill side or to a side if pointed straight uphill. -
Page 39: Skidding Or Sliding
SKIDDING OR SLIDING You may experience skidding or sliding when you are not braking. You may be able to overcome it by using the techniques listed below. If your front wheel skids: Gain front wheel traction by reducing the throttle opening and leaning your body slightly forward. - Page 40 You can ride the ATV through shallow water. Make sure it is not more than 10cm (4 inches) deep and is not moving fast. Choose a good place to cross before you ride through the water. Look for a spot where the banks are gently sloped on both sides and the bottom of the stream is hard.
-
Page 41: Riding Through Water
RIDING IN COLD WEATHER Pre-ride Inspection Check that the throttle and all control levers move freely. Make sure that the footrests are free of ice or snow. Move the ATV forward and backward to check that the wheels roll freely. If you cannot move the ATV, the tires may be frozen to the ground, or the brakes may be frozen to the wheels. - Page 42 Riding in cold weather can be hazardous. At a temperature of 10° F (-12° C), the wind chill created by going just 10 mph (16km/h) makes you as cold as if you were standing still at a temperature of -9° F (-23° C). At this temperature, exposed flesh will freeze in just a few minutes.
-
Page 44: Accessory Use And Vehicle Loading
Practice riding your ATV in an open snow- or ice-covered area, at slow speeds, before handling out on snow- or ice-covered trails. Learn how your ATV responds to steering and braking on the type of terrain you will encounter on your ride. Your eyes may be sensitive to sunlight when you ride over snow or ice on a bright, sunny day. -
Page 45: Inspection And Maintenance
stability and handling of your ATV. 9. Allow enough stopping distance. Stopping distance increases if you carry loads. Use engine braking as much as possible. INSPECTION AND MAINTENANCE It is very important to inspect and maintain your ATV regularly. Follow the guidelines in the chart. - Page 46 Brake Oil Strainer Wheel Bearing KnuckleShafts Steering Shaft 1 = clean 2 = lubricate 3 = adjust, inspect, replace if necessary. Center or call Ricky Power sports LLC hotline: 1-844-250-2199 Center.
-
Page 47: Tools
TOOLS A tool kit is provided with your ATV. SPARK PLUG Your ATV is equipped with TORCH or equivalent level spark plug. To determine if the standard spark plug is in good condition, check the color of the plug’s center electrode insulator after vehicle operation. -
Page 48: Spark Plug
CAUTION To maintain a proper functioning spark plug, keep the plug free of carbon. Remove carbon from the plug with a wire or pin, and adjust the gap to 0.6~0.8mm for good ignition. Use a thickness gauge to check the gap. -
Page 49: Valve Inspection
VALVE INSPECTION REFER TO MAINTENANCE SCHEDULE IN THIS OWNER’S MANUAL FOR VALVE ADJUSTMENT INSPECTION INTERVALS. Valve clearance should be: Intake: 0.03-0.06 mm Exhaust: 0.03-0.06mm The engine will make excess noise if the gap is too large in air valve. If gap is too small valve operation will be hindered which could result in valve malfunction and failure. -
Page 50: Battery Installation
BATTERY INSTALLATION INITIAL SERVICE AND INSTALLATION OF BATTERY: Note: The following page is for vehicles with battery’s containing separate electrolyte pack. Most battery’s will come with the electrolyte already sealed into the battery. - Page 51 Preparing the battery: · Place battery on level surface. Remove sealing tape from top. (See figure 1) · Take the electrolyte container out of the plastic bag. · Place electrolyte container upside down with the sealed silver mouths of the electrolyte bottles in line with the six filler holes of the battery.
- Page 52 After 30 minutes the battery is ready for its initial charge. Place cap strip loosely over the filling holes as shown in the picture. (See figure 4)
- Page 53 How to Initially Charge the battery: Connect the red positive (+) cable to the red positive (+) pole of the battery. (See figure 5) 2.Connect the black negative (-) cable to the black negative (-) pole of the battery. (See figure 6) Note: The red positive (+) cable has a larger diameter than the black negative y cable.
- Page 54 Figure 9 Figure 10...
- Page 55 NEVER REMOVE THE STRIP OF CAPS NOR ADD ANY WATER OR ELECTROLYTE. Battery Replacement: · Remove old battery. Mark which cable is connected to the positive terminal (+) and which cable is connected to the negative (-) terminal. · Clean cable connectors with wire brush or sandpaper to remove oxidation. ·...
-
Page 56: Adjustment Of Throttle Lever
serious injury or death. · Batteries contain sulfuric acid. · Always shield eyes with protective eye wear when working around battery acid. · Battery acid is poisonous and can cause severe burns. · DO NOT smoke around batteries and keep away from open flame. THE ADJUSTMENT OF THROTTLE LEVER To adjust the throttle lever free distance: 1. -
Page 57: Idle Speed
Operating the vehicle with an inadequate throttle lever free distance could be hazardous. Inadequate throttle lever free distance could cause engine speed to rise suddenly when you turn the handlebars. This can lead the rider to lose control. Adjust the throttle lever free distance so that engine idle speed does not rise due to handlebar movement. -
Page 58: Engine Oil Check And Change
Engine oil dip stick location ENGINE OIL CHECK AND CHANGE Engine oil dip stick Engine oil drain bolt 1. Remove the drain bolt and allow oil to drain into an approved container. 2. Re-install the drain bolt 3. Add fresh oil of the specified type (see page 13, fuel and oil). NOTE: Approximately 1 Qt (1L) of oil is required. -
Page 60: Air Cleaner
AIR CLEANER The air cleaner element must be kept clean to provide good engine power. If you use your vehicle under normal, low-tension conditions, you should service the air cleaner at the intervals specified. If you ride in dusty, wet, or muddy conditions, you will need to inspect the air cleaner element much more frequently. - Page 61 REMOVAL The air cleaner accumulates dust and must be cleaned periodically. If the ATV is ridden in dusty areas, the air cleaner must be cleaned at more frequent intervals than specified in the Maintenance Schedule. If the ATV is submerged in water, the air cleaner should be checked and water should be drained from the air cleaner housing before starting the engine.
-
Page 63: Drive Chain
DRIVE CHAIN The condition and adjustment of the drive chain should be checked before riding. Always follow the guidelines below for inspecting and servicing the chain. Failing to maintain the chain properly before each riding could be hazardous. Riding with the chain in poor condition could lead to an accident. Be sure to inspect and maintain the chain before riding, according to these guidelines. -
Page 64: Drive Chain Cleaning And Oiling
DRIVING CHAIN CLEAN AND OILING If you find any of these problems with your sprocket, consult Ricky Power Sports LLC or your local service center. DRIVE CHAIN CLEANING AND OILING Clean and oil the chain as the following: Steam cleaning, high-pressure washers, and certain solvents can damage the drive chain. Use only kerosene to clean the chain. - Page 65 Adjust two screws clockwise to tighten the chain, and turn two screws counterclockwise to make sure the chain be loosen. Failing to inspect the drive chain slack before each use of the ATV could be hazardous. Too much chain slack could cause the chain to come off the sprockets, resulting in an accident or serious damage to the ATV.
-
Page 66: Tires
TIRES Any questions please consult Ricky Power Sports LLC authorized dealers. - Page 67 TIRES The ATV is equipped with low pressure tubeless tires of the size and type listed below: Front :AT19 x7-8 Rear: AT18 x 9.5-8 Tire Tread Condition 4.0 mm (0.16 in)
- Page 68 Tire Air Pressure Check the air pressure in all tires before riding. Improper air pressure would affect handling, steering response, traction, tire life and rider comfort. Be sure that the tires are inflated to the pressures shown below. Tire pressure should only be measured or adjusted when the tires are cold.
- Page 69 The ATV may have unusual handling if the tires are installed incorrectly. The tires are intended to rotate in a specific direction, as indicated by the arrows on the sidewall of each tire. Install tires correctly so they rotate in the proper direction.
-
Page 70: Brakes
BRAKES The ATV has two front drum brakes and a rear disk brake. Front Brake Adjustment Try to move the vehicle backward and forward when the brake is applied. If the front wheels can turn, adjust the brake to lock the wheels securely. Measure the amount of free play needed to lock the brake lever, as shown in above, if necessary. -
Page 71: Rear Disc Brake
After any adjustment of the brake, check again to make sure the front wheels cannot turn when the brake is applied. Rear Disk Brake Pedal Inspect the disk brake for leakage. If the brake fluid leaks, the safety of riding could be affected. Inspect the brake hose for cracks, and the joint for leakage. - Page 72 Brake fluid can be hazardous to humans and pets. Brake fluid is harmful or fatal if swallowed, and harmful if it comes in contact with your skin or eyes. Keep brake fluid away from children and pets. Call your doctor immediately if brake fluid is swallowed, and induce vomiting.
-
Page 73: General Lubrication
GENERAL LUBRICATION Proper lubrication is important for safe, smooth operation and long life of your vehicle. Be sure that all lubrication is performed during periodic maintenance on the vehicle. Increase intervals when you use your ATV in severe conditions. Your authorized service center should do general lubrication as shown in the MAINTENANCE CHART. - Page 74 Fuel Supplying Check 1. Make sure there is adequate fuel in the fuel tank. 2. Check that the engine stop switch is in the RUN position. 3. Check that the fuel valve is in the ON position. 4. Make sure there is enough fuel reaching the carburetor from the fuel tank. Draining fuel from the carburetor could be hazardous.
-
Page 75: Transporting
Performing the spark test improperly could be hazardous. You could get a high voltage electrical shock if you are not familiar with this procedure. Do not perform this check if you are not familiar with the procedure. Do not point the spark plug near the spark plug hole during this test. -
Page 76: Cleaning Procedure
Failing to secure the ATV properly could be hazardous. Failing to secure the vehicle properly may result in an accident or damage to the vehicle. When transporting the ATV, lock the parking brake lever and tie down the vehicle securely with straps, rope, or some other suitable means. -
Page 77: Washing Your Atv
WASHING YOUR ATV With some care, your ATV can be washed in a similar manner to washing an automobile. Note: Avoid spraying or allowing water to flow over the following places: · Ignition switch · Spark plug · Fuel tank cap ·... -
Page 78: Storage Procedure
STORAGE PROCEDURE If you do not use your ATV for a long time, it will need special service requiring appropriate materials, equipment and skill. For this reason, we recommend that you trust this maintenance work to your authorized service center. If you wish to service the machine for storage yourself, follow the general guidelines below: VEHICLE Place the vehicle on level ground and wash the entire vehicle. -
Page 79: Specifications
TIRES Inflate tires to the normal pressure. EXTERNAL 1. Spray all vinyl and rubber parts with rubber protection. 2. Spray unpainted surfaces with rust preventative. 3. Coat painted surfaces with car wax. PROCEDURE FOR RETURNING TO SERVICE 1. Clean the entire vehicle. 2. - Page 80 Starter System Electric Type of carburetor PZ20 Lubrication Press Splash Cooling Air cooled Ignition Type C.D.I Generator Magneto Clutch Automatic Transmission Automatic...
-
Page 82: Emission Control System Warranty
Ricky Power Sports, LLC. EMISSION CONTROL SYSTEM WARRANTY YOUR WARRANTY RIGHTS AND OBLIGATIONS The emission control system warranty period for this vehicle begins on the date the vehicle is delivered to the first purchaser other than an authorized dealer, or the date it is first used as a demonstrator, lease, or company vehicle, whichever comes first and continues for 30 months after that date, or 5,000km, whichever comes first, provided there has been no abuse, neglect or improper maintenance of your vehicle. - Page 83 Coverage of repairs under this warranty applies only when repairs are completed at an authorized dealer or repair facility. Ricky Power Sports, LLC will not cover repairs performed outside of an authorized dealer or repair facility. The use of replacement parts not equivalent to the original parts may impair the effectiveness of your vehicle’s emission control system.
- Page 84 including any warranty of merchantability or fitness for a particular purpose is limited to the express emission control system warranty terms stated in this warranty. The foregoing statements of warranty are exclusive and in lieu of all other remedies. All express warranties not stated in this warranty are disclaimed.
- Page 85 Ricky Power Sports, LLC. 2425 Camp Ave.#100, Carrollton, TX75006 Toll Free: 844-250-2199...
Need help?
Do you have a question about the UT125-8 and is the answer not in the manual?
Questions and answers