Table of Contents
Advertisement
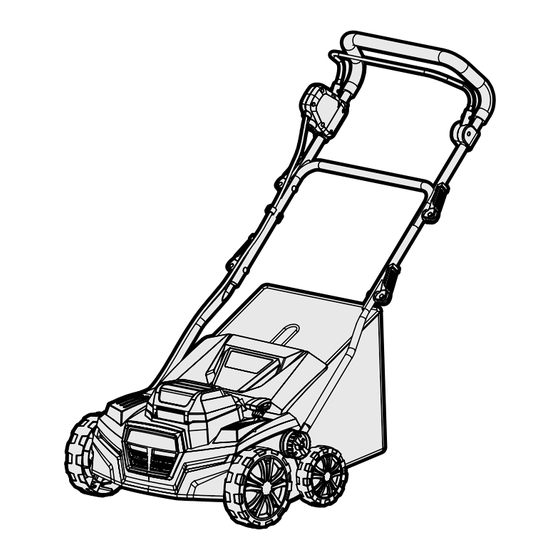
MODEL 20716, 20716BT
20V MAX 15-INCH BRUSHLESS
SCARIFIER AND DETHATCHER
Instruction Manual
NEED HELP? CONTACT US!
Have product questions? Need technical support? Please feel free to contact us:
1-847-429-9263 (M-F 8AM-5PM CST)
TECHSUPPORT@WENPRODUCTS.COM
IMPORTANT: Your new tool has been engineered and manufactured to WEN's highest standards for dependability,
ease of operation, and operator safety. When properly cared for, this product will supply you years of rugged,
trouble-free performance. Pay close attention to the rules for safe operation, warnings, and cautions. If you use
your tool properly and for its intended purpose, you will enjoy years of safe, reliable service.
WENPRODUCTS.COM
For replacement parts and the most up-to-date instruction manuals, visit
Advertisement
Table of Contents

Related Manuals for Wen 20716BT


Summary of Contents for Wen 20716BT
- Page 1 1-847-429-9263 (M-F 8AM-5PM CST) TECHSUPPORT@WENPRODUCTS.COM IMPORTANT: Your new tool has been engineered and manufactured to WEN’s highest standards for dependability, ease of operation, and operator safety. When properly cared for, this product will supply you years of rugged, trouble-free performance. Pay close attention to the rules for safe operation, warnings, and cautions. If you use your tool properly and for its intended purpose, you will enjoy years of safe, reliable service.
-
Page 2: Table Of Contents
20V 5A Quick Charger (Model 20201Q) WEN plans to continue to add more items to our 20V line. For an up-to-date list of the 20V cordless tools compat- ible with the included battery and charger, visit wenproducts.com and search model number 20202 (2Ah), 20204 (4Ah), or 20205 (5Ah). -
Page 3: Welcome
INTRODUCTION Thanks for purchasing the WEN Scarifier and Dethatcher. We know you are excited to put your tool to work, but first, please take a moment to read through the manual. Safe operation of this tool requires that you read and understand this operator’s manual and all the labels affixed to the tool. -
Page 4: Safety
GENERAL SAFETY RULES WARNING! Read all safety warnings and all instructions. Failure to follow the warnings and instructions may result in electric shock, fire and/or serious injury. Safety is a combination of common sense, staying alert and knowing how your item works. The term “power tool” in the warnings refers to your mains-operated (corded) power tool or battery-operated (cordless) power tool. - Page 5 GENERAL SAFETY RULES WARNING! Read all safety warnings and all instructions. Failure to follow the warnings and instructions may result in electric shock, fire and/or serious injury. Safety is a combination of common sense, staying alert and knowing how your item works. The term “power tool” in the warnings refers to your mains-operated (corded) power tool or battery-operated (cordless) power tool.
-
Page 6: Dethatcher & Scarifier Safety Warnings
DETHATCHER & SCARIFIER SAFETY WARNINGS WARNING! Do not operate the power tool until you have read and understood the following instructions and the warning labels. DETHATCHER AND SCARIFIER SAFETY 13. Before carrying out any maintenance or repairs, al- ways turn the dethatcher / scarifier OFF, remove the bat- 1. -
Page 7: Electrical Information (Charger)
ELECTRICAL INFORMATION (CHARGER) DOUBLE-INSULATED CHARGER The charger’s electrical system is double-insulated where two systems of insulation are provided. This eliminates the need for the usual three-wire grounded power cord. Double-insulated tools do not need to be grounded, nor should a means for grounding be added to the product. All exposed metal parts are isolated from the internal metal components with protecting insulation. -
Page 8: Battery & Charger Safety Warnings
Never carry the charger by its cord or yank it by the cord battery chemicals. If the battery or charger are damaged, to disconnect it from the receptacle. Keep the cord away call WEN customer service at 1-847-429-9263 for as- from heat, oil and sharp edges. Make sure the cord will sistance. - Page 9 BATTERY & CHARGER SAFETY WARNINGS ABOUT THE BATTERY 1. The battery pack has to be charged completely before you use the tool for the first time. 2. For optimum battery performance, avoid low discharge cycles by charging the battery pack frequently. 3.
-
Page 10: Before Operating
UNPACKING & PACKING LIST UNPACKING With the help of a friend or trustworthy foe, such as one of your in-laws, carefully remove the Dethatcher and Scari- fier from the packaging and place it on a sturdy, flat surface. Make sure to take out all contents and accessories. Do not discard the packaging until everything is removed. -
Page 11: Know Your Dethatcher & Scarifier
TOOL PURPOSE Pick up debris from your lawn for better oxygen absorption, airing, and drainage with your WEN Dethatcher and Scarifier. Despite its name, a scarifier has nothing to do with Halloween; please do not attempt to scare any neigh- borhood children with it. -
Page 12: Assembly & Adjustments
ASSEMBLY & ADJUSTMENTS WARNING! Make sure that the machine is switched OFF and that the safety key and batteries are removed from their terminals before assembling or making any adjustments. ATTACHING THE HANDLE Fig. 1 Fig. 2 1. Attach the lower handle (Fig. 1 - 1) to the dethatcher / scarifier body using an angle adjustment cam knob (Fig. - Page 13 ASSEMBLY & ADJUSTMENTS INSTALLING THE THATCH BAG Fig. 5 WARNING! Turn the machine OFF, remove the safety key and the batteries from their terminals, and wait for the tines to come to a complete stop before attaching or emptying the thatch bag. Attach the thatch bag to the dethatcher / scarifier before beginning operation.
- Page 14 NOTE: The battery packs and charger are not included with model 20716BT. 1. Connect charger to a 120V, 60Hz AC outlet. The green lights on the charger will illuminate, indicating that the charger is powered.
-
Page 15: Operation & Maintenance
OPERATION POWERING ON & OFF Fig. 7 WARNING! Before powering ON the machine, make sure that it will not come in contact with any foreign objects during start up. Keep your hands and feet away from the rotating tines / blades. 1. - Page 16 OPERATION OVERLOAD PROTECTION Your machine is equipped with overload protection and will activate in the following circumstances: a. If there is a build-up of scarified materials around the cutting device. b. If the scarified materials are larger than the motor capacity. c.
-
Page 17: Maintenance
MAINTENANCE ROUTINE INSPECTION Before each use, inspect the tool. When performing maintenance, make sure that the safety key and the batteries are removed from their terminals. If any of these following conditions exist, do not use until parts are replaced. Check for: •... - Page 18 MAINTENANCE REPLACING / CHANGING THE BLADE WARNING! Make sure that the machine is switched OFF and that the safety key and batteries are removed from their terminals before removing or replacing the blade. WARNING! The tines are very sharp and become hot during use. Handle with care when removing or replac- ing.
-
Page 19: Exploded View & Parts List
EXPLODED VIEW & PARTS LIST NOTE: Not all parts may be available for purchase. Parts and accessories that wear down over the course of normal use are not covered under the warranty. - Page 20 EXPLODED VIEW & PARTS LIST PART NO. DESCRIPTION QTY. PART NO. DESCRIPTION QTY. DT1315-001 Front Hub Cap 20716-039 Housing Cover DT1315-002 Front Wheel Washer 40-1 DT1315-005 Front Wheel 40-2 20716-040 Safety Key Assembly DT1315-038 Front Wheel Pin 40-3 Self-tapping Screw, 41-1 20716-005 20716-041...
- Page 21 EXPLODED VIEW & PARTS LIST PART NO. DESCRIPTION QTY. PART NO. DESCRIPTION QTY. 20716-106 Bearing, 608-2RS 20716-411 Rocker Switch Flexible Shaft Washer, 20716-412 Spring 20716-107 12mm 20716-413 Trigger 20716-108 Motor Gear 20716-414 Switch Button 20716-109 Key, 3x3x10 20716-415 Switch Housing, Right 20716-110 Large Gearshaft 20716-416...
-
Page 22: Warranty Statement
(2) years from date of purchase or 500 hours of use; whichever comes first. Ninety days for all WEN products if the tool is used for pro- fessional or commercial use. - Page 23 NOTES...
- Page 24 THANKS FOR REMEMBERING V. 2023.10.04...
Need help?
Do you have a question about the 20716BT and is the answer not in the manual?
Questions and answers
I need a replacement screw for attaching the dethatching/scarifier blades. Can you tell me the correct size and where to purchase it? Thanks
The correct replacement screw for attaching the dethatching/scarifier blades for the Wen 20716BT is a self-tapping screw, size ST4x20.
This answer is automatically generated
How long does a fully charged 4.0AH battery last on a Wen battery operated dethathatcher before needing a recharge and also how long does it take to charge the batteries with the included dual port charger. Thank You