
Subscribe to Our Youtube Channel
Summary of Contents for Lisowod An1
- Page 1 USER MANUAL An1 VIDEO PROJECTOR Where Quality Meets Innovation http://www.ultraprojection.com...
- Page 2 Dear customer, Welcome to our projector's official website! http://www.ultraprojection.com We are a professional projector manufacturer committed to providing customers with high-quality projection experiences. By logging into our official website, you can activate your three-year warranty service online. If you need to replace parts, our official website also provides free options for you to choose from.
-
Page 3: Table Of Contents
-Projection Distance and Size ····················································· 029 -Installation Method ··································································· 030 Mount Ceiling Method ····························································· 031 PROJECTOR SPECIFICATIONS ················································ 032 Please contact Lisowod official to verify the authenticity of your Lisowod projector, here are the official email addresses: US: Support_us@Lisowod.com JP: Support_jp@Lisowod.com... - Page 4 The fastest and most efficient way to contact us? Method 1- Via email: US: Support_us@Lisowod.com JP: Support_jp@Lisowod.com Method 2: Your Orders>The order has a problem>Choose a topic from list displayed>...
-
Page 5: Contact Us
Support_us@Lisowod.com CONTACT US Thank you very much for supporting Lisowod! Hope our products and services bring you a pleasant journey of audio-visual enjoyment. Lisowod promises a 3-Year Warranty and Lifetime Technical Support, please do not worry when encountering any problems. -
Page 6: Trouble Shooting
② You can try to reset WiFi or restart the projector, or restore factory default. You can find the operation videos on our "Lisowod" channel on YouTube. ③ If you tried the above ways and still can't solve the problem, please send emails to our support team along with your order number. - Page 7 Tips: To prolong the life of the projector, we recommend you to clean or exchange the dustproof net every two months. If you need the dustproof nets , please email us, we will send 10 Pieces of Dust-Proof Net for you for free so that you could replace it regullarly. US:Support_us@Lisowod.com JP: Support_jp@Lisowod.com...
- Page 8 Support_us@Lisowod.com Support_us@Lisowod.com to get more Support_us@Lisowod.com Support_jp@Lisowod.com...
- Page 9 Support_us@Lisowod.com Support_us@Lisowod.com Support_jp@Lisowod.com...
-
Page 10: Packing List
Support_us@Lisowod.com PACKING LIST Remote User Manual HD Cable Power Cable... - Page 12 Support_us@Lisowod.com Side View A. Left side Ventilation Inlet Ventilation Outlet B. Right side Ventilation Outlet...
- Page 13 Support_us@Lisowod.com Rear View Headphone HDMI USB1 USB2 Power Type-c power Power Indicator USB(5V OUT) Bottom View Battery Tab (Swipe left to disassemble the external battery) Rubber Pads Rubber Pads Rubber Pads Rubber Pads...
-
Page 14: Remote Control
Support_us@Lisowod.com REMOTE CONTROL Installation of the remote control 1. Install 2 pieces of AAA batteries into the remote before using it. Do not combine new batteries with old ones in a remote controller, which can cause operation failure due to insufficient power supply. -
Page 15: Connection Overview
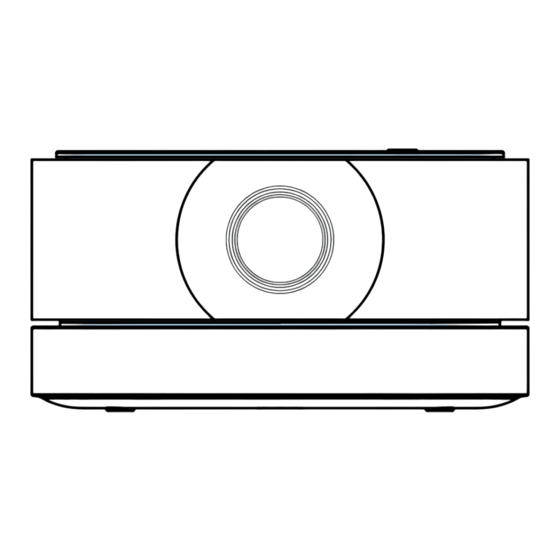
Support_us@Lisowod.com CONNECTION OVERVIEW The An1 projector consists of two parts: the projector body and the external battery base. The battery base can be used alone as a battery. It can also be combined with the projector body to make it a battery-powered projector. - Page 16 Support_us@Lisowod.com ② The battery can be combined with the projector body. Place the projector body on the battery base and press gently. Make sure the body is tightly linked to the base from all sides. ③ ③When combined together, the battery can power the projector so that you can use the projector without a power cable.
- Page 17 Support_us@Lisowod.com Take it apart and use ① ①Swipe left the battery tab at the bottom of the base to disassemble the external battery. ②...
-
Page 18: Quick Start
Support_us@Lisowod.com ②The projector body and the battery base can be taken apart and be used seperately. ③ ③ The battery can charge a variety of devices via the USB port. QUICK START... -
Page 20: Miracast And Dlna
Support_us@Lisowod.com 3. Press the “ ” “ ” button on the remote to get the best image perfor- mance. 4. Press the power button twice to turn off the projector. Miracast and DLNA Warming Tips: ① The fluency of screen mirroring with wireless connection will be affected by the network environment. -
Page 21: Pc Miracast
2. Click the apple logo on the top left, choose [System Preference] 3. Click [Sharing] on the appearing page 4. Check the box [Screen Sharing]. Close the page. 5. Click on the AirPlay Display on the top right, choose [AN1-XXXX] to connect... - Page 22 Support_us@Lisowod.com The casting identification varies among different software versions.
- Page 23 1. Connect your laptop with Router’s wifi 2. Click [Win+P] or [Win+K] on the PC to enter the projection settings 3. Choose the [Duplicate] Mode 4. Click [Connect to a wireless display] 5. Among the available devices, choose [AN1-XXXX] to connect...
-
Page 24: Android Miracast
Support_us@Lisowod.com Android Miracast... -
Page 25: Ios Miracast
IOS Miracast DLNA 1. Connect your mobile/Pad device and projector with the same Router’s wifi 2. Open your video player app 3. Click the TV icon and select the projection name 4. Among the available devices, choose [AN1-XXXX] to connect... -
Page 26: Input Source
Support_us@Lisowod.com INPUT SOURCE In the home page, press the “ ” on the remote to open the HDMI connec- tion page. HDMI Connection 1. Connect one end of the HDMI cable to the HDMI output port on the device you want to connect, and insert the other end into the HDMI input port on the projector. -
Page 27: Multimedia
Support_us@Lisowod.com MULTIMEDIA USB Connection 1. Insert the USB memory into the projector. If the connection is successful, the USB indicator light on the top right of the homepage will light up. 2. By selecting "Text," "Movie," "Music," or "Photo" on the homepage screen, you can play files from the USB. -
Page 28: Brightness Mode
Support_us@Lisowod.com Item Option Function Projection Mode Normal Front/ Normal Back/ Set projection directions Invert Front/ Invert Back Image Scaling 100% to 75% Zoom the picture from 100% to Color Range Auto/ 16-235/ 0-255 Available when connected to PC via HDMI... -
Page 29: Other Setting
Support_us@Lisowod.com Item Option Function OSD Language English/ Spanish/ Set language. 26 languages Chinese/ Japan etc. for you to choose from Software Update(USB) Update software via USB MultiScreen Upgrade Updare the MultiScreen System Restore Factory Default Restore the projector to factory default... -
Page 30: Warranty Card
Support_us@Lisowod.com Warranty card Contact manufacturer to activate your 3-year warranty BLUETOOTH CONNECTION Bluetooth Mode:Connect to external speakers Step 1: On the home page, go to [Setting]---[Other Setting]---[Bluetooth]. Press [OK] button to enter. Step 2:On the Bluetooth page, press right button to turn Bluetooth on. - Page 31 Support_us@Lisowod.com Notes: If it shows [Saved] or [Paired], it has not connected successfully. In this case, please contact customer service for help. Support_us@lisowod.com Support_jp@lisowod.com Speaker Mode: Projector works as a speaker and play music from your mobile devices. Step 1: Long press the Power button for 3 seconds. Choose the "Speaker Mode"...
- Page 32 Support_us@Lisowod.com Step 3: Open the music apps on your phone. Now the projector can work as a speaker and plays the musics. Notes: When the projector work as a speaker, you can choose the "Green Mode" on bottom left, under which the projector will turn off the light to...
-
Page 33: Installation
1. Projection Distance and Size Please follow the data in chart below, to adjust the image size and the distance. 100inch 65inch 50inch 30inch 2.62ft 4.92ft 6.56ft 9.84ft AN1 Projection Size and Distance Projection Size (Inch) Projection Distance(ft) 2.62 4.92 6.56 9.84 16.4 19.69... -
Page 34: Installation Method
Support_us@Lisowod.com Please note that the best image quality would be achieved with a projection distance of 6.5-9.8ft. A larger screen size would affect the image quality in a certain degree. 2.Installation Method The projector support front and rear projection, it can be table mounted and ceiling mounted. -
Page 35: Mount Ceiling Method
Support_us@Lisowod.com Please keep the projector at a height where its lens is axial symmetry to the screen. *Any buyer with any questions who comes to contact us will have our promise to get a satisfactory solution + an Extra 6 Month Warranty to thanks for your support! Support_us@lisowod.com... -
Page 36: Projector Specifications
Support_us@Lisowod.com PROJECTOR SPECIFICATIONS lmaging technology TFT LCD Power input of battery base 16V/1.3A Native resolution 1920*1080P lnput USB*2/HDMI*1 Light source Output Earphone/USB(5V OUT) Focus mode Electronic focus Output interface of battery base USB(5V OUT) Projection distance 2.62ft-19.69ft Colour White/Grey Screen size... - Page 37 Support_us@Lisowod.com FCC STATEMENT : This device complies with Part 15 of the FCC Rules. Operation is subject to the following two conditions: (1)This device may not cause harmful interference, and (2)This device must accept any interference received, including interfer- ence that may cause undesired operation.
- Page 38 Support_us@Lisowod.com Please read the notes carefully: To ensure stable power supply, please use national standard power cable and power cord with grounding; Please use the type of power supply indicated on the projector and the supplied power supply for power supply;...
- Page 41 This equipment has been tested and found to comply with the limits for a Class B digital device, pursuant to part 15 of the FCC Rules. These limits are designed to provide reasonable protection against harmful interference in a residential installation. This equipment generates, uses and can radiate radio frequency energy and, if not installed and used in accordance with the instructions, may cause harmful interference to radio communications.
- Page 42 IC warning statements: -English Warning Statement: RSS-GEN ISSUE 5, 8.4 User manual notice This device contains licence-exempt transmitter(s)/receiver(s) that comply with Innovation, Science and Economic Development Canada’s license exempt RSS(s). Operation is subject to the following two conditions: (1) This device may not cause interference. (2) This device must accept any interference, including interference that may cause undesired operation of the device.
Need help?
Do you have a question about the An1 and is the answer not in the manual?
Questions and answers
Whats under the tab at the front right to the lens. thanks
Under the tab at the front right of the lens on the Lisowod An1 is the external battery, which can be disassembled by swiping left.
This answer is automatically generated
NO PICTURE IS TRANSFERRED FROM PC TO PROJECTOR