Table of Contents
Advertisement
Quick Links
Questo manuale d'istruzione è fornito da trovaprezzi.it. Scopri tutte le offerte per
tuo prodotto tra le
•
Before using the product, please read these instructions carefully, and
kept them safe for future reference.
•
OSD options and pictures shown in this document may differ slightly from
your product.
•
Changes to this manual may be made without notice.
English
migliori offerte di Videoproiezione
Regulatory Model
P160
XGA Models
P161
XGA Models
P162
WXGA Models
P163
WUXGA Models IN1029, IN1039, IN1049, IN1059
User manual
Advanced LCD Series
IN1004, IN1014
IN1024, IN1034, IN1044
IN1026, IN1036, IN1046
www.infocus.com
InFocus IN1046
o cerca il
2021.06.v1.0
Advertisement
Table of Contents

Summary of Contents for LightPro InFocus P160
- Page 1 Questo manuale d’istruzione è fornito da trovaprezzi.it. Scopri tutte le offerte per InFocus IN1046 o cerca il tuo prodotto tra le migliori offerte di Videoproiezione User manual Advanced LCD Series Regulatory Model P160 XGA Models IN1004, IN1014 P161 XGA Models IN1024, IN1034, IN1044 P162 WXGA Models IN1026, IN1036, IN1046 P163 WUXGA Models IN1029, IN1039, IN1049, IN1059 •...
-
Page 2: Disclaimer
Disclaimer Disclaimer InFocus makes no representations or warranties with respect to this manual and, to the maximum extent permitted by law, expressly limits its liability for breach of any warranty that may be implied to the replacement of this manual with another. Furthermore, InFocus reserves the right to revise this publication at any time without incurring an obligation to notify any person of the revision. The information provided in this documentation contains general descriptions and/ or technical characteristics of the performance of the products contained herein. This documentation is not intended as a substitute for and is not to be used for determining suitability or reliability of these products for specific user applications. It is the duty of any such user or integrator to perform the appropriate and complete risk analysis, evaluation and testing of the products with respect to the relevant specific application or use thereof. Neither InFocus nor any of its affiliates, subsidiaries or licensees shall be responsible or liable for misuse of the information that is contained herein. If you have any suggestions for improvements or amendments or have found errors in this publication, please notify us. All pertinent state, regional, and local safety regulations must be observed when installing and using this product. For reasons of safety and to help ensure compliance with documented system data, only the manufacturer shall perform repairs to components. Failure to observe this information can result in injury or equipment damage. InFocus shall not be liable for any damages or problems arising from the use of any options or any consumable products other than those designated as original InFocus products or InFocus approved products by InFocus. InFocus shall not be held liable for any damage resulting from electromagnetic interference that occurs from the use of any interface cables other than those designated as InFocus approved Products by InFocus. Copyright © 2021 InFocus All rights reserved. No part of this publication may be reproduced, distributed, or transmitted in any form or by any means, including photocopying, recording, or other electronic or mechanical methods, without the prior written permission of the publisher. For permission requests and for requests for improvements or amendments to our users guides or other literature contact us via our website contract page. https://infocus.com/support/contact/ www.infocus.com... -
Page 3: Features And Design
Features and design Features and design This Projector is designed with the most advanced technology for portability, durability, and ease of use. This projector has built-in multimedia features, and support the LCD technology by using the colour depth of 1.07 billion colour. Security function Simple computer system setting The Security function helps you to The projector has a multi-scan system to ensure security of the projector. With conform to almost all computer output the Key lock function, you can lock the signals quickly. Up to WUXGA resolution operation on the control panel or remote can be accepted. control. PIN code lock function prevents Useful functions for presentations unauthorized use of the projector. The digital zoom function allows you to Auto setup function focus on the crucial information during a This function enables input source presentation. search, AUTO PC adjust and AUTO Light source mode Keystone by simple pressing the AUTO button on the remote control. -
Page 4: Table Of Contents
Content Content Disclaimer ......................2 Features and design ..................3 Content ......................4 Safety operation guideline ................7 Safety instructions .......................7 Chemical Substances table ..................8 Air ventilation ......................12 Place your projector correctly ..................12 Moving your projector ....................13 Compliance ....................14 Accessory ....................... 15 Name and function of your projector ............. - Page 5 Content Project way .......................46 Menu position ......................47 Background display ....................48 System ........................48 Colour adjust ....................50 Image mode ......................50 Colour adjust (For PC.) ....................51 Colour adjust (For Video) ...................52 Setting ......................53 Direct power on ......................53 Standby mode ......................53 High land ........................54 Light source mode ....................54 Cooling fast .......................55 Closed caption ......................55 Key lock ........................56...
- Page 6 Content Maintenance and cleaning ................88 WARNING light indicator ...................88 Clean the lens ......................89 Clean casing of your projector ...................89 Clear the filter ......................89 Reset the filter counter ....................90 Lamp replacement ....................90 Lamp model ......................90 Appendix ......................93 Troubleshooting ......................93 Menu tree .........................96 Light indicator status ....................100 Compatible computer screen ..................101 Terminal configuration .....................103 Dimensions ......................105...
-
Page 7: Safety Operation Guideline
Safety operation guideline Safety operation guideline Safety instructions This document and your projector employ certain symbols to illustrate how to use your projector safely. They are described below: Please get yourself familiar with them before going through this document. Ignoring messages indicated by this symbol may lead to personal Caution injuries or deaths. Ignoring messages indicated by this symbol may lead to personal Note injuries or property damage. High voltage inside with risks of electric shock. RG2.DO NOT stare into the beam. Please read this manual carefully before installing and operating your projector. -
Page 8: Chemical Substances Table
Safety operation guideline Caution High voltage inside Danger of electric shock with risks of electric DO NOT open this. shock. Note: DO NOT remove the casing (or back cover) as this may result in electric shock. Users shall not Operation and execute any maintenance work on components maintenance within your projector except replacing lamps. Call tips about these qualified maintenance personnel in case of any components. - Page 9 Safety operation guideline Caution Safety precautions: • GROUND your projector. • The lens of your projector projects strong light. DO NOT look at the light beam directly. You may hurt your eyesight. This is especially the case with children. • Unplug the AC power plug if your projector will not be used for long time. • DO NOT overload the socket of power cord as it may lead to fire or electric shock. DO NOT place objects on the projector or its power cord or place the project where the power cord may be tripped over. • Disconnect the power plug before cleaning your projector. DO NOT apply liquid or sprays to your projector. DO NOT wipe your projector with wet cloth. • Please follow warnings and instructions given in labels attached to your projector. Unplug your projector when experiencing a thunderstorm weather, is unmanned, or not in use for long periods to prevent damage caused by lightning and power surges. • DO NOT use accessories without recommendation by the manufacturer as it may result in potential risks. Caution Precautions on air outlet: • Keep adequate clearance around your projector for its ventilation and cooling. See figure below for the least clearance requirements. The least clearance is a MUST when your projector is placed within a cabinet or other closed environment. Greater than Greater than Greater than 500 mm 1000 mm 1000 mm Sides and bottom...
- Page 10 Safety operation guideline Caution Precautions on location of your projector: • Place your projector in a proper location or it may result in fire. • DO NOT expose your projector in rain or high humidity environments or it may result in fire or electric shock. DO NOT your projector near water or splashing water. DO NOT place any water container, e.g. flower vase, atop your projector. • DO NOT place your projector in environments of soot, moisture or smoke, e.g. your kitchen, or it may lead to product failure or accidents. Your projector may be damaged by contact with oil or chemicals. • DO NOT place your projector near exhaust pipe or air conditioning equipment. • DO NOT place your projector near radiator or heating pipes. • DO NOT place your projector on a unstable truck, rack, or table. It may fall and/ or lead to personal injuries and property damages. Please use cart or rack recommended by the manufacturer or included with your product. Please follow steps given in the installation guidelines included with the wall or ceiling mount. Use installation components approved by the manufacturer. • Be careful when moving your projector when mounted on a cart. Abrupt stops, pushing too hard and rugged surfaces may topple your projector as well as the cart. FOR EU USERS The symbol mark and recycling systems described below apply to EU countries and do not apply to countries in other areas of the world. Your product is designed and manufactured with high quality materials and components which can be recycled and, or reused. The symbol mark means that electrical and electronic equipment, batteries and accumulators, at their end-of-life, should be disposed of separately from your household waste.
- Page 11 Safety operation guideline Caution Contains mercury For more information on safe handling procedures, the measures to be taken in case of accidental breakage and safe disposal options visit: ec.gc.ca/mercure-mercury/. Dispose of or recycle in accordance with applicable laws. Note Precautions on using your projector: • DO NOT project the same image for long time as residual images may be long periods of displayed. This effect is called ghosting and is inherent to LCD display technology. • Use power as indicated in tags attached to your projector. If you have doubts over available power type, consult your dealer or local power company first. • DO NOT open or remove the casing as this may lead to electric shock or other damages. Call qualified maintenance personnel or InFocus customer service case of any maintenance requirements. • In case of the following, unplug the power cord and call qualified maintenance personnel for service immediately: a. Damaged or broken power cord or plug b. Liquid splashed in your projector c. Your projector exposed to rain or water d. If your projector fails to work as expected by following operation instructions, adjust it according to given instructions. Other invalid operations may damage your projector, which requires the technician to spend more time before returning it back to normal. e. The projector falls or its casing is damaged.
-
Page 12: Air Ventilation
Safety operation guideline Air ventilation Place your projector correctly Openings in the casing are designed for Use your projector at specified location ventilation and overheating prevention. in correct way. Invalid projector location DO NOT block or cover these openings to may shorten life-cycle of lamps or even keep your projector in normal operation lead to severe incidents or fire. and from overheating. Note Note Heat exhaust at the air outlet. Avoid installing your projector as Keep the following in mind when illustrated below: using or installing your projector: DO NOT tilt your projector –... -
Page 13: Moving Your Projector
Safety operation guideline Moving your projector When moving your projector close its adjustment legs as they may damage the lens and casing. Keep your projector in suitable box when it is not to be used for a long time. Note Focus Precautions on moving or shipping your projector: • DO NOT drop your projector as it may get damaged or failed in operation. • Focus. Zoom • Prohibit express or other shipping service provider personnel from shipping your projector with improper boxes. Your projector may become damaged. Please consult your dealers for shipping your projector by express or other shipping service providers. • Place your projector in box only after it has fully cooled down. Precautions on dealing with your projector: T lift or move your projector by holding DO NO the lens, zoom or focus ring as it may damage... -
Page 14: Compliance
Compliance Compliance Note This equipment has been tested and found to comply with the limits for a Class B digital device, pursuant to Part 15 of the FCC Rules. These limits are designed to provide reasonable protection against harmful interference in a residential installation. This equipment generates, uses, and can radiate radio frequency energy, and if not installed and used in accordance with the instructions, may cause harmful interference to radio communications. However, there is no guarantee that interference will not occur in a particular installation. If this equipment does cause harmful interference to radio or television reception, which can be determined by turning the equipment off and on, the user is encouraged to try to correct the interference by one or more of the following measures: – Reorient or relocate the receiving antenna. – Increase the separation between the equipment and receiver. – Connect the equipment into an outlet on a circuit different from that to which the receiver is connected. – Consult the dealer or an experienced radio, TV technician for help. Use of shielded cable is required to comply with class B limits in Subpart B of Part 15 of FCC Rules. Do not make any changes or modifications to the equipment unless otherwise specified in the instructions. If such changes or modifications should be made, you could be required to stop operation of the equipment. www.infocus.com... -
Page 15: Accessory
Accessory Accessory Included accessories are as follows: AC power cord Remote control without batteries Note A regional specific AC power cord is provided with your projector. Quick start guide VGA cable www.infocus.com... -
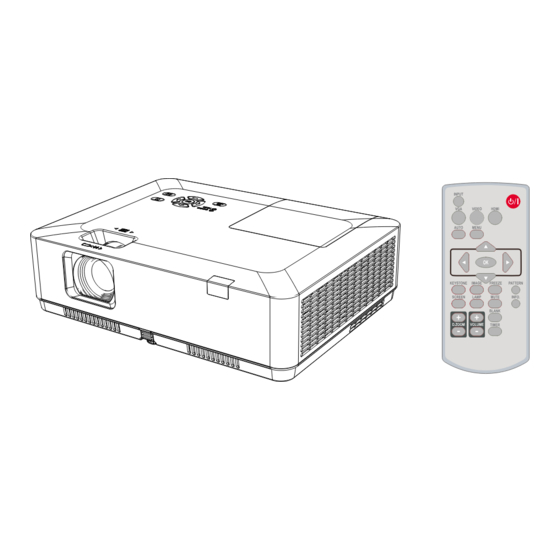
Page 16: Name And Function Of Your Projector
Name and function of your projector Name and function of your projector Zoom ring Front/Top Focus ring Keypad control panel Filter IR receiver (front) Projection lens Speaker Anti-theft lock slot AC Power Cord port IR receiver (back) Rear Kensington security slot Note • Kensington security slot is for a Kensington lock used to deter theft of the projector. • Kensington is a registered trademark of ACCO Brands Corporation. Adjustable front foot Bottom Note Do not place your hands or other objects near the vent: • Vent will shed heat. Do not put your hands or face, or... -
Page 17: Terminals
Name and function of your projector Terminals Mono (L/R) terminal VIDEO IN terminal A Mono audio signal (A single audio Connect video output signal to this terminal) should be connected to the terminal. AUDIO (R / L) interface. AUDIO IN terminal AUDIO OUT terminal Connect audio signal of the PC to this Connect external audio devices to this terminal. terminal. MONITOR OUT terminal COMPUTER IN For monitor output, output the signal Connect RGB to this terminal. from to other monitors. HDMI1, HDMI2 connector RS-232C Connect HDMI1 digital output signals When using the RS232 functional to or HDMI2 digital output signals to these operate the projector, connect the serial terminals. communication to this terminal. USB-B connector IR (rear) When using the "USB display" function, Receives the remote control IR signal. connect your computer to this terminal via the USB cable. LAN terminal Connect a RJ45 cable to this terminal USB-A connector when using network control to operate... - Page 18 Name and function of your projector Terminals HDMI connector C onnect HDMI digital output signals to this terminal. COMPUTER IN Connect RGB to this terminal. VIDEO IN terminal Connect video output signal to this terminal. SERVICE terminal Upgrade features only. Kensington security slot When using the "Kensington security slot" function, it will help users to deter theft of the projector. RS-232C When using the RS232 functional to operate the projector, connect the serial communication to this terminal. • For IN1004, IN1014 www.infocus.com...
-
Page 19: Keypad Controls And Indicator Lights
Name and function of your projector Keypad controls and indicator lights POWER MENU Turn on or off the projector. Open or close the OSD menu. Arrow /UP/DOWN/VOL-/VOL+/ – Select items or adjust the data in the – Enter the OSD menu. OSD menu. – Select options in the OSD menu. – Shift the image in the "Digital zoom INPUT +/-" mode. Open or close the INPUT menu. – Adjust the volume. WARNING indicator – The indicator is flashing red,when the internal temperature of the projector exceeds the operating range. POWER indicator – The power indicator turns steady red, when the projector is in standby mode. –... -
Page 20: Remote Control
Name and function of your projector POWER Remote control Power on or off your projector. INPUT Open or close the INPUT menu. VGA Select VGA input source. AUTO Enter auto adjustment mode. VIDEO Select VIDEO input source. HDMI Select HDMI 1, HDMI 2 input source. MENU Open or close the OSD menu. FREEZE D.ZOOM + Arrow Freeze projected Zoom in projected image. – Select items or adjust data images. D.ZOOM - in the OSD menu. PATTERN – Select display area in Zoom out projected image. digital zoom+/- mode. Select built-in test VOLUME + pattern of your projector. -
Page 21: Installing Batteries In The Remote Control
Name and function of your projector Installing batteries in the remote control Two AAA batteries Open the Insert Put the battery new AAA cover Place batteries with its cover. back. batteries. anode and cathode (+ and -) in correct direc- tion. Keep both poles in good connection to the contacts within the compartment. Please follow the following rules for safety operation: • Use two of AAA batteries of the same brand. • Replace both batteries at the same time. • Do not mix new and old batteries as one pair. -
Page 22: Installation
Installation Installation Set up your projector Ambient brightness may affect your projection image quality. For the optimal image, it is recommended to control the brightness in your environment. Values shown in figure below are approximates only. They may differ from the actual ones. The further the projector is away from the screen, the larger the projection size will be. Use the following table to install the projector in the best position from the screen. The values provided are for reference only. W i d t h Projection distance The value indicates the distance from the screen to the front edge of the projector. Lens offset The value indicates the distance from the optical axis of the projection lens to the lower edge of the projected area. *The results are the values calculated bу standard designed specifications, however, they don't provide any guarantees. www.infocus.com... - Page 23 Installation IN1004, IN1014 Projection distance Screen size Standard 4:3 Compatible 16:9 Screen size (inch) Width (m) Height (m) Wide Tele Wide Tele 30” 0.610 0.457 0.887 1.069 0.968 1.167 60” 1.219 0.914 1.797 2.161 1.960 2.356 80” 1.626 1.219 2.404 2.889 2.621 3.149 100” 2.032 1.524 3.010 3.617 3.282 3.943 150”...
- Page 24 Installation IN1046, IN1039, IN1059 Projection distance Screen size Standard 16:10 Compatible 16:9 Screen size (inch) Width (m) Height (m) Wide Tele Wide Tele 30” 0.646 0.404 0.812 1.347 0.835 1.384 60” 1.292 0.808 1.630 2.702 1.675 2.777 80” 1.723 1.077 2.178 3.610 2.239 3.711 100” 2.154 1.346 2.728 4.523 2.804 4.648...
-
Page 25: Adjust The Projected Image
Installation Adjust the projected image Adjust the position of the projected image: 1. Place the projector so that it is perpendicular to the screen, Image (1). 2. Raise the front of the projector and press the foot lock on the projector. Loosen the foot lock can lock the adjustable foot. Rotate the adjustable foot to adjust the height. Rotating the adjustable foot in the direction shown in the Image (2) to extend it, and rotating in the opposite direction retracts it, thus adjusting the vertical projection angle. Max Angle Max length (10°) 41mm Adjustable feet lock Image (1) Image (2) www.infocus.com... -
Page 26: Connect To Pc (Digital And Analogue Rgb)
Installation Connect to PC (digital and analogue RGB) Cables for connection: • VGA cable • Crossover serial cable* • HDMI cable* * This cable is not included with the projector HDMI digital VGA VGA RS232 Signal Output Signal Input Signal Output Output Serial cable (Cross type) VGA VGA HDMI Digital RS232 Signal Output Signal Input Input Signal Input • For IN1029, IN1039, IN1049, IN1059, IN1024, IN1034, IN1044, IN1026, IN1036, IN1046 www.infocus.com... -
Page 27: Connect To Video Equipment
Installation Connect to video equipment Cables for connection: • VIDEO cable* * This cable is not included VIDEO Output Signal VIDEO Input Signal • For IN1029, IN1039, IN1049, IN1059, IN1024, IN1034, IN1044, IN1026, IN1036, IN1046 www.infocus.com... -
Page 28: Connect To Audio Equipment
Installation Connect to audio equipment Cables for connection: • Audio cable* * This cable is not included External audio devices Audio output Audio IN Audio output Audio output (R) (L) (R) (L) Note Audio The left and right Audio cable Audio cable cable channels are (Stereo) (Stereo) combined when only the L (Mono) is inserted. Audio input Audio output Audio IN Audio IN • For IN1029, IN1039, IN1049, IN1059, IN1024, IN1034, IN1044, IN1026, IN1036, IN1046 www.infocus.com... -
Page 29: Connect To Usb (Usb-A - Usb-B Or Usb-C - Usb-B)
Installation Connect to USB (USB-A – USB-B or USB-C – USB-B) Cables for connection: • USB-A to USB-B cable* • USB-C to USB-B cable* * This cable is not included USB-A or USB-C output USB-A storage device USB-B input • For IN1029, IN1039, IN1049, IN1059, IN1024, IN1034, IN1044, IN1026, IN1036, IN1046 www.infocus.com... - Page 30 Installation Connect to PC (Digital and Analogue RGB) Cables for connection: • VGA cable • Crossover serial cable* • HDMI cable* * This cable is not included HDMI digital VGA RS232 Signal Output Signal Output output Only the Serial cable main (cross type) program upgrades function HDMI digital VGA RS232 Signal Input Signal Input input • For IN1004, IN1014 www.infocus.com...
- Page 31 Installation Connect to video equipment Cables for connection: • VIDEO cable* * This cable is not included VIDEO Output Signal VIDEO Input Signal • For IN1004, IN1014 www.infocus.com...
-
Page 32: Connect The Ac Power Cord
Installation Connect the AC power cord The required standard voltage of your projector is AC 100-240V. It adapts to different input voltage automatically. Your projector uses a single-phase power cord with neutral ground cabling. Do not use any other type of power cords or you may face the risks of electric shock. In case you have any doubt on the type of power cord you are using, please call your dealer or service centre for help. Before powering on your projector, get all external equipment connected in advance. Note Keep your AC power socket close to your projector for easy plugging and unplugging. Note For safety reasons, unplug the AC power cord when your projector is not in use. Your Connect included AC power projector will consume a small amount of cord to your projector. power when it is connected to AC power grid and in standby mode. Precautions on power cord Your AC power cord should meet regulations of the country, district where your projector is used. Please make sure the type of the power plug is compliant with those given in figure below. Make sure you are using a valid AC power cord. In case the included AC power cord does not comply with the AC power socket in your location, call your dealer for a replacement. The projector side Connect to the AC power socket Grounding end Connect to power cord connector of Connect to AC power socket your projector Note • Use of invalid power cord may hamper product performance or even lead to electric shock, fire, and other incidents. Always use a compliant power cord... -
Page 33: Basic Operation
Basic operation Basic operation Power on your projector 1. Connect all external equipment to your projector (e.g. computer or camera) before powering it on. 2. Connect AC power cord of your projector to an AC power socket. The Power indicator turns on in red. 3. Press the Power button on the top control Note panel or the remote control. The Power indicator lights in green and the In case the “Logo Select” option cooling fan starts running. is set to OFF, then no welcome 4. If your projector is set up as password pro- image will display on screen. tected, the password dialogue box displays. You can do nothing but powering Enter your password as instructed below. off your projector during the period welcome image is displayed. Enter password (PIN) Press button to select a number, press button to enter it and move the cursor. The PIN code number you typed is displayed as “ ”. To edit number you have entered, press button to Cancel move the cursor to the number you want to... -
Page 34: Power Off Your Projector
Basic operation Power off your projector 1. Press the Power button at the top control panel or the remote control, the “Power off?” message displays. 2. Press the Power button again in 4 seconds Power off? after the “Power off?” message prompted to you. The POWER indicator flashes red while the cooling fan continues running. (You may set up noise level and speed of the fan.) “Power off?” message Unplug the power cord until the fan stops disappears in 4 seconds. running. Failure to do so may shorten life cycle of your projector or lead to power on failures or operation abnormalities. 3. The POWER indicator stops flashing once the projector has been cooled down to ready for power on again. To maintain the life cycle of the lamp, only power off your projector after it has been turn on for at least five minutes. Do not leave your projector turned on for extended periods of time. As it may hurt the life cycle of your lamp. Power off your projector at least once every 24 hours and have it idle for an hour. Note • If the “Direct power on” function is set to “On”, your projector will power on once it is connected to an AC power socket. • Speed of the cooling fan speed varies based on the internal temperature of your projector. • Do not place your projector in any box before it is fully cooled down. • In case the POWER indicator flashes or turns red, refer to the “WARNING light indicator” for instructions. -
Page 35: How To Operate The Osd
Basic operation How to operate the OSD Remote control You can adjust or set up the projector MENU via the on-screen menu. The menu has a multilayer structure. each main menu is divided into several sub-level menus, with further levels below each sub-level. Please refer to the appropriate section of this manual for the procedure on adjustment and settings.Press the MENU button on the projector keypad or remote control and the OSD displays. Top control 1. Press the MENU button on the panel projector keypad or remote control POWER and the OSD displays. 2. Press button to act on or select one main menu item. Press button or <OK> button to enter a submenu. 3. Press button to select required submenu, then press <OK> button or button to set up or enter an option. 4. Press button to select settings MENU INPUT or navigate options, then press <OK>... -
Page 36: Menu Item Overview
Basic operation Menu item overview Display menu Main menu Submenu • Select Auto PC adj., Fine sync, H position, V position, H.Size to Display adjust the parameters to match Auto PC adj. the VGA format. Fine sync • Aspect: Normal, Wide, Full, H position Advanced. V position H.Size • Project way: choose Front, Rear, Aspect Wide Ceiling/Front, Ceiling/Rear, Auto Project way Front ceiling/Front and Auto ceiling/ Menu position Upper left Rear. -
Page 37: Adjust The Projector Zoom And Focus
Basic operation Adjust the Projector Zoom and Focus 1. Rotate the zoom ring from the centre, rotate the picture to the left to zoom out or rotate the picture to the right to zoom in. 2. Rotate the focus ring to adjust the focal length of the image, and adjust it to be ZOOM clear according to the display content of the screen. FOCUS Adjust the projector Focus Adjust the projector Zoom www.infocus.com... -
Page 38: Auto Setting Function
Basic operation Auto setting function Remote control Press the AUTO button on your remote control to auto execute settings given in the Auto Setup on the Expand menu (including Input search, Auto PC adj. and Auto keystone). AUTO Keystone adjustment You may adjust keystone distortion of image in your projector with the H/V keystone Remote adjustment. Follow steps below to adjust control keystone distortion of projected image manually. Press the KEYSTONE button on your remote control. The keystone adjustment dialogue KEYSTONE box displays ( including H/V keystone, corner correction, curved correction, reset value), press button to adjust keystone • The arrow mark looks white distortion. when there is no keystone adjustment in existence. Adjust the projected image when H/V the projector is on the horizontal • The arrow mark indicating the Keystone or vertical keystone distortion. adjustment direction turns red. Adjust the projected image • The arrow mark disappears Corner... -
Page 39: Volume Adjustment
Basic operation Volume adjustment Remote control For quick adjustment of the volume settings please use the remote control. Volume Press the remote control Volume +/- buttons Menu to adjust the volume. MUTE Press the mute button on the remote control to select "ON", you can temporarily turn off the sound. Press the mute button again to select "Off" or press the Volume +/- keys to re-open the audio effects. Mute function is also effective for audio output interfaces. Volume +/- Mute Menu operation 1. Press the MENU button on the top control Sound menu panel or remote control and the OSD displays. Press button to enter setting Setting menu, then press <OK> or button. Sound Volume 2. Press button to select sound, press Mute <OK> or button to enter. 3. Press button to select volume or mute. Setting Press button to increase Direct power on Volume volume. -
Page 40: Remote Control Operation
Basic operation Remote control operation Remote control Use your remote control for common operations. Freeze (FREEZE) Press the FREEZE button on remote control to freeze image and mute the audio. Freeze icon appears on the screen .Press the FREEZE Freeze button or any button to cancel the freeze Image function, then the image replay and the sound is restored. Lamp Mute (MUTE) Press the mute button on the remote control to turn off the sound. To remove the mute function, please press the mute button or Volume +/- button to cancel the mute function. Volume +/- Mute INFO. VOLUME +/- (VOLUME +/-) Press the Volume +/- on remote control to increase or decrease volume. IMAGE (IMAGE) Press the IMAGE button on remote control to select required image mode. LAMP (LAMP) Press the Lamp button on remote control to change screen brightness. - Page 41 Basic operation Blank (BLANK) BLANK Press the BLANK button on remote control; a blank screen displays to replace existing image. Press the BLANK button or any other button to restore the image. The BLANK screen disappears Press the BLANK to toggle switch your screen if no buttons are pressed as shown below: in 2 seconds. BLANK Normal BLANK Normal ..02 : 02 Timer (TIMER) Press the TIMER button on remote control. A timer animation (00:00) displays on the upper Timer display right conner and starts timing in format of (00:00-59:59). Press the TIMER button to stop timing. Press the TIMER button again to disable the timing function. Digital Zoom + (D.ZOOM+) Remote control Press the D.ZOOM+ button on remote control to enter the Digital Zoom mode. When OSD menu disappear, the screen display digital zoom + information. *Only for input as VGA, RGBHV, and the screen size setting as Normal or Wide. Digital Zoom - (D.ZOOM-) Press the D.ZOOM- button on remote control to enter the Digital Zoom mode.
-
Page 42: Input Selection
Basic operation Input selection Remote control Basic operation Input Press the INPUT button on the control panel Video or on the remote control to select one of the HDMI following input: VGA, Video, HDMI 1, HDMI 2, Memory Viewer, Network, USB Display. Alternatively, you may press the VGA, HDMI VIDEO button on remote control to select VGA, HDMI1, HDMI 2, VIDEO. Top Control Panel Menu operation 1. Press the INPUT button on remote control to enter the Input menu. 2. Press button to select one of the following input: VGA, video, HDMI 1, Input HDMI 2, Memory Viewer, Network, USB Display, and then press the <OK> button to select the input source. Input menu Select input VGA if a PC is connected to the VGA IN terminal. Select input HDMI 1 if a device is HDMI 1 connected to the HDMI terminal. HDMI 1 Select input HDMI 2 if a device HDMI 2 is connected to the HDMI 2 HDMI 2 terminal. - Page 43 Basic operation Note • If the "Input search" function in the auto setup option is set to "On", once you press the AUTO button, the projector will search for input signals automatically. The auto searching function maybe invalid for input of "USB Display", "Memory Viewer" and "Network". • The following function will be invalid: FREEZE, ASPECT, IMAGE, AUTO SETUP, PATTERN and SCREEN, once "USB Display", "Memory Viewer", "Network" has been selected as signal input. • For further details about Memory Viewer function, please turn to page 83-85. • For further details about USB Display function, please turn to 86-87. www.infocus.com...
-
Page 44: Display
Display Display Auto PC adj. Auto PC adj. menu Select Auto PC Adj. function to adjust Fine Display sync, H position, V position, H size to be Auto PC adj. compatible with the computer automatically. Fine sync H position Menu operation V position H.Size Auto PC adj. Aspect Wide Project way Front Press < MENU > button on the remote control Menu position Upper left or on the top control panel to display the OSD Background display Blue System menu. Press button to select the display menu, then press <OK> or button. 1. Press button to select [ Auto PC adj. ] Note menu. -
Page 45: Position
Display V position V position menu (Only for PC signal input) Display On the premise that the relative position of Auto PC adj. Fine sync both projector and the screen is set up right, H position you can move the image vertical position, if V position the position of the projected image on the H.Size screen is deviated. Aspect Wide Project way Front 1. Press button to select [ V position ] Menu position Upper left Background display Blue menu. System 2. Press <OK> button. 3. Press button to adjust image V position. -
Page 46: Project Way
Display Project images at the aspect of Wide 16:9. Project images to the maximum. Full • Only for PC (VGA) signal input. Splicing screen. Advanced • Only for PC (VGA) signal input. 1. Press button to select [ Aspect ] menu. 2. Press <OK> button. 3. Press button to select [ Advanced ] menu. 4. Press <OK> button. 5. Press button to select the required item. Set the H total, and images will H total be vertical division by the set value. Adjustment range is from 1 to 5 of widescreen. Set the V total, and images will V total be horizontal division by the set value. Adjustment range is from 1 to 5 of widescreen. Set the projector in horizontal Position H position. Adjustment range is from1 to the current H total value. Set the projector in horizontal Position V position. -
Page 47: Menu Position
Display 1. Press button to select [ Project way ] menu. 2. Press <OK> button. 3. Press button to switch. When the projector is installed on Front the table and projected in front of the screen. When the projector is installed Rear on the table and projected in rear of the screen (using translucent screen). When use the bracket to lift the Ceiling / projector (optional) in front of the Front screen. When use the bracket to lift the Ceiling / projector (optional) in rear of the Rear screen(using translucent screen). When the projector is projected in Auto ceiling / front of the screen. Front When the projector is projected in Auto ceiling / rear of the screen. Rear Menu position Menu position menu Select this function to set the menu position. Display Auto PC adj. -
Page 48: Background Display
Display The menu display on the lower Background display menu Lower right right corner of the screen. Display Background display Auto PC adj. Fine sync Select this function can adjusts background H position colour. V position H.Size Press < MENU > button on the remote control Aspect Wide Project way Front or on the top control panel to display the OSD Menu position Upper left menu. Press button to select the display Background display Blue menu, then press <OK> or button. System 1. Press button to select [ Background display ] menu. Note 2. Press <OK> button. - Page 49 Display Select the computer system manually System for PC signal 1. Press the MENU button on remote control Display and the OSD displays. Press button to System point to the Input icon, press button or 1024x768,75HZ 1280x768,75HZ <OK> button and the Input menu displays. - - - - 2. Press button to select System Signal - - - - Format, then press <OK> button. - - - - 3. Press button to select required system signal format, then press <OK> button to confirm your selection. Video System for Video signal Select this function to set resolution of input signal to be compatible with the PC. Display System Set Video / S-video input signal colour system AUTO...
-
Page 50: Colour Adjust
Colour adjust Colour adjust Select colour Adjustment to set the image mode and adjust the quality of the projected image. Image mode Remote control Direct operation Press the Image mode button on remote control to select required image mode. Image Menu operation Press <MENU> button on the remote control or on the top control panel to display the OSD menu. Press button to select the colour adjust menu, then press <OK> or button. Image mode (For PC) 1. Press button to select [ Image mode ] menu. Color adjust 2. Press <OK> button. -
Page 51: Colour Adjust (For Pc.)
Colour adjust Colour adjust (For PC.) Colour adjust (For PC) Press <MENU> button on the remote control or on the top control panel to display the OSD menu. Press button to select the Colour Color adjust Image mode Standard adjust menu, then press <OK> or button. Contrast Brightness 1. Press button to select required item. Color temp. 2. Press <OK> button. Green 3. Press button to adjust set point. Blue Press button to decrease Sharpness Contrast contrast, range from 0 - +63. Press button to increase contrast, range from 0 - +63. Press button to decrease Brightness brightness, range from 0 - +63. Press button to increase brightness, range from 0 - +63. Press button to select Colour temp. -
Page 52: Colour Adjust (For Video)
Colour adjust Colour adjust (For Video) Colour adjust (For Video) Press < MENU > button on the remote control or on the top control panel to display the OSD menu. Press button to select the Colour Color adjust Image mode Standard adjust menu, then press <OK> or button. Contrast Brightness 1. Press button to select required item. Color 2. Press <OK> button. Tint 3. Press button to adjust set point. Green Blue Press button to decrease Sharpness Contrast contrast, range from 0 - +63. Press button to increase contrast, range from 0 - +63. Press button to decrease Brightness brightness, range from 0 - +63. Press button to increase brightness, range from 0 - +63. Press button to decrease Color saturation, press button to increase saturation. -
Page 53: Setting
Setting Setting Setting menu The projector has Setting function, you can select other functions as described below. Setting Menu operation Direct power on Standby mode Press < MENU > button on the remote control High land Light source mode or on the top control panel to display the OSD Cooling fast Normal menu. Press button to select the setting Closed caption menu, then press <OK> or button. Key lock Iris 1. Press button to select required item. -
Page 54: High Land
Setting In order to reduce power Network consumption, some functions in standby mode will be limited. Under network standby, network function is not available and RS-232C serial communication (except boot command) function is not available. • Standby mode network wake-up function can only use the "Wake On LAN" tool. In order to reduce power Even Normal in standby mode,there are no restraint on network function and High land serial communication function. High land Setting Direct power on This projector provides fan control function in Standby mode the settings menu. You can change the setting High land about speed of cooling fan according to the Light source mode Cooling fast Normal altitude your projector is operating at. Closed caption Key lock 1. Press button to select [ High land ] menu. -
Page 55: Cooling Fast
Setting Cooling fast Cooling fast After your projector is powered off, select Setting cooling fan speed to shorten the cooling time. Direct power on 1. Press button to select [ Cooling fast ] Standby mode High land menu. Light source mode 2. Press <OK> button. Cooling fast Normal Closed caption 3. Press button to switch required menu. Key lock Iris Running in normal way. Sound Normal HDMI Setup Running faster than in normal 60 Sec mode with shorter time but a Note louder sound. -
Page 56: Key Lock
Setting Key lock Key lock Select this function to lock and unlock the control panel or remote control keypad. Setting 1. Press button to select [ Key lock ] menu. Direct power on Standby mode 2. Press <OK> button. High land 3. Press utton to switch required menu. Light source mode Cooling fast Normal The control panel or remote Closed caption Key lock control keypad are effective. Normal Iris Sound Control panel keypad is invalid. HDMI Setup Projector Remote control keypad is invalid. -
Page 57: Hdmi Setup
Setting HDMI setup HDMI Setup When the external device is connected to the HDMI terminal of the projector, and the images can not be projected normally, please switch Setting Direct power on on the Image or Sound setting. Standby mode High land Press < MENU > button on the remote control Light source mode or on the top control panel to display the OSD Cooling fast Normal menu. Press button to select the setting Closed caption menu, then press <OK> or button to enter Key lock Iris the sub-menu. Sound HDMI Setup 1. Press button to select [ HDMI setup ] menu. 2. Press <OK> button. Note • Display [ HDMI setup ] instantly. -
Page 58: Expand
Expand Expand The projector has Expand function, you can Expand menu select other functions as described below. Expand Menu operation Language Auto setup Press < MENU > button on the remote control Keystone or on the top control panel to display the OSD Logo Security menu. Press button to select the expand Power management menu, then press <OK> or button. Filter counter Test pattern 1. Press button to select required item. Network Factory default 2. Press <OK> button. -
Page 59: Auto Setup
Expand Auto setup Auto setup Press the AUTO button on your remote control Expand to execute the following functions: Input Auto setup search, Auto PC adj., and Auto keystone. Input search Auto PC adj. 1. Press button to select [ Auto setup ] Auto keystone menu. 2. Press <OK> button. 3. Press button to select required items. Select this function to detect the Input search signal, then project images and input signals automatically. Note Select this function to adjust [ Fine Auto PC adj. sync ], [ H Position ], [ V Position ] • One of input search, Auto PC and [ H.Size ] automatically, when adj. and Auto keystone option projector input analogue signals. should be set to On at least. Select this function to correct Auto • Please adjust the projector vertical distortion of the projected keystone... - Page 60 Expand Keystone Keystone sub-menu Select this function to store and reset keystone Expand after closing the projector or unplugging the AC Keystone power. Keystone Store H/V Keystone • This function is only when the option about Corner correction auto keystone is not set On. Curved correction Reset value Store keystone after closing the Store projector or unplugging the AC power. Keystone function will be cancelled Reset after closing the projector or unplugging the AC power when the standby mode is set to ECO. mode. When the standby mode is set to normal, keystone will be cancelled if you unplug the AC power; while it will be stored when closing the projector. H/V Keystone Select this function to correct the projected images horizontally or vertically. Press button Press button Press...
- Page 61 Expand 6-Conner correction (Only for WUXGA series) Select this function to correct the projected images of six corners distorted. Press button to keystone at six corners of the screen. The six corners are looped in sequence shown below: Top Top Top Bottom Bottom Bottom left right middle middle left right Curved correction (Only for WUXGA series) Select this function to correct the projected images with linearity uneven or vertical and horizontal bending deformation. Press button to adjust options. Item Operation Adjustment Press Extend left and right vertically. Press ...
- Page 62 Expand Item Operation Adjustment Correct the horizontal line on the left. Press Expand the top and bottom while maintaining the central area. Correct the horizontal line to the right. Press Expand the top and bottom while Curved maintaining the central area. correction Correct the horizontal line on the left. X offset Press Expand the top and bottom while maintaining the central area. Correct the horizontal line to the right. Press Expand the top and bottom while maintaining the central area. Correct vertical lines on both sides. Expand the lower corners while Press maintaining the central and upper regions. Correct vertical lines on both sides. Expand the top corners while Press maintaining the central and upper regions. Correct vertical lines on both sides. Expand the lower corners while Press maintaining the central and upper Curved regions. correction Y Correct vertical lines on both sides.
- Page 63 Expand Note • After adjusting values about H/V keystone, if users adjust conner correction, values about H/V keystone will be reset, and after adjusting values about conner correction, if users adjust about H/V keystone, values about conner correction will be reset also. • Curved correction X offset and curved correction y offset can not be adjusted individually. Adjust curved correction X offset and curved correction y offset after adjusting the X/Y curved correction. • Maximum keystone range up to ±30° vertically and ±30° horizontally. However, the image quality will deteriorate, and become more difficult to focus. install the projector with the minimal correction value. • The screen size will be changed with various H/V keystone adjustments . • Keystone may influence image aspect. Grid image tune (Only for WUXGA series) Select this function to adjust the local points of the projected image. 1. Press button to select [ Grid image tune ] option. 2. Press <OK> button. Reset value Select this function to make adjustment value back to the factory default. 1. Press button to select [ Reset value ] option. 2. Press <OK> button. • Release keystone mode.
-
Page 64: Logo
Expand Logo Logo menu (including Logo and Logo PIN Code lock setup) Expand You may use this function to select Logo Language screen, Logo PIN Code lock, change power Auto setup Keystone on password, and set up default logo screen. Logo Security 1. Press button to select [ Logo ] menu. Power management 2. Press <OK> button. Filter counter Test pattern 3. Press button to select required items. Network Logo Select Factory default Select this to set up the logo screen when power on your projector: Expand Logo Display factory default logo Logo select Default Default screen. -
Page 65: Security
Expand entered, press <MENU> button to move the cursor to the number you want to change, Note press button to select the correct one. • Repeat this step to type in a 3-digit number. • After changing the Logo PIN Move the cursor to set after you have typed Code to a new number, please the 3-digit number. Press <OK> button. remember it and keep it safe The Logo PIN Code cannot • If the password is invalid, the password be changed again if the new displayed as “ *** ” will be in red. Please try password is lost or forgotten. again with a valid one. • After you have entered valid logo screen PIN code, you may press button to toggle switch Off and On. Logo PIN Code change You may change the Logo PIN Code to any 3-digit number you like. Press OK key to select Logo PIN Code change. The Logo PIN Code change dialogue box prompts, press arrow button to give a valid new code. The New Logo PIN Code dialogue box prompts. Set up a new Logo PIN Code, check contents contained in the dialogue box, select Yes and the new password is set now. Please remember your new password and keep it safe. You cannot change the Logo PIN Code again if you forgot the password you have set. Security Security menu Set a password to lock the control panel or... - Page 66 Expand The [ Enter Password ] screen Security submenu will appear when the projector is on. If you want to change the Expand Security PIN code lock or password (for PIN code lock three digits), you must enter the PIN code change password. The factory default password is "111". Reset password To change the password protection, press <OK> button, and the PIN Code change pop- up dialogue box prompts. • Press arrow button to select a number, Note then press <OK> button to enter it and move the cursor. • After changing the PIN Code • The number you typed is displayed as “*”. to a new number, please To edit number you have entered, press remember it and keep it safe menu button to move the cursor to the The PIN Code cannot be number you want to change, press changed again if the new button to select the correct one. password is lost or forgotten. • Repeat this step to type in a 3-digit number.
-
Page 67: Power Management
Expand Power management Power management menu To reduce power consumption and maintain Expand life cycle of lamp, the power management Language function will turn off the projection lamp if your Auto setup Keystone projector has no signals for a period of time. Logo Security 1. Press button to select [ Power Power management management ] menu. Filter counter Test pattern 2. Press <OK > button. Network 3. Press button to switch required item. Factory default The Power light indicator flashes Ready green when the lamp is fully Expand cooled down. The lamp turns Power management Ready on again if an input signal is Shut down connected or any key (except the... -
Page 68: Filter Counter
Expand Filter counter Set this function to reset the filter usage time Filter counter menu and set up warning display. Expand 1. Press button to select [ Filter counter ] Filter counter menu. Filter counter Timer 200H 2. Press <OK> button. Filter counter reset Filter check 3. Press button to switch required item. When the projector reaches the user-set cleaning time, filter warning icon will appear on the screen to notify the user needs to clean the projector filter. Please make sure to select the initial state and set the timer after cleaning it. Once resetting filter counter, filter warning icon will be closed. Filter counter reset? Displays the filter usage time. Filter counter :Move :Select :Back MENU Set the time to display a warning Timer... -
Page 69: Test Pattern
Expand Test pattern Test pattern menu Select this function to display the projector's built-in test pattern. Expand Test pattern Location, size, and other factors cannot be reflected in the test pattern. Please make sure Gray scale1 to display the input signal before performing Gray scale2 Gray scale3 various adjustments. Gray scale4 1. Press button to select [ Test pattern ] Color bar menu. Green Blue 2. Press <OK > button. Cross hatch 3. Press button to switch required item. 4. Press <OK> button. Expand Test pattern Gray scale 1, Gray scale 2, Gray scale 3, White Gray scale 4, Colour bar, Red, Green, Blue, Black... -
Page 70: Network
Expand Network Network menu This function is designed to allow the computer control on the projector remotely over your local network. Expand Network Preparation Network setting Network information 1. Required equipment: Projector, computer, MAC address: 7C:6F:F8:4E:B9:2F IP address 192.168.1.100 network cable 2. Connection: Connect your projector to a router or switch in the LAN with normal or jumper network cable. In case a normal network cable failed to connect successfully, use a jumper cable instead. Network setting 3. Turn on the computer. The LAN port on DHCP computer and projector are flashing after IP address power on the projector. Subnet Gateway Operation steps Cancel 1. Power on your projector. -
Page 71: Memory Viewer
Memory Viewer Memory Viewer Select Memory Viewer function can project Note images stored in USB memory, when you insert the USB memory into the projector. USB play back requires the purchase of an optional USB Press < MENU > button on the remote control memory drive, it is not supplied to display the OSD menu. Press button with the projector. to select the memory viewer menu, then press <OK> or button. Memory viewer menu 1. Press button to select required item. 2. Press <OK> button. Memory Viewer 3. Press button to set options. -
Page 72: Sort Order
Memory Viewer Sort order Note Select this function to set the slide's USB play back requires the purchase order. of an optional USB memory drive, it is 1. Press button to select [ Sort not supplied with the projector. order] menu. 2. Press < OK > button. 3. Press button to switch required Best fit item. Set the image to be compatible with Sort by expand names of projection screen. Extend order file or folder. 1. Press button to select [ Best fit ] Sort by size of file or folder. menu. Size order 2. Press < OK > button. Sort by the time of file or 3. Press button to switch required Time order folder. item. Sort by names of file or Display images by the Name order folder. -
Page 73: Info
Info. Info. Select Info. function to detect the projected image signal and the projector operating Info. status. Input VGA1 Menu operation H-sync freq..KHZ V-sync freq..HZ Press < Info. > button on the remote control Light source counter or < MENU > button on the control panel to Power management display the OSD menu. Press button to Image mode Standard xxxxx Model Name select the info. menu, then press <OK> or ... -
Page 74: Network Control
Network control Network control Network control operation Expand This function is designed to remote control Network Network setting computer in the same LAN. Network information MAC address: 7C:6F:F8:4E:B9:2F Preparation IP address 192.168.1.100 1. Required equipment: Projector, computer, network cable. 2. Connection: Connect your projector to a router or switch in the LAN with normal or jumper network cable. In case a normal network cable failed Network setting to connect successfully, use a jumper cable DHCP... - Page 75 Network control Installation procedure: Expand 1. Type the Wireless SSID/ESSID address Network Network setting (172.28.120.1) of the projector in the Network information address bar of the web browser. MAC address: 7C:6F:F8:4E:B9:2F (Please find the SSID/ESSID address from IP address 192.168.1.100 the Network information in the OSD.) 2. Click download button. Network Display System>Download Download Login User Name admin Password 3. pwPresenter software: After entering the IP Login address of the projector in the web page to the main interface, click "Download", and download the corresponding PwPresenter software with your projector. Network Display System>Download Download You can download pwPresenter Windows from here:...
-
Page 76: Enter Through A Web Browser
Network control Enter through a web browser Network Display System>Download 1. Start the computer's web browser. Download Login 2. Enter the IP address on the projector set in the URL input field of the Web User Name admin browser. Password Login 3. Enter the password in the [ Password ]. • The factory default setting is the user name: "admin" (administrator privileges), password: "admin". 4. Click the [ Login ] Note Users can click on the top right corner of the web browser screen to select the display language. Do not start multiple web browser settings or control. Do not use more than one computer to control the projector. Please change your password. If the network does not appear on screen controls, please consult your network administrator. Description of each option Network Display System>System Status System Status Model Name... - Page 77 Network control [ System status ] Network Display System>System Status System Status page Versions General Setup Firmware Version 0.00.1003 Picture Setup LAN Status Image Setup 192.168.0.65 IP Address Network Setup Subnet 255.255.255.0 Gateway 192.168.0.1 Wire MAC Address 00:1e:c0:f2:11:e6 Versions LAN status Displays the firmware Displays the LAN version of the projector. connection status.
- Page 78 Network control [ Image setup ] page Network Display System>Image Setup System Status Aspect Normal General Setup Fine sync (0-31) Picture Setup H Position Image Setup V Position Network Setup H Size Freeze Auto PC adj. V Keystone (-60---60) H Keystone (-30---30) Curved correction X Gain (-40---40) Curved correction Y Gain (-40---40) Curved correction XOffset_x (-40---40) Curved correction XOffset_y (-40---40)
- Page 79 Network control [ Network setup ] page Network Display System>Network Setup System Status Obtain IP Address Automatically Use Following IP Address General Setup IP Address Picture Setup LAN Setup Subnet Image Setup Gateway Network Setup Apply Network Setup If you want to enable the DHCP client, select the IP address automatically. Please enter the DNS Please enter the IP address IP address address, when you do not when you do not use the use the DHCP server.
- Page 80 Network control 6. Click the icon to enter into pwPresenter software. Search network projector Click to enter to search, select the needed projector and connect it . Set the same IP address (for example: 192.168.1.100) as the projector in pwPresenter software, and set user name as "admin", and the password is "admin". Note • Before using the pwPresenter search, please switch to network signal source. Screenshot start or pause Start or pause the selected pictures. Select screenshot mode. Select screenshot mode from the "full range", "fixed size" or "variable size". www.infocus.com...
- Page 81 Network control Parameter setting Basic setting Advanced setting language, capture region size, etc. JPEG image setting, network port setting, white list, and black list, etc. Global setting Multicast setting Remote control setting, Sound capture Volume setting, Bandwidth, Sampling and Screen capture, etc. frequency, etc. www.infocus.com...
- Page 82 Network control Network projector management Set pwPresenter network user name and password, etc. Cut off projector connection. www.infocus.com...
-
Page 83: Useful Function
Useful function Useful function Memory Viewer function When the USB memory inset into the projector, the viewer memory function can project the video and pictures stored in the USB memory. The projected content of memory viewer function Memory Viewer function supports the following picture files: Extension name Video Codec Audio Codec Video Format Video Maximum MotionJPEG ADPCM 1280x720, 30fps Extension Format Description name Baseline encoder 24 Max resolution: 10000x10000 jpg, jpeg Progressive RGB24 bit Max resolution: Panel Resolution 1,4,8-bit palette-based Picture Max resolution: 1280x800 RGB 24,32 bit 24-Bit colour palette space 24, 48-bit True Colour Max resolution: 1024x768 1,4,8-bit palette-based Max resolution: 800x600... - Page 84 Useful function Play image Only one image show on the screen when you play it. 1. Press button to select a file. 2. Press <OK> or button. • Full screen display 3. Press <OK > button. • Press <OK> to return the thumbnail. Play slide The slide show mode in the memory viewer menu is set to a special setting, all images in the same folder can play automatically. 1. Press button to select a file. 2. Press button to select [ Memory Viewer ] menu, then select [ From scratch ] menu. 3. Press <OK > button. • Full screen display • Press <OK> button to return the thumbnail. Play video Play video files. 1. Press button to select a file. 2. Press <OK> button. • Full screen display • Use the remote control to operate the control that appears at the bottom of the screen.
- Page 85 Useful function The termination of Memory Viewer 1. Press button to select , displayed in the left corner of the screen. 2. Press <OK > button. 3. Unplug the USB memory directly. Note • When you insert a USB memory, please make sure insertion direction to avoid damaging the port. • Please note the following points when inserting and removing USB memory: a. The indicator flashes,when the USB memory insert into the projector or the projector is reading data, do not remove the USB memory When the light is flashing. b. If you use a USB memory device without lights, the projector will not recognize when reading data. Please close its browse function on and turn off the projector, then remove the USB memory. c. Do not install and remove USB memory frequently. Then remove it after the installation of at least 5 seconds. After removing at least five seconds and then reinstall it. The projector is on switch mode during the operation when installing or removing the USB memory. Precautions on processing and storage of USB memory • Please do not place the USB memory or the lid where children can reach. Swallow USB memory or the lid may cause choking.
-
Page 86: Usb Display Function
Useful function USB display function Select this function to can project the image and audio from the computer through the USB converter cable. When using Windows: Windows operating environment Operating System Windows Vista, 7, 8, 10. 32bit and 64bit Intel Core 2 Duo 2.0 GHZ or faster compatible processors Memory Capacity 256MB or above (512MB or above) Disk Space Available 20MB or above Monitor Resolution 640x480 and above CAN NOT guarantee that the PC meeting the above conditions can operate normally. Project USB display 1. Using USB-B cable to connect the projector to the USB display terminals. • Items in grey are not available. 2. Press the information source menu on the remote control or the input button on the control panel, then select [ USB display ] in the input source menu. 3. Press the driver icon in the computer's task bar , the select one item in the pop-up menu bar. • Pop-up menu only anglais [ Active audio ] / [ Disable audio ] Sets up the output from the computer's audio [ Play video ] / [ Pause video ] Switch on playing and pausing images [ Start / Stop ]... - Page 87 Useful function When using Mac OS: Mac OS operating environment Operating System Mac OS x 10.5 and higher Power PC G4 1GHz or faster compatible processors Memory Capacity 512MB or above Disk Space Available 20MB or above Monitor Resolution 640x480 and above CAN NOT guarantee that the PC meeting the above conditions can operate normally. Project USB display 1. Using USB-B cable to connect the projector to the USB display terminals. 2. Press the information source menu on the remote control or the input button on the control panel, then select [ USB Monitor ] in the input source menu. 3. Double-click "monitor.app" button installed on the virtual disk. • Project image on the computer screen. 4. Press the driver icon in the dock of computer and select one item in the pop- up menu bar. • Pop-up menu only display in English. • Items in grey are not available. [ Active audio ] / [ Disable audio ] Sets up the output from the computer's audio. [ Play video ] / [ Pause video ] Switch on playing and pausing images.
-
Page 88: Maintenance And Cleaning
Maintenance and cleaning Maintenance and cleaning WARNING light indicator Note The WARNING light indicator shows status of projector protection function. Check Unplug the AC power cord in WARNING and POWER light indicator for case of any abnormality as it may good maintenance operation. lead to fire or electric shock. The projector turns off and the WARNING indicator flashes red Your projector powers off automatically to protect components within it when it is overheated. The POWER indicator flashes when your projector is cooling down. Press the POWER button to power your projector The WARNING on again when it is cooled down to normal indicator flashing red operation temperature. Check the following: – Is adequate clearance provided for Note your projector’s ventilation? Check the installation status and any air outlet block. -
Page 89: Clean The Lens
Maintenance and cleaning Clean your projector only using the below Note guidelines. Unplug the AC power cord before any cleaning operation. Clean the lens Wipe the lens with clean cloth dampened with non-abrasive camera lens cleaner or clean it with lens cleaning paper or compressed air. Do not over apply cleaner to the lens. Abrasive cleaner, solution, or other rough chemical may scratch the lens. Clean casing of your projector Wipe the casing surface with clean and soft cloth. Gently wipe the casing with clean and soft cloth dampened to remove heavy dirt. Do not over apply cleaner, abrasive cleaner, solution, or other rough chemical that may scratch the casing surface. Place your projector in proper container after use to protect it from dirt and dust and being scratched. Clear the filter The filter is designed to keep dust from entering in your projector, which may lead to dusts accumulated on surface of internal components. Clogged filter may reduce cooling fan effects, which, in turn, will overheat your projector and shorten its life cycle. Clean the filter immediately whenever the Filter Warning icon displays. -
Page 90: Reset The Filter Counter
Maintenance and cleaning Reset the filter counter 1. Press MENU button and the OSD displays. Expand Press button to select Expand menu, Filter counter press button or OK. Filter counter Timer 200H 2. Press button to select "Filter Counter", Filter counter reset press button or OK. Press button Filter check to select “Filter counter reset” and press OK. The “Reset filter counter?” message displays. Select Yes to proceed. 3. In another pop-up dialogue box, select Yes to reset the filter counter. Recommendations Please do not use your projector at place Note of dust and smoke. This may affects image quality. Using your projector in place of dust Reset the filter counter after its and smoke may lead to piling dusts on lens, cleaning or replacement. LCD panel, and lens components within it. In case like this, call your dealer or service centre for correct cleaning. - Page 91 Maintenance and cleaning Note Do not replace the lamp after it went dark as it may be broken. Always assume the lamp of a ceiling mounted your projector is broken when replacing it. Stand beside the lamp cover instead of below it. Remove the lamp cover gently. Small piece of glass debris may fall out when opening the lamp cover. Consult with a doctor immediately if there is any glass debris fell in your eyes or mouth. Note Let your projector cool for at least 45 minutes before opening the lamp cover, as temperature within your projector is high. Note Replace the lamp with a new one of the same model just in case. Do not drop or touch the lamp! It may break and lead to personal injuries. Follow steps below to replace the lamp: Handle 1. Power off your projector and unplug the AC power cord. Let it cool down for at least 45 Screw minutes. 2. Open the lamp cover after removing screws holding the cover. 3. Loose all 3 screws fixing the lamp. Remove the lamp by holding its handle. 4. Replace with a new lamp and tighten all 3 screws. Make sure the lamp has been installed correctly. Close the lamp cover and tighten the screw. 5. Connect your projector to an AC power source and power it on.
- Page 92 Maintenance and cleaning Precautions on lamp operation Your projector employs high voltage lamp, which requires careful and correct operation. Fail to do so may lead to accidents, personal injuries, or fire. • Life cycle of lamp varies with environment it is in service. Life cycle of lamp varies. That is, some lamps may last longer than their counterparts. • If your projector prompts you to replace lamp (by showing a lamp replacing icon) then replace it with a new one after powering it off and it is fully cooled down. (Please replace lamp by strictly following steps given in this manual.) If you keep on using the lamp after being prompted to replace it then you are exposed to greater risks of lamp explosion. • Lamp may explode due to external impact and shock. Risks of explosion vary with projector and use environment and status of the lamp. In case of lamp explosion, take the following safety measures: Disconnect your projector from power source immediately in case of lamp explosion. Call authorized service centre to inspect your projector and replace lamp. Make a thorough inspection to ensure every piece of debris after explosion has been removed. Remove every piece of debris after explosion. No one else may inspect the internal of your projector except those authorized and well trained technician who also are familiar with its maintenance. Or we shall not be held liable for the consequences. www.infocus.com...
-
Page 93: Appendix
Appendix Appendix Troubleshooting Check the following before calling your dealer or service centre: Troubleshooting Solution • Plug the power cord of your projector in an AC socket. • Make sure the POWER light indicator turns red. • Restart your projector until the POWER light indicator turns Power on failure red. It indicates your projector is ready for power on again. • Check the lamp. • Disable the Key Lock function of your projector. Logo screen display • Make sure the Off and Countdown Off is selected in the failure Display function. The Logo screen • Make sure you did not select User or Off in the Logo differs from the Screen. standard settings Input signal switch • Make sure you have correctly set up the Input Search (or do not switch) function. - Page 94 Appendix Troubleshooting Solution • Check for contrast and brightness settings. • Check for correct image mode settings • Check for lamp brightness settings. Image looks dim • Check for lamp replacement alert. The lamp replacement alert suggests the lamp is reaching the end of its life cycle. Please replace it with a new one of the same model immediately. • Check for the connection between your projector and computer or image equipment. • Check for correct input signal from computer. Connection with certain notebook computer may mandate changes to its display output settings. See the user manual included with the computer for details on settings. • It takes about 30 seconds for your projector to show the No image displays first image. • Check for mode of signal, colour system, image system, or computer system. • Make sure the ambient temperature is within given range [0°C–40°C (35-ECO)]. • Image does not display in BLANK mode. The BLANK button or other buttons on the remote control. • Check for mode of signal, colour system, image system, or computer system. Abnormal colour • Make sure Blackboard mode is not selected in Image mode.
- Page 95 Appendix Troubleshooting Solution A password prompt • You have set up the Logo PIN Code lock function. displays after power on • Check the battery. • Make sure there is no obstacles stand in between your projector and the remote control. • Make sure the remote control is not too far away from your Remote control does projector. The maximum operation range is 8m. not work • Make sure the remote control and your projector are paired with the same remote control codes. • Disable the key lock of the remote control in the Setting menu. Light indicator turns • Check status of your projector according to the light on or flashes indicator status. "X" mark displays • Invalid operation, please operate your projector correctly. Control panel does • Disable the key lock on control panel function in the Key not function lock option of the Setting menu. Cannot remove the Logo Select • Please call your dealer or service centre. password, Key Lock, and PIN Code lock • Make sure your projector is correctly connected to external equipment.
-
Page 96: Menu Tree
Appendix Menu tree Main menu Sub-menu Setting Remarks Auto PC adj. Fine sync 0 - 31 H position -5 - +5 V position -5 - +5 The range of H.Size -15 - +15 H.Size differs from signals. Normal Wide Aspect Advanced Full Front Rear Ceiling/Front Project way Ceiling/Rear Display Auto Ceiling/Front Auto Ceiling/Rear Upper left, Upper right Menu position Centre Lower left, Lower right Background Black display Blue Auto SECAM NTSC... - Page 97 Appendix Main menu Sub-menu Setting Remarks Contrast 0-63 Brightness 0-63 Colour 0-63 Tint 0-63 Colour adj. Video input 0-63 Green 0-63 Blue 0-63 Sharpness 0-15 Direct power on On, Off Standby mode Normal, ECO High land On, Off Light source mode Normal, ECO Cooling fast Normal, 60 Sec, 0 Sec Closed caption Off, CC1, CC2, CC3, CC4 Key lock Off, projector, remote control Iris On, Off Setting Volume 0-25 Sound Mute...
- Page 98 Appendix Main menu Sub-menu Setting Remarks PIN code lock On, Off Security PIN code change Ready Shut down Power Off management Timer Ready countdown Filter counter Timer Filter counter Filter counter reset Expand Filter check On, Off Off, Gray scale (1-4), Colour bar, Test pattern Red, Green, Blue, Cross hatch, White, Black, Raster grey LAN DHCP(On/Off) Network IP address Network setting Subnet Gateway Factory default Set slide Slide transition Slide down effect Slide right Extend order Size order...
- Page 99 Appendix Main menu Sub-menu Setting Remarks Model Name Info Firmware Version Input VGA HDMI1 HDMI2 Video Network Memory Viewer USB display www.infocus.com...
-
Page 100: Light Indicator Status
Appendix Light indicator status Check light indicator to learn status of your projector. Light indicator POWER State of your projector WARNING (Red / Green / (Red) Yellow) Your projector is in Off status (without AC power supply). Your projector is in standby status. Press Power button to turn it on. Your projector is in normal status. It is in ready status or the light source is cooling. Your projector is in Ready mode. Your projector detects the voltage abnormality and switches into standby mode. Your projector detects the FAN abnormality and switches into cooling mode. Your projector detects the temperature abnormality and switches into cooling mode. Your projector detects the temperature abnormality and switches into standby mode. Your projector detects the light source abnormality and switches into cooling mode. Your projector detects the light source abnormality and switches into standby mode. Your projector detects its usage time ≥ the life of the projector and < 1.1 times of the life of the projector. Your projector detects its usage time ≥1.1 times of the life of the projector..Green ...Red ...Yellow ...Turns off ...Flashing green ...Flashing red ...Flashing yellow www.infocus.com... -
Page 101: Compatible Computer Screen
Appendix Compatible computer screen Your projector is designed to accept every computer signal below Dot Clock 160MHz. See table below for details on resolution and relevant frequency. Source Specification No OSD Display Pixel clock H-freq V-freq RGB HDMI Video Resolution (MHz) (KHz) (Hz) NTSC — — NTSC NTSC-443 — — NTSC 4.43 — 15.734 59.940 PAL-60 — — PAL60 PAL-M — — PAL-M — —... - Page 102 Appendix Source Specification No OSD Display Pixel clock H-freq V-freq RGB HDMI Video Resolution (MHz) (KHz) (Hz) — 21 800x600, 56Hz 36.000 35.156 56.250 22 800x600, 60Hz — 40.000 37.879 60.317 23 800x600, 72Hz — 800x600 50.000 48.077 72.188 24 800x600, 75Hz — 49.500 46.875 75.000 25 800x600, 85Hz —...
-
Page 103: Terminal Configuration
Appendix Source Specification No OSD Display Pixel clock H-freq V-freq RGB HDMI Video Resolution (MHz) (KHz) (Hz) — 1600x1200 53 1600x1200, 60Hz 162.000 75.000 60.000 54 1680x1050, 60Hz — 1680x1050 146.250 65.290 59.954 55 1920x1080, 60Hz — 1920x1080 138.500 66.587 59.934 56 1920x1200, 60Hz — 1920x1200 154.000 74.038 59.950 57 3840x2160, 30Hz... - Page 104 Appendix LAN Terminal 1 TX + 5 ----- 2 TX - 6 RX - 3 RX + 7 ----- 87654321 4 ----- 8 ----- HDMI Terminal (HDMI Type A 19) 1 TMDS Data2+ 11 TMDS Clock Shield 2 TMDS Data2 Shield 12 TMDS Clock- 3 TMDS Data2- 13 CEC 4 TMDS Data1+ 14 Reserved (N.C. on device) 5 TMDS Data1 Shield 15 SCL 19 17 15 13 11 6 TMDS Data1- 16 SDA...
-
Page 105: Dimensions
Appendix Dimensions (For IN1029, IN1039, IN1049, IN1059, IN1024, IN1034, IN1044, IN1026, IN1036, IN1046) Support frame for Ceiling Mount Screw: M4 Depth: 10.0 Unit: www.infocus.com... - Page 106 Appendix Dimensions (For IN1004, IN1014) Support frame for Ceiling Mount Screw: M4 Depth: 10.0 Unit: www.infocus.com...
-
Page 107: Technical Specifications
Appendix Technical Specifications LightPro Advanced LCD IMAGE Projection LCD with Micro-Lens Array Technology Panel Size 3 x SonyTM 0.63" 3 x SonyTM 0.59" 3 x SonyTM 0.64" Native Resolution WXGA WUXGA Pixels 1024 x 756 1280 x 800 1920 x 1200 Aspect Ratio 16:10 16:10 Contrast Ratio 2000:1 50000:1 with Iris Brightness (Lumens) 3100 3400 4000 4800 4800 4200 4600 4600 4200 4200 4600 4600... - Page 108 Appendix LightPro Advanced LCD Keystone Manual Automatic / Manual Adjustment Vertical Keystone ±30° correction Horizontal Keystone ±30° correction 1.34 ~ 1.48 ~ 1.37 ~ 1.26 ~ 1.37 ~ 1.26 ~ 1.37 ~ 1.26 ~ Projection Factor 1.48 ~ 1.78:1 2.22:1 1.78:1 1.65:1 2.09:1 1.65:1 2.09:1 1.65:1 2.09:1 Projection Distance 0.81 ~ 0.94 ~ 0.87 ~ 0.81 ~ 0.87 ~ 0.81 ~ 0.87 ~ 0.81 ~...
- Page 109 Appendix LightPro Advanced LCD POWER Power Supply 100 ~ 240 V AC; 50 - 60 Hz Power Consumption Max [W] Power Consumption Min. [W] Power Consumption <2 Network Standby (W) Power Consumption <0.5 Standby (W) GENERAL Dimensions 345 x 261 x 99 (W x H x D) [mm] Weight [kg] Fan Noise [dB (A)] 26 ~ 32 Audio (W) 1 x 16 Operating 5 ~ 40 Temperature [°C] Operating Humidity 20 ~ 80 Operating Altitude 0 ~ 3000 (meters) Storage Temperature -10 ~ 50 [°C] Storage Humidity [%] 20 ~ 80 Security Kensington Lock Port, Security Bar, Keypad Lock, PIN & Timer Functions...
-
Page 110: Rs232 Control Mode
Appendix RS232 control mode 1. Serial connection 1.1 Port setting Project Set point Communication method Asynchronous communication Communication rate 19200 Length 8-bit Parity check Stop position Flow control 1.2 Connection mode Can only use RS232 serial cross connect PC and projector. Computer terminal Projector terminal CD 1 1 N.C. RXD 2 2 RXD TXD 3 3 TXD DTR 4 4 N.C. SG 5 5 SG DSR 6 6 N.C. RTS 7 7 RTS CTS 8 8 CTS RING 9 9 N.C. www.infocus.com... - Page 111 Appendix 2. Basic commands Distinguish the letter case, and enter Each command ends with [ CR ] (enter). Command Option Command Option POWER ON Video POWER OFF (immediately) C15 NETWORK POWER OFF MEMORY VIEWER HDMI1 USB DISPLAY HDMI2 2.1 POWER ON command Command “C00” [ CR ] Power ON action. Do nothing,when you are in Power ON state . Details Send this command can force the end of the countdown in the countdown state. Receive successfully [ ACK ] [ CR ] Return value Receive unsuccessfully “ ? ” [ CR ] 2.2 POWER OFF command (Namely Power Off immediately) Command “C01”[ CR ] Power off action. Details Send this command can force your projector to power off during in power on state. Receive successfully [ ACK ] [ CR ] Return value Receive unsuccessfully “ ? ” [ CR ] 2.3 POWER OFF command...
- Page 112 Appendix 2.4 HDMI 1 command Command “C36” [ CR ] Details Select HDMI input. Receive successfully [ ACK ] [ CR ] Return value Receive unsuccessfully “ ? ” [ CR ] 2.5 VGA command Command “C06” [ CR ] Details Select VGAIN input Receive successfully [ ACK ] [ CR ] Return value Receive unsuccessfully “ ? ” [ CR ] 2.6 NETWORK command Command “C15” [ CR ] Details Select NETWORK input Receive successfully [ ACK ] [ CR ] Return value Receive unsuccessfully “ ? ” [ CR ] 2.7 MEMORY VIEWER command Command “C16” [ CR ] Details Select MEMORY VIEWER input Receive successfully [ ACK ] [ CR ] Return value Receive unsuccessfully “ ? ” [ CR ] 2.8 USB Display command Command...
- Page 113 Appendix 2.9 Video command Command “C07” [ CR ] Details Select Video input Receive successfully [ ACK ] [ CR ] Return value Receive unsuccessfully “ ? ” [ CR ] 2.10 HDMI 2 command Command “C37” [ CR ] Details Select HDMI 2 input Receive successfully [ ACK ] [ CR ] Return value Receive unsuccessfully “ ? ” [ CR ] www.infocus.com...
-
Page 114: Getting Help
Getting help Getting help Contacting InFocus InFocus technical support can be contacted at the below phone numbers within the stated operating hours, by using the enquiry form links provided or by visiting infocus.com and clicking on the chat support icon found on every page. US & Canada Mon-Fri | 6:00am - 5:00pm PST United States Canada 877-388-8360 877-388-8360 Technical support enquiry Europe, Middle-East & Africa Mon-Fri | 08:00 - 17:00 CET Austria France Germany 0800 4636287 0800 905993 0800 1813649 Italy Sweden Spain 0800 877238 020 791251 0900 993163 Switzerland UK & Northern Ireland European Union 0800 04636287 0800 0286470 +8000 463 6287 Technical support enquiry www.infocus.com... - Page 115 Getting help Asia-Pacific region Mon-Fri | 08:00 - 17:00 Local Time Australia India 1300-577-321 044-22252042 044-42015277/89 Malaysia New Zealand Singapore +607-3535133 008000 463-6287 +65 93387857 +603-80708889 Technical support enquiry www.infocus.com...
-
Page 116: Restriction Of Use
Restriction of use Restriction of use When this product is used for applications requiring high reliability/safety, such as transportation devices related to aviation, rail, marine, automotive, disaster prevention devices; various safety devices, or functional/precision de- vices, you should use this product only after giving consideration to including fail-safes and redundancies into your design to maintain safety and total system reliability. Because this product was not intended for use in applications requiring extremely high reliability/safety, such as aerospace equipment, main communication equipment, nuclear power control equipment, or medical equipment related to direct medical care, etc., please make your own judgment on this product’s suitability after a full evaluation. www.infocus.com... -
Page 117: Network Service
Network Service Network Service Important Statement on Network Service All contents and services obtained from the Product are owned by third parties and protected by copyright, patent, trademark and/or other intellectual property laws. These contents and services are only for your persona! non-commercial purposes, which shall not be used in a way not authorised by the content owner or service provider. Under no circumstance shall InFocus be liable for any direct, indirect or unexpected losses or damages arising from your or any third party's access to any contents or services or any information or third-party software through this Product. Third-party services may be subject to change, removal or discontinuation without prior notice. InFocus does not represent or warrant that some services or contents will remain accessible at any time. InFocus will not be responsible for any service related to these contents and services or assume any liability for customer service. For any question or service request about these contents and services, please directly contact the corresponding content or service provider. www.infocus.com... -
Page 118: Regional & Country Specific Notices
Regional & country specific notices Regional & country specific notices Disposing of your used product In the European Union EU-wide legislation as implemented in each Member State requires that used electrical and electronic products carrying the mark (below) must be disposed of separately from normal household waste. This includes projectors and their electrical accessories. When you dispose of such products, please follow the guidance of your local authority and/or ask the shop where you purchased the product. After collecting the used products, they are reused and recycled in a proper way. This effort will help us reduce the waste as well as the negative impact to the human health and the environment at the minimum level. The mark on the electrical and electronic products only applies to the current European Union Member States. The crossed-out wheeled bin implies that used batteries should not be put to the general household waste! There is a separate collection system for used batteries, to allow proper treatment and recycling in accordance with legislation. According to the EU directive 2006/66/EC, the batteries can’t be disposed improperly. The battery shall be separated to collect by local service. Disposing of your used product outside the European Union If you wish to dispose of used electrical and electronic products outside the European union, please contact your local authority and ask for the correct method of disposal. Californian residence WARNING TO CALIFORNIA RESIDENTS: Handling the cables supplied with this product will expose you to lead, a chemical known to the State of California to cause birth defects or other reproductive harm. -
Page 119: Lamps
Regional & country specific notices 1. deséchalo If this equipment does cause harmful interference to radio or television reception, which can be determined by turning the equipment off and on, the user is encouraged to try to correct the interference by one or more of the following measures: • Reorient or relocate the receiving antenna. • Increase the separation between the equipment and receiver. • Connect the equipment into an outlet on a circuit different from that to which the receiver is connected. • Consult the dealer or an experienced radio / TV technician for help. Turkish RoHS information relevant for Turkish market EEE Yonetmeligine Uygundur. This device is not intended for use in the direct field of view at visual display workplaces. To avoid incommoding reflections at visual display workplaces this device must not be placed in the direct field of view. Lamps US Residents The lamp in this product contains mercury. Please dispose according to Local, State or Federal Laws. Canadian Environmental Protection Act, 1999 The lamp(s) in this product contains mercury. Please dispose according to your local authority law. -
Page 120: Manufacturer, Eu Importer And Eu Authorised Representative In Accordance With Eu Directives
Regional & country specific notices Manufacturer, EU importer and EU Authorised Representative in accordance with EU directives Manufacturer Maxnerva Technology Services Limited Room 1001, 10/F, Houston Centre, 63 Mody Road, Tsim Sha Tsui East, Kowloon, Hong Kong. EU Importer Grand Field Technology Limited Room 1001, 10/F, Houston Centre, 63 Mody Road, Tsim Sha Tsui East, Kowloon, Hong Kong. EU Authorised Representative 24Hour-AR Storgatan 51, 903 26 Umeå, Sweden +46 (0)10-424 00 20 info@24hour-ar.com www.24hour-ar.com UK Authorised Representative in accordance with UK regulations Independent Quality Solutions Ltd Enterprise House, Wrest Park, Silsoe, Bedfordshire, MK45 4HR... -
Page 121: Eu Declaration Of Conformity
EU Declaration of Conformity EU Declaration of Conformity EU Declaration of Conformity 20210802-000 2021/08 (1. document number) (2. Year, Month in which the CE mark is affixed) We, MAXNERVA TECHNOLOGY SERVICES LIMITED (3. company name & manufacturer) Room 1001, 10/F Houston Centre 63 Mody Road, Tsim Sha Tsui East, Kowloon, Hong Kong (4. - Page 122 EU Declaration of Conformity EU Declaration of Conformity 20210802-001 2021/08 (1. document number) (2. Year, Month in which the CE mark is affixed) We, MAXNERVA TECHNOLOGY SERVICES LIMITED (3. company name & manufacturer) Room 1001, 10/F Houston Centre 63 Mody Road, Tsim Sha Tsui East, Kowloon, Hong Kong (4.
- Page 123 EU Declaration of Conformity EU Declaration of Conformity 20210802-002 2021/08 (1. document number) (2. Year, Month in which the CE mark is affixed) We, MAXNERVA TECHNOLOGY SERVICES LIMITED (3. company name & manufacturer) Room 1001, 10/F Houston Centre 63 Mody Road, Tsim Sha Tsui East, Kowloon, Hong Kong (4.
- Page 124 EU Declaration of Conformity EU Declaration of Conformity 20210802-003 2021/08 (1. document number) (2. Year, Month in which the CE mark is affixed) We, MAXNERVA TECHNOLOGY SERVICES LIMITED (3. company name & manufacturer) Room 1001, 10/F Houston Centre 63 Mody Road, Tsim Sha Tsui East, Kowloon, Hong Kong (4.
-
Page 125: Uk Declaration Of Conformity
UK Declaration of Conformity UK Declaration of Conformity UK Declaration of Conformity 20210907-009 2021/09 (1. document number) (2. Year, Month in which the UKCA mark is affixed) We, MAXNERVA TECHNOLOGY SERVICES LIMITED (3. company name & manufacturer) Room 1001, 10/F Houston Centre 63 Mody Road, Tsim Sha Tsui East, Kowloon, Hong Kong (4. - Page 126 UK Declaration of Conformity UK Declaration of Conformity 20210907-010 2021/09 (1. document number) (2. Year, Month in which the UKCA mark is affixed) We, MAXNERVA TECHNOLOGY SERVICES LIMITED (3. company name & manufacturer) Room 1001, 10/F Houston Centre 63 Mody Road, Tsim Sha Tsui East, Kowloon, Hong Kong (4.
- Page 127 UK Declaration of Conformity UK Declaration of Conformity 20210907-011 2021/09 (1. document number) (2. Year, Month in which the UKCA mark is affixed) We, MAXNERVA TECHNOLOGY SERVICES LIMITED (3. company name & manufacturer) Room 1001, 10/F Houston Centre 63 Mody Road, Tsim Sha Tsui East, Kowloon, Hong Kong (4.
- Page 128 UK Declaration of Conformity UK Declaration of Conformity 20210907-012 2021/09 (1. document number) (2. Year, Month in which the UKCA mark is affixed) We, MAXNERVA TECHNOLOGY SERVICES LIMITED (3. company name & manufacturer) Room 1001, 10/F Houston Centre 63 Mody Road, Tsim Sha Tsui East, Kowloon, Hong Kong (4.
-
Page 129: Warranty
WARRANTY WARRANTY INFOCUS LIMITED WARRANTY For product purchases effective 1st January 2021 WARRANTY STATEMENT In Focus warrants its products to be free from defects in material and workmanship during the warranty period. If a product proves to be defective in material or workmanship during the warranty period, In Focus will, at its sole option, repair or replace the product with a similar product. Replacement Products or parts may include remanufactured or refurbished parts or components. The replacement unit will be covered by the balance of time remaining on the customer's original limited warranty. In Focus provides no warranty for any third-party software whether included with the product or installed by the customer, installation of any unauthorized or third party hardware parts or components (e.g. Projector Lamps}. DEAD ON ARRIVAL (DOA) All brand new In Focus products carry a thirty (30} day Dead on Arrival ( DOA } warranty policy for the first consumer purchaser. A new replacement unit will be provided if the Product is found to be non-operational within thirty (30} days of purchase and freight shall be covered both ways by lnFocus. WHO THE WARRANTY PROTECTS This warranty is valid only for the first consumer purchaser, it is nontransferable. WARRANTY PERIOD Product Period 5 years or 20,000 hours which ever Laser Illuminated Projectors comes first Lamp & LED Illuminated Projectors 2 years Interactive Touch Displays 3 years OPS and Slotable PC's 1 year... - Page 130 WARRANTY WHAT THE WARRANTY DOES NOT COVER 1. Any product on which the serial number has been defaced, modified or removed. 2. Damage, deterioration or malfunction resulting from: a. Accident, misuse, neglect, fire, water, lightning, or other acts of nature, unauthorized product modification, or failure to follow instructions supplied with the product. b. Repair or attempted repair by anyone not authorized by In Focus. c. Damage to or loss of any programs, data or removable storage media. d. Software or data loss occurring during repair or replacement. e. Any damage of the product due to shipment. f. Removal or installation of the product. g. Causes external to the product, such as electric power fluctuations or failure. h. Use of supplies or parts not meeting lnFocus specifications. Normal wear and tear. Failure of owner to perform periodic product maintenance as stated in User Guide. k. Any other cause which does not relate to a product defect. Damage caused by static (non-moving} images displayed for lengthy periods of time (image burn-in}. m. Any third-party software included with the product or installed by the customer. n. Installation of any unauthorized hardware, accessories, consumable parts or components.
- Page 131 WARRANTY LIMITATION OF IMPLIED WARRANTIES TO THE EXTENT ALLOWED BY LOCAL LAW, THIS PRODUCT IS PROVIDED TO YOU "AS IS" WITHOUT WARRANTIES OR CONDITIONS OF ANY KIND, WHETHER ORAL OR WRITTEN, EXPRESS OR IMPLIED. INFOCUS SPECIFICALLY DISCLAIMS ANY IMPLIED WARRANTIES OR CONDITIONS OF MERCHANTABILITY, SATISFACTORY QUALITY, NON INFRINGEMENT AND FITNESS FOR A PARTICULAR PURPOSE. EXCLUSION OF DAMAGES IN FOCUS'S LIABILITY IS LIMITED TO THE COST OF REPAIR OR REPLACEMENT OF THE PRODUCT. IN FOCUS SHALL NOT BE LIABLE FOR: 1. DAMAGE TO OTHER PROPERTY CAUSED BY ANY DEFECTS IN THE PRODUCT. 2. DAMAGES BASED UPON INCONVENIENCE, LOST PROFIT, LOST DATA OR DOWNTIME COSTS, LOSS OF USE OF THE PRODUCT, LOSS OF TIME, LOSS OF PROFITS, LOSS OF BUSINESS OPPORTUNITY, LOSS OF GOODWILL, INTERFERENCE WITH BUSINESS RELATIONSHIPS, OR OTHER COMMERCIAL LOSS, EVEN IF ADVISED OF THE POSSIBILITY OF SUCH DAMAGES. 3. ANY OTHER DAMAGES, WHETHER DIRECT, SPECIAL, INCIDENTAL, CONSEQUENTIAL OR OTHERWISE. 4. ANY CLAIM AGAINST THE CUSTOMER BY ANY OTHER PARTY. LOCAL LAW This warranty gives you specific legal rights, and you may also have other rights which vary from locality to locality. Some localities do not allow limitations on implied warranties and/or do not allow the exclusion of incidental or consequential damages, so the above limitations and exclusions may not apply to you. www.infocus.com...