Advertisement
Table of Contents
- 1 Set Clock, Year, Month, Day
- 2 Access Service Menus
- 3 Configure Service Menus
- 4 Wiring: Terminal Designations
- 5 Table 1. Terminal Block Designations
- 6 Table 2. Advanced Configuration: Service Menus
- 7 Table 2. Advanced Configuration Service Menus (Cont.)
- 8 Table 2. Advanced Configuration Service Menus (CONT.)
- Download this manual
AN ASTRONICS COMPANY
1
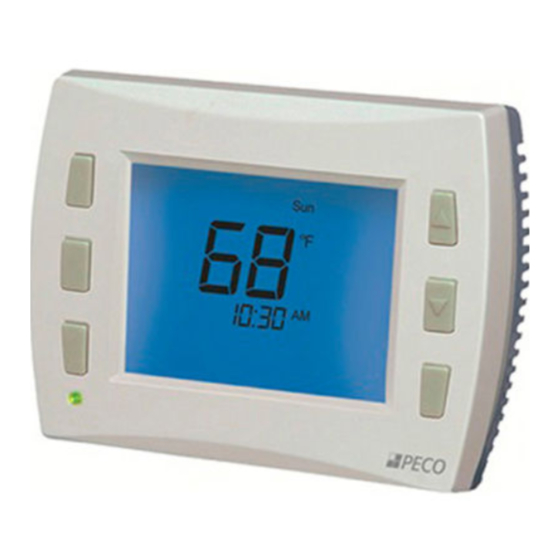
SeT clocK, Year, MonTH, daY
1. Press ▲/ ▼ to select 12 or 24 Hr mode, then
press
Next.
2. Press ▲/ ▼to select hour, then press Next.
3. Press ▲/ ▼to select minutes, then press Next.
4. Press ▲/ ▼ to select current year, then press Next.
5. Press ▲/ ▼ to select current month, press Next.
6. Press ▲/ ▼ to select the calendar day number.
7. Press
to complete operation.
Done
note: Select
More >
2
acceSS Service MenuS
Insulator
Tab
1. Hold lower right and lower left keys for fi ve
seconds.
2. Press
or
Next
Go Back
Service Menu.
3. Press ▲/ ▼ to select Menu option.
4. Press
when complete.
Done
Note: Upon completion of installation, remove
the plastic insulator tab from the back side of the
thermostat.
© COPYRIGHT 2014 PECO ASTRONICS. ALL RIGHTS RESERVED.
Clock, to access after setup.
Service
button to select a
PERFORMANCE PRO T8000
3
configure Service MenuS
The following Service Menus (SM) commonly require
confi guration. Please verify that these are set for your
specifi c application. additional confi guration may be
required. refer to Table 2 for all available Service Menus.
• SM 100 = Programmable or nonprogrammable
• SM 110 = System Type
• SM 120 = fan control
• SM 130 = reversing valve
• SM 240 = number of Program Periods
• SM 260 = Temperature format (°f or °c)
• SM 340 = Keypad lockout
4
Wiring: TerMinal deSignaTionS
1. connect wires for appropriate system type
(Table 1).
▲
!
WARNING: DISCONNECT POWER BEFORE BEGINNING INSTALLATION.
•
CAUTION: Use copper wire only. Insulate or wire-nut all unused leads.
•
Use care to avoid electrostatic discharge to thermostat
•
CAUTION: Do not connect unused wires together
•
ALL ELECTRICAL LOADS MUST BE CONNECTED TO TERMINAL C
(24 VAC).
Table 1. TerMinal blocK deSignaTionS
Fan Coil (Conventional)
C
24 VAC, Unswitched side
Menu
W1
Stage 1 Heat
Current
option
W2
Stage 2 Heat
G
FAN
A
Economizer/Damper/Humidity A
E
Stage 3 Heat
Y1
Stage 1 Cool
Y2
Stage 2 Cool (or Dehumidify)
24 VAC Power for heating,
RH
switched side
24 VAC Power for cooling,
RC
switched side
SC
Sensor Common
S1
Indoor Remote Sensor
S2
Occupancy Setback Input*
S3
Outdoor Remote Sensor
*Contact PECO to learn more about Occupancy Setback
Input sensor applications.
1
QUICK START GUIDE
Heat Pump
C
24 VAC, Unswitched side
B/O
Reversing Valve
AUX
Auxiliary Heat (Stage 3)
G
FAN
Economizer/Damper/Humidity
E
Emergency Heat
Y1
Compressor Stage 1/Heat/Cool 1
Compressor Stage 2/Heat/Cool 2
Y2
(or Dehumidify)
24 VAC Power for heating,
RH
switched side
24 VAC Power for cooling,
RC
switched side
SC
Sensor Common
S1
Indoor Remote Sensor
S2
Occupancy Setback Input
S3
Outdoor Remote Sensor
P/N 70931 3220-2323 REV 00
Advertisement
Table of Contents

Subscribe to Our Youtube Channel
Summary of Contents for Astronics Peco PERFORMANCE PRO T8000
- Page 1 Indoor Remote Sensor thermostat. Occupancy Setback Input* Occupancy Setback Input Outdoor Remote Sensor Outdoor Remote Sensor *Contact PECO to learn more about Occupancy Setback Input sensor applications. © COPYRIGHT 2014 PECO ASTRONICS. ALL RIGHTS RESERVED. P/N 70931 3220-2323 REV 00...
- Page 2 Fan Off Delay Cool 0-99 Seconds cool Select the amount of time (in seconds) that the fan will run after the thermostat outputs are turned off. © COPYRIGHT 2014 PECO ASTRONICS. ALL RIGHTS RESERVED. P/N 70931 3220-2323 REV 00...
- Page 3 Defines the number of cycles per hour for heating. Select 0 to enable ON-OFF control for Emergency (CPH) Emergency Heating & Stage 3 Heat. Heating & Stage 3 Heat © COPYRIGHT 2014 PECO ASTRONICS. ALL RIGHTS RESERVED. P/N 70931 3220-2323 REV 00...
- Page 4 Select 1 to activate the Economizer output for 10 minutes; select 0, Done or a different Service Menu to Economizer disable. Disable Economizer Output Enable Economizer Output © COPYRIGHT 2014 PECO ASTRONICS. ALL RIGHTS RESERVED. P/N 70931 3220-2323 REV 00...
Need help?
Do you have a question about the Peco PERFORMANCE PRO T8000 and is the answer not in the manual?
Questions and answers