Table of Contents
Advertisement
Manufactured by:
Backyard Discovery
3305 Airport Drive, Pittsburg, KS 66762
800-856-4445
Basepoint Business Centre: Rivermead Drive,Westlea, Swindon SN5 7EX Phone: 0800-118-2476
J.P. Coenstraat 7, The Bridge, The Hague, 2595 WP, Netherlands Phone: 08005678990
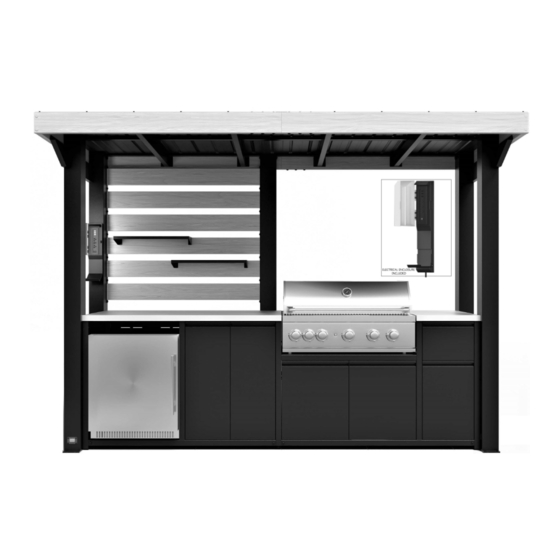
FUSION FLAME OUTDOOR KITCHEN
MODEL # : 2304079
Please visit www.backyarddiscovery.com
For the most up to date assembly manual, to register your product, or to order
replacement parts Para obtener instrucciones en español, visite
www.backyarddiscovery.com
EASY STEP-BY-STEP
3D INTERACTIVE INSTRUCTIONS
DOWNLOAD THE FREE APP
INS-2304079-A-FUSION FLAME OUTDOOR KITCHEN-ENG 10-18-2023
Made in China
Advertisement
Table of Contents

Subscribe to Our Youtube Channel
Summary of Contents for Backyard Discovery 2304079
- Page 1 For the most up to date assembly manual, to register your product, or to order replacement parts Para obtener instrucciones en español, visite www.backyarddiscovery.com EASY STEP-BY-STEP 3D INTERACTIVE INSTRUCTIONS DOWNLOAD THE FREE APP Made in China INS-2304079-A-FUSION FLAME OUTDOOR KITCHEN-ENG 10-18-2023...
- Page 2 OWNER'S MANUAL - BASIC SETUP DIMENSIONS & ASSEMBLY NOTES It is critically important that you start with square and level footings, concrete pad or deck to attach your structure Pay close attention to the items needed for each step. Make sure you are using the correct hardware for each step. •...
- Page 3 OWNER'S MANUAL - ANCHORING LAYOUT...
- Page 13 PRE-ASSEMBLY STEP 1 - SORTING PARTS It is critical for ease of assembly that you take the time to sort and organize the parts and hardware. METAL PARTS: • Organize metal parts by the three-digit, alpha-numeric number stamped on each part (ex. P01). •...
- Page 14 PRE-ASSEMBLY STEP 2 - TOOLS REQUIRED Drill Attachments: Phillips Head Open End Wrench 7/16" 1/8", 3/16", 3/8" & 7/16" Drill Bits 3/8" Drive Ratchet, 1/2" & 7/16" STD Sockets 1/2" & 7/16" Deep Sockets Phillips Screw Driver Cordless Drill or Electric Drill Rubber Mallet - Claw Hammer...
- Page 15 PRE-ASSEMBLY STEP 3 - CHOOSE YOUR ASSEMBLY METHOD There are several types of assembly instructions available to you. 1. Printed Assembly Manual included with your set 2. BILT APP - 3D interactive instructions 3. Combination of the Printed Manual and BILT APP (Note: Step numbers can differ between the two methods)
- Page 127 PowerPort™ 9205413 ELECTRICAL ENCLOSURE (x1) FOR POWERPORT INSTALLATION REFER TO ASSEMBLY INSTRUCTIONS THAT COME PACKAGED WITH THE POWERPORT KIT. INSTALL ON ANY EXTERIOR POST THAT IS DESIRED. FOLLOW DIRECTIONS FOR PROPER INSTALLATION. DO NOT INSTALL POWERPORT ON MIDDLE POST OF ASSEMBLY, AS THIS WILL BE TOO CLOSE TO THE GRILL.
- Page 128 Manufactured by: Backyard Discovery 3305 Airport Drive, Pittsburg, KS 66762 800-856-4445 Basepoint Business Centre: Rivermead Drive,Westlea, Swindon SN5 7EX Phone: 0800-118-2476 J.P. Coenstraat 7, The Bridge, The Hague, 2595 WP, Netherlands Phone: 08005678990 OUTDOOR KITCHEN GRILL KIT MODEL # 9230118 MASTER # 304112 IMPORTANT: Save for electrical inspector’s use.
- Page 129 Read this installation and User Care Guide carefully and completely before using your built- in grill to reduce the risk of fire, burn hazard and other injuries. DANGER WARNING If you smell gas: 1. Do not store or use gasoline or other 1.
- Page 130 Your safety and the safety of others is very important We have provided many important safety messages in this manual and on your appliance. We have provided many important safety messages in this manual and on your appliance. Always read and obey all safety messages Always read and obey all safety messages This is the safety alert symbol.
- Page 131 GENERAL WARNINGS WARNING • Maintain a minimum clearance of 36 inches (91 cm) between back and all sides of grill, deck railings, walls, or other combustible material. Not adhering to this clearance may prevent proper ventilation and can increase the risk of a fire and/or property damage, which could also result in personal injury.
- Page 132 GENERAL WARNINGS WARNING • DO NOT operate any outdoor cooking gas appliance with a damaged cord, plug, or after the appliance malfunctions or has been damaged in any manner. Contact the manufacturer for repair. • DO NOT let the cord hang over the edge of a table or touch hot surfaces. •...
- Page 133 IMPORTANT SAFETY INSTRUCTIONS WARNING This model is designed for the use with a STANDARD 20 lb liquid To reduce the risk of fire, electrical shock, injury to persons, or Petroleum gas tank. damage when using the outdoor cooking gas appliance, follow basic A 20 lb tank of approximately 305mm in diameter by 393mm high.
- Page 134 INSTALLATION REQUIREMENT Tools and Parts WARNING Gather the required tools and parts before starting installation. Read and follow the instructions provided with any tools listed here. Explosion Hazard Tools Needed Securely tighten all gas connections. Have a qualified technician make sure that gas pressure does not •...
- Page 135 Explanation for Outdoor Installation Areas: 1. An appliance is considered to be outdoors if installed with shelter no more inclusive than with walls on three sides, but with no overhead cover; all openings must be permanently open; sliding doors, garage doors, windows, or screened openings are not considered as permanent openings.
- Page 136 BUILT-IN OUTDOOR GRILL SPEC This built-in outdoor grill is only for installation in a WARNING built-in enclosure constructed from noncombustible materials. Non-combustible materials could be brick, firewall or steel. Do not use wood or other combustible materials for built-in enclosure. Fire Hazard Do not use grill near combustible materials.
- Page 147 Visual Inspection for CGA 791 Connection WARNING Cylinder face elastomer face seal element on CGA 791 connection could overtime, show marked and visible damage or deterioration that might cause a leak even when connection is tightened. Visually inspect the seal every time a LP Gas Cylinder is replaced or refiled.
- Page 148 OUTDOOR GRILL USE WARNING WARNING Inspect the LP Gas Fuel Tank Supply Hose WARNING...
- Page 149 Main Burner Ignition Manually Lighting the Main Grill Prepare the Gas Supply Do not lean over the grill. Open the hood completely. Do not light burners with the Make sure all burner control knobs are turned off. Push each hood closed. knob in and turn it clockwise to ensure it is in the OFF Make sure control knobs are turned to OFF.
- Page 150 Sear Burner Ignition Manually Lighting the Rotisserie Prepare the Gas Supply Do not lean over the grill. Open the hood completely. Do not light burners with the hood closed. Open the lid. Make sure control knobs are turned to OFF. The drip tray Remove the manual lighting extension from underneath must be in place and pushed all the way to the grill cabinet, attached to upright tube ( see following...
- Page 151 Rotisserie Burner Ignition Prepare the Gas Supply Manually Lighting the Rotisserie Open the hood completely. Do not light burners with the Do not lean over the grill. hood closed. Open the lid. Remove the warming rack and cooking Remove the warming rack and cooking grates from the grates from the cook box.
- Page 155 DRIP TRAY BURNERS IMPORTANT: The drip tray should only be removed when grill is Cleaning Method: completely cool. • Clean the exterior of the burner with a wire brush. The full-width drip tray collects grease and food particles that fall through the grill.
- Page 156 Please visit www.backyarddiscovery.com For the most up to date assembly manual, to register your product, or to order replacement parts Para obtener instrucciones en español, visite www.backyarddiscovery.com...
- Page 157 Manufactured by: Backyard Discovery 3305 Airport Drive, Pittsburg, KS 66762 800-856-4445 Basepoint Business Centre: Rivermead Drive,Westlea, Swindon SN5 7EX Phone: 0800-118-2476 J.P. Coenstraat 7, The Bridge, The Hague, 2595 WP, Netherlands Phone: 08005678990 OUTDOOR KITCHEN FRIDGE MODEL # 9230132 IMPORTANT: Save for electrical inspector’s use.
-
Page 158: Table Of Contents
Content Operating Manual..................... 1 General ........................1 Information on this manual ..................1 Warning notices ...................... 1 1.4 Limitation of liability ....................2 Safety ........................2 2.1 Intended use ......................2 2.2 General Safety information ..................3 2.3 Sources of danger ....................5 2.3.1 Risk of fire / flammable materials used. -
Page 159: Operating Manual
1 Operating Manual 1.1 General Please read the information contained herein so that you can become familiar with your device quickly and take advantage of the full scope of its functions. Your refrigerator will serve you for many years if you handle it and care for it properly. We wish you a lot of pleasure in using it! 1.2 Information on this manual These Operating Instructions are a component of the Outdoor Cooler (referred to... -
Page 160: Limitation Of Liability
1.4 Limitation of liability All the technical information, data and notices with regard to the installation, operation and care are completely up-to-date at the time of printing and are compiled to the best of our knowledge and belief, taking our past experience and findings into consideration. No claims can be derived from the information provided, the illustrations or descriptions in this manual. -
Page 161: General Safety Information
WARNING ► Observe the procedural methods described in this Operating Manual. Claims of all kinds due to damages resulting from unintended uses are excluded. The User bears the sole risk. 2.2 General Safety information PLEASE NOTE Please observe the following general safety notices with regard to the safe handling of the device. - Page 162 PLEASE NOTE ► For the installation of the unit, the dimensions of the unit (see illustration: Dimensioning), as well as sufficient air flow, must be observed. ► The power outlet must be freely accessible in case you need to disconnect the appliance from the mains quickly.
-
Page 163: Sources Of Danger
Sources of danger Risk of fire / flammable materials used. Danger of 2.3.1 burns or of explosion DANGER There is a danger of burns and explosion due to excess pressure that is created in the event the device is not used properly. Observe the following safety notices to avoid dangers of burns or an an explosion: Warning: Risk of fire / flammable materials used. -
Page 164: Commissioning
DANGER ► Do not operate this device if it has a damaged cable or plug, if it is not working properly or if it has been damaged or dropped. If the power cable or plug are damaged, then they must be replaced by the manufacturer or its service agent in order to avoid a hazard. ►... -
Page 165: Disposal Of The Packaging
3.4 Disposal of the packaging The packaging protects the device against damages during transit. The packaging materials are selected in accordance with environmentally compatible and recycling-related points of view and can therefore be recycled. Returning the packaging back to the material loop saves raw materials and reduces the quantities of accumulated waste. -
Page 166: The Handle Installing
3.5.3 The handle installing The Outdoor Cooler comes with one handle. To install simply screw them to the door with the supplied screws. To do this, slide the rubber seal on the back of the door to the side to lay open the predrilled holes. Use the included screws to install the handle on the door. -
Page 167: Design And Function
4 Design and Function This chapter provides you with important safety notices on the design and function of the device. 4.1 Complete overview (1) upper hinge (2) door sealing (3) door frame (4) door handle (5) down hinge (6) foot (7) metal shelves 3 pcs (8) thermostat with knob (9) switch for LED light... -
Page 168: Operation And Handing
Operation and Handing This chapter provides you with important notices with regard to operating the device. With the switch for LED light you can turn on and off the light. With the knob you can adjust the temperature according to your preferences. -
Page 169: Moving The Appliance
Manual defrosting The volume of the collection container (K) may be too small during manual defrosting. We recommend emptying the container with a sponge during the defrosting phase. We recommend defrosting the appliance two to three times a year. The collection container is located at the back of the appliance at the bottom right. -
Page 170: Disposal Of The Old Device
Please Note: ► If you are unable to solve the problem with the steps shown above, please contact Customer Service. 8 Disposal of the Old Device Old electric and electronic devices frequently still contain valuable materials. However, they also contain damaging substances, which were necessary for their functionality and safety.
Need help?
Do you have a question about the 2304079 and is the answer not in the manual?
Questions and answers