Table of Contents
Advertisement
Quick Links
Advertisement
Table of Contents

Summary of Contents for Teledyne Detcon RXT-320
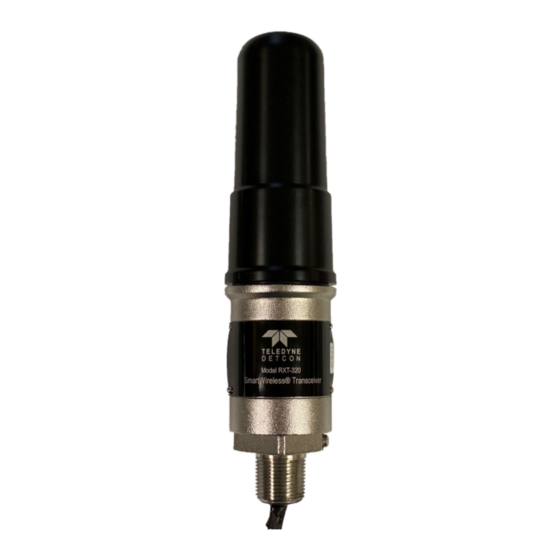
- Page 1 Instruction Manual Wireless Transceiver Wireless Modbus 4-20mA Transceiver Model RXT-320 TELEDYNE DETCON, Inc. 14880 Skinner Road, Cypress, Texas 77429 Phone 713.559.9200 www.teledynegasandflamedetection.com January 24, 2023 • Document # 3588 • Revision 2.4...
- Page 2 This page left intentionally blank Shipping Address: 14880 Skinner Road, Cypress, Texas 77429 Phone: 713.559.9200 http://www.teledynegasandflamedetection.com detcon-sales@teledyne.com • RXT-320 Wireless Instruction Manual...
-
Page 3: Table Of Contents
Register – Address Switch ......................21 4.2.10 Register – Timestamp ......................21 Troubleshooting Guide ............................22 Customer Support and Service Policy ........................23 RXT-320 Wireless Transceiver Warranty ......................24 Appedix ................................25 Specifications ..........................25 Spare Parts ............................26 Revision Log ..............................26 RXT-320 Wireless Instruction Manual... - Page 4 Figure 5 Smart Battery Pack..........................4 Figure 6 Quad Battery Charger........................5 Figure 9 RXT-320 Wireless Transceiver w/ Battery and Mounting Assembly ..........7 Figure 10 RXT-320 Wireless Transceiver Remote Mounting................8 Figure 11 Wiring Diagram for Remote RXT-320 Transceiver Mounting ............9 Figure 12 Internal Alarm Output Circuit ......................
-
Page 5: Introduction
RXT-320 transceivers connected to Modbus™ devices thus creating a seamless network of Modbus™ devices that need not be physically connected in any way. The RXT-320 transceiver can be mounted to a J-Box/condulet with an optional Model 100 Terminal Board that allows for power, data connections and addressing enabling it to interface with a wide range of devices. -
Page 6: Rxt-320 Wireless Radio
1.2 RXT-320 Wireless Radio The RXT-320 transceivers utilize radios based upon the IEEE 802.15.4 standard that operate at 2.4 GHz using DSSS encoding for robustness. DSSS was initially used by the military to resist jamming but later was widely adopted for wireless implementations since it was robust in noisy environments. -
Page 7: Model 100 Terminal Board (Optional)
Figure 3 Mesh Network Topology 1.3 Model 100 Terminal Board (Optional) The RXT-320 wireless transceiver can be ordered with an optional Model 100 Terminal Board mounted in a condulet/J-Box (See Figure 4). The terminal board includes connector plugs for the following: J1 6-Pin Phoenix Connector –... -
Page 8: Smart Battery Pack (Optional)
1.4 Smart Battery Pack (Optional) The RXT-320 transceiver can also be powered by an optional battery pack that enables it to be remotely mounted without the need for any cables because of its wireless operation. The available battery pack is Teledyne Detcon’s plug-in Smart Battery Pack which provides an output of 12VDC (See Figure 5). -
Page 9: Figure 6 Quad Battery Charger
Battery packs can remain connected to the charger even after a full charge indication (Green “Charge” LED) is shown due to the protection circuitry of the battery pack which prevents any overcharging issues. RXT-320 Wireless Instruction Manual Rev. 2.4 Page 5 of 26... -
Page 10: Installation
14. Installation shall be performed only by a trained and skilled professional. 15. This equipment is not suitable for use in locations where children are likely to be present 16. Continuous energization is required in order to maintain pollution degree 2. RXT-320 Wireless Instruction Manual Rev. 2.4 Page 6 of 26... -
Page 11: Mounting
Detcon’s custom J-Box is needed to accommodate both the terminal board and the battery pack plus a T-Outlet box with a drain is required (See Figure 9). The RXT-320 wireless transceiver assembly is typically mounted on a wall or pole. -
Page 12: Remote Mounting
2.2.1 Remote Mounting The RXT-320 wireless transceiver is normally connected directly to the J-Box containing the battery/terminal board assembly. In situations where RF line-of-sight is diminished by obstructions, it may be necessary to remotely mount the wireless transceiver away from this J-Box. Remote separation distances of up to 15 feet are possible with the recommended cable. -
Page 13: Remote Mounting Steps
Figure 9 Wiring Diagram for Remote RXT-320 Transceiver Mounting 2.3 Remote Mounting Steps 1. Remove the J-Box cover of the RXT-320 wireless transceiver assembly. 2. If the wireless transceiver assembly has the Smart Battery Pack, unplug the battery pack from the terminal board by pulling the battery pack out of the junction box. -
Page 14: Table 1 Extension Cable Wire Identification
RXT transceiver wires to 3 of the phoenix connectors per the wiring diagram in Figure 11. Reference Table 2 RXT-320 Transceiver Wire Identification for color code identification. 7. Reconnect these 3 phoenix connectors to their corresponding places back on the 12-position terminal board. -
Page 15: Wiring Connections/Functions
2.4 Wiring Connections/Functions Dependent upon use and function, the RXT-320 wireless transceiver can be wired in different ways to different devices. It is important to insure that the wiring is correct for the device to operate properly. Wire identification for the transceiver can be found in Table 2 RXT-320 Transceiver Wire Identification. -
Page 16: Modbustm A & B
2.4.3 Alarm 0-3 Each RXT-320 wireless transceiver provides outputs for up to four alarms (Alarm 0, Alarm 1, Alarm 2 and Alarm 3) which can drive relays on custom terminal boards provided by Teledyne Detcon. There are four internal Modbus™... -
Page 17: Serial Clock & Serial Data Line
NOTE: These settings assume the RXT-320 is not being used with a Teledyne Detcon Model 100 sensor. If the RXT-320 is being used with a Model 100 sensor, these jumper settings may be different. Please refer to the appropriate Model 100 manual for the correct settings. -
Page 18: Remove From Service
The Model 100 Terminal Board also contains two rotary switches which are used to set the Modbus™ address for the RXT-320 wireless transceiver. The address selected is a two digit hex value with the MSD (most significant digit) represented by the top rotary switch (closest to the J1 connector) and the LSD (least significant digit) represented by the bottom rotary switch (closest to the J2 connector). -
Page 19: Operation And Configuration
In transparent mode, the RXT-320 wireless transceiver behaves like a wired Modbus™ device in that any data transmitted over Modbus™ will be passed on over the RF network and be broadcast to all other RXT-320’s in the wireless network and presented on their respective Modbus™ interface. The transparent mode is achieved by setting the transceiver’s Modbus™... -
Page 20: Slave Configuration With Alarm Station
Modbus™ interface with the new translated address. This translate function allows a single DM-100 sensor to be installed per each RXT-320 since all DM-100 sensors have a fixed address of 01h. If a sensor with an address of 01h is found, it will respond back to the transceiver via Modbus™. The transceiver will then translate the 01h address back to its original value and send the response back to the controller over the RF network. -
Page 21: Modbus Communications
If these two conditions are true, the RXT-320 will then check to see if it is a valid Function Code. Function Codes supported by the RXT-320 are: Function Code 03 (03h) –... -
Page 22: Modbustm Broadcast Request
Broadcast requests are not confined to sleep commands but can be used where any normal write command is used. Broadcast requests received by the RXT-320 are also passed on to the local Modbus™ interface to allow a controller to write to slave devices on that interface. -
Page 23: Register - Detcon Type
Both register maps include this Detcon Type and is a unique identifier of the type of device and associated register map. A controller can therefore perform a search and determine what Teledyne Detcon devices are present on a Modbus™ system. -
Page 24: Register - Battery Info
If there are no batteries used within the network of RXT-320 transceivers this register is not utilized. Upon power up, this register is set to 0 and the RXT-320 is not in low power mode. To place a network to sleep the controller will generate a broadcast request (Modbus™... -
Page 25: Register - Control
The Control register is generally unused and should not be written to normally. Using the control register, the RXT-320 can be reset, Modbus™ exceptions can be enabled and the Alarm Outputs 2 and 3 can be used as indications of receive for Modbus™ or Wireless interfaces. Each bit in the control register can control a particular function and should be read first then modify the bits needed and written back. -
Page 26: Troubleshooting Guide
Probable Causes: Loose cover on T-Outlet box, loose cover on transceiver housing, loose NPT connections to condulet/j-box, expired condensation prevention packet. Verify cover is tight on T-Outlet box and transceiver housing. Verify all NPT connections are secure and tight. Replace condensation prevention packet. RXT-320 Wireless Instruction Manual Rev. 2.4 Page 22 of 26... -
Page 27: Customer Support And Service Policy
Including all implied warranties of merchantability and fitness and the express warranties stated herein are in lieu of all obligations or liabilities on the part of Teledyne Detcon Inc. for damages including, but not limited to, consequential damages arising out of, or in connection with, the performance of the product. -
Page 28: Rxt-320 Wireless Transceiver Warranty
* Shipping point is FOB the Teledyne Detcon factory. * Net payment is due within 30 days of invoice. * Teledyne Detcon, Inc. reserves the right to refund the original purchase price in lieu of replacement RXT-320 Wireless Instruction Manual Rev. -
Page 29: Appedix
Inputs RS-485 Modbus™ RTU (9600bps) Two 4-20mA inputs Outputs RS-485 Modbus™ RTU (9600bps) Power Source to the RXT-320 must be limited to max output of 15 watts Power Input 7-30VDC DC symbol, to indicate direct current power source Power Consumption Base RXT-320 unit: <500mW, 20 mA max at 24VDC... -
Page 30: Spare Parts
Extensive revision and detail added to all aspects of manual 08/02/12 Updated board and wiring diagrams, updated spare part list 07/19/13 Update approvals and guidelines for safe use 08/30/22 Updated for approvals and section 8.1 01/24/23 Minor updates RXT-320 Wireless Instruction Manual Rev. 2.4 Page 26 of 26...
Need help?
Do you have a question about the RXT-320 and is the answer not in the manual?
Questions and answers