Table of Contents
Advertisement
Advertisement
Table of Contents

Related Manuals for Stagg STP-710

Summary of Contents for Stagg STP-710
- Page 1 USER MANUAL DIGITAL PIANO STP-710...
- Page 3 Using the Instruction Manual Thank you for purchasing this Digital Piano. The use of high technology and the most advanced sampling technique brings you high quality sound and enjoyment. The combination of digital piano and electronic keyboard features let you perform perfectly. We hope this skilfully built digital piano will able to explore your creativity, and brings you unlimited happiness and music enjoyment.
-
Page 4: Table Of Contents
Contents Digital Piano Set-up Guide General Guide The Connectors - Using the AC power jack - Using Headphones - Using the AUX.OUT jack - Using the Foot Pedals - Using the MIDI IN/OUT ports Operation 1. Power Switch & Volume 2. -
Page 5: Digital Piano Set-Up Guide
Digital Piano Set-up Guide 1. Open the package, and check whether the following parts are available: 1. Piano body 2. Music stand 3. Right leg component 4. Left leg component 5. Back panel skirt 6. Foot pedal unit 7. Hand screw (4 pcs.) 8. - Page 6 Digital Piano Set-up Guide...Continued 2. Follow the illustration below and finish off the set-up procedures. A. Put the foot pedal unit(6) in between the left and right legs components (3&4), use 4 pieces of screws (2 on each side) to stable the legs onto the foot pedal unit. (Make sure the direction of the placement is correct before screwing) B.
- Page 7 Digital Piano Set-up Guide...Continued C. Put the piano body(1) on the top of the assembly finished in part B, use 4 pieces of hand screws to stable afterward. D. After the initial set-up, stick the cable stabling hook(10) on the internal side of the leg component (see the below illustration for reference).
-
Page 8: General Guide
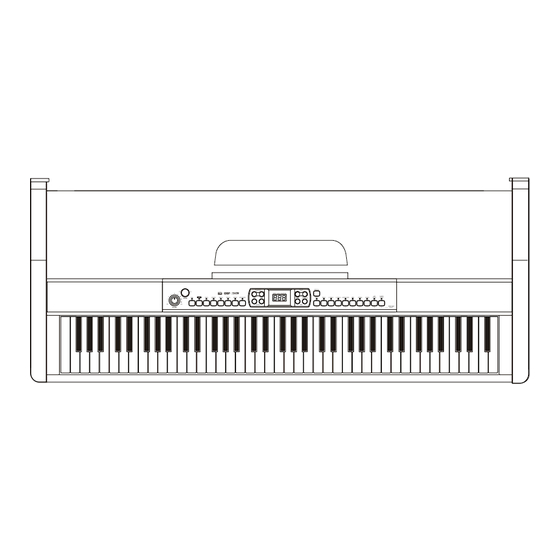
General Guide Control Panel Footboard DIN socket MIDI IN/OUT DIN sockets AUX. OUT jack AC Mains Power socket Headphones j ack Top View Rear View Front View Soft Pedal Sostenuto Pedal Sustain Pedal Music Stand Piano Keyboard... -
Page 9: General Guide
General Guide...Continued POWER SWITCH MASTER VOLUME DUAL DSP (Digital Signal Processor) TOUCH RECORD TRACK A TRACK B REPEAT METRONOME TRANSPOSE +/- TEMPO +/- DEMO ALL RECORD - PLAY - STOP DEMO - SELECT - START/STOP VOICE TYPE & DEMO SONG SELECT 0 - PIANO 1 1 - PIANO 2 2 - E.PIANO 1... -
Page 10: The Connectors
The Connectors Using the AC power socket Connect the power cable to the AC mains socket underneath the piano body. 3. Turn the volume control anti-clockwise to the minimum volume level. 5. If you have done the above procedures you are now safe to turn on the piano. Caution: When the piano is not in use or during a thunderstorm, disconnect the power for safety sake. -
Page 11: Using The Foot Pedals
The Connectors...Continued Using the Foot Pedals Connect the DIN plug of the footboard to the “PEDAL” DIN socket on the rear panel. You will experience the sustain effect. Using the MIDI IN/OUT Ports MIDI stands for Musical Instrument Digital Interface. MIDI is a world wide standard that allows various electronic musical instruments and other devices to communicate with each other. -
Page 12: Operation
Operation Power Switch & Volume 1. Turn the POWER switch on. The LED display lights up. If the LED display has not lit up after you turned on the piano, please check Note: the power supply. If the piano is silent, the volume may be adjusted to its minimum level. Voice/ Dual Voice 3. -
Page 13: Dsp (Digital Signal Processor)
Operation...Continued 4. DSP (Digital Signal Processor) 5. Transpose 6. Tempo Press the on/ off the Digital Signal Processor. The LED display will clearly show the DSP status. The Transpose function allows you to change the pitch of the instrument in semi-tone steps, up to a maximum of 12 semi-tones (one octave) above or below the standard pitch. -
Page 14: Touch Response
Operation...Continued 7. T ouch Response 8. Record & Playback The digital piano features a touch- sensitive keyboard. This function is a default setting when you turn on the piano. Pressing the repeatedly adjusts the touch response level from 1 to 3, where 2 is the default level. -
Page 15: Demo Song
Operation...Continued 9. Demo Song Repeat the playback During the playback, press the [REPEAT] button once to set the starting point of the repeated part you want to listen.“r-A” appears on the display. Then, press the [REPEAT] button again to set the ending point of the playback. -
Page 16: Operation
Operation...Continued 10. Foot pedals Soft Pedal Sustain Pedal Sostenuto Pedal Repeat the demo song To play a Demo song in loop, press the [REPEAT] button once to set the starting point of the repeated part you want to listen.“r-A” appears on the display. Then, press the [REPEAT] button again to set the ending point of the playback part."r-B"... -
Page 17: Midi
Record performance data using the piano Auto Accompaniment on an external computer (equipped w/ a MIDI card) or an external sequencer (featuring MIDI facilities). After recording, edit the data with the computer/ sequencer, then play it again on the piano. STP-710 Play music from another keyboard . STP-710 The keyboard is equipped with two types of MIDI tsockets, both located on the rear panel. -
Page 18: Specifications
Specifications Keyboard Voice Demo Song Display Switch and Buttons Transpose Pedals Touch Response Connectors Speaker Dimensions (W*D*H) Weight 88 hammer action keys 10 Voices 20 Demo Songs POWER SWITCH, VOLUME SWITCH, DUAL, DSP, TOUCH, RECORD, TRACK A, TRACK B, REPEAT, METRONOME, TRANSPOSE +/-, TEMPO +/-, DEMO ALL, RECORD - PLAY/STOP, DEMO - SELECT/ START/STOP, VOICE SELECT 0-9... -
Page 19: Voice List
Voice List Name of Voice Name of Voice on Panel Demo Song List... - Page 20 STAGGMUSIC.COM...
Need help?
Do you have a question about the STP-710 and is the answer not in the manual?
Questions and answers
What Cable does this e piano need and how do I convert the voltage of Germany to english voltage
The Stagg STP-710 e-piano requires a power cable that connects to an AC mains power outlet. To convert German voltage (typically 230V) to English voltage (typically 230V as well), no voltage conversion is needed as both use the same standard. However, a plug adapter may be necessary to fit the shape of the UK power socket if the plug is not compatible.
This answer is automatically generated