
Related Manuals for PROTRON PD-DVR100

Summary of Contents for PROTRON PD-DVR100
-
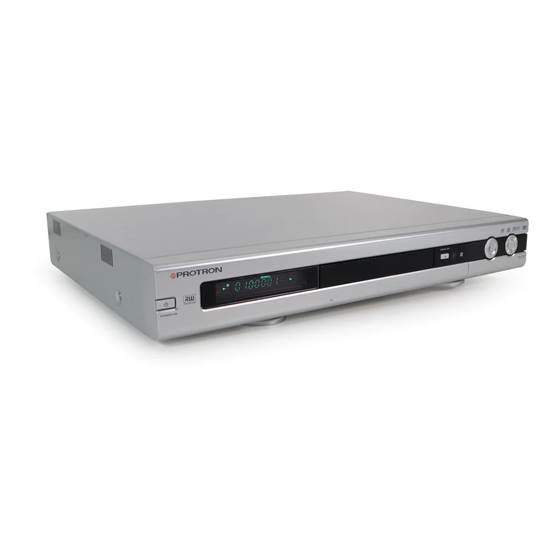
Page 1: Dvd Recorder
OMPDDVR100.book Page i Monday, September 19, 2005 8:35 AM PD-DVR100 DVD Recorder User’s Manual OPEN/CLOSE DVD+ReWritable STANDBY/ON... - Page 2 OMPDDVR100.book Page ii Monday, September 19, 2005 8:35 AM Protron PD-DVR100 DVD Recorder User’s Manual. © 2005 Protron Digital Corporation. All rights reserved. Under copyright law, this manual may not be reproduced in any form, in whole or in part, without the prior written consent of Protron Digital Corporation.
-
Page 3: Product Cautions
OMPDDVR100.book Page i Monday, September 19, 2005 8:35 AM Product Cautions TO PREVENT POSSIBLE DANGER, ELECTRIC SHOCK, AND OTHER INJURIES WHEN HANDLING YOUR DVD RECORDER, PLEASE BE AWARE OF OF ALL WARNINGS AND SAFETY PRECAUTIONS LISTED BELOW. Never spill any liquid of any kind on the device. Never insert anything into the device, where objects can come into contact with high voltage nodes or damage internal components. -
Page 4: Conformity And Compliance
OMPDDVR100.book Page ii Monday, September 19, 2005 8:35 AM Conformity and Compliance FCC Compliance Statement This equipment has been tested and found to comply with the limits for a Class B digital device, pursuant to Part 15 of the FCC Rules. These limits are designed to provide reasonable protection against harmful interference when the equipment is operated in a residential installation. -
Page 5: Table Of Contents
Overwriting the Disc (DVD+RW Only) ..........20 Making the Disc Compatible with Other DVD Players (DVD+RW Only) ....20 Locking and Unlocking the Disc (DVD+RW Only) . - Page 6 OMPDDVR100.book Page iv Monday, September 19, 2005 8:35 AM Table of Contents Playing DVDs ..............24 The LCD Readout .
-
Page 7: Introduction
OMPDDVR100.book Page 1 Monday, September 19, 2005 8:35 AM Introduction Congratulations on purchasing your new Protron DVD Recorder! With a television tuner and three audio/video inputs, you can record television broadcasts and video signals from other devices on DVD, for up to 360 minutes of recorded video on each DVD. Further, with a progressive scan component video output and 5.1 channel surround sound, your DVD recorder can play back DVDs with the highest quality available. -
Page 8: Unpacking Your New Dvd Recorder
OMPDDVR100.book Page 2 Monday, September 19, 2005 8:35 AM Unpacking Your New DVD Recorder Before using your new DVD recorder, you should unpack the contents of the box and check to make sure everything is present and undamaged. To unpack the player: 1. - Page 9 OMPDDVR100.book Page 3 Monday, September 19, 2005 8:35 AM 5. Install the included AAA batteries in the remote. 6. Place the recorder in its intended position and connect the power cable to a wall socket. Unpacking Your New DVD Recorder NT SC Video Pb/B...
-
Page 10: Connecting The Recorder To Other Devices
OMPDDVR100.book Page 4 Monday, September 19, 2005 8:35 AM Connecting the Recorder to Other Devices There are numerous connections on the rear of the recorder that may be used to connect to other devices for video and audio playback and recording. Connecting to a Display Using Component Video Component video offers higher quality than all other video outputs on the recorder. -
Page 11: Connecting To A Display Using S-Video
OMPDDVR100.book Page 5 Monday, September 19, 2005 8:35 AM Connecting to a Display Using S-Video S-Video offers higher quality than composite video, but lower quality than component video. The S-Video output is located in the VIDEO OUT block on the rear of the recorder. To connect to a display using S-Video: 1. -
Page 12: Connecting To A Display Using Composite Video
OMPDDVR100.book Page 6 Monday, September 19, 2005 8:35 AM Connecting the Recorder to Other Devices Connecting to a Display Using Composite Video Composite video is the most common video connection, but offers lower quality than either S-Video or component video. The yellow Video output in the VIDEO OUT block on the rear of the recorder is the recorder’s composite video output. -
Page 13: Connecting To A Television Signal Source
OMPDDVR100.book Page 7 Monday, September 19, 2005 8:35 AM Connecting to a Television Signal Source The RF IN jack on the rear of the recorder is the recorder’s television signal input. When a signal is connected to RF IN, you can record it to DVD. The RF OUT jack allows you to connect to another device the same television signal connected to RF IN. -
Page 14: Connecting To A Stereo Audio System Using An Analog Connection
OMPDDVR100.book Page 8 Monday, September 19, 2005 8:35 AM Connecting the Recorder to Other Devices Connecting to a Stereo Audio System Using an Analog Connection The FR (right) and FL (left) outputs in the AUDIO OUT block on the rear of the recorder are the recorder’s analog stereo audio outputs. -
Page 15: Connecting Other Audio/Video Sources To The Recorder
OMPDDVR100.book Page 9 Monday, September 19, 2005 8:35 AM Connecting Other Audio/Video Sources to the Recorder There are three audio/video inputs on the recorder, one on the front and two on the rear. Each has an S-Video input, a composite video input, and a stereo audio input. In addition, there is a 4-pin IEEE 1394 (i.LINK/FireWire) input on the front of the recorder. -
Page 16: Using The Recorder For The First Time
OMPDDVR100.book Page 10 Monday, September 19, 2005 8:35 AM Using the Recorder for the First Time Before using your new DVD recorder, you will need to set the clock and, if you have connected a television signal, scan the signal spectrum to disable weak channels. To set the clock: 1. -
Page 17: Operating The Recorder
OMPDDVR100.book Page 11 Monday, September 19, 2005 8:35 AM Operating the Recorder Turning the Recorder On and Off Once the recorder is attached to a power outlet, you can turn it on and off by pressing the button on the front of the recorder or on the remote. Inserting a Disc The receptacle for DVDs and CDs is located on the front of the player. -
Page 18: Bringing Up The On-Screen Display
OMPDDVR100.book Page 12 Monday, September 19, 2005 8:35 AM Operating the Recorder Indicator Indication Playback control is on (Video CDs). When playback control is on, the Video CD’s menu will be available. CHANNEL The input source is set to Tuner. The two digits immediately below CHANNEL will indicate the current channel number. -
Page 19: Using The Remote Control
OMPDDVR100.book Page 13 Monday, September 19, 2005 8:35 AM Using the Remote Control The remote control can be used to control every aspect of the recorder’s operation and includes more functionality than the controls on the recorder itself. The following is a list of all buttons on the remote and their functions: Button Function Turns the player on and off (standby) -
Page 20: Button Function
OMPDDVR100.book Page 14 Monday, September 19, 2005 8:35 AM Using the Remote Control Button Function Adds a selection to the program playlist or removes a selection from the playlist Brings up the Program menu, which allows you to program playback sequence Used to navigate menus Confirms the current selection or entry Brings up the On-Screen Display (OSD), which displays and allows you to... -
Page 21: Replacing The Remote Batteries
OMPDDVR100.book Page 15 Monday, September 19, 2005 8:35 AM Button Function Zooms in on the picture. Pressing this button repeatedly cycles through the zoom levels. Repeats an arbitrary section of audio/video. Press once to mark the beginning of the section, a second time to mark the end of the section and begin repeating, and a third time to return to normal play mode. -
Page 22: Recording Dvds
OMPDDVR100.book Page 16 Monday, September 19, 2005 8:35 AM Recording DVDs Your DVD recorder can record up to six hours of video on a 4.7GB disc from any of the three analog audio/video sources, the IEEE 1394 input, or the television tuner. Upon inserting a blank disc, the recorder will immediately begin to format the disc to prepare it for recording. -
Page 23: The On-Screen Display
OMPDDVR100.book Page 17 Monday, September 19, 2005 8:35 AM The On-Screen Display The DVD recording OSD has two modes: The first mode (press DISPLAY once) shows the current signal source and recording quality. Monitor Ch001 (No signal) SP The second mode (press DISPLAY twice) displays and allows you to change the current recording mode, signal source, recording quality, recording state, title, chapter, and playback time. -
Page 24: Finalizing The Disc
If you are recording to a DVD+R disc, you must finalize the disc before it can be read by other DVD players. For information on how to do this, see “Using the Disc Edit Menu” on page 19 and “Finalizing the Disc (DVD+R Only)” on page 20. -
Page 25: Editing Recorded Dvds
OMPDDVR100.book Page 19 Monday, September 19, 2005 8:35 AM Editing Recorded DVDs Once a DVD has been recorded, you can edit the video on the DVD using the Disc Edit menu and Edit Mode. Using the Disc Edit Menu Press DISC EDIT to enter the Disc Edit menu. This menu allows you to change settings for the entire disc. -
Page 26: Overwriting The Disc (Dvd+Rw Only)
The recorder will take a few seconds to perform the unlock procedure. Finalizing the Disc (DVD+R Only) A DVD+R disc must be finalized before it can be read by other DVD players. You can finalize a disc with the Finalize Disc option in the Disc Edit menu. -
Page 27: Using The Title Menu
OMPDDVR100.book Page 21 Monday, September 19, 2005 8:35 AM Using the Title Menu Press TITLE to enter the Title menu. This menu allows you to change individual titles on the disc. You can do the following with the Title menu: •... -
Page 28: Overwriting A Title (Dvd+Rw Only)
OMPDDVR100.book Page 22 Monday, September 19, 2005 8:35 AM Editing Recorded DVDs Overwriting a Title (DVD+RW Only) If you are using a DVD+RW, you can overwrite a title using the Overwrite Title option in the Title menu. When you select this option, the recorder will automatically set the recording mode to Overwrite Title, at which point any new recording will overwrite the selected title. -
Page 29: Hiding A Chapter
OMPDDVR100.book Page 23 Monday, September 19, 2005 8:35 AM To delete a chapter marker: 1. Pause title playback in the chapter whose marker you would like to delete. 2. Select Chapter Marker in the Edit Mode menu and press . 3. -
Page 30: Playing Dvds
OMPDDVR100.book Page 24 Monday, September 19, 2005 8:35 AM Playing DVDs DVDs will play upon insertion. The player can perform all standard DVD playback and search functions. The LCD Readout When playing a DVD, the first two digits of the readout indicate the current chapter. The rest of the digits indicate the current playback time. -
Page 31: Searching To A Location
OMPDDVR100.book Page 25 Monday, September 19, 2005 8:35 AM Press to fast reverse the DVD. Press the speed options: ×2, ×4, ×16, ×32, and normal speed. Press to play the video at a slower speed. Repeated presses cycle through the speed options: ×1/2, ×1/4, ×1/8, ×1/16, and normal speed. -
Page 32: Playing Video Cds
OMPDDVR100.book Page 26 Monday, September 19, 2005 8:35 AM Playing Video CDs Video CDs can contain video or still images such as photos. Your DVD recorder will play all standard Video CD formats. Upon insertion, the player will read and begin to play the CD. If there is a menu on the CD, it will appear, allowing you to navigate through the tracks stored on the CD. -
Page 33: Searching To A Location
OMPDDVR100.book Page 27 Monday, September 19, 2005 8:35 AM When the disc is playing, press When the disc is paused, press Press to return to the previous track. Press to skip to the next track. Press to fast reverse the video. Press through the speed options: ×2, ×4, ×16, ×32, and normal speed. -
Page 34: Playing Audio Cds
OMPDDVR100.book Page 28 Monday, September 19, 2005 8:35 AM Playing Audio CDs Audio CDs will play upon insertion. All standard Audio CD navigation features are available. When an Audio CD begins playing, a display will appear showing all tracks on the CD and allowing you to navigate the tracks. -
Page 35: Programming Playback Sequence
OMPDDVR100.book Page 29 Monday, September 19, 2005 8:35 AM Programming Playback Sequence The navigation menu that appears when you first insert an Audio CD allows you to program playback sequence. To program playback sequence: 1. Use to select a track, then press ADD/CLEAR to add it to the playlist. -
Page 36: Playing Kodak Picture Cds
OMPDDVR100.book Page 30 Monday, September 19, 2005 8:35 AM Playing Kodak Picture CDs Upon insertion, the player will read and begin to play your Kodak Picture CD, displaying a slideshow of the images on the disc. The LCD Readout When playing a Kodak Picture CD, the first two digits of the readout indicate the current image number. -
Page 37: Enabling Slideshow Transition Effects
OMPDDVR100.book Page 31 Monday, September 19, 2005 8:35 AM Enabling Slideshow Transition Effects Press ANGLE to cycle through the slideshow transition effects: • Random Wipe Mode • Top to Bottom • Bottom to Top • Left to Right • Righ to Left •... -
Page 38: Playing Media On Data Cds
OMPDDVR100.book Page 32 Monday, September 19, 2005 8:35 AM Playing Media on Data CDs Upon inserting a data CD, the player will display a menu showing all media files on the disc and allowing you to select files for playback. The LCD Readout When playing media on a data CD, the first two digits of the readout indicate the current file number. -
Page 39: Controlling Audio File Playback
OMPDDVR100.book Page 33 Monday, September 19, 2005 8:35 AM You can also play back audio files while displaying image files. To do so, begin playback of an audio file, then select an image file for playback. The audio will play while the image slideshow displays. -
Page 40: Controlling Video File Playback
OMPDDVR100.book Page 34 Monday, September 19, 2005 8:35 AM Playing Media on Data CDs Controlling Video File Playback When video is playing, press Press to stop playback and return to the menu. Press to return to the previous file. Press Press to fast reverse playback. -
Page 41: Configuring The Recorder
OMPDDVR100.book Page 35 Monday, September 19, 2005 8:35 AM Configuring the Recorder The Setup menu allows you to configure the operation of the recorder. You can change video, audio, and language settings, control access to mature programming, and configure other general behavior. -
Page 42: Playback
OMPDDVR100.book Page 36 Monday, September 19, 2005 8:35 AM Configuring the Recorder Playback The Playback sub-menu allows you to change audio and video playback settings and set up parental controls. The menu items are as follows: TV Aspect Ratio Selects the aspect ratio used by the external display and the method used to display widescreen video on non- widescreen displays:... -
Page 43: Digital Audio Output
OMPDDVR100.book Page 37 Monday, September 19, 2005 8:35 AM To set a new password: 1. Use the arrow controls to select the NEW button and press ENTER. Another pop-up box will display asking for the new password. 2. Enter a new four-digit password in the New Password box. -
Page 44: Language
OMPDDVR100.book Page 38 Monday, September 19, 2005 8:35 AM Configuring the Recorder Record The Record sub-menu configures DVD recording. The menu items are as follows: Auto Chapter Marker Sets up automatic chapter marking, which creates a new DVD chapter at regular intervals. -
Page 45: Channel Scan
OMPDDVR100.book Page 39 Monday, September 19, 2005 8:35 AM Audio Language Changes the language used for audio Channel Scan The Channel Scan sub-menu configures the television tuner. The menu items are as follows: Tuner Input Source Sets the type of television signal the tuner uses: •... -
Page 46: Clock
OMPDDVR100.book Page 40 Monday, September 19, 2005 8:35 AM Configuring the Recorder Clock The Clock sub-menu allows you to set the current date and time. To set the date/time: 1. Use to select Date or Time and press ENTER. 2. Enter the desired value using the keypad. Alternatively, you can select each digit individually by pressing and , then adjust it by pressing... -
Page 47: Troubleshooting
OMPDDVR100.book Page 41 Monday, September 19, 2005 8:35 AM Troubleshooting Symptom Possible Cause Power does not come Power cord(s) not securely connected Power outlet is off or not working Remote control not Batteries inserted functioning improperly Batteries low on energy A button is stuck Obstacle between remote and recorder... -
Page 48: Support Information
“Finalizing the Disc (DVD+R Only)” on page 20). If you are using a DVD+RW disc, ensure you have made it compatible (see “Making the Disc Compatible with Other DVD Players (DVD+RW Only)” on page 20). Not all players support DVD+R/RW discs. Ensure... -
Page 49: Specifications
OMPDDVR100.book Page 43 Monday, September 19, 2005 8:35 AM Specifications General Dimensions Weight Playback Formats Record Formats Inputs Outputs Power Input Power Consumption Storage Temperature Operating Temperature Television Tuner Tuner Type Frequency Range Input Sensitivity Video D/A Sample Rate D/A Resolution A/D Sample Rate A/D Resolution Dynamic Range... -
Page 50: Limited Warranty
OMPDDVR100.book Page 44 Monday, September 19, 2005 8:35 AM Limited Warranty Protron warrants this product to be free from manufacturing defects in material and workmanship under normal use for the period listed at the bottom of this document. How to obtain service: •... - Page 51 OMPDDVR100.book Page 45 Monday, September 19, 2005 8:35 AM • The identifiable markings on the product such as Serial # are defaced, unrecognizable, or missing. • The product is used outside the country in which it was originally sold. This warranty is non-transferable and only applies to the original purchase. Any implied warranties, including the warranty of merchantability, are limited in duration to the period of this expressed warranty and no warranty whether expressed or implied shall apply to the product thereafter.
- Page 52 OMPDDVR100.book Page 46 Monday, September 19, 2005 8:35 AM Protron Digital Corporation http://www.protronusa.com/ PD-DVR100 OMPDDVR100...
Need help?
Do you have a question about the PD-DVR100 and is the answer not in the manual?
Questions and answers
What is the connections from cable and tv to protron DVR-
@Michele tessler
To connect a cable and TV to the PROTRON PD-DVR100, follow these steps:
1. Connect the Cable Input:
- Plug the cable television signal into the appropriate input on the PD-DVR100.
- If connecting directly to a cable television wall outlet, check with your cable provider for compatibility.
2. Scan for Channels:
- Use the remote control to navigate to the channel scan option.
- Select "Scan Channels" and press "ENTER."
- The recorder will scan for available channels and display progress.
3. Connect the DVR to the TV:
- Use an S-Video or composite video (RCA) cable to connect the video output of the DVR to the TV.
- Connect the audio output (RCA) to the corresponding input on the TV.
4. Power On the Recorder and TV:
- Plug the DVR into a power outlet and turn it on using the power button on the front or the remote.
- Turn on the TV and set it to the correct input source for the DVR.
5. Insert a Disc (Optional):
- Press the eject button on the recorder or remote to open the disc tray.
- Place a DVD or CD on the tray and close it.
Once connected, you can use the DVR to watch and record cable television.
This answer is automatically generated
Where is the connection
Where is the connection to the protron DVR to the tv and cable
To connect the PROTRON PD-DVR100 to the TV and cable:
1. Connect the cable signal to the recorder:
Use an RF coaxial cable (not included) to connect the cable source (e.g., cable box or antenna) to the RF input on the back of the recorder.
2. Connect the recorder to the TV (video):
- For component video: Use three RCA cables to connect the Y, Pb, and Pr outputs from the VIDEO OUT section of the recorder to the matching component video inputs on the TV.
- For composite video: Use an RCA cable to connect the yellow VIDEO OUT port on the recorder to the composite video input on the TV.
3. Connect the recorder to the TV (audio):
Use two RCA cables (red and white) to connect the AUDIO OUT (L and R) ports on the recorder to the corresponding audio input ports on the TV.
This setup allows the recorder to receive a TV signal and send video and audio to the TV.
This answer is automatically generated
Where is the connection on the protron DVR from the tv and cable
The PROTRON PD-DVR100 has the following TV and cable connections:
Inputs:
- 1 × television (F-type connector)
Outputs:
- 1 × television pass-through (F-type connector)
These connections are used to connect the TV and cable signal to and from the DVD recorder.
This answer is automatically generated
Where do you connect the tv and cable to the protron DVR 100
To connect the TV and cable to the PROTRON PD-DVR100:
1. Connect the cable television line directly to the recorder’s TV tuner input.
2. Use the "Scan Channels" function to scan the signal spectrum. Select "Scan Channels" using the arrow buttons and press ENTER to start the scan.
3. To connect the recorder to your TV, use one of the video output options:
- S-Video
- Composite video (RCA)
4. For audio, use:
- 5.1 channel audio (RCA)
- Coaxial digital (RCA)
- Optical digital (TOSLINK)
This setup allows the PROTRON PD-DVR100 to receive cable signals and send video/audio output to the TV.
This answer is automatically generated