Table of Contents
Advertisement
Quick Links
Advertisement
Table of Contents

Summary of Contents for Pool Pro X30
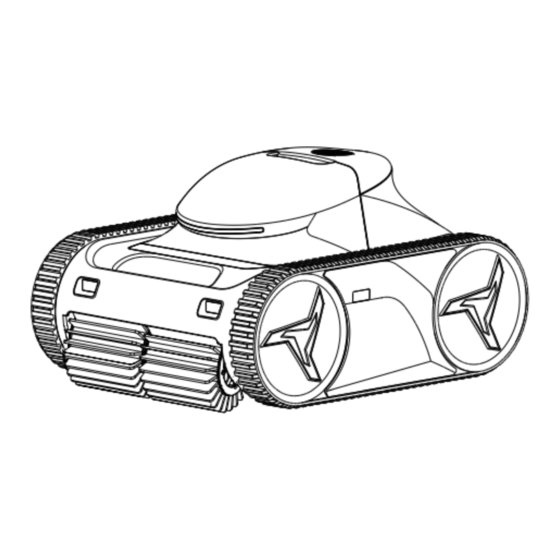
- Page 1 INVERX AI-WIRELESS ROBOTIC POOL CLEANER USER MANUAL Model: X30 / X45 / X60 / X80 THANK YOU FOR PURCHASING THE INVERX AI-WIRELESS ROBOTIC POOL CLEANER. Please read the manual thoroughly before installing or using the product. Keep this manual for future reference.
- Page 2 IMPORTANT WARNINGS & SAFETY INFORMATION This manual contains important information about the installation, operation, and safe use of this product. This information should be given to the owner and/or operator of the robot. When installing and using the robot, basic safety precautions should always be followed. Failure to follow safety warnings and instructions in this manual can result in serious injury and/or damage to your equipment.
-
Page 3: Table Of Contents
Table of Contents SECTION 1. PRODUCT OVERVIEW ......................... 4 1.1 Packaging Contents ..........................4 1.2 Technical Specifications ........................5 1.3 Preparation............................6 - 7 SECTION 2. OPERATION ..........................8 2.1 Control Panel Buttons ........................9 - 10 2.2 Startup and Operation of the Unit ....................10 - 11 2.3 Pool with a Sloped Beach Entry ...................... -
Page 4: Section 1. Product Overview
SECTION 1. PRODUCT OVERVIEW 1.1 Packaging Contents The following items are included in the packaging of the robot. Please contact your dealer if any items are damaged or missing. ① Robot cleaner ② Charger ③ Hook ④ Magnetic safety cap x 2 ⑤... -
Page 5: Technical Specifications
1.2 Technical Specifications Model X80 Model X60 Model X45 Model X30 Endurance Time – Floor Mode 4.5h Endurance Time – Floor/Wall/Waterline Mode 4.5h 3.5h 2.5h Charging Time 4.5h 14Ah 10.4Ah 7.8Ah 5.2Ah Battery (352wh) (262wh) (196wh) (131wh) Ideal Pool Water Temperature Range Between 4°C and 35°... -
Page 6: Preparation
1.3 Preparation Ensure the robot is turned off. Remove the magnetic safety cap from underneath the robot and store it in a safe place. Do not lose the magnetic cap. Take the cover off the charging port. The charging port cover will remain tethered to the robot’s body – do not lose the charging port cover. - Page 7 4. Plug the other end of the charger into a 240V power supply. When on the robot is flashing green, the robot is charging. When on the robot has 3 green lights on, the robot is fully charged. Note: Please fully charge the robot before the first use.
-
Page 8: Section 2. Operation
SECTION 2. OPERATION CAUTION To prevent possible damage to the robot, injury to people or voiding your warranty, please follow these guidelines: • Use the hook (attached to your telepole) to lift the robot from the bottom of the pool to the surface of the pool water. -
Page 9: Control Panel Buttons
2.1 Control Panel Buttons Cleaning Error Battery Wifi Cleaning On/Off Mode Mode Code Indicator Signal Time Button Icon Display Status Description Green light flashing Robot is starting up Power (on/off) Green light on (solid) Robot is running 1 green light on Clean for 0.5 hours 2 green lights on Clean for 1 hour... -
Page 10: Startup And Operation Of The Unit
Button Icon Display Status Description 1 green light on Battery level: 20-50% Battery indicator (when robot is 2 green lights on Battery level: 50-75% not charging) 3 green lights on Battery level: 75-100% Low battery 1 red light flashing Battery level: 15-20% 1 green light flashing Battery level: 0-50% Battery indicator... -
Page 11: Pool With A Sloped Beach Entry
The robot will start cleaning automatically after it reaches the floor (unless you chose a delayed start for one of the AI modes). If the battery reaches less than 15% charge during a cleaning cycle, will flash 1 red light, the robot will automatically go to the side of the pool then enter into Sleep mode after 5 minutes. -
Page 12: Cleaning The Filter Basket
2.4 Cleaning the Filter Basket 1. Clean the filter basket after each cleaning cycle. When a cleaning cycle is complete, the robot will stop at the side of the pool. 2. Use the hook (attached to your telepole) to hook onto the robot’s handle, and lift the robot from the bottom of the pool to the surface of the pool water. -
Page 13: Charging The Robot
8. Check the water inlet is free of debris and clean accordingly. 9. Close the basket and re-insert the basket into the robot, ensuring both magnets reconnect. 2.5 Charging the Robot Take the cover off the charging port. The charging port cover will remain tethered to the robot’s body – do not lose the charging port cover. -
Page 14: Wifi Connection
When the the battery light on the robot has 3 green lights on, the robot is fully charged. Note: Fully charge the robot before the first use. Once the robot is fully charged, turn the power off at the wall, then unplug the charger from the robot and the power supply. -
Page 15: Section 3. Maintenance
SECTION 3. MAINTENANCE WARNING 1. To avoid electric shock and other hazards which could result in major injuries, ensure the robot is disconnected from the charger before performing any cleaning and/or maintenance. 2. Before any maintenance, be sure to insert the magnetic cap underneath the robot to prevent any parts from moving and causing injury. -
Page 16: Replacing Worn Brushes
7. Remove 1 x impeller screw and take off the impeller. This screw has an opposite thread and must be unscrewed clockwise to undo the screw. 8. Visually check the impeller and impeller shaft for any hair or other debris, and clean if necessary. Hair or debris in the impeller or impeller shaft may cause reduced suction or climbing performance. -
Page 17: Replacing Worn Track Belts
3. Undo each tab, then remove the brush. 4. Take your new brush and insert the edge without the tabs under the brush holder. Ensure the brush is inside the raised edges of the roller. 5. Pull the brush around the roller and fasten each connection tab. Pull on the end of each tab until its edges pass through the slits. - Page 18 2. Place the robot on its side then remove the worn track belt by peeling it up and away from the robot. Position the new track belt by wrapping it around the small front wheel first. Ensure the track belt is orientated so the teeth on the inside of the belt are closest to the outside of the cleaner. Page 18 of 23 Visit www.inverx.com.au...
-
Page 19: Section 4. Troubleshooting
5. Ensure the belt is sitting correctly in the grooves of the small front wheel. Pull the track belt over the rear large wheel as much as possible. 6. Hold the belt on the large rear wheel with a downward pressure, while pushing the track belt so it turns the wheels. - Page 20 Problem Possible Cause Solution Low battery Charge the robot (Refer to Section 2.5) Robot is not submerged in enough Ensure the robot is submerged under a minimum of Robot not water 40cm of water, and ensure the robot is turned on moving or Press the power button after you have selected the Power button was not pressed after...
-
Page 21: Section 5. Schematics
SECTION 5. SCHEMATICS Visit www.inverx.com.au for more information Page 21 of 23... - Page 22 PART Filter Top Cover Filter Bracket Assembly w/ Screws Main Filter Cartridge Control Panel Hook Front Infrared Sensor Brush Assembly w/ Screws Brush Only Out-of-water Sensor Side Infrared Sensor Wheel Cover w/ Screws Decorative Wheel Trim Track Belt Motor Box Assembly Water Pump Motor Drive Motor Battery...
-
Page 23: Section 6. Warranty
SECTION 6. WARRANTY • The warranty for the X30, X45, X60 and X80 robotic pool cleaner covers manufacturer’s defects in materials and workmanship for: 3 years on the battery 2 years on non-wearing parts 12 months on wearing parts Statutory 12 months warranty applies if purchased online through a non-Pool Pro Certified Dealer.
Need help?
Do you have a question about the X30 and is the answer not in the manual?
Questions and answers