Table of Contents
Advertisement
Available languages
Available languages
Quick Links
Operator's
Manual
CRRF [SM
®
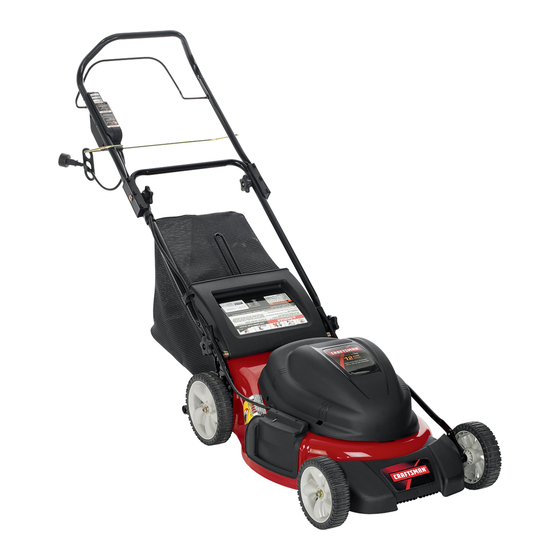
19=inch Electric
Rotary Mower
Model No. 247.370160
CAUTION:
Before
using
this product,
read this
manual
and follow
all
safety
rules
and operating
instructions.
,, SAFETY
o ASSEMBLY
o OPERATION
o MAINTENANCE
o PARTS LIST
o ESPANOL R 24
o
his symbol on the product's nameplate
means it is listed by
LISTED UNDERWRITERSLABORATORIESINC,
Sears, Roebuck and Co., Hoffman
Estates,
IL 60179, U.S.A.
Visit our web site: www.craftsman.com
FORMNO.769-04643A
November17,2009
Advertisement
Table of Contents

Related Manuals for Craftsman 247.370160


Summary of Contents for Craftsman 247.370160
- Page 1 Sears, Roebuck and Co., Hoffman ® using Estates, Visit our web site: www.craftsman.com ,, SAFETY o ASSEMBLY o OPERATION o MAINTENANCE o PARTS LIST o ESPANOL R 24 means it is listed by his symbol on the product's nameplate LISTED UNDERWRITERSLABORATORIESINC, IL 60179, U.S.A.
- Page 2 12Amperes © Sears Brands,LLC Service andMaintenance ..Off-Season S torage ... Troubleshooting ... PartsList... Espa_ol ... Service Numbers ... Craftsman Two Year Limited Warranty Sears, Roebuck and Co., Hoffman Estates, IL 60179 Model Number SerM Number Dateof Purchase BackCover Recordthe modelnumber,serialnumber, and dateof purchaseabove.
-
Page 3: Operation
Whenusingelectriclawnmowers,basic safetyprecautionsshould alwaysbe followedto reducethe risk of fire, electricshock,and personalinjury.These basicprecautionsincludethe following: Double Insulated Lawn Mower • This machineis a precisionpiece of powerequipment,nota plaything.Therefore,exerciseextremecautionat all times. This machinehas beendesignedto performonejob: to mow grass. Donot use itfor anyotherpurpose. - Page 4 • Wearsturdy,rough-soled work shoesand close-fittingslacks and shirts. Shirtsand pants thatcover thearms and legsand steel-toedshoesare recommended. N everoperatethis machine in barefeet, sandals,slipperyor light weight(e.g.canvas)shoes. Do not puthandsor feet near rotatingparts or undercuttingdeck. Contactwith bladecan amputatehandsand feet. A missingor damageddischargechutecan causebladecontact or thrownobject injuries. Manyinjuriesoccuras a resultof the mowerbeingpulledoverthe foot duringa fall causedby slippingor tripping.Donot hold on to the mowerif youare falling;...
- Page 5 SRope Operation: Slopesare a majorfactor relatedto slipand fall accidentswhich can result in severeinjury.Operationon slopes requiresextra caution.If youfeel uneasyon a slope,do not mowit. Foryour safety,usethe slopegaugeincludedas partof this manualto measureslopes before operatingthis machineon a slopedor hillyarea. If the slopeis greater than 15degrees,do not mowit. Mowacrossthe face of slopes;neverup and down.
- Page 6 SAFETY SYMBOLS This pagedepictsand describessafety symbolsthat may appearon this product. Read,understand,and follow all instructionson the machine beforeattemptingto assembleand operate. READ THE OPERATOR'S Read,understand,and followall instructionsin the manual(s)beforeattemptingto assembleand operate. DANGER To reducethe risk of injury,keephandsand feet away.Donotoperateunlessdischargecoveror grass catcheris in its properplace. If damaged,replaceimmediately. •...
- Page 7 e TO REDUCETHE RiSK OF ELECTRIC SHOCK, DO NOT EXPOSE e REMOVE OBJECTS TI-_TCANBETHROWNBY THE BLADEiN UNiT TO WATEROR OPERATE UNiT ON WET GROUND, REPLACE DAMAGEDCORDiMMEDiATELY. e DISCONNECT FROM SUPPLYCiRCUiTBEFORESERViCiNGOR REMOVINGBLADE, e KEEPHANDSAND FEETAWAYFROM ROTATING PARTS, e DO NOT MOW WHEN CHILDREN OR OTHERS ARE AROUND. ANY DiRECTiON,WEARSAFETY GLASSES, e USE EXTRACAUTIONON SLOPES.
- Page 8 Use this pageas a guide to determineslopeswhereyoumay not operatesafely.Do not operate the lawnmoweron such slopes. This symbolpoints outimportant safety instructions which,ifnot followed,could endangerthe personalsafetyand/or propertyof yourselfand others.Readand follow all instructions inthis manualbeforeattemptingto operatethis machine.Failureto complywith these instructions may result inpersonalinjury. W henyou seethis symbol,HEEDITS WARNING! :::3-...
- Page 9 Thispage leftintentionally blank.
-
Page 10: Assembling The Handle
NOTE:Standbehindthe moweras if youweregoing to operateit. Your righthand correspondsto the rightside of the mower;yourleft hand correspondsto the left side of the mower. LOOSE PARTS IN CARTON Thefollowingitemsare packagedloosein thecarton: Operator'sManual,Grass Catcher REMOVING THE UNIT FROM THE CARTON Cut the cornersof thecarton and lay the sidesflat on theground. Removeall packinginserts. -
Page 11: Grass Catcher
NOTE: Donot plug yourextensioncord intothe powersourcerecep- tacle (outlet)prior to routingit throughthe cord retainerand connecting theextensioncord to the mower'scord outlet receptacle. Toproperlyrouteyourextensioncordthroughthecord retainer: Approximately 14to 16-inches from its end,creaseyourextension cordto form a tight loop. Pushthe loop throughthe bottomholein the cord retainer. S ee Figure4-A. -
Page 12: Converting To Side Discharge
Followstepsbelowto attachgrass catcher: Lift reardischargedoor, Removerear mulchingbaffle, Placegrasscatcheron the pivot rod.Let go of discharge door sothat it restson the grasscatcher.See Figure6. _',, "_'L'4 / Figure6 Toremovegrass catcher,lift rear dischargedoor on the mower.Lift grasscatcherup and out, off of the pivot rod.Releasereardischarge door to allowit to close rear openingof mower. - Page 13 MOTOR/BLADE CONTROL Themotor/ blade controlhandleis a safetydevice.Neverattemptto bypassits operations. The motor/bladecontrolhandleis locatedon the upperhandleof the mower.See Figure9. The motor/bladecontrolhandleengagesand disengages the motorand blade. OVERLOAD PROTECTION SWITCH The moweris equippedwith an overloadprotectionswitch,locatedon the motor/bladecontrol.This overloadprotectionswitchmay pop out whentoo muchstrain is placedon the motor.Referto Maintenance & AdjustmentsSectionto resetthis switch.
-
Page 14: Stopping The Motor
If motordoesnot cometo a stopwhenthe motor/blade control handleis released,contacta Searsor other authorized servicedealer. Releasethe blade/motorcontrol handleto stopthe motor and blade. USING YOUR LAWN MOWER Be surethat lawnis clearof stones,sticks,wires,or otherobjects which coulddamagethe lawnmoweror motor.Suchobjectscould be accidentallythrownby the mowerin any directionand cause serious personalinjuryto theoperatorand others. -
Page 15: Maintenance
MAINTENANCE General Recommendations Alwaysobservesafetyruleswhenperformingany maintenance. Thewarrantyon this lawnmowerdoesnot coveritemsthat have been subjectedto operatorabuseor negligence. T o receivefull valuefromwarranty,operatormustmaintainthe lawnmoweras instructedhere. • All adjustmentsshouldbe checkedat least onceeach season. • Periodically checkall fastenersand makesuretheseare tight. Alwaysstopthe motorand disconnectfrom the powersourcebefore cleaning,lubricatingor performing any repairsor maintenanceon the lawnmower. -
Page 16: Blade Care
Replacing Trail Shield Neveroperatemowerunlessthe trail shieldisin placeand working. Neveroperatemowerwith damagedsafetydevices.Failureto do so can resultin personalinjury. Thetrail shieldis subjectto wearand damagewhichcouldexpose movingpartsor allowobjectsto be thrown.Forsafetyprotection, frequentlycheckthe trail shieldand replaceimmediately with original equipmentmanufacturer's (OEM)part only,931-05686. Toremovetrail shield,lift rear door and removescrewsholding trailshieldin place. Pressshieldin on eithersideto removefrom hole.See Figure14. - Page 17 G rind metalfrom the heavyside untilit balances evenly. Alwaysstopthe motorand unplug mowerbeforecleaning,lubricating or performingany repairsor maintenance on the lawn mower.Always wearsafety glassesduringoperation or whileperforming anyadjust- mentsor repairs. EachUse Mowerblades...
-
Page 18: Off-Season Storage
OFF-SEASON STORAGE Thefollowingstepsshouldbe takento prepareyourlawnmowerfor storage: • Cleanand lubricatemowerthoroughlyas describedin the lubrica- tion instructions. • Removeanybuildupof grass and leaveson or around themotor cover(do notuse water).Wipethe mowercleanwith a dry cloth. Wedo not recommend the use of a pressurewasheror garden hoseto cleanyourunit. Makecertain thepowersupplyis disconnected. -
Page 19: Need More Help
Alwaysstop the motorand unplugmowerbeforecleaning,lubricatingor performing any repairsor maintenance on the lawnmower.Alwayswear safetyglasses duringoperation or whileperforming anyadjustments or repairs. Motorfailsto start Corddisconnected from the motor/blade control. Motor/bladecontroldefective. Extensioncord notconnectedto the plug on the mower. Extensioncord notconnectedto a source of power. Overload protection switchonthe mower or circuitbreaker i n the housereceptacle tripped. - Page 20 19=inch Electric Rotary Mower B Model No. 247.370160...
- Page 21 Grass Bag 647-04107-0637 Grass BagFrame 68_02225-0637 Front BracketAssembly 938-0148 Screw,Shoulder,.50x .66 68_02228-0637 RearBracketAssembly 710-3025 Screw,5/16-18x .625 710-1242 Screw,5/16-14x .750 712-04063 Nut, FlangeLock,5/16-18 B Model No. 247.370160 712-04065 734-1988 734-1987 720-0230 712-0324 749-04353 925-04035 753-04430 74_04672 726-0368-0637 731-05186 731-05178 747-04663A 710-0572 720-04072A...
- Page 22 777S32911 777Dl1051 • TO REDUCE THE RISK OF ELECTRICSHOCK, DO NOT EXPOSE • REMOVEOBJECTSTHATCANBE THROWNBY THE BLADEIN UNIT TO WATER OR OPERATEUNIT ON WET GROUND. REPLACEDAMAGED CORD IMMEDIATELY. • DISCONNECT FROM SUPPLY CIRCUIT BEFORESERVICING OR REMOVING BLADE. • KEEP HANDS AND FEET AWAY FROM ROTATING PARTS. •...
- Page 23 Congratulations on makinga smartpurchase.YournewCraftsman® productis designedand manufactured foryears of dependableopera- tion. But likeall products,itmay requirerepairfrom time to time.That's whenhavinga RepairProtectionAgreement c an saveyou moneyand aggravation. Here'swhat the RepairProtectionAgreement*includes: Expert service by our 10,000professional r epairspecialists Unlimited service and no charge for partsand labor on all coveredrepairs Product replacement up to $1500if your coveredproductcan't be fixed...
- Page 24 Soluci6n de problemas ... Piezas de Reemplazo ... 20 (Manual ingles) NOmero de servicio ... Garantia de dos ahos de Craftsman Sears, Roebuck and Co., Hoffman Estates,IL 60179 N_rnerode rnodelo N_rnerode serie Fechade cornpra Registreel nQrnero de rnodelo,nQrnero de seriey fechade cornpra fuera de temporada ...
- Page 25 de instrucciones de seguridadirnportantesque La presencia de este sfrnboloindicaque se trata debe respetarpara evitarponer en riesgosu seguridadpersonaly/o materialy la de losdern_.s. Lea y siga todaslas instruccionesde este manualantes de poner en funcionarniento esta rn_.quina. Si no respetaestasinstrucciones puedeprovocarlesionespersonales.Cuandovea este sirnbolo, _JENTA LA ADVERTENCIA! Su responsabilidad: R estrinjael usode esta rn_.quina r notorizada...
- Page 26 • Nuncatire de la cortadorahaciasi rnientrascarnina.Si debe retrocedercon la cortadoraparaevitar una paredu obst_.culo, mireprirnerohaciaabajo y atr_.spara evitartropezarsey luego sigaestospasos: Ap_.rtese de la cortadorahasta estirarcornpletarnente los brazos. AsegOrese que est,. bienequilibradoy bien parado. Jalela cortadoralentarnente haciasi, no rn_.s de la rnitadde la distanciaentreustedy la cortadora.
- Page 27 Funcionamiento en pendientes Las pendientes son un factorirnportante q ue se relacionaconlos accidentesproducidospor derrapesy caidas y que puedenproducir lesionesgraves.La operaci6nen pendientesrequierernucha precauci6n.Si no se sienteseguroen una pendiente,no corte el cesped.Parasu seguridad,useel indicador de pendientesque se incluye cornoparte de este manualpara rnedirla pendienteantesde operarla rn&quina en una zonainclinada.
- Page 28 Esta p_.gina representa y describela seguridadlos sirnbolosque puedenpareceren este producto.Lea,cornprenda, y sigatodas instrucciones en la rn_.quina antesprocurarpara reuniry operar. ® LEA EL MANUAL(S) Lea,cornprenda, y siga todasinstruccionesen el manual(rnanuales) a ntes procurarpara reuniry operar. PELIGRO m GIRANDO Parareducirel riesgode herida,guarde rnanosy pieslejos. Nofuncionea rnenosque la tapade des- cargao el receptorde hierbaest_n en su lugarapropiado.De serda_ado,sustituyainrnediatarnente.
- Page 29 Use esta p_.gina comoguia para determinarlas inclinaciones de las pendientes en las que podria no teneruna operaci6nsegura.Noopere la podadoraen dichas pendientes. La presenciade este simboloindicaque se tratade instruccionesimportantes de seguridadque se debenrespetarparaevitar poneren peligrosu seguridadpersonaly/o materialy la de otras personas.Leay sigatodas las instrucciones de este manual antes de poner en funcionamiento esta m_.quina.
- Page 30 • TO REDUCE THE RISK OF ELECTRIC SHOCK, DO NOT EXPOSE UNIT TO WATER OR OPERATE UNIT ON WET GROUND. REPLACE DAMAGED CORD IMMEDIATELY. • DISCONNECT FROM SUPPLY CIRCUIT BEFORE SERVICING REMOVING BLADE. • KEEP HANDS FEET AWAY FROM ROTATING PARTS.
- Page 31 Esta pgtginase march6 intencionadamenteen blanco.
- Page 32 iVlANIJA Retireel materialde empaqueque pudieraestar entrelas manijas superiore inferior. Aflojecadaperillade manoque se encuentraen el lado internode la manijasuperior. Levantecon cuidadoy gire la manijasuperiora la posici6n de funcionamiento como semuestraen la Figura1. Figura1 Retirelas perillasen estreilade los soportesde montaje de la manijay sujetela manijainferiora los soportesde la manijacolocandoel orificio inferiorde la manijainferioren los pasadores de los soportes.
- Page 33 Para p asar correctarnente elprolongador atraves del r etenedor cable: A aproxirnadarnente 14-16pulgadasdel extrerno,done el prolongadorparaforrnarun lazoajustado. Ernpujeel lazoa travesdel orificioinferiordel retenedordel cable. Vea la Figura4a. Coloqueel lazosobreel brocheque hayen el retenedordel cable y estire haciaabajohasta que el cable calcec6rnodarnente en el broche.Veala Figura4b.
- Page 34 Siga los pasossiguientesparaarmarel colectorde cesped: Levantela puertade descargatrasera. Quitela tolvade abonoposterior. Coloqueel colectorde cesped sobrela varillade pivote. Sueltela puertade descargade modoque descansesobre el colectorde c_sped.Veala Figura6. Figura6 Para sacarel colectorde c_sped,levantela puertatraserade descargade la cortadorade c_sped.Levanteel colectorde cesped, sac_.ndolo de la varillade pivote.Sueltela puertade descargatrasera para permitirque la mismacierrela aberturaposteriorde la cortadora.
- Page 35 MANIJA DE CONTROL DEL iVIOTOR/LA CUCHILLA La rnanijade control del rnotor/lacuchiNa est,. ubicadaen la rnanija superiorde la cortadorade c_sped.Vea la Figura9. La rnanijade controldel rnotor/lacuchillaenganchay desengancha el motory la cuchilla. La rnanijade controldel rnotor/lacuchillaes un dispositivode seguridad.Nuncaintenteanularsu funcionarniento. INTERRUPTOR DE PROTECCION SOBRECARGA La cortadoratieneun interruptor de protecci6nde sobrecargaubicado en el controldel rnotor/lacuchilla.El interruptor de protecci6nde so-...
- Page 36 Arranquedei motor Evitearranquesaccidentales. A seg_resede estaren la posici6ndel operadordetr_.s de la cortadorarnientrasla usa. Paraevitar lesiones graves,tantoel operadorcornola unidaddebenestar en posici6n estableduranteel encendido. Conexi6n a una fuente de alimentaci6n Esta cortadorase debe utilizaren un circuitode 15 6 20 AMP.Si tienedificultadpara arrancarcon un fusibleo disyuntorde 15AMP, p6ngaseen contactocon Searso el centrode servicioautorizado rn_.s cercano.No utiliceun fusible o disyuntorcon mayorpotencia nominalsin consultarantescon su cornpaSia el_ctrica.
- Page 37 Apagadodei motor La cuchillacontinuagirandopor unoscuantossegundos despu_s que el motorse ha apagado.Si el motorno se defienecuandose sueltala manijade controldel motor/lacucNla, p6ngaseen contacto [con e d str bu dor de servc o autorzadom&scercano. Sueltela manijade controldel motor/lacuchillapara detenerel motor y la cuchilla. Uso de la cortadora de c_sped AsegOrese que el c_spedest,.
- Page 38 RECOMENDACIONES GENERALES Siempreque realicetareas de mantenimiento debe respetarlas reglasde seguridad, La garanfiade estacortadorano cubreelementos que han estado sujetosal realusoo la negligencia del operador.Pararecibirel reembolso totalde la garantia,el operador deber&mantener la cortadora como seindicaen estemanual, • Todoslosajustesdebenser verificadospor Io menosuna vez por temporada.
- Page 39 Si la protecci6ncontrasobrecargasalta pocodespu_sde restablecer: Sueltela manijade controldel motor/lacuchillay NOvuelvaa arrancarla cortadoraduranteal menos 15minutos,dando mAs tiempoal motorel@tricopara que se enfrie. Oprimael interruptorde protecci6ncontrasobrecargapara restablecer. Vuelvaa arrancarla unidad. NOTA:Si el interruptor de protecci6ncontra sobrecarga sara repetidamente duranteel funcionamiento, o si no se mantiene cuandose intentarestablecer, p 6ngaseen contactoconsu centro de servicioautorizadoparaacordaruna reparaci6n.
- Page 40 Afilado de Hoja Paraafinarcorrectarnente el corte de las hojas,quitarla igualdad de cantidadesde metalde arnbosextrernosde las hojasa Io largode los hordesde corte, paraleloal horde,en un 25 oa 30 ode _.ngulo. V ea la Figura16. Figura16 NOTA:Afilandola cuchilla,sigael _.ngulo originalde rnueleny rnuelen cadafilo igualrnente para guardarla cuchillaequilibrada.Equilibrela cuchillaen un destornillador de eje redondo.Quiteel metaldel lado pesadohastaque esto equilibreregularrnente.
- Page 41 PREPARACION DE LA CORTADORA CO'SPED Se deben seguirestospasos paraprepararla cortadorapara almacenarla, • Limpiey lubriquela cortadoracomo sedescribeen las instruc- clonesde lubricaci6n. • No utiliceuna lavadoraa presi6no manguerade jardinpara limpiarsu unidad. • Hagaseguroel suministrode energiaes desconectado. • Cubrala cuchillade la cortadoracon grasaparachasispara irnpedirque se oxide.
- Page 42 Siernpreapagueel motor,lubricaro realizarcualquierreparaci6n o tareade rnantenirniento en la cortadorade c_sped.Utilicesiernpreanteojos de seguridaddurantela operaci6no rnientrasrealizaajusteso reparaciones. La cortadorano arranca Cabledesconectadodel controldel motor/ la cuchilla. Controldel rnotor/lacuchilladefectuoso. Prolongador no conectadoal enchufede la cortadora. Prolongador no conectadoa una fuentede alirnentaci6n. El interruptorde protecci6nde sobrecarga de la cortadorao el disyuntordel tornacor- rientede la casa se desconect6.
- Page 43 Felicitacionespor haberrealizadouna adquisici6ninteligente.El productoCraftsman@ que ha adquiridoest&diseSadoy fabricado para brindarrnuchosaSosde funcionarniento confiable.Perocorno todos losproductosa vecespuederequerirde reparaciones. E sen ese rnornento cuandoel disponerde un Acuerdode protecci6npara reparaciones le puedeahorrardineroy problernas. A continuaci6nsedetallanlos puntosincluidosen el Acuerdo: * Servicio experto prestadopor nuestros10,000especialistasen reparaciones profesionales * Servicio ilirnitado sin cargopara las piezasy la rnanode obra en todas las reparaciones cubiertas * Reernplazodel producto hasta 1500d61ares si no es posible...
- Page 44 For expert troubleshooting For repair - in your home - of all major brand appliances, lawn and garden equipment, no matter who made it, no matter who sold it! For the replacement owner's manuals that you need to do-it-yourself. For Sears professional and items like garage door openers and water heaters.
Need help?
Do you have a question about the 247.370160 and is the answer not in the manual?
Questions and answers