Advertisement
Quick Links
Issue 1 September 2020
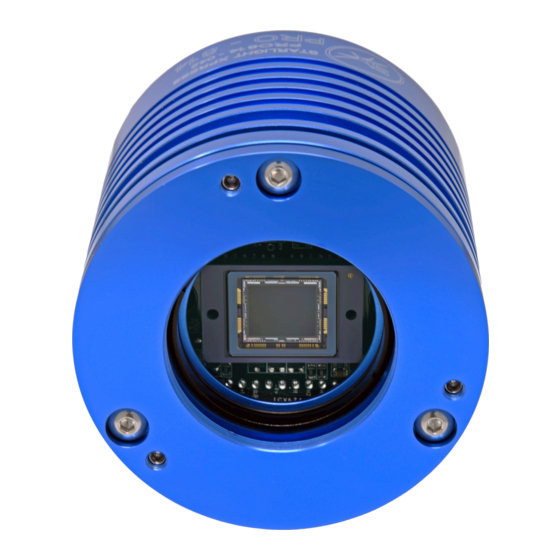
Handbook for the TRIUS PRO 814
Manual for the TRIUS PRO 814 mono CCD
camera
Thank you for purchasing a Starlight Xpress 'TRIUS PRO 814' camera. We hope that you
will be very pleased with the performance of this product. Please register your product
and warranty at
https://forms.gle/tmsHEJfQG2bLJjr57
.
The TRIUS-PRO 814 is an advanced, high resolution, cooled CCD camera, especially
designed for astronomical imaging. It uses a third generation version of the very
popular Sony 'EXview' CCDs that offer very high QE and extremely low thermal noise.
This 'PRO' camera uses an updated version of the original TRIUS main board and has
both improved read noise and faster download time. It features an internal USB hub
with 3 external ports and a dry argon CCD chamber fill. The USB hub permits several
other devices to share the single USB connection and greatly reduces the number of
cables required in a typical set-up. For example, a Lodestar PRO or Ultrastar PRO
guide camera and an SX filter wheel could use two of the USB ports and the third
might connect to an electric focuser, or similar peripheral. The argon fill, along with
other improvements to the cooler stack, has improved the delta T to about -42
degrees C below ambient. The camera also includes a CCD temperature monitoring
circuit that provides regulated set-point cooling of the chip, an adjustable chip
alignment plate and a very compact overall size.
1
Advertisement

Subscribe to Our Youtube Channel
Related Manuals for Starlight Xpress TRIUS PRO 814


Summary of Contents for Starlight Xpress TRIUS PRO 814
- Page 1 Manual for the TRIUS PRO 814 mono CCD camera Thank you for purchasing a Starlight Xpress ‘TRIUS PRO 814’ camera. We hope that you will be very pleased with the performance of this product. Please register your product and warranty at https://forms.gle/tmsHEJfQG2bLJjr57...
- Page 2 Issue 1 September 2020 Handbook for the TRIUS PRO 814 The TRIUS-PRO 814 uses a Sony ICX815AL ‘EXview’ progressive scan CCD, with 3388 x 2712 x 3.69uM pixels in a 12.5 x 10mm active area. This EXview device has an...
- Page 3 Handbook for the TRIUS PRO 814 Issue 1 September 2020 ‘Quick Starting’ your TRIUS-PRO system In the shipping container you will find the following items: 1) The TRIUS-PRO 814 camera head. 2) A universal AC power supply module. 3) A 3 metre USB camera cable.
- Page 4 Now connect the USB cable to the socket on the camera rear panel. Windows will report ‘Found new hardware’ and will automatically find the drivers. You can check this by opening ‘Device Manager’ and looking for a ‘Starlight Xpress CCD’ in the USB Devices list.
- Page 5 Handbook for the TRIUS PRO 814 Issue 1 September 2020 Now connect up the power supply and switch it on. The supply is a very efficient ‘switch mode’ unit, which can operate from either 110v or 220v AC, via an appropriate mains power cable (supplied).
- Page 6 Handbook for the TRIUS PRO 814 Issue 1 September 2020 Recording your first image: We now have the camera and computer set up to take pictures, but an optical system is needed to project an image onto the CCD surface. You could use your telescope, but this introduces additional complications, which are best avoided at this early stage.
- Page 7 Issue 1 September 2020 Handbook for the TRIUS PRO 814 If you use a normal lens, then stop it down to the smallest aperture number possible, (usually F22), as this will minimise focus problems and keep the light level reasonable for daytime testing. The pin hole needs no such adjustments and will...
- Page 8 Handbook for the TRIUS PRO 814 Issue 1 September 2020 After the exposure and download have completed (about 4 seconds) an image of some kind will appear on the computer monitor. It will probably be poorly focused and incorrectly exposed, but any sort of image is good. In the case of the pinhole, all...
- Page 9 Handbook for the TRIUS PRO 814 Issue 1 September 2020 ********************************************************************* Astronomical Imaging with the TRIUS-PRO 1) Getting the image onto the CCD: It is fairly easy to find the correct focus setting for the camera when using a standard...
- Page 10 Issue 1 September 2020 Handbook for the TRIUS PRO 814 It is necessary to set up a good optical match between your camera and the telescope. Most SCTs have a focal ratio of around F10, which is too high for most...
- Page 11 Issue 1 September 2020 Handbook for the TRIUS PRO 814 positioned anywhere in the camera field. To use this mode, start up the software and select the Exposure mode. Set the camera mode to Binned 1x1 and select an exposure time of 1 second. Press ‘Start Exposure’ and wait for the image to download.
- Page 12 Issue 1 September 2020 Handbook for the TRIUS PRO 814 different from those used in other brands of camera and generates an extremely low level of dark noise. Indeed, it is so low that subtracting a dark frame can actually INCREASE the noise in your images! This is because the statistical readout noise of the dark frame can exceed the ‘pattern noise’...
- Page 13 Handbook for the TRIUS PRO 814 Issue 1 September 2020 Processing a deep-sky image: Further small refinements are usually possible and you will become expert at judging the best way to achieve these as your experience increases. As a rough guide, software filters can be used to sharpen, soften or noise reduce the image.
- Page 14 Issue 1 September 2020 Handbook for the TRIUS PRO 814 Although the star will also suffer from blurring, the eye can more easily gauge when the most compact blur has been achieved! You could begin by imaging lunar craters, or the planets, Jupiter, Saturn or Mars. The...
- Page 15 Handbook for the TRIUS PRO 814 Issue 1 September 2020 more sophisticated software can automatically align planetary images and you may find these programs (e.g. ‘Registax’) to be very useful. ********************************************************************* Taking and using a flat field: Flat fields are images that display only the variations of illumination and sensitivity of the CCD and are used to mathematically modify a wanted image in such a way that the errors are removed.
- Page 16 Handbook for the TRIUS PRO 814 Issue 1 September 2020 Most imaging sessions begin or end in twilight and so the dusk or dawn sky can provide a distributed source of light for a flat field. However, using the sky directly is likely to result in recording many unwanted stars, or patches of cloud etc., so a...
- Page 17 Issue 1 September 2020 Handbook for the TRIUS PRO 814 CCD alignment: The front plate of the TRIUS-PRO is attached via three tip-tilt screws and locking screws. It floats on a 2.5mm thick nitrile rubber ring, which provides a light-tight seal and a degree of ‘spring action’...
- Page 18 Handbook for the TRIUS PRO 814 Issue 1 September 2020 Accessing the CCD faceplate: 1) Disconnect the leads from the camera head and remove it from the telescope. Place it on a table with the optical window facing upward. 2) Examine the window retaining ring, which is screwed into the barrel and compresses a nitrile rubber O ring under the window.
- Page 19 Handbook for the TRIUS PRO 814 Issue 1 September 2020 The ports are sealed by M4 stainless set-screws and soft plugs, which may be removed to provide access to the chamber gas fill. You will need to make some kind of nozzle to fit the gas ports, but simply tapering the end of the standard 4 mm plastic gas tubing that is used with small welding bottles, will probably be sufficient.
- Page 20 Issue 1 September 2020 Handbook for the TRIUS PRO 814 Some details of the camera and CCD characteristics The TRIUS-PRO 834 uses a Sony ICX815ALG ‘EXview’ progressive scan CCD, with 3388 x 2712 x 3.69uM pixels in a 12.5 x 10mm active area. This EXview device has the...
-
Page 21: Conditions Of Guarantee
Handbook for the TRIUS PRO 814 Dear Observer, Thank you for purchasing a Starlight Xpress CCD Imaging System. We are confident that you will gain much satisfaction from this equipment, but please read carefully the accompanying instruction manual to ensure that you achieve the best performance that is capable of providing.
Need help?
Do you have a question about the TRIUS PRO 814 and is the answer not in the manual?
Questions and answers