
Related Manuals for Samsung SMH7195WC


Summary of Contents for Samsung SMH7195WC
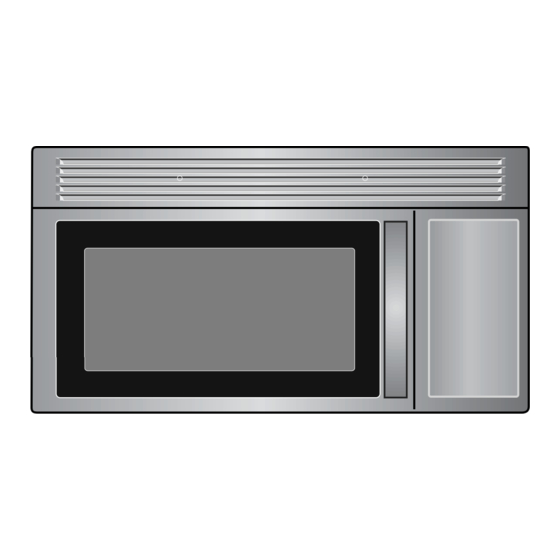
- Page 1 Microwave Oven Owner’s Manual SMH7175WC / BC / CC SMH7195WC / BC / CC Code No. : DE68-00356D...
-
Page 2: Safety
Never try to repair the oven on your own – there is examination, repair, or adjustment. dangerous voltage inside. If the oven needs to be repaired, call 1-800-SAMSUNG for the name of an authorized service • Do not cover or block any of the openings on this appliance. center near you. - Page 3 Safety Important Safety Instructions, continued • Do not mount over a sink. • Do not store anything directly on top of the appliance when it is in • Do not store this appliance outdoors. Do not use near water – for operation.
- Page 4 Safety THE VENT FAN MPORTANT ROUNDING NSTRUCTIONS The fan will operate automatically under certain conditions (see page 15).Take care to prevent the starting and spreading of This appliance must be grounded. In the event of an electrical accidental cooking fires while the vent fan is in use. short circuit, grounding reduces the risk of electric shock by •...
-
Page 5: Table Of Contents
Contents Your New Microwave oven Checking Parts Safety ......................2 Contents ....................5 Your New Microwave oven ..............5 Unpack your microwave oven and check to make sure that you have all Checking Parts ......................5 the parts shown here. If any part is missing or broken, call your dealer. Warranty and Service Information ................6 Setting Up Your Microwave Oven................6 Control Panel Buttons .....................7... -
Page 6: Warranty And Service Information
Place the glass tray securely in the center of the pre-assembled vice Center. If you should require warranty service, provide the above roller guide. information with a copy of your sales receipt to the Samsung Authorized Service Center. For service assistance and the location of the nearest service center, please call 1-800-SAMSUNG (1-800-726-7864), or go on-line to WWW.SAMSUNGSUPPORT.COM... -
Page 7: Control Panel Buttons
Your New Microwave oven Control Panel Buttons Sensor Reheat p.11 Auto Defrost p.12 Sets weight of food to be defrosted. Sensor Cook Buttons p.11 Sensor settings to cook popular foods. Handy Helper, Kids Meal, Snack Bar p.12 Selects type of dish to be reheated. More/Less p.14 Increase or decrease cooking time. -
Page 8: Operation
Operation Turning on the Power and Selecting a Using the My Choice feature Display Language Your new microwave oven can be customized to suit your personal tastes. Simply press My Choice to set these options. For your conve- The first time you plug the power cord into an outlet, or after there has nience, all the options are summarized in the following table: been an interruption in power, the display shows after four seconds “ENJOY YOUR COOKING -- -- -- PRESS MY CHOICE FOR PER-... -
Page 9: Selecting The Display Weight
Operation Selecting the Display Weight Setting the Clock AM/PM You can choose between pounds(LBS) and kilograms(KG). Press the Clock button. The display will show: SELECT AM/PM Press My Choice button and then press the 2 button. The display shows : LBS OR KG PRESS MY CHOICE. To select AM or PM, press the Clock button. -
Page 10: Setting And Using The Custom Cook Button
Operation Setting and Using the Custom Cook Using the Pause/Cancel Button Button The Pause/Cancel button allows you to clear instructions you have entered. It also allows you to pause the oven’s cooking cycle, so that The Custom Cook button memorizes the time and power setting for a you can check the food. -
Page 11: Using The Sensor Cook Buttons
Operation Using the Sensor Cook Buttons Using the Sensor Reheat Button By actually sensing the steam that escapes as food heat, this feature Heating leftovers and precooked foods is easy with your new micro- automatically adjusts the oven’s heating time for various types and wave. -
Page 12: Using The Auto Defrosting Button
Operation Using the Auto Defrosting Button Using the Handy Helper Button To thaw frozen food, set the weight of the food and the microwave auto- Press the Handy Helper button corresponding to the food you are matically sets the defrosting time, power level and standing time. cooking. -
Page 13: Using The Kids Meal Button
Operation Using the Kids Meal Button Using the Snack Bar Button Press the Kids Meal button corresponding to the food you are Press the Snack Bar button corresponding to the food you are cooking. cooking. The display shows : CHICKEN NUGGETS. The display shows : NACHOS. -
Page 14: Setting Cooking Times & Power Levels
Operation Setting Cooking Times & Power Levels Multi-stage Cooking Follow steps 1 and 2 in the “One-Stage Cooking” section on the Your microwave allows you to set up to three different stages of cooking, previous page. each with its own time length and power level. The power level lets you control the heating intensity from Warm (1) to High (0). -
Page 15: Turning The Turntable On/Off
Operation Turning the Turntable On/Off Turning the Vent Fan Turbo/Hi/Low/Off For best cooking results, leave the turntable on. The vent fan removes steam and other vapors from surface cooking. It can be turned off for large dishes. Press Vent Fan Turbo/Hi/Low/Off button once for turbo fan speed, Press Turntable On/Off button to turn the turntable on or off. -
Page 16: How To Use The Shelf When Microwaving
Operation How to Use the Shelf When Shelf and Reheating Microwaving To reheat on 2 levels or to reheat 2 dishes on the lower level : Multiply reheat time by 1½. • Make sure the shelf is positioned properly inside the microwave to prevent damage to the oven from arcing. -
Page 17: Cooking Instructions
Cooking Instructions Cooking Utensils Not Recommended • Glass jars and bottles — Regular glass is too thin to be used in a Recommended Use microwave, and can shatter. • Glass and glass-ceramic bowls and dishes — Use for heating or •... -
Page 18: Cooking Techniques
Cooking Instructions Cooking Techniques General Tips Stirring • Dense foods, such as potatoes, take longer to heat than lighter Stir foods such as casseroles and vegetables while cooking to distribute foods. Foods with a delicate texture should be heated at a low power heat evenly. -
Page 19: Auto Sensor Cook
Cooking Instructions Auto Sensor Cook Important The Auto Sensor allows you to cook your food automatically by detect- • After installing the oven and plugging into an electrical outlet, do not ing the amount of gases generated from the food while cooking. unplug the power cord. - Page 20 Cooking Instructions Sensor Cooking Guide • Follow the instructions below when sensor cooking different types of Food Amount Procedure food. Chicken 8-32 oz.. Place chicken breasts on a microwave Food Amount Procedure breast safe plate and cover with wax paper. Cook to an internal temperature of 170 Popcorn 3.0 ~ 3.5 oz...
-
Page 21: Sensor Recipes
Cooking Instructions Sensor Reheat Guide Sensor Recipes • Follow the instructions below when sensor reheating different types of food. French Onion Soup (4 servings) 3 tablespoons butter or margarine Food Amount Procedure 3 cups ( about 3 medium ) sliced onions Plate of 1 serving Use only pre-cooked, refrigerated foods. - Page 22 Cooking Instructions Peas With Lettuce (4 servings) Vegetable Medley(4 to 6 servings) 2 cups fresh shelled green peas 1 1/2 cups broccoli flowerets, 3/4 to 1 inch in diameter 1/3 cup thinly sliced celery 1 1/2 cups cauliflower flowerets, 3/4 to 1 inch in diameter 2 tablespoons water 1 medium yellow squash, cut into 1/4 inch diagonal slices 3 cups shredded head lettuce...
-
Page 23: Cooking Guide
Cooking Instructions Cooking Guide Guide for Cooking Poultry in Your Microwave • Place poultry on a microwave-safe roasting rack in a microwave-safe Guide for Cooking Meat in Your Microwave dish. • Place meat on a microwave-safe roasting rack in a microwave-safe •... - Page 24 Cooking Instructions Guide for Cooking Seafood in Your Microwave Guide for Cooking Eggs in Your Microwave • Cook fish until it flakes easily with a fork. • Never cook eggs in the shell, and never warm hard-cooked eggs in the shell; they can explode. •...
- Page 25 Cooking Instructions Auto Defrosting Guide Notes: • Follow the instructions below when defrosting different types of food. Check foods when the oven signals. After the final stage, small sections may still be icy; let them stand to continue thawing. Do not defrost until Standard all ice crystals have thawed.
-
Page 26: Recipes
Cooking Instructions Recipes Broccoli and Cheese Casserole ¼ cup butter or margarine Beef and Barley Stew ¼ cup chopped onion 1½ lbs. beef stew cubes, cut into ½-inch pieces 1½ Tbs. flour ½ cup chopped onion ½ tsp. salt 2 Tbs. all-purpose flour ¼... - Page 27 Cooking Instructions Warm Potato Salad Black Bean Soup 2 lbs. small red potatoes, cut into ½-inch pieces 1 cup chopped onion 4 slices bacon (uncooked), cut into ½-inch pieces 1 clove garlic, minced ¼ cup chopped onion 2 cans (15 oz. each) black beans, drained 2 tsp.
-
Page 28: Appendix
Appendix Troubleshooting Guide Before you call a repair person for your oven, check this list of possible Using your microwave causes TV or radio interference. problems and solutions. • This is similar to the interference caused by other small appliances, Neither the oven’s display nor the oven operate. -
Page 29: How To Clean The Outside
Appendix How to Clean the Outside Light Bulb Replacement Do not use cleaners containing ammonia or alcohol on the microwave Cooktop Light oven. Ammonia or alcohol can damage the appearance of the micro- wave. Replace the burned-out bulb with a 40-watt incandescent bulb. Case 1. -
Page 30: Exhaust Feature
Appendix Exhaust Feature The Vent Fan Charcoal Filter The exhaust fan has 2 metal reusable grease filter. The charcoal filter cannot be cleaned. It must be replaced. A charcoal filter can be used for removing smoke and odors in case the If the oven is installed on the wall(or cabinet) and not vented to the out- fan is not vented outside. -
Page 31: Specifications
2 screws. Net/Gross Weight 58.4/64.4 lbs If you have a problem you cannot solve, please call our service line: Model Number SMH7195WC / BC / CC 1-800-SAMSUNG (1-800-726-7864) Oven Cavity 1.9cuft Controls 10 power levels, including defrost... -
Page 32: Warranty
SAMSUNG or SAMSUNG’s authorized service center. BY THE USE, MISUSE OR INABILITY TO USE THIS PRODUCT, SAMSUNG will repair or replace this product, at our option and at no REGARDLESS OF THE LEGAL THEORY ON WHICH THE CLAIM IS... -
Page 33: Guía Rápida
Guía Rápida Memo Función Operación Ajuste de Reloj 1. Presione CLOCK. 2. Para seleccionar AM o PM, presione CLOCK. 3. Use botones numéricos para seleccionar hora. 4. Presione CLOCK de nuevo. Cocinado Fase 1. Use botones numéricos para seleccionar tiempo. simple 2. -
Page 34: Quick Reference
Auto Defrost 1. Press AUTO DEFROST. 2. Enter weight of food by pressing AUTO DEFROST button repeatedly or using the SAMSUNG ELECTRONICS AMERICA, INC. number buttons. HEADQUARTERS 3. When the oven beeps, press PAUSE/CANCEL 105 CHALLENGER ROAD button and turn food over. Press START to resume defrosting cycle.
Need help?
Do you have a question about the SMH7195WC and is the answer not in the manual?
Questions and answers