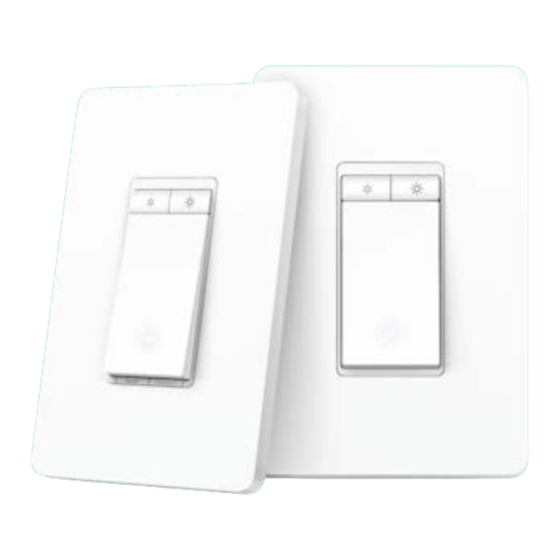
kasa HS210 KIT User Manual

kasa HS210 KIT User Manual

Smart wi-fi light switch, 3-way dimmer kit

Advertisement

Quick Links

User Manual of Product 1:
Kasa Smart 3-Way Light Switch Kit by TP-Link (HS210 KIT) -
Neutral Wire and 2.4GHz Wi-Fi Connection Required, Works
with Alexa and Google Home, No Hub Required, UL Certified,
2-Pack
User Manual of Product 2:
Kasa Smart In-Wall WiFi Outlet by TP-Link (KP200) - Neutral
Wire and 2.4GHz Wi-Fi Connection Required, Works with
Alexa, Echo and Google Home, No Hub Required, Remote
Control, UL Certified White

Advertisement

Table of Contents
loading

Summary of Contents for kasa HS210 KIT

  • Page 1 User Manual of Product 1: Kasa Smart 3-Way Light Switch Kit by TP-Link (HS210 KIT) - Neutral Wire and 2.4GHz Wi-Fi Connection Required, Works with Alexa and Google Home, No Hub Required, UL Certified, 2-Pack User Manual of Product 2: Kasa Smart In-Wall WiFi Outlet by TP-Link (KP200) - Neutral Wire and 2.4GHz Wi-Fi Connection Required, Works with...
  • Page 2 User Guide Kasa Smart Wi-Fi Light Switch, 3-Way Dimmer Kit KS230Kit © 2021 TP-Link 1910013033 REV1.0.0...
  • Page 3: Table Of Contents

    Contents About This Guide ···················································· 1 Create Groups ························································25 Introduction ······························································· 2 Create Scenes························································29 Appearance ······························································· 3 Smart Actions ·························································31 Set Up Your Smart 3-Way Dimmer Kit ········· 5 Voice Control & Third-Party Support ·········44 Main Device Controls ··········································· 6 Authentication ························································48 Adjust Brightness ···················································...
  • Page 4: About This Guide

    This guide provides a brief introduction to Smart 3-Way Dimmer Kit and the Kasa Smart app, as well as regulatory information. Features available in Kasa Smart may vary by model and software version. Kasa Smart and 3-Way Dimmer Kit availability may also vary by region. All images, steps, and descriptions in this guide are only examples and may not reflect your actual Kasa Smart experience.
  • Page 5: Introduction

    Introduction With the Smart 3-Way Dimmer Kit, you can control the ambiance of any space with the push of a button. Download the Kasa Smart app and control your dimmer remotely. The Kasa Smart app provides easy step-by-step installation instructions and convenient remote control from anywhere.
  • Page 6: Appearance

    Appearance The Smart 3-Way Dimmer Kit is compatible with incandescent, LED, Halogen, and compact fluorescent light bulbs. It includes a main dimmer and a satellite dimmer. See below for the main dimmer and check the next page for the satellite dimmer. Press to decrease the lighting brightness.
  • Page 7 Press to decrease the lighting brightness. Press to increase the lighting brightness. On/Off Button Status LED Always on. It shows the Smart Dimmer location in the dark. Satellite Dimmer...
  • Page 8: Set Up Your Smart 3-Way Dimmer Kit

    Open the app. Use your TP-Link ID to log in. Tap the button in the app. Follow the app the QR code below to download the Kasa instructions to wire your Smart 3-Way Dimmer If you don’t have a TP-Link ID, tap...
  • Page 9: Main Device Controls

    Main Device Controls After you successfully set up your Smart 3-Way Dimmer Kit, you will see the home page of the Kasa Smart app. Here you can view and manage all devices that you've added to Kasa. Tap your 3-way dimmer to control and manage it.
  • Page 10: Adjust Brightness

    Adjust Brightness Adjust the brightness of your light from 1% to 100% to have the perfect atmosphere for any activities. Go to the status page and tap the Brightness tab. Your light will change brightness to the value you set.
  • Page 11: Set Preset Brightness

    Set Preset Brightness Set preset brightness levels so you can switch to the desired brightness with just one tap. You can set up to 4 preset brightness levels. Method 1- In the Status Page 1. Go to the status page and tap the Brightness tab.
  • Page 12 Method 2- Through the Presets Tab 1. Go to the status page and tap the Presets tab. 2. Change the preset brightness. beside a Preset to customize its brightness. Or tap Gentle Off to fade your light off slowly when you turn off light..
  • Page 13: Set Schedules

    Set Schedules Schedule: Set schedules to automatically turn on/off the light at set times according to your daily routine. 1. Tap your 3-way dimmer in the Home 2. Tap + on the top right corner. 3. Choose an action for your light to do, for example, simply turn on/off at certain time, page, and then tap or turn on at a preset brightness.
  • Page 14 4. Set fade rate, i.e., how long you would like your light to fade in or fade out after 5. Select the time and repeating frequency at which your schedule starts. you want your schedule to run.
  • Page 15 6. The schedule you have created is listed in the Schedule Page. Now your light will be turned on to 80% brightness at 7:30 AM every weekday. You can add more schedules following the same steps.
  • Page 16: Set Timer

    Set Timer Timer: Set the timer for your light to automatically turn on/off after the time ends. 1. Tap your 3-way dimmer in the Home 2. Set the time after which the light will be 2. Tap START and you'll see the timer is automatically turned on/off.
  • Page 17: Set Away Mode

    Set Away Mode Away Mode: Set Away Mode for your light to turn on/off automatically at random intervals while you are away to make the appearance that someone is at home. 1. Tap your 3-way dimmer in the Home 2. Set the start and end time during which the light will be automatically turned on and off at random intervals, and the repeating frequency.
  • Page 18: Manage Device Settings

    Manage Device Settings You can change the settings in the Device Settings page. Tap your 3-way dimmer in the Home page and then tap to enter the Device Settings page.
  • Page 19 Change Device Name & Icon Change the name and icon of the 3-way dimmer.
  • Page 20 Customize Smart Dimmer Configuration Settings Set how fast you want your light to turn on/off and the effects you want your light to show when you long press your 3-way dimmer.
  • Page 21 Turn On/Off LED The LED is an indicator of the dimmer's position at night. When turned off, it won't illuminate when light fixture is off. Note: The only controls the on and off of the main dimmer switch LED.
  • Page 22 Check Feature Tutorial Check the main advanced features of your 3-way dimmer.
  • Page 24 Dimming Calibration Calibrate your light to avoid flickering. Test the dimming range of your 3-way dimmer by slowly reducing the brightness of your light until you find the minimum level of brightness.
  • Page 25: Reset Your Smart 3-Way Dimmer Kit

    There are three methods to reset your Smart 3-Way Dimmer. Method 1 Swipe left your Smart 3-Way Dimmer and tap Delete. Then tap Remove Device. Your Smart 3-Way Dimmer will be removed from your Kasa account and restored to factory settings.
  • Page 26 Method 2 Tap your Smart 3-Way Dimmer and go to the Devices Settings page. Then tap Remove Device in the bottom. Your Smart 3-Way Dimmer Switch will be removed from your Kasa account and restored to factory settings.
  • Page 27 Method 3 Press and hold the Reset button on the panel of the main dimmer switch for 10s to restore your it to factory default settings. Press and hold the Reset button on the panel of the main dimmer switch for 5s to reset Wi-Fi while keeping previous settings. Reset...
  • Page 28: Create Groups

    Create Groups With groups, you can control multiple devices simultaneously. This page allows you to add your Smart 3-Way Dimmer and your other Kasa smart devices to a group for unified management. 1. Create groups 2. Select your Smart 3-Way Dimmer and other 3.
  • Page 29 4. The created group is listed in the Home page. You can tap to turn on or off the devices together in the group.
  • Page 30 2. Manage the group 1. Tap the group you want to manage. 2. Turn on or off the Group in the status 3. Tap Brightness to adjust the brightness of page. your 3-way dimmer.
  • Page 31 5. Tap Remove Group if you want to remove the 4. Tap in the top right corner to enter the settings page. You can change the group group from your device list. Then double confirm it. name or devices in the group as you like. All devices in the group will remain accessible on the device list.
  • Page 32: Create Scenes

    3. Select devices for the scene to work on and 1. Tap at the bottom, then tap + at the set their status respectively. top right corner. E.g. Turn on 3-way dimmer and turn off study room lamp plugged in a Kasa smart plug with a tap.
  • Page 33 4. Pick an icon for your scene. 5. Name your scene. 6. Your scene is created successfully. Just tap the scene to activate it.
  • Page 34: Smart Actions

    Smart Actions Smart Actions is a function provided that enables device interconnections and home automations. With Smart Actions, your Kasa devices can work together to create a smarter smart home. From the moment you wake up to the moment you drift asleep, Smart Actions make your home safer and more comfortable.
  • Page 35 1. Configure Motion Sensing If you already have a Kasa Smart Camera E.g. When my Kasa camera senses a motion, the light will be turned on. 1. Tap Motion Sensing. 2. Select your Kasa smart camera.
  • Page 36 3. Add your 3-way dimmer.
  • Page 37 4. Set the time when you want the action to run. You can choose Always or tap Custom to choose time according to your needs. E.g. I want the motion to trigger the light on from 18:00 to 7:00 of next day every day.
  • Page 38 5. (Optional) Set an auto-off timer then tap Complete. Then your light will be turned off after the time you set.
  • Page 39 6. Name the action. 7. The Smart Action is created successfully and displayed in the Smart Actions list.
  • Page 40 2. Configure Control With a Switch If you already have other Kasa smart devices E.g. When I turn on/off my 3-way dimmer, also turn on/off the air conditioner (plugged in my Kasa smart plug). 1. Tap Control With a Switch.
  • Page 41 3. Name your action for easy identification. 4. Now Your Smart Action is created successfully and is displayed in the smart actions list.
  • Page 42 3. Configure Schedule a Scene E.g. I want to turn on automatically the scene I have created at scheduled time. 1. Tap Schedule a Scene. 2. Select a scene that you have created.
  • Page 43 3. Set the time and frequency at which you 4. Name your action. 4. The Smart Action is created successfully and want your scene to be activated. displayed in the Smart Actions list.
  • Page 44 4. Configure Auto-Off Timer E.g. I want to turn off my Kasa Smart 3-Way Dimmer after 3 minutes whenever it turns on. 1. Tap Auto-Off Timer. 2. Select your 3-way dimmer.
  • Page 45 3. Set the time after which your dimmer switch will be off. 4. Tap COMPLETE.
  • Page 46 5. Name your action for easy identification. 6. The Smart Action is created successfully.
  • Page 47: Voice Control & Third-Party Support

    Use the Kasa Smart app to pair your Smart 3-Way Dimmer Kit with Amazon Alexa or Google Home Assistant, and enjoy a full hands-free experience. Kasa helps manage the rest of your smart home too, working with Samsung SmartThings to trigger changes when you arrive home or leave for the day.
  • Page 48 1. Set up Amazon Alexa 1. Tap Amazon Alexa. 2. Tap Connect. 3. Sign in with your amazon account.
  • Page 49 3. After sign-in, tap LINK. 4. Your TP-Link ID has been successfully linked with your amazon account. You can use Alexa voice commands to control your 3-way dimmer switch.
  • Page 50 2. Set up Google Assistant 1. Tap Google Assistant. 2. Follow instructions to conenct your device to your Google Home. Or find the FAQ at https://www.tp-link.com/en/support/faq/1534/.
  • Page 51: Authentication

    Authentication FCC compliance information statement Product Name: Kasa Smart Wi-Fi Light Switch, 3-Way Dimmer Kit Model Number: KS230 KIT Responsible party: TP-Link USA Corporation Address: 10 Mauchly, Irvine, CA 92618 Website: https://www.tp-link.com/us/ Tel: +1 626 333 0234 Fax: +1 909 527 6804 E-mail: sales.usa@tp-link.com...
  • Page 52 2. This device must accept any interference received, including interference that may cause undesired operation. Any changes or modifications not expressly approved by the party responsible for compliance could void the user’s authority to operate the equipment. Note: The manufacturer is not responsible for any radio or TV interference caused by unauthorized modifications to this equipment. Such modifications could void the user’s authority to operate the equipment.
  • Page 53 Canadian Compliance Statement This device complies with Industry Canada license-exempt RSSs. Operation is subject to the following two conditions: 1. This device may not cause interference, and 2. This device must accept any interference, including interference that may cause undesired operation of the device. Le présent appareil est conforme aux CNR d’Industrie Canada applicables aux appareils radio exempts de licence.
  • Page 54 • 清潔本產品之前請先拔掉電源線。請勿使用液體、噴霧清潔劑或濕布進行清潔。 • 注意防潮,請勿將水或其他液體潑灑到本產品上。 • 插槽與開口供通風使用,以確保本產品的操作可靠並防止過熱,請勿堵塞或覆蓋開口。 • 請勿將本產品置放於靠近熱源的地方。除非有正常的通風,否則不可放在密閉位置中。 • 不要私自拆開機殼或自行維修,如產品有故障請與原廠或代理商聯繫。 限用物質含有情況標示聲明書 設備名稱: 型號(型式): Equipment name Type designation (Type) Kasa Smart Wi-Fi Light Switch, 3-Way Dimmer Kit KS230Kit 限用物質及其化學符號 Restricted substances and its chemical symbols 單元 六價鉻 多溴聯苯 多溴二苯醚 鉛 汞...
  • Page 55 Safety Information • Keep the device away from water, fire, humidity or hot environments. • Do not attempt to disassemble, repair, or modify the device. • Do not use the device where wireless devices are not allowed. • Alert to service person CAUTION DOUBLE POLE / NEUTRAL FUSING Please read and follow the above safety information when operating the device.
  • Page 56 Explanation of the symbols on the product label Symbol Explanation Indoor use only RECYCLING This product bears the selective sorting symbol for Waste electrical and electronic equipment (WEEE). This means that this product must be handled pursuant to European directive 2012/19/EU in order to be recycled or dismantled to minimize its impact on the environment. User has the choice to give his product to a competent recycling organization or to the retailer when he buys a new electrical or electronic equipment.
  • Page 57 Instruction Manual Guide D’utilisation Manual de instrucciones DWE46152 5" (125 mm) Concrete Surface Grinding Shroud 5" (125 mm) Carter d'aspiration pour meuleuses de finition du béton 5" (125 mm) Cubierta protectora para esmerilado de superficies de concreto If you have questions or comments, contact us. Pour toute question ou tout commentaire, nous contacter.
  • Page 58 English English (original instructions) Français (traduction de la notice d’instructions originale) Español (traducido de las instrucciones originales)
  • Page 59 English Definitions: Safety Alert Symbols and Words This instruction manual uses the following safety alert symbols and words to alert you to hazardous situations and your risk of personal injury or property damage. DANGER: Indicates an imminently hazardous situation which, if not avoided, will result in death or serious injury. WARNING: Indicates a potentially hazardous situation which, if not avoided, could result in death or serious injury.
  • Page 60 English GENERAL POWER TOOL SAFETY WARNINGS b ) Use personal protective equipment. Always wear eye protection. Protective equipment such as dust WARNING! Read all safety warnings and all mask, non-skid safety shoes, hard hat, or hearing instructions. Failure to follow the warnings and protection used for appropriate conditions will reduce instructions may result in electric shock, fire and/or personal injuries.
  • Page 61 English f ) Keep cutting tools sharp and clean. Properly Never start the tool with a person in line with the wheel. maintained cutting tools with sharp cutting edges are This includes the operator. less likely to bind and are easier to control. •...
  • Page 62 English • lead from lead-based paints, DO nOT use under wet conditions or in presence of flammable liquids or gases. • crystalline silica from bricks and cement and other masonry products, and The surface grinding shroud is a professional tool. DO nOT let children come into contact with the tool.
  • Page 63 English For optimal positioning, the diamond wheel should 3. Lock the DWV9000 connector  12  to secure. ride above the brushes 1/8" (3.18 mm). If diamond Fig. D wheel rides inside the shroud or stands taller than 1/4" (6.35 mm) the shroud will not work properly. NOTICE: If surface grinding shroud cannot be tightened by the clamp adjusting screw, do not use the tool and take the tool and surface grinding shroud...
  • Page 64 English 5. When surface grinding is complete, turn the tool off and Replacement brush skirts are available at extra cost from disconnect from the power source. Allow the tool to your local dealer or authorized service center. If you need stop rotating before laying it down.
  • Page 65 English Three Year Limited Warranty WALT will repair, without charge, any defects due to faulty materials or workmanship for three years from the date of purchase. This warranty does not cover part failure due to normal wear or tool abuse. For further detail of warranty coverage and warranty repair information, visit www.dewalt.com or call 1-800-4-D WALT (1-800-433-9258).
  • Page 66 FRAnçAis Définitions : symboles et termes d'alarmes sécurité Ces guides d'utilisation utilisent les symboles et termes d'alarmes sécurité suivants pour vous prévenir de situations dangereuses et de risques de dommages corporels ou matériels. DANGER : indique une situation dangereuse imminente qui, si elle n’est pas évitée, entraînera la mort ou des blessures graves.
  • Page 67 FRAnçAis AVERTISSEMENTS DE SÉCURITÉ GÉNÉRAUX f ) S’il est impossible d’éviter l’utilisation d’un outil électrique dans un endroit humide, POUR LES OUTILS ÉLECTRIQUES brancher l’outil dans une prise ou sur un circuit AVERTISSEMENT! lire tous les avertissements de d’alimentation dotés d’un disjoncteur de fuite à sécurité...
  • Page 68 FRAnçAis AVERTISSEMENT : l’utilisation de tout accessoire ou • Utiliser exclusivement des meules boisseau diamant pièce, ou l’exécution de toute opération avec cet outil, de surfaçage à sec avec ce carter d’aspiration pour autre que celle recommandée dans ce manuel de meuleuses de finition.
  • Page 69 FRAnçAis ou bras pourraient entrer en contact avec l’accessoire • L’arsenic et le chrome dans le bois ayant subi un en rotation. traitement chimique. • Attendre systématiquement l’arrêt complet de Le risque associé à de telles expositions varie selon la l’accessoire avant de poser l’outil électrique. fréquence à...
  • Page 70 FRAnçAis finition peut être utilisé pour retirer une vaste majorité des 5. Pour retirer le carénage pour meulage de surface, poussières statiques atmosphériques qui en son absence ouvrez le levier de serrage, faites pivoter le carénage pourraient contaminer l’environnement de travail ou poser pour meulage de surface pour aligner les encoches et des risques accrus pour la santé...
  • Page 71 FRAnçAis Dépoussiérage (Fig. A, D) UTILISATION AVERTISSEMENT : utiliser exclusivement les AVERTISSEMENT : pour réduire le risque de outils électriques recommandés par D WALT avec blessures graves, éteindre l’outil et retirer le cet accessoire. débrancher avant d’effectuer tout réglage et d’enlever ou d’installer tout accessoire. Un Pour plus d’informations concernant les outils électriques démarrage accidentel peut provoquer des blessures.
  • Page 72 FRAnçAis 3. Resserrez les vis à oreilles pour arrimer la poignée à AVERTISSEMENT : ne jamais utiliser de solvants ni la meuleuse. d’autres produits chimiques puissants pour nettoyer les pièces non métalliques de l’outil. Ces produits Applications : bordures (Fig. A) chimiques peuvent affaiblir les matériaux de plastique Le carter d’aspiration pour meuleuses de béton possède une utilisés dans ces pièces.
  • Page 73 FRAnçAis par la présente garantie, visiter le site www.dewalt.com ou composer le 1 800 433-9258 (1 800 4-D WALT). Cette garantie ne s’applique pas aux accessoires et ne vise pas les dommages causés par des réparations effectuées par un tiers. Cette garantie confère des droits légaux particuliers à...
  • Page 74 EsPAñOl Definiciones: Símbolos y palabras de alerta de seguridad Este manual de instrucciones utiliza los siguientes símbolos y palabras de alerta de seguridad para alertarle de situaciones peligrosas y del riesgo de lesiones corporales o daños materiales. PELIGRO: Indica una situación de peligro inminente que, si no se evita, provocará la muerte o lesiones graves. ADVERTENCIA: Indica una situación de peligro potencial que, si no se evita, podría provocar la muerte o lesiones graves.
  • Page 75 EsPAñOl ADVERTENCIAS GENERALES DE SEGURIDAD un suministro protegido con un interruptor de circuito por falla a tierra (GFCI). El uso de un GFCI PARA HERRAMIENTAS ELÉCTRICAS reduce el riesgo de descargas eléctricas. ¡ADVERTENCIA! Lea todas las advertencias de 3) Seguridad Personal seguridad e instrucciones.
  • Page 76 EsPAñOl herramienta, distintos a los recomendados en este • No utilice accesorios que no estén diseñados y manual de instrucciones puede representar un riesgo recomendados específicamente por el fabricante de lesiones personales. de la herramienta. El hecho de que el accesorio pueda acoplarse a la herramienta eléctrica no garantiza un b ) No utilice la herramienta eléctrica si no puede funcionamiento sin riesgos.
  • Page 77 EsPAñOl detener desechos despedidos por las diversas operaciones • polvo de sílice proveniente de ladrillos y cemento y realizadas con la herramienta. La máscara antipolvo o el otros productos de albañilería, y respirador debe poder filtrar partículas generadas por la •...
  • Page 78 EsPAñOl concreto. Puede eliminar el polvo al eliminar la pintura, herramienta y lleve la herramienta y la campana el pegamento y el adhesivo de las superficies. Al usar la pulidora a un centro de reparaciones para reparar o esmeriladora adecuada, el disco de diamante de esmerilar sustituir la campana pulidora.
  • Page 79 EsPAñOl Extracción de polvo (Fig. A, D) OPERACIÓN ADVERTENCIA: Únicamente use herramientas ADVERTENCIA: Para reducir el riesgo de lesiones eléctricas recomendadas por D WALT con este personales graves, apague la herramienta accesorio. y desconéctela de la fuente de alimentación antes de realizar ajustes o de retirar/instalar Para más información sobre las herramientas eléctricas dispositivos o accesorios.
  • Page 80 EsPAñOl Limpieza 2. Gire el asa hasta la posición deseada de 45˚ o 90˚ asegurándose de que las ranuras de detención estén ADVERTENCIA: Sople la suciedad y el polvo de todos alineadas. los conductos de ventilación con aire seco, al menos 3.
  • Page 81 EsPAñOl • Cuando el producto no hubiese sido operado de acuerdo MOnTERREY, n.l. con el instructivo de uso que se acompaña; Av. Francisco I. Madero 831 Poniente - Col. (818) 375 23 13 • Cuando el producto hubiese sido alterado o reparado Centro por personas distintas a las enlistadas al final de PUEBlA, PUE...
  • Page 82 EsPAñOl AMÉRiCA lATinA: Esta garantía no se aplica a los productos que se venden en América Latina. Para los productos que se venden en América Latina, debe consultar la información de la garantía específica del país que viene en el empaque, llamar a la compañía local o visitar el sitio Web a fin de obtener esa información.
  • Page 84 WALT Industrial Tool Co., 701 East Joppa Road, Towson, MD 21286 (MAY19) Part No. N744359 DWE46152 Copyright © 2015, 2017, 2019 D WALT The following are trademarks for one or more D WALT power tools: the yellow and black color scheme, the “D” shaped air intake grill, the array of pyramids on the handgrip, the kit box configuration, and the array of lozenge-shaped humps on the surface of the tool.

This manual is also suitable for:

Kp200Ks230kit

Table of Contents