Table of Contents
Advertisement
Quick Links
Advertisement
Table of Contents

Subscribe to Our Youtube Channel
Summary of Contents for Pepperl+Fuchs IST-HH20
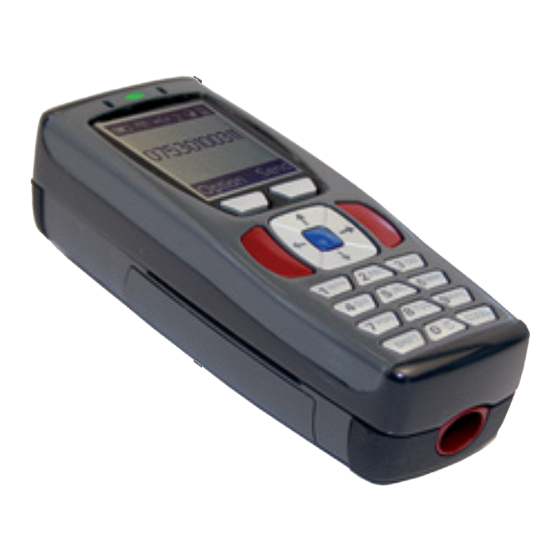
- Page 1 FACTORY AUTOMATION MANUAL IST-HH20 HANDHELD (250 KHZ)
- Page 2 IST-HH20 With regard to the supply of products, the current issue of the following document is appli- cable: The General Terms of Delivery for Products and Services of the Electrical Industry, published by the Central Association of the Electrical Industry (Zentralverband Elektrotech- nik und Elektroindustrie (ZVEI) e.V.) in its most recent version as well as the supplementary...
-
Page 3: Table Of Contents
Declaration of Conformity ................7 Safety ................8 Symbols relevant to safety ...............8 Intended use ....................8 General notes on safety................9 Product description IST-HH20........10 Use and application ................10 LED indicators and control keys............11 4.2.1 Status LED ....................12 4.2.2 Display.......................12 4.2.3 Key overview .....................14... - Page 4 IST-HH20 Commissioning............25 Switching on and off................25 Basic operation..................26 6.2.1 Navigation through menus ................ 26 6.2.2 Data entry ....................26 Operating modes ..................27 6.3.1 Wireless operation (batch mode).............. 27 6.3.2 Cable operation: RS 232 ................28 6.3.3 Cable operation: PS/2................29 6.3.4 Cable operation: USB ................
- Page 5 IST-HH20 Software description PF_Ident ........ 40 Read/Write menu ..................40 9.1.1 Read/Write > Data read ................41 9.1.2 Read/Write > Data write................45 9.1.3 Read/Write > Data copy................49 9.1.4 Read/Write > Read fixcode ..............54 9.1.5 Read/Write > Make ICC................58 9.1.6 Read/Write > Read spec. fix..............61 9.1.7...
-
Page 6: Introduction
IST-HH20 Introduction Introduction Congratulations You have chosen a device manufactured by Pepperl+Fuchs. Pepperl+Fuchs develops, produces and distributes electronic sensors and interface modules for the market of automation technology on a worldwide scale. Symbols used This manual contains different symbols that draw your attention to information or instructions. -
Page 7: Declaration Of Conformity
Note! A Declaration of Conformity can be requested from the manufacturer. The manufacturer of this product, Pepperl+Fuchs GmbH, in D-68307 Mannheim, Germany, has a certified quality management system in accordance with ISO 9001. ISO9001 Declaration of Conformity The device has been tested for compliance with FCC regulations Tests confirmed that all valid FCC rules and regulations have been complied with. -
Page 8: Safety
IST-HH20 Safety Safety Symbols relevant to safety Danger! This symbol indicates a warning about a possible danger. In the event the warning is ignored, the consequences may range from personal injury to death. Warning! This symbol indicates a warning about a possible fault or danger. -
Page 9: General Notes On Safety
IST-HH20 Safety General notes on safety Installation and commissioning of all devices must be performed by a trained professional only. When packing the device for storage or transport, use materials that will protect the device from bumps and impacts and protect against moisture. The original packaging provides the best protection. -
Page 10: Product Description Ist-Hh20
Product description IST-HH20 Use and application Handheld IDENTControl by Pepperl+Fuchs is a proven system designed for stationary RFID applications. A portable device for process monitoring (reading/writing functions, data carrier initialization) is provided with this Handheld. One new feature is the cellphone design with keypad and display for intuitive operation. -
Page 11: Led Indicators And Control Keys
IST-HH20 Product description IST-HH20 LED indicators and control keys The device has the following LED indicators and control keys: Status LED LC display Softkeys Navigation keys Trigger keys Keypad Interface Battery compartment Read/write head... -
Page 12: Status Led
IST-HH20 Product description IST-HH20 4.2.1 Status LED The status LED indicates the following states: Meaning of the status LED Status Description Lights up green • The Handheld has been switched on. • The interface has been modified. • Data has been read or written. - Page 13 IST-HH20 Product description IST-HH20 The following table lists all the symbols on the toolbar and the functions they perform: Symbols in the toolbar Symbol Description Charging status The capacity of the battery is between 50 % and 100 %. The capacity of the battery is between 20 % and 50 %.
-
Page 14: Key Overview
IST-HH20 Product description IST-HH20 Symbol Description Input mode Numerical input mode - data entered using the keys appears in the form of numbers. Alphabetical input mode - data entered using the keys appears in the form of letters. Alphabetical input mode - data entered using the keys appears in the form of lower case letters. - Page 15 IST-HH20 Product description IST-HH20 Trigger keys Keys Description Left trigger key Right trigger key Input keys "Alphanumerical "Alphanumerical Keys "Numerical" mode upper case" mode lower case" mode "Symbols" mode Switches between "Numerical", "Alphanumerical upper case", "Alphanumerical lower case" and "Symbols" mode.
-
Page 16: Interfaces
IST-HH20 Product description IST-HH20 Interfaces The handheld has the following interfaces: 8-pin connecting socket Scope of supply The scope of supply includes: • Handheld without storage battery or battery compartment cover • CD with documentation (manual) Note! You will require other components in addition to the Handheld included in the scope of supply to complete assembly of the device. -
Page 17: Accessories
IST-HH20 Product description IST-HH20 Accessories Different connection cables, handles, mounts, storage batteries and a range of accessories for chargers and interfaces are available for this Handheld. 4.5.1 Connecting cable The following connecting cables are available as an option: Designation Description ODZ-MAH-CAB-B14 Connecting cable USB interface, length approx. -
Page 18: Chargers
IST-HH20 Product description IST-HH20 4.5.5 Chargers The following chargers are available as an optional accessory: Designation Description ODZ-MAH200-CHARGER Charger for 2 lithium ion storage batteries ODZ-MAH-CHARGER Battery charging tray for handles with integrated lithium ion storage battery ODZ-MAH200-SUPPLY + Plug supply unit with cable for direct connection of the... -
Page 19: Installation
Check that all items are present and correct based on your order and the shipping documents. If you have any questions, please contact Pepperl+Fuchs. Keep the original packing material in case you need to store or ship the unit at a later time. - Page 20 IST-HH20 Installation Push the locking device upwards and push in the battery. Push the battery in the Handheld, hold in position and release the locking device so that the battery engages. Charging battery Charge the battery as follows: Connect the Handheld, including battery, to an interface cable.
-
Page 21: Handle Installation
IST-HH20 Installation Handle installation Fitting the standard handle Fit the handle to the Handheld as follows: Insert the Handheld including battery in the mount on the handle. Push the Handheld back until the plug on the handle enters the cable connection socket on the Handheld. - Page 22 IST-HH20 Installation Fitting a handle with cable connection Fit the handle to the Handheld as follows: Remove the battery from the battery compartment of the Handheld if necessary. Carefully pull the rear, flexible part of the handle attached to the plug downwards.
- Page 23 IST-HH20 Installation Securing the interface cable against accidental removal You have the option of fitting a protective cap in order to secure the interface cable against accidental removal. To do so, proceed as follows: Connect the interface cable to the cable connection socket on the handle.
- Page 24 IST-HH20 Installation Removing the handle Remove the handle as follows: If you have secured the handheld with screws on the handle, remove the screws. Push the locking device in the direction of the arrow and press the handheld out of the retainer.
-
Page 25: Commissioning
IST-HH20 Commissioning Commissioning Switching on and off Switching on the handheld Switch on the Handheld as follows: Press either the left trigger key ( ) or the right trigger key ( ) and hold for approx. 1 second. The Handheld switches on. -
Page 26: Basic Operation
IST-HH20 Commissioning Basic operation 6.2.1 Navigation through menus Function Browse upwards in different menus and Up navigation key ( submenus Browse downwards in different menus and Down navigation key ( submenus Select menus, submenus and individual menu entries Enter navigation key ( Function depends on the menu. -
Page 27: Operating Modes
USB connection on the computer. If the computer does not supply sufficient current to the USB connection, you will require a USB hub with separate bulk power supply or a battery for the Handheld. This optional accessory (see chapter 4.5) is available from Pepperl+Fuchs. -
Page 28: Cable Operation: Rs 232
IST-HH20 Commissioning 6.3.2 Cable operation: RS 232 Adjusting the settings for the RS 232 interface on the Handheld Adjust the settings for the RS 232 communication interface on the Handheld as follows: Select Settings > Communication Activate the interface RS232. -
Page 29: Cable Operation: Ps/2
IST-HH20 Commissioning 6.3.3 Cable operation: PS/2 Adjusting the settings for the PS/2 interface on the Handheld Adjust the settings for the PS/2 communication interface on the Handheld as follows: Select Settings > Communication. Activate the PS2 interface. A prompt appears asking you whether you wish to use the Handheld in PS2 mode. -
Page 30: Cable Operation: Usb
IST-HH20 Commissioning 6.3.4 Cable operation: USB Adjusting the USB interface settings on the Handheld Adjust the settings for the USB communication interface on the Handheld as follows: Select Settings > Communication Activate the interface USB. The USB submenu opens. Press the Enter navigation key ( ) to activate the desired mode. -
Page 31: Operating With Bluetooth
IST-HH20 Commissioning 6.3.5 Operating with Bluetooth This Handheld has a wireless Bluetooth interface with a class 1 radio device that enables wireless point-to-point communication with other Bluetooth-compatible devices. If the other Bluetooth-compatible device also has a class 1 radio device, this results in a range of approx. -
Page 32: Operation
IST-HH20 Operation Operation Read data The Handheld cannot read the data stored on a data carrier until you select the correct setting for the data carrier type, known as the Tag type. The read data is saved in the Handheld or sent to the computer depending on the setting Settings >... - Page 33 IST-HH20 Operation Reading data on data carriers Read data on a data carrier as follows: Select Read/Write > Data read. Position the read/write head on the Handheld directly beside the data carrier. Press the left softkey ( If the read process is successful, the status LED lights up yellow and then green. If you have activated the buzzer and the vibration alarm in the Settings menu, an acoustic signal sounds and the Handheld vibrates.
-
Page 34: Writing Data
IST-HH20 Operation Writing data Data read Data write Read/Write Address Data copy Storage No. blocks Read fixcode Settings Data Write fixcode Applications Options Read register About write The following table shows how to enter data into the Handheld. Data formats... - Page 35 IST-HH20 Operation Setting the number of blocks The number of blocks determines how many data blocks the Handheld reads from the data carrier and how many data blocks can be written to the data carrier. Each block corresponds to 4 bytes.
-
Page 36: Editing And Entering Data Manually
IST-HH20 Operation Editing and entering data manually Editing data manually Edit data that has already been entered as follows: Select Storage. Press the left navigation key ( ) or right navigation key ( ) to browse to the relevant data record. - Page 37 IST-HH20 Operation Entering data manually Enter a new value as follows: Select Storage. Press the left softkey ( ) to open the options. Select Enter data. Enter the data record using the input keys. Press the Enter navigation key ( ) to confirm your entry.
-
Page 38: Troubleshooting
IST-HH20 Troubleshooting Troubleshooting Error message "no tag" Possible cause Fault Rectification No data carrier within reception range Position the Handheld correctly or move the data carrier within the reception range. Incorrect data carrier type setting Set the correct data carrier type. -
Page 39: Error Message "No Stored Data
IST-HH20 Troubleshooting Error message "No stored data" Possible cause Fault Rectification All data transferred and "Auto delete" mode active No data in the memory Read or enter data manually. Error message "No Data to copy" Possible cause Fault Rectification No data has been read in up to now. -
Page 40: Software Description Pf_Ident
IST-HH20 Software description PF_Ident Software description PF_Ident Read/Write menu The following options are available in the Read/Write menu: • Reading data on data carriers. (Data read) • Writing data to data carriers. (Data write) • Reading data on one data carrier and copying it to another. (Data copy) •... -
Page 41: Read/Write > Data Read
IST-HH20 Software description PF_Ident 9.1.1 Read/Write > Data read In this menu, you have the option of reading data located on a data or code carrier. Data read menu Submenu Options Menu entry Address No. blocks Description of menu entries... - Page 42 IST-HH20 Software description PF_Ident Changing the number of blocks Change the number of blocks as follows: Select No. blocks Press the CLEAR input key ( ) to delete the quantity already entered. Enter the number of blocks using the input keys.
- Page 43 IST-HH20 Software description PF_Ident Data format submenu Submenu Menu entry ASCII Description of the submenu Data format In the Data format submenu, you have the option of defining the format of data that you intend to read or write. Description of menu entries...
- Page 44 IST-HH20 Software description PF_Ident apply to key submenu Submenu Menu entry left right handle Description of the submenu apply to key In the apply to key submenu, you have the option of assigning the command from the overriding menu to the trigger keys on the Handheld and the handle.
-
Page 45: Read/Write > Data Write
IST-HH20 Software description PF_Ident 9.1.2 Read/Write > Data write In this menu, you have the option of writing data to a data carrier. Data write menu Submenu Options Menu entry Address No. blocks Data Description of menu entries Address In the data input field of the Address menu entry, you have the option of changing the start address. - Page 46 IST-HH20 Software description PF_Ident Changing the number of blocks Change the number of blocks as follows: Select No. blocks Press the CLEAR input key ( ) to delete the quantity already entered. Enter the number of blocks using the input keys.
- Page 47 IST-HH20 Software description PF_Ident Data format submenu Submenu Menu entry ASCII Description of the submenu Data format In the Data format submenu, you have the option of defining the format of data that you intend to read or write. Description of menu entries...
- Page 48 IST-HH20 Software description PF_Ident apply to key submenu Submenu Menu entry left right handle Description of the submenu apply to key In the apply to key submenu, you have the option of assigning the command from the overriding menu to the trigger keys on the Handheld and the handle.
-
Page 49: Read/Write > Data Copy
IST-HH20 Software description PF_Ident 9.1.3 Read/Write > Data copy In this menu, you have the option of copying a data record that you have just read in to one or more other data carriers Copy data menu Submenu Options Menu entry Address No. - Page 50 IST-HH20 Software description PF_Ident Changing the number of blocks Change the number of blocks as follows: Select No. blocks Press the CLEAR input key ( ) to delete the quantity already entered. Enter the number of blocks using the input keys.
- Page 51 IST-HH20 Software description PF_Ident Data format submenu Submenu Menu entry ASCII Description of the submenu Data format In the Data format submenu, you have the option of defining the format of data that you intend to read or write. Description of menu entries...
- Page 52 IST-HH20 Software description PF_Ident apply to key submenu Submenu Menu entry left right handle Description of the submenu apply to key In the apply to key submenu, you have the option of assigning the command from the overriding menu to the trigger keys on the Handheld and the handle.
- Page 53 IST-HH20 Software description PF_Ident Instructions on Copy data function Copying data Copy a data record from one data carrier to another data carrier as follows: Select Read/Write > Data copy. Position the read/write head on the Handheld directly beside the data carrier from which you wish to copy the data record.
-
Page 54: Read/Write > Read Fixcode
IST-HH20 Software description PF_Ident 9.1.4 Read/Write > Read fixcode In this menu, you have the option of reading the fixcode for a data carrier. Read fixcode menu Submenu Options Menu entry Options submenu Submenu Data format apply to key Menu entry... - Page 55 IST-HH20 Software description PF_Ident Data format submenu Submenu Menu entry ASCII Description of the submenu Data format In the Data format submenu, you have the option of defining the format of data that you intend to read or write. Description of menu entries...
- Page 56 IST-HH20 Software description PF_Ident apply to key submenu Submenu Menu entry left right handle Description of the submenu apply to key In the apply to key submenu, you have the option of assigning the command from the overriding menu to the trigger keys on the Handheld and the handle.
- Page 57 IST-HH20 Software description PF_Ident Read fixcode Read the fixcode from a data carrier as follows: Select Read/Write > Read fixcode. Position the read/write head on the Handheld directly beside the data carrier. Press the left softkey ( If the read process is successful, the status LED lights up yellow and then green. If you have activated the buzzer and the vibration alarm in the Settings menu, an acoustic signal sounds and the Handheld vibrates.
-
Page 58: Read/Write > Make Icc
IST-HH20 Software description PF_Ident 9.1.5 Read/Write > Make ICC In this menu, you have the option of programming the data carrier IDC ... 1K to behave in the same way as ICC code carriers. Make ICC A unique code is allocated to code carriers used in the inductive fixcode system. The manufacturer guarantees that each code number is allocated only once for use in security- related applications where forgery protection is paramount. - Page 59 IST-HH20 Software description PF_Ident Options submenu Submenu Data format apply to key Menu entry apply to key submenu Submenu Menu entry left right handle Description of the submenu apply to key In the apply to key submenu, you have the option of assigning the command from the overriding menu to the trigger keys on the Handheld and the handle.
- Page 60 IST-HH20 Software description PF_Ident Description of menu entries Description left The command from the overriding menu is assigned to the left trigger key( right The command from the overriding menu is assigned to the right trigger key( handle The command from the overriding menu is assigned to the trigger key on the handle.
-
Page 61: Read/Write > Read Spec. Fix
IST-HH20 Software description PF_Ident 9.1.6 Read/Write > Read spec. fix In this menu, you have the option of reading the special fixcode for a data carrier. Special fixcode Type IDC ... 1K data carriers can be programmed to read 24-bit information (the so-called "special fixcode") extremely quickly. - Page 62 IST-HH20 Software description PF_Ident Data format submenu Submenu Menu entry ASCII Description of the submenu Data format In the Data format submenu, you have the option of defining the format of data that you intend to read or write. Description of menu entries...
- Page 63 IST-HH20 Software description PF_Ident apply to key submenu Submenu Menu entry left right handle Description of the submenu apply to key In the apply to key submenu, you have the option of assigning the command from the overriding menu to the trigger keys on the Handheld and the handle.
- Page 64 IST-HH20 Software description PF_Ident Instructions on Read spec. fix function Read special fixcode Read the special fixcode of a data carrier as follows: Select Read/Write > Read spec. fix. Position the read/write head on the Handheld directly beside the data carrier.
-
Page 65: Read/Write > Read Spec. Fix
IST-HH20 Software description PF_Ident 9.1.7 Read/Write > Read spec. fix In this menu, you have the option of writing a special fix code to a data carrier. Special fixcode Type IDC ... 1K data carriers can be programmed to read 24-bit information (the so-called "special fixcode") extremely quickly. - Page 66 IST-HH20 Software description PF_Ident Data format submenu Submenu Menu entry ASCII Description of the submenu Data format In the Data format submenu, you have the option of defining the format of data that you intend to read or write. Description of menu entries...
- Page 67 IST-HH20 Software description PF_Ident apply to key submenu Submenu Menu entry left right handle Description of the submenu apply to key In the apply to key submenu, you have the option of assigning the command from the overriding menu to the trigger keys on the Handheld and the handle.
- Page 68 IST-HH20 Software description PF_Ident Instructions on Write spec. fix function Writing a special fixcode Write a special fix code to a data carrier as follows: Select Read/Write > Write spec. fix > Data. Enter the relevant data in the correct syntax for the data format selected using the input keys.
-
Page 69: Read/Write > Initialise Tag
IST-HH20 Software description PF_Ident 9.1.8 Read/Write > Initialise tag In this menu, you have the option of resetting the attribute bit of the data carrier. This function also lifts the block for conventional writing and reading of type IDC-...-1K data carriers that were set with a special fixcode. - Page 70 IST-HH20 Software description PF_Ident Data format submenu Submenu Menu entry ASCII Description of the submenu Data format In the Data format submenu, you have the option of defining the format of data that you intend to read or write. apply to key submenu...
- Page 71 IST-HH20 Software description PF_Ident Description of menu entries Description left The command from the overriding menu is assigned to the left trigger key( right The command from the overriding menu is assigned to the right trigger key( handle The command from the overriding menu is assigned to the trigger key on the handle.
-
Page 72: Read/Write > Fill Tag
IST-HH20 Software description PF_Ident 9.1.9 Read/Write > Fill tag In this menu, you have the option of overwriting the complete data carrier with a separately defined character so that you can then format or delete it. Fill tag menu Submenu... - Page 73 IST-HH20 Software description PF_Ident Data format submenu Submenu Menu entry ASCII Description of the submenu Data format In the Data format submenu, you have the option of defining the format of data that you intend to read or write. Description of menu entries...
- Page 74 IST-HH20 Software description PF_Ident apply to key submenu Submenu Menu entry left right handle Description of the submenu apply to key In the apply to key submenu, you have the option of assigning the command from the overriding menu to the trigger keys on the Handheld and the handle.
- Page 75 IST-HH20 Software description PF_Ident Instructions on Overwrite tag function Fill tag Select Read/Write > Fill tag > Data. Press the CLEAR input key ( ) to delete individual characters. You can only delete the last character entered, not individual characters within the character string.
-
Page 76: Storage Menu
IST-HH20 Software description PF_Ident Storage menu In the Storage menu, you can save all read-in data records provided the corresponding setting has been enabled under Settings > Send/Log. The following options are available in the Storage menu: • Browsing through stored data records. -
Page 77: Storage > Options
IST-HH20 Software description PF_Ident 9.2.1 Storage > Options In this menu, you have the option of sending, modifying, deleting or manually entering data. Options Submenu Menu entry Send Edit Delete Send all Delete all Enter data Description of menu entries... - Page 78 IST-HH20 Software description PF_Ident Select Send. If the record is sent successfully, "#[data record number] sent" appears in the status bar on the display. Press the left navigation key ( ) or the right navigation key ( ) to open another data record.
- Page 79 IST-HH20 Software description PF_Ident Deleting data records Delete data records as follows: Press the left navigation key ( ) or the right navigation key ( ) to open the relevant data record. Press the left softkey ( ) to open the options.
- Page 80 IST-HH20 Software description PF_Ident Delete all This command gives you the option of deleting all data records. Deleting data Delete all data records as follows: Press the left softkey ( ) to open the options. Select Delete all. "Delete all data?" appears on the display.
-
Page 81: Settings Menu
IST-HH20 Software description PF_Ident Settings menu You can adjust the following default settings in the Settings menu: • Change tag type. • Change data format. • Assign functions to the trigger keys on the Handheld and the handle. • Switch time stamp on and off. -
Page 82: Settings > Tag Type
IST-HH20 Software description PF_Ident 9.3.1 Settings > Tag type In the Tag type submenu, you have the option of selecting the data carrier type. Tag type menu Submenu Menu entry 50 ICC-... 52 IDC-... Other Description of menu entries Tag types 250 kH... -
Page 83: Settings > Data Format
IST-HH20 Software description PF_Ident 9.3.2 Settings > Data format In the Data format submenu, you have the option of choosing to read and write the data in ASCII, hexadecimal or decimal format. Data format submenu Submenu Menu entry ASCII Description of menu entries... -
Page 84: Settings > Trigger Keys
IST-HH20 Software description PF_Ident 9.3.3 Settings > Trigger keys In the Trigger keys submenu, you have the option of assigning commands to the trigger keys on the Handheld and the handle. Overview of available commands Trigger key menu Submenu Menu entry... -
Page 85: Settings > Time Stamp
IST-HH20 Software description PF_Ident 9.3.4 Settings > Time stamp In the Time stamp submenu, you have the option of activating or deactivating the time stamp. The current date and time is automatically attached to the read data records in the format YYYY-MM-DD HH:MM:SS either in the memory or in the output program when the records are transferred automatically to the computer. -
Page 86: Settings > Checksum
IST-HH20 Software description PF_Ident 9.3.5 Settings > Checksum In the Checksum submenu, you have the option of allocating a checksum to the data you wish to transfer. This checksum is inserted in front of the suffix and is used to check if the data was transferred without error. -
Page 87: Settings > Prefix/Suffix
IST-HH20 Software description PF_Ident 9.3.6 Settings > Prefix/Suffix In the Prefix/Suffix submenu, you have the option of adding a prefix or a suffix (after the time stamp) to the data you wish to transfer. Single characters or character strings (in ASCII format) can be added. -
Page 88: Settings > Communication
IST-HH20 Software description PF_Ident 9.3.7 Settings > Communication In the Communication submenu, you have the option of configuring interfaces and their parameters. Interface menu Submenu RS232 Bluetooth Options Menu entry Description of menu entries You can configure these parameters for the individual interfaces in the various operating... - Page 89 IST-HH20 Software description PF_Ident Interface and operating modes Description Stop bits Specify the required stop bits here. Select one of the following values: • • Parity Specify the required parity here. Select one of the following settings: • None •...
- Page 90 (end-to-end handshake). Pepperl+Fuchs offers "XML router - BE" software for XML Bluetooth modems. This software is suitable for Windows PCs and Windows Pocket PCs. "XML Router - BE" also offers Bluetooth-to-keyboard-wedge communication for applications that require a keyboard port.
- Page 91 IST-HH20 Software description PF_Ident Description of menu entries auto connect. If the Auto connect menu entry is activated, the Handheld is connected automatically to the computer via the interface when the interface cable is attached. auto disconnect If the auto disconnect menu entry is activated, the Handheld is disconnected from the computer automatically after the data is transferred.
-
Page 92: Settings > Send/Log
IST-HH20 Software description PF_Ident 9.3.8 Settings > Send/Log In the Send/Log submenu, you have the option of deciding how the read data is subsequently processed. Send/Log menu Submenu Menu entry Always send Always log Auto erase Auto upload Description of menu entries... -
Page 93: Settings > Language
IST-HH20 Software description PF_Ident 9.3.9 Settings > Language In the Language submenu, you have the option of selecting the menu language. Language menu Submenu Menu entry English German 9.3.10 Settings > Date/Time In the Date/Time submenu, you have the option of setting the date and time for the time stamp... -
Page 94: Settings > System
IST-HH20 Software description PF_Ident 9.3.11 Settings > System In the System submenu, you have the option of setting the display lighting time as well as the time limit before the device switches to standby mode. System menu Submenu Menu entry Backlight time in sec. -
Page 95: Settings > Vibrator
IST-HH20 Software description PF_Ident 9.3.12 Settings > Vibrator In the Vibrator submenu, you have the option of activating or deactivating the vibration alarm for the device. Vibrator menu Submenu Menu entry... -
Page 96: Settings > Buzzer
IST-HH20 Software description PF_Ident 9.3.13 Settings > Buzzer In the Buzzer submenu, you have the option of adjusting the volume of the buzzer (in percent) and the signal duration (in ms) for successful reading and successful writing. Buzzer menu Submenu Menu entry Volume [0...100%]... -
Page 97: Settings > Default Settings
IST-HH20 Software description PF_Ident 9.3.14 Settings > Default settings The "Default settings" command gives you the option of restoring all settings to the factory settings. Default settings Function Default value Assignment of trigger keys right/left keys and handle Data format ASCII/HEX/DEC... - Page 98 IST-HH20 Software description PF_Ident Restoring settings to their default values Select Settings > Default sett. "Reset to default value?" appears on the display Press the left softkey ( ) to confirm the prompt.
-
Page 99: Applications Menu
IST-HH20 Software description PF_Ident Applications menu All JavaScript applications saved on the device are displayed in the Applications menu. The two programs IxTmode.js and PF_Ident.js are required to operate the device as a Handheld. After selecting a JavaScript application, you have the option of launching the script (Run), displaying information on the version status of the script (Version) or deleting the script (Delete). -
Page 100: About Menu
IST-HH20 Software description PF_Ident About menu The About menu includes information on the: • Manufacturer • Type designation • Part number (PrtNo) • Status of the firmware for the read/write head (FW) • Status of the software PF_Ident.js (SW) •... -
Page 101: Command Reference
IST-HH20 Command reference Command reference Command Description Read data Write data Read fix code Make ICC Read special fix code Write special fix code Init. tag Overwrite tag Read tag type Set tag type Single Read Words (SR) Command: SR<WordAddr><WordNum>... - Page 102 IST-HH20 Command reference Single read special fix code (SS) Command: Response: <Status><Data> Only one attempt is made to read a "special fix code". Single program special fix code (SP) Command: SP<FixLen> <Data> Response: <Status> Only one attempt is made to write a "special fix code".
- Page 103 IST-HH20 Command reference Legends for variables <Baud> 4-6 characters in the preset data format Baud rate [in bit/s] <Data> <WordNum> times 4 bytes in the preset data format When communicating a data block, the bytes are transferred chronologically starting with the highest value and ending with the lowest value.
-
Page 104: Ascii Table
IST-HH20 ASCII table ASCII table ASCII ASCII ASCII hex ASCII Space " & < >... - Page 105 Twinsburg, Ohio 44087 · USA Tel. +1 330 4253555 E-mail: sales@us.pepperl-fuchs.com Asia Pacific Headquarters Pepperl+Fuchs Pte Ltd. Company Registration No. 199003130E Singapore 139942 Tel. +65 67799091 E-mail: sales@sg.pepperl-fuchs.com www.pepperl-fuchs.com Subject to modifications TDOCT1400__ENG 205267 Copyright PEPPERL+FUCHS • Printed in Germany 12/2007...
Need help?
Do you have a question about the IST-HH20 and is the answer not in the manual?
Questions and answers