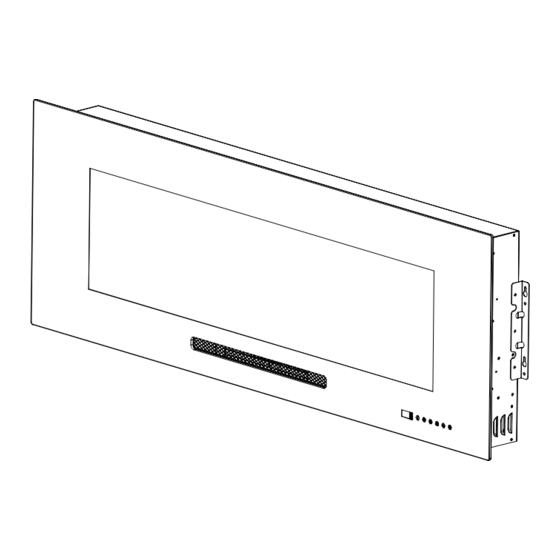
Table of Contents
Advertisement
Quick Links
IMPORTANT INSTRUCTIONS & OPERATING MANUAL
WM36D / WM42D / WM50D
WM60D / WM72D / WM84D / WM100D
Read and understand this entire owner's manual, including all safety
information, before plugging in or using this product. Failure to do so could
WARNING
result in fire, electric shock, or serious personal injury.
Keep this owner's manual for future reference. If you sell or give this product
CAUTION
away, make sure this manual accompanies this product.
NO VENTING REQUIRED
120V AC; 60 Hz; 1500 Watts
Advertisement
Table of Contents

Summary of Contents for Oxhark Flame WM36D
- Page 1 IMPORTANT INSTRUCTIONS & OPERATING MANUAL WM36D / WM42D / WM50D WM60D / WM72D / WM84D / WM100D Read and understand this entire owner’s manual, including all safety information, before plugging in or using this product. Failure to do so could WARNING result in fire, electric shock, or serious personal injury.
- Page 2 IMPORTANT: IMPORTANT: IMPORTANT: It It It It is is is is important important important important to to to to read read read these these instructions instructions carefully carefully before before using using appliance appliance IMPORTANT: read these these instructions instructions carefully carefully before before using using the...
-
Page 3: Instructions Importantes
Instructions importantes 1. Lisez toutes les instructions avant d'installer ou d'utiliser ce radiateur. 2. Ce radiateur est chaud lorsqu'il est utilisé. Pour éviter les brûlures, ne laissez pas la peau nue toucher les surfaces chaudes. Gardez les matériaux combustibles, tels que les meubles, les oreillers, la literie, les papiers, les vêtements, etc. -
Page 4: Unpacking And Testing Appliance
UNPACKING AND TESTING APPLIANCE Carefully remove the appliance from the box. Prior to installing the appliance, test to make sure the appliance operates properly by plugging the power supply cord into a conveniently located 110-120 Volt grounded outlet. Grounding Grounding Grounding Grounding Appliance Appliance... - Page 5 STEP 4:Place the white plastic tray inside the product, place the Crystal and logs on it, hang the glass and fix it with two silver white screws. 2.Recessed functional fireplace Installation. Warning:This product is installed in a semi-embedded way. STEP 1:Remove the six silvery white screws as shown in the picture,and then remove the wall hook and glass. STEP 2:Move the wall hook forward and install it as shown in the picture.
- Page 6 STEP 3:Put the fireplace into the hole and fix it with screws.Again, this is a semi-embedded product. STEP 4:Place the white plastic tray inside the product, place the Crystal and logs on it, hang the glass and fix it with two silver white screws. After the installation is completed, please note that the product is semi-embedded into the wall so that the upper air outlet can be breathable.
- Page 7 Plug the power cord into a 110-120 Volt 15 Amp outlet.Make sure the outlet is in good condition and that the plug is not loose.NEVER exceed the maximum amperage for the circuit.DO NOT plug other appliances into the same circuit. 【...
- Page 8 Safety Safety instructions instructions 【 【 【 【 Safety Safety instructions instructions】 】 】 】 1、 Only use the appliance in accordance with the instructions in this manual! It cannot be used for any other purpose. 2、 Never operate the appliance when the appliance itself or the main cable show any signs of damage. 3、...
-
Page 9: Control Panel / Remote Control Operation
【 【 【 【 Instruction Instruction Instruction Instruction for for Remote Remote Remote Remote Controller Controller Controller Controller and and Switch Switch Switch Switch Panel Panel Panel Panel】 】 】 】 Color setting Brightness setting Color Brightness setting setting Control Panel / Remote Control Operation (Control panel POWER switch must be ON to use remote control.) The touch display panel is shown by LED's on the front bottom right of the appliance. -
Page 10: Temperature Limiting Control
When the heater is first turned on, a slight odor may be present. This is normal and NOTICE should not occur again unless the heater is not used for a long period of time. To improve operation, aim the remote control at the front of the fireplace. DO NOT NOTICE press the buttons too quickly. - Page 11 5. Do not use this heater in the immediate surroundings of a bath, a shower or a swimming pool. 6. In order to avoid overheating, do not cover the heater. Model:WM36D,WM42D,WM50D,WM60D,WM72D,WM84D,WM100D Power supply:120V-60Hz Power consumption: 1500W...

Need help?
Do you have a question about the WM36D and is the answer not in the manual?
Questions and answers