Table of Contents
Advertisement
Advertisement
Table of Contents

Summary of Contents for Jack Stonehouse EX03018
- Page 1 Instruction Manual Air Conditioning Unit Model: EX03018 / EX03019...
- Page 2 WARNING 1. Do not use means to accelerate the defrosting process or to clean, other than those recommended by the manufacturer. 2. The appliance shall be stored in a room without continuously operating ignition sources (for example: open flames, an operating gas appliance or an operating electric heater.) 3.
- Page 3 Notes: * The air conditioning is only suitable for indoor use, and is not suitable for other applications. * Follow local grid interconnection rules while installing the air conditioning and ensure that it is properly grounded. If you have any questions on electrical installation, follow the instructions of the manufacturer, and if necessary, ask a professional electrician to install it.
- Page 4 * Do not pull the plug to turn off the machine. * Do not place cups or other objects on the body to prevent water or other liquids from spilling into the air conditioning. * Do not use insecticide sprays or other flammable substances near the air conditioning.
-
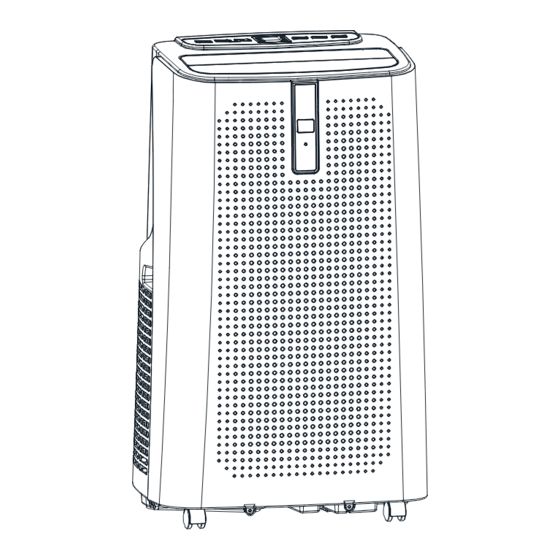
Page 5: Features And Components
Features and Components Features Cooling, dehumidification and fan functions Class A energy rating Compact design LED display control panel Castor wheels for easy movement Sleep mode (quiet setting) 24 hour timer Remote control Water full indicator Air filtration capacity Components... - Page 6 Exhaust Pipe Assembly Window Sealing Plate Assembly...
-
Page 7: Installation And Adjustment
Installation and Adjustment Warning: before using the mobile air conditioning, keep it upright for at least two hours. The air conditioning unit can be easily moved in the room. When moving the machine, please ensure that the air conditioning unit is in the upright position and is placed on a flat surface. - Page 8 1.3 Install the body 1) Move the machine with installed heat pipe and fittings before the window, and the distance between the body and walls or other objects shall be least 50 cm (as shown in Fig.4). Fig.4 2) Elongate the exhaust pipe and snap the flat end of the exhaust pipe joints into the hole of the window sealing plate assembly (as shown in Fig.5 and Fig.6).
-
Page 9: Important Notice
Important Notice The length of the exhaust hose shall be 280 - 1,500mm, and this length is based on the specifications of the air conditioning unit. Do not use extension tubes or replace it with other different hoses, or this may cause a malfunction. The exhaust hose must be not blocked;... - Page 10 II. Operating Instructions of the Remote Control The remote control panel is as follows: Instructions of key operation of the high-quality remote control are as follows: 1. Power: press the key to turn on or turn off the machine. 2. Mode: press the key to switch between cooling, fan and dehumidifying mode.
- Page 11 8. Press the key to switch between Celsius and Fahrenheit. 9. Sleep Mode: Press the key to turn on the sleep mode. 7. Sleep Mode: Press the key to turn on the sleep mode. III. A Variety of Protection Functions 3.1 - Frost Protection Function: In cooling, dehumidifying or economic power saving mode, if the temperature of the exhaust pipe is too low, the machine will automatically...
-
Page 12: Drainage Instructions
Drainage Instructions Manual drainage: 1) When the machine stops after the water is full, turn off the machine power and unplug the power plug. Notes: Please move the machine carefully, so as not to spill the water in the water pan at the bottom of the body. 2) Place the water container below the side water outlet behind the body. - Page 13 installed, otherwise condensate water of the machine will flow to the floor or the carpet. Continuous drainage (optional) (only applicable to cooling and dehumidifying mode), as shown in figure: 1) Unscrew the drainage cover, and unplug the water plug. 2) Set the drainage pipe into the water outlet. 3) Connect the drainage pipe to the bucket.
-
Page 14: Maintenance
Maintenance Cleaning: before cleaning and maintenance, turn off the machine and unplug the plug. 1. Clean the surface Clean with surface of machine with a damp cloth. Don't use chemicals, such as benzene, alcohol, gasoline, etc.; otherwise, the surface of the air conditioning will be damaged or even the whole machine will be damaged. - Page 15 2: Turn on the machine, adjust it to low-wind ventilation mode, and maintain this state until the drainage pipe becomes dry, so as to keep the inside of the body in a dry state and prevent it from mildewing. 3: Turn off the machine, unplug the power plug, and wrap the power cord around the wrapping post;...
-
Page 16: Troubleshooting
Troubleshooting Do not repair or disassemble the air conditioning by yourself. Unqualified repair will lead to failure of the warranty card, and may cause damage to users or their properties. Problems Reasons Solutions Turn it on after connecting it to a There is no electricity. - Page 17 The air conditioning is not Put the air conditioning on a flat and Big Noise placed on a flat surface. hard place (to reduce noise). compressor Wait for 3 minutes until the does not Overheat protection starts. temperature is lowered, and then work.
- Page 18 Appendix X. Addendum Schematic diagram for air conditioning (The specific technical parameters of the machine shall be subject to the nameplate on the product) Capillary Condenser Compressor Evaporator Treatment: Don't put the abandoned machine with other unsorted waste together. Such waste shall be placed separately for other special use.
- Page 20 PHONE For further 01604 537900 information, additional parts WEBSITE and accessories www.jackstonehouse.com or other queries: E-MAIL sales@jackstonehouse.com ADDRESS 35 Tameside Drive Birmingham B35 7AG SCAN FOR WEBSITE FOLLOW US...
Need help?
Do you have a question about the EX03018 and is the answer not in the manual?
Questions and answers
how do you empty the water