Table of Contents
Advertisement
Quick Links
MEETS NFPA
1851: 2020
REQUIREMENTS
READY RACK EXTRACTOR
OWNER'S MANUAL
EW22
Extractor
DIMENSIONS OF THE WASHER:
LENGTH: 27.0" (L)
DEPTH: 30.5" (D)
HEIGHT: 38.7" (H)
DEPTH WITH DOOR OPEN: 52.6"
WEIGHT: 190 lbs
SHIP WEIGHT:
275 lbs
PERMISSIBLE WATER PRESSURE: 20 - 120 psi
MAX SPIN - 100 G Force
POWER SUPPLY:
120 V~ 60 Hz
Advertisement
Table of Contents

Related Manuals for Ready Rack EW22


Summary of Contents for Ready Rack EW22
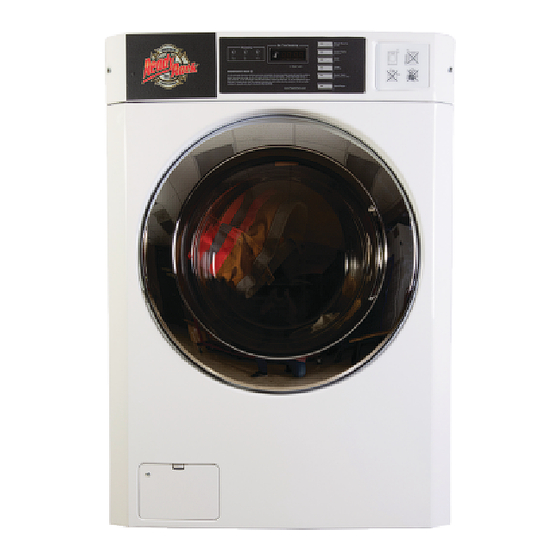
- Page 1 MEETS NFPA 1851: 2020 REQUIREMENTS READY RACK EXTRACTOR OWNER’S MANUAL EW22 Extractor DIMENSIONS OF THE WASHER: LENGTH: 27.0” (L) DEPTH: 30.5” (D) HEIGHT: 38.7” (H) DEPTH WITH DOOR OPEN: 52.6” WEIGHT: 190 lbs SHIP WEIGHT: 275 lbs PERMISSIBLE WATER PRESSURE: 20 - 120 psi...
-
Page 2: Product Features
PRODUCT FEATURES PRODUCT FEATURES DIRECT DRIVE SYSTEM The advanced brushless DC motor drives the drum directly without using a belt and pulley. TILTED DRUM AND EXTRA LARGE DOOR OPENING The tilted drum and extra large opening makes it possible to load and unload clothing more easily. ULTRA CAPACITY The larger drum enables more tumbling action and greater centrifugal force, but also less tangling and wrinkling of the laundry. -
Page 3: Important Safety Instructions
IMPORTANT SAFETY INSTRUCTIONS IMPORTANT SAFETY INSTRUCTIONS READ ALL INSTRUCTIONS BEFORE USE WARNING For your safety, the information in this manual must be followed to minimize the risk of fire or explosion, electric shock, or to prevent property damage, injury to persons, or death. Your Safety and the safety of others are very important. - Page 4 IMPORTANT SAFETY INSTRUCTIONS IMPORTANT SAFETY INSTRUCTIONS READ ALL INSTRUCTIONS BEFORE USE WARNING For your safety, the information in this manual must be followed to minimize the risk of fire or explosion, electric shock, or to prevent property damage, injury to persons, or death. BASIC SAFETY PRECAUTIONS WARNING To reduce the risk of fire, electric shock, or injury to persons when using this appliance, follow basic...
- Page 5 IMPORTANT SAFETY INSTRUCTIONS IMPORTANT SAFETY INSTRUCTIONS READ ALL INSTRUCTIONS BEFORE USE WARNING For your safety, the information in this manual must be followed to minimize the risk of fire or explosion, electric shock, or to prevent property damage, injury to persons, or death. SAFETY INSTRUCTIONS FOR INSTALLATION WARNING To reduce the risk of fire, electric shock, or injury to persons when using this appliance, follow basic...
- Page 6 IMPORTANT SAFETY INSTRUCTIONS IMPORTANT SAFETY INSTRUCTIONS READ ALL INSTRUCTIONS BEFORE USE WARNING For your safety, the information in this manual must be followed to minimize the risk of fire or explosion, electric shock, or to prevent property damage, injury to persons, or death. SAFETY INSTRUCTIONS FOR USE, CARE, CLEANING, AND DISPOSAL WARNING To reduce the risk of fire, electric shock, or injury to persons when using this appliance, follow basic...
-
Page 7: Parts And Accessories
PARTS AND ACCESSORIES PARTS AND ACCESSORIES Parts Detergent dispenser Water inlets drawer Control panel Shipping Power bolts cord Door Door seal Drain Magnet Door hose Plunger (see page 2) Drain pump filter cover Drain pump filter Drain hose Accessories Hot and Cold Non-skid pads Caps (4) Harness... -
Page 8: Control Panel Features
CONTROL PANEL FEATURES CONTROL PANEL FEATURES Display LED Optional cycle The display shows the remaining time and Super Wash: Wash cycle with longest run time. programming options. Error codes are also displayed here. Start/Pause button The Start/Pause LED flashes when the cycle has been chosen. -
Page 9: Installation Instructions
INSTALLATION INSTRUCTIONS INSTALLATION INSTRUCTIONS Checking and choosing the Installing on a floor proper location 22.5” (56.5 cm) Install the washing machine on a solid floor that is strong and rigid enough to support the weight of the washing machine, even when fully loaded, without flexing or bouncing. -
Page 10: Unpacking And Removing Shipping Bolts
INSTALLATION INSTRUCTIONS Unpacking and removing shipping bolts NOTE When removing the washer from the carton base, be sure to remove the foam drum • Save the bolt assemblies for future use. support in the middle of the carton base. To prevent damage to internal If you must lay the washer down to remove the components, DO NOT transport the base packaging materials, always lay it carefully... -
Page 11: Connecting The Water Lines
INSTALLATION INSTRUCTIONS Connecting the water lines Connect the hoses to the water inlets tightly Check the rubber seals on both sides of the by hand and then tighten another 2/3 turn hose. with pliers. - Insert a rubber seal into the threaded - Connect the blue hose to the cold water fittings on each hose to prevent leaking. -
Page 12: Connecting The Drain Line
INSTALLATION INSTRUCTIONS Using a laundry tub Connecting the drain line Clip the end of the hose into the elbow Secure the drain hose in place to prevent bracket. moving and leaking. - Connect the elbow bracket within 4 inches (10 cm) from the end of the drain hose. NOTE If the drain hose is extended more than 4 inches (10 cm) beyond the end of the... - Page 13 INSTALLATION INSTRUCTIONS Leveling the washing machine Check the washing machine’s level again. - Push or rock the top edges of the washing The washer tub of your new washing machine machine gently to make sure that the spins at very high speeds. To minimize washing machine does not rock.
-
Page 14: Operating Your Washer
OPERATING YOUR WASHER OPERATING YOUR WASHER 1. Ready mode The cycle LEDs flash at the same time, and displays “PUSH.” 2. Select the cycle Press the desired button and press the Start button. The display LED will show the remaining time and the selected cycle starts. 3. - Page 15 OPERATING YOUR WASHER INSTALLING A PUMP Channel # Type Wire Color Signal Type Input Period Black Brown Orange Yellow Main Wash Blue Main Wash Phase - The Blue and Black wire will be used for connecting the extractor to a single pump. - The Blue wire triggers the pump to run detergent into nozzle 1 of the extractor.
-
Page 16: Maintenance
MAINTENANCE MAINTENANCE Cleaning the drum Using the washing machine in a humid space for a long period of time may lead to a buildup Cleaning the door seal of black mold and germs in the air inside the Clean the door seal once a month to prevent washer tub and affect your health. -
Page 17: Cleaning The Water Inlet Filters
MAINTENANCE Unclip the drain hose and remove the plug from the drain hose to drain the remaining Cleaning the water inlet filters water. Clean the water inlet filters periodically to prevent clogging. Take extra care to clean the water inlet filters for areas using hard water. -
Page 18: Error Mode
It will clear and restart the cycle when the suds are gone. • Thermistor is opened or shorted. Thermistor should be replaced. *For further troubleshooting, please contact Ready Rack by Groves Incorporated at 800-991-2120. **Please have your product serial number ready before calling. -
Page 19: Power Fail Recovery
In case of power failure, the machine stops running but the time display remains on, showing the time just before power failure. SPECIFICATIONS Model Name Front-loading Washing Machine: EW22 Power supply 120 V~ 60 Hz 27.0”(L) X 30.5”(D) X 38.7”(H), 52.6”(D with door open) Size 68.6 cm (L) X 77.5 cm (D) X 98.3 cm (H), 133.7 cm (D with door open)
Need help?
Do you have a question about the EW22 and is the answer not in the manual?
Questions and answers