Advertisement
Quick Links
Advertisement

Related Manuals for iFan EVAPORATIVE IF7310

Summary of Contents for iFan EVAPORATIVE IF7310
- Page 1 AIR COOLER 65W EVAPORATIVE WITH BUILT-IN IONISER IF7310...
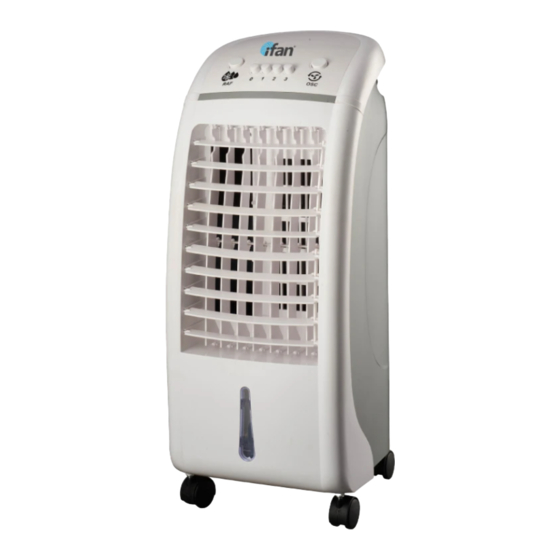
- Page 2 Parts & Description Control Panel Control Panel Short Louvers Long Louvers Wheel...
- Page 3 Cooling Pad Dust Filter Water Tank Ice Pack (two) (for Water Tank)
- Page 4 Warnings ATTENTION : Read this booklet carefully as it contains important instructions for a safe installation, use and maintenance. Important instructions to be kept for future reference. The following basic precautions should always be followed when using electrical appliances: 1. Read all instructions before using the appliance. The Appliance 2.
- Page 5 Location 10. This appliance is NOT suitable to be used or stored near heat sources (open flame, ovens, heaters, stoves, etc.) and/or in an explosive environment (in the presence of flammable substances such as gas, vapour, mist or dust, in atmospheric conditions when, after ignition, the combustion is spread in the air).
- Page 6 e. To turn ON : Press the Speed Button 0 (OFF) on the Control Panel. Insert the plug of the power cable directly into the wall socket and switch ON. Ensure that the plug fits tightly into the socket. f. Press any of the Speed Buttons on the Control Panel to turn the appliance ON. The Speed Buttons correspond to the following wind speeds: 0 (OFF) ®...
- Page 7 16. During operation, DO NOT touch the appliance with wet body parts, and it is recommended to have between you and the standing surface, an isolating element (for example, wearing shoes with rubber soles). 17. DO NOT soak the appliance (especially the Motor Unit) in water or other liquids, wash it under the tap, or let any liquid flow into the internal casing of the appliance (especially the Control Panel) to prevent electric shock.
- Page 8 HOW TO USE Warning: The appliance comes fully assembled. DO NOT operate the appliance with any of its parts disassembled. The entire assembled unit works as a single appliance. The appliance must only operate in the upright position. Any other position will be hazardous.
- Page 9 What the Functions Buttons do: Function Press the Cool Button on the Control Panel once to enter Cool the COOL mode. Press again to exit the COOL mode. Press the Speed 0 (OFF) Button on the Control Panel once ON/OFF to turn the appliance OFF.
-
Page 10: How To Clean
HOW TO CLEAN 1. Switch the appliance OFF. Wait for the appliance to cool down completely. 2. Clean the exterior parts of the appliance thoroughly with warm water & detergent with a non-abrasive sponge and wipe dry. Take special care that the Control Panel found at the top of the appliance is kept dry and that the Motor Unit DOES NOT come into contact with water. - Page 11 c. Remove the Water Tank from the appliance completely. d. Empty the Water Tank. e. Clean the Water Tank with damp cloth moistened with warm water & detergent with a non-abrasive sponge. DO NOT use metal scouring pads. f. Push the empty Water Tank halfway into the appliance. g.
- Page 12 (Put the frozen Ice Packs into the Water Tank only if you intend to use the appliance immediately as an Air Cooler in COOL mode after cleaning the appliance) Re-fill the Water Tank with fresh, clean water using a hose or any clean container until the water level indicator reaches the top of the Water Level scale (above the minimum and below the maximum levels of the tank).
- Page 13 6. Use a vacuum cleaner to suck up dirt from the Air Inlet and Air Outlet and around the Motor Unit periodically, based on the frequency of use and the air quality of the environment. Dust (including smoke residue, hair, fur/feathers from pets, fibres from clothes, towels, curtains and carpets, etc.) can collect on the Grills, Fan blades and inside the Motor Unit.
-
Page 14: Problem Solving
PROBLEM SOLVING Fault symptom Cause analysis Troubleshooting The power cable could be Please stop use and contact damaged. customer service. AC fuse could be damaged Replace the fuse or restart or the circuit stops the unit. If problems persist, The appliance functioning to prevent please stop use and does not... - Page 15 Fault symptom Cause analysis Troubleshooting Clean the Water Tank and replace the water in the Water Tank. The Cooling Pad is dry or Clean the Water Hose. contains an insufficient Remove dirt from the amount of water due to either Water Pump’s strainer.
- Page 16 Fault symptom Cause analysis Troubleshooting As water is continually removed from the Water Tank, various salts are left behind, which in time become saturated and White exceed their Solubility sediments in The water in the Water Tank Product values (K the Water is saturated with salt.
-
Page 17: Specification
ENVIRONMENTAL TIP This appliance, along with all other electronic appliances, should, when it is no longer capable of functioning, be disposed with the least possible environmental damage according to the local regulations in your area. In most cases you can discard the appliance at your local recycling centre. -
Page 18: Warranty
WARRANTY Warranty Conditions 1. This warranty provides against defective materials and manufacturing faults throughout for two years from the date of purchase of the appliance. The warranty on the Compressor is 10 years subject to the same conditions as above. 2. - Page 19 Please complete the on-line registration warranty form available on our website. There is no further requirement to send us any hard copy as part of our efforts to save the environment. In accordance with the terms and conditions of this limited warranty as stated above, PowerPac Electrical Pte Ltd, at its expense shall provide free services for the appliance within the warranty period from its date of purchase from our Authorised dealers.