Advertisement
Seeed Wio Terminal - P25RX/RX-II Display Quick Start Guide
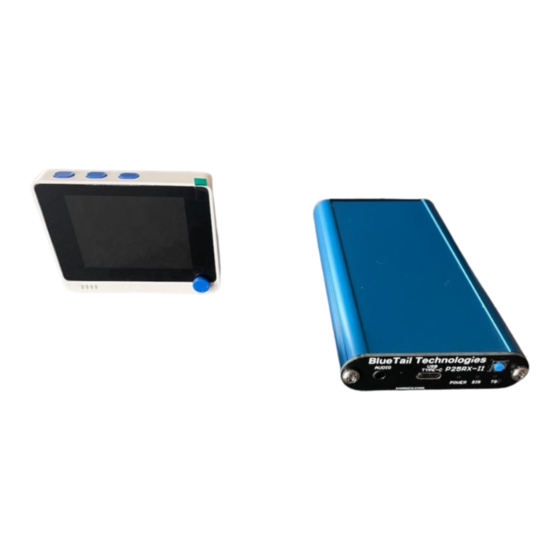
The P25RX and the P25RX-II both support the Wio Display. When the P25RX is mentioned in this guide,
the P25RX-II is also included.
>> Verify your P25RX model has the firmware that supports the Wio Terminal <<
Step 1.
Connect the Wio Terminal to a computer with the usb-c cable provided by Seeed. When first
powered on you may see a game loading and running on the Wio Terminal. Enjoy!
.
Step 2
To install the P25RX display firmware, the WioTerminal must be in "bootloader" mode. Quickly
slide the power switch down twice (like double clicking a mouse). The screen will be blank and the blue
LED near the USB port should be "pulsing" when in bootloader mode. It may take a you few trys to get
the power switch slide timing correct.
Version 1.1
No Arduino code writing is discussed in this guide
Advertisement
Table of Contents

Related Manuals for BlueTail Technologies P25RX

Summary of Contents for BlueTail Technologies P25RX
- Page 1 Version 1.1 No Arduino code writing is discussed in this guide The P25RX and the P25RX-II both support the Wio Display. When the P25RX is mentioned in this guide, the P25RX-II is also included. >> Verify your P25RX model has the firmware that supports the Wio Terminal <<...
- Page 2 Step 3. Go to the Blue Tail Technologies web page https://bluetailtechnologies.com/pages/p25rx-wio-terminal-p25-demo-application Download the "CURRENT.UF2" file from the web page. You will be replacing (overwriting) the "CURRENT.UF2" that is now on your Wio (Arduino folder) with the "CURRENT.UF2"...
- Page 3 USB Host also supplies power to the connected USB devices. The P25RX is a USB Device. When a P25RX is connected to a computer, the computer (the USB Host) is in control. The computer also supplies the 5 Volt power to the P25RX.
- Page 4 As an end user, you can determine how you would like to supply the 5 volts to the GPIO pins. CAUTION: >> MAKE SURE YOU CONNECT NO MORE THAN VOLTS TO THE CORRECT GPIO PINS. << If you do NOT feel comfortable with DIY electronics see "Seeed Wio Terminal Chassis Battery (650 mAh) option"...
- Page 5 Like above, this is a USB screw terminal cable solution example. https://www.amazon.com/zdyCGTime-Connector-terminals-Pluggable- Cable%EF%BC%8830CM/dp/B07QQQZ1DV Solid copper wire - like "bell wire" - could be connected to the 5 volt and Ground screw terminals on the cable. The 5 volt solid copper wire connects to Pin 2 (or 4) on the WIO and the Ground solid copper wire connects to Pin 6 on the WIO.
- Page 6 The Wio Terminal 40 pin GPIO header as a 2.54 mm (0.1 inch) spacing between the holes. Wire to Board Terminal Block connectors with a pitch of 2.54 mm (0.1 inch) will insert directly into the GPIO header. Here are two examples that could be inserted into GPIO pins 4 and 6 for five volt power input: 2 Position Wire to Board Terminal Block Horizontal with Board 0.1"...
- Page 7 Powering the Seeed Chassis Battery for long periods of time through the USB C charging port may put the Lithium Polymer battery in a constant charging cycle with no discharge cycle. The battery will only provide about 45 minutes of run time to an original P25RX receiver The battery will...
- Page 8 Appendix A: Update Wio UF2 file Updating the Wio Terminal firmware is easy. Set the Wio Terminal to "bootloader" mode, as seen in Step 2 above. In bootloader mode, the Wio Terminal becomes a Mass Storage USB device (i.e. a flash drive). In Windows 10, look for a new external drive created called "Arduino".
Need help?
Do you have a question about the P25RX and is the answer not in the manual?
Questions and answers