Table of Contents
Advertisement
Quick Links
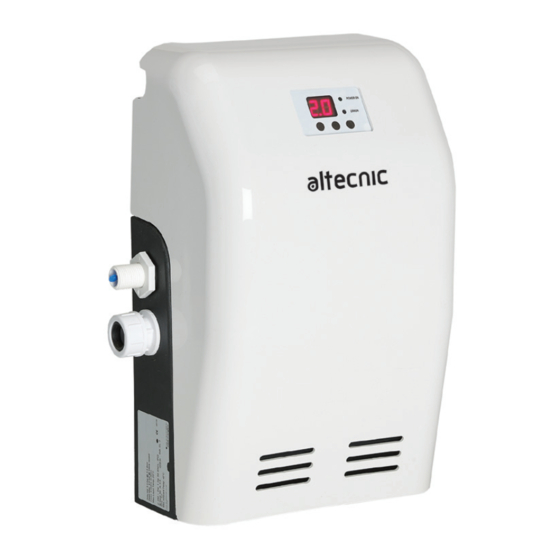
Matrix Mini
Installation, Operation & Maintenance
Instructions
Please leave this instruction booklet with the end user as it contains important
guarantee, maintenance and safety information
Read this manual carefully before commencing installation.
This manual covers the following products:
Matrix Mini 130D
Pt. No. 121-1001
Matrix Mini 230D
Pt. No. 121-1002
CE compliant product
2
Advertisement
Table of Contents

Summary of Contents for Altecnic Matrix Mini 130D
- Page 1 Please leave this instruction booklet with the end user as it contains important guarantee, maintenance and safety information Read this manual carefully before commencing installation. This manual covers the following products: Matrix Mini 130D Matrix Mini 230D Pt. No. 121-1001 Pt. No. 121-1002...
-
Page 2: Table Of Contents
PRODUCT DESCRIPTION Heating and cooling system pressurisation top up unit with integral water storage tank and electric solenoid piston pump, automated control system consisting of pressure transducer and water level switch. The tank includes an AB air gap for category 5 fluid isolation (BS EN 1717). APPLICATION The Matrix Mini range is designed to provide intermittent water top up only to compensate for intermittent losses in system pressure in heating and cooling systems in commercial or industrial... - Page 3 WARNINGS This appliance must not be used for any other application without the written consent of Altecnic Limited. This appliance can be used by children aged from 8 years and above and persons with reduced physical, sensory or mental capabilities or lack of experience and knowledge if...
-
Page 4: Checklist
CHECKLIST IMPORTANT: With the appliance removed from its packaging check for any damage prior to installation. If any damage is found contact Altecnic Ltd within 24 hours of receipt. Electrical rating Front cover removed for clarity plate & serial number Fig. -
Page 5: Important Facts - Read Before Commencing Installation
1 IMPORTANT FACTS: READ BEFORE COMMENCING PUMP INSTALLATION A Water storage capacity. 1.11 The Matrix Mini has a usable water volume of approximately 2 litres; the length of time the Matrix Mini takes to pressurise a system will be dependent on:- The pressure differential between the cold fill and set pressures and also the refill rate of the tank 1.12 Ensure the pumps are primed as described in the priming section before starting, to... -
Page 6: Location
2 LOCATION - GENERAL 2.11 Location: The Matrix Mini must be located on a solid wall of sufficient strength to support the filled weight of the Matrix Mini, close to the water source and a suitable overflow position (see Section 10 - Technical Specification for filled weight). - Page 7 However, care must be taken when mounting the Matrix Mini that any noise is not amplified through loose panels or pipework. 2.21 Flexible hose: Only use the Altecnic Ltd hose supplied with the Matrix Mini. 2.22 Isolating valves: Separate system isolating valves (non-restrictive) must be fitted to allow easy service of the Matrix Mini.
-
Page 8: Key Features
3 KEY FEATURES 3.11 The Matrix Mini comprises of the following main components:- 1. Moulded tank – Main body of the Matrix Mini, comprising of an integrated water tank with warning pipe and weir overflow and mounting the solenoid piston pumps, manifold and controller. -
Page 9: Installation
4 INSTALLATION 4.11 Fill valve flow restrictor guidelines: Ensure side entry fill valve is fitted with the correct filter and flow restrictor combination (dependant on the mains water pressure) into the G ½ threaded tail as outlined below: Coloured insert - To be used for water pressure between 1 and 4 bar White insert - The Matrix Mini is pre fitted with the white high pressure insert. - Page 10 5. Retain the Matrix Mini to the wall mounting plate using the single M6 retaining screw at the top of the wall plate. Fig. 6 6. Fit the plastic cover by pressing as indicated below with the palm of the hand as until the Dual Lock is heard to ‘click’.
- Page 11 4.14 Pipework connections & guidelines: 1. Before connecting the Matrix Mini to the system ensure that system flushing has been performed correctly and all foreign matter, including pipe scale, has been removed. Note: Foreign material from the system coming into contact with the expansion vessel bladder could cause premature failure of the expansion vessel.
- Page 12 6. The flexible hose and any wiring can be retained in the desired position using cable ties and the two metal cable retention points on the top left and right of the Matrix Mini tank. See Figs. 8 & 9. 7.
-
Page 13: Electrical Installation
5 ELECTRICAL INSTALLATION / EARTHING 5.11 Regulations: The electrical installation must be carried out in accordance with the current national electrical regulations and installed by a qualified person. 5.12 Safety: In the interests of electrical safety a 30 mA residual current device (R.C.D. - Page 14 5.21 Wiring of connection unit: WARNING: This appliance must be earthed. The wires in the mains lead (supply cord) are coloured in accordance with the following code: Green and Yellow: Earth Blue: Neutral Brown: Live As the colours of the wires in the mains lead of this appliance may not correspond with the coloured markings identifying the terminals in your connection unit proceed as follows: The wire which is coloured green and yellow must be connected to the terminal in...
- Page 15 5.23 Boiler interlock connections: The circuits connected to the relay is limited to 5 Amps, 230 V a.c. maximum. The Installer MUST fit a 5 Amp fuse in the circuit to the alarm relay to protect the Matrix Mini from damage. Boiler Interlock Fig.
- Page 16 If the supply cord is to be changed or is damaged, it must be replaced with a special cord assembly, please contact Altecnic Ltd for further details. On disassembly note the cord retention and routing system. Re-assemble to the same pattern.
-
Page 17: Commissioning
6 COMMISSIONING 6.11 Pre-commissioning checklist: Before starting the commissioning process the following conditions must be met. If these conditions are not adhered to, damage to the equipment, system and property may result. Ensure the unit is sited in a frost free area, away from precipitation and water sprays/ jets. - Page 18 6.15 Controller overview The Matrix Mini controller is designed to be intuitive to use and allows functions and alarms to be set by the installer/user. The functions are set using the 3 buttons (A, B, & C) on the front of the controller and with the help of on screen prompts via the back lit LCD display.
- Page 19 6.16 Function list & explanation The functions are contained within an initial display and a settings menu. 6.17 Initial display On start up, and during normal operation, if the Matrix Mini has had no button inputs for 1 minute, the system pressure will be displayed (see Section 7.11). 6.18 Setting of Matrix Mini see Fig.
- Page 20 Sets low system pressure alarm. Set in 0.05 bar increments P4 Lo Alarm (4) below the System pressure (2) - Differential pressure (3) - 0.05 see Fig. 18 bar. Alarm auto resets when system pressure is increased above alarm level Sets number of pumps fitted to Matrix Mini.
-
Page 21: Operation
7 OPERATION 7.11 Normal operation: The ‘Home’ screen will display the status of the system pressure. Fig. 21 A green ‘Power on’ light will be displayed on the front of the Matrix Mini. During normal operation the Matrix Mini will monitor the system pressure and re- pressurise the system if the system pressure drops below the system pressure –... -
Page 22: Maintenance
8 MAINTENANCE 8.11 Routine maintenance & service checks: Every 6 & 12 months (see Section 12 - service log) the Matrix Mini should be inspected for:- Damage to the electrical supply cable. Damage to the outlet flexible hoses. Leakage from the Matrix Mini or the connecting pipework. Test unit operation Float valve check Water condition check... -
Page 23: Environment Protection
8.14 Restart To ensure the Matrix Mini is in good working order after a prolonged period of maintainance the following steps should be taken. 1. Inspect the Matrix Mini for signs of damage. 2. Check Matrix Mini tank for debris, remove debris and clean tank if needed. Debris may cause damage to the pumps if it is allowed to be drawn in. -
Page 24: Technical Specification
Filled weight 6.6 Kg 7.2 Kg Altecnic Ltd reserve the right to amend the specification without notice. 10.11 Noise: The equivalent continuous A-weighted sound pressure level at a distance of 1 metre from the pump does not exceed 70 dB(A). -
Page 25: Trouble Shooting
Pressure sensor fault Remove pressure from the Matrix Mini outlet and verify the displayed pressure is 0 bar. Error will be displayed if the sensor signal is outside parameters. (Replace sensor – call Altecnic Ltd). Sensor failure error Sensor error... -
Page 26: Product Log
12 PRODUCT LOG 12.11 Customer Details Customer/company name Site address Date 12.12 Equipment details System volume m Expansion vessel(s) fitted & pre- charge pressure Boiler(s) fitted 12.13 Commissioning record Date commissioned Company Engineer System set pressure Differential pressure Hi alarm set pressure Lo alarm set pressure 12.14 Service Log Service No. - Page 27 Service No. 2 Date Engineer name Company name Tel. No System pressure bar Differential pressure bar Check 6 months 12 months Condition of wiring ü ü Condition of hoses ü ü Evidence of leakage ü ü Test pump operation ü ü...
- Page 28 Service No. 4 Date Engineer name Company name Tel. No System pressure bar Differential pressure bar Check 6 months 12 months Condition of wiring ü ü Condition of hoses ü ü Evidence of leakage ü ü Test pump operation ü ü...
-
Page 29: Guarantee
We are confident this product will provide many years of trouble free service as all our products are manufactured to the very highest standard. The Altecnic Matrix Mini is guaranteed to be free from defects in materials or workmanship for 2 years from the date of purchase. - Page 30 - 30 -...
- Page 31 - 31 -...
- Page 32 Altecnic Ltd in any form, without prior written consent of Altecnic Ltd.
Need help?
Do you have a question about the Matrix Mini 130D and is the answer not in the manual?
Questions and answers